OIDC身分プロバイダの作成
ダウンロード
フォーカスモード
フォントサイズ
身分プロバイダを作成する方法は二つあります:Cloud Access Management (CAM)コンソールまたはCAM APIを使用する方法です。
コンソールでの作成
1. OIDC身分プロバイダを作成するには、身分プロバイダ(IdP)からフェデレーションメタデータドキュメントを取得する必要があります。このメタデータドキュメントには、発行者名、クライアントID、身分プロバイダURL、および身分プロバイダから受信した署名公開鍵の検証が含まれます。
説明
本稿は身分プロバイダAzure Active Directoryを例として説明します。
2. CAMコンソールにログインし、身分プロバイダ>ロールSSOページにアクセスし、新規プロバイダをクリックします。
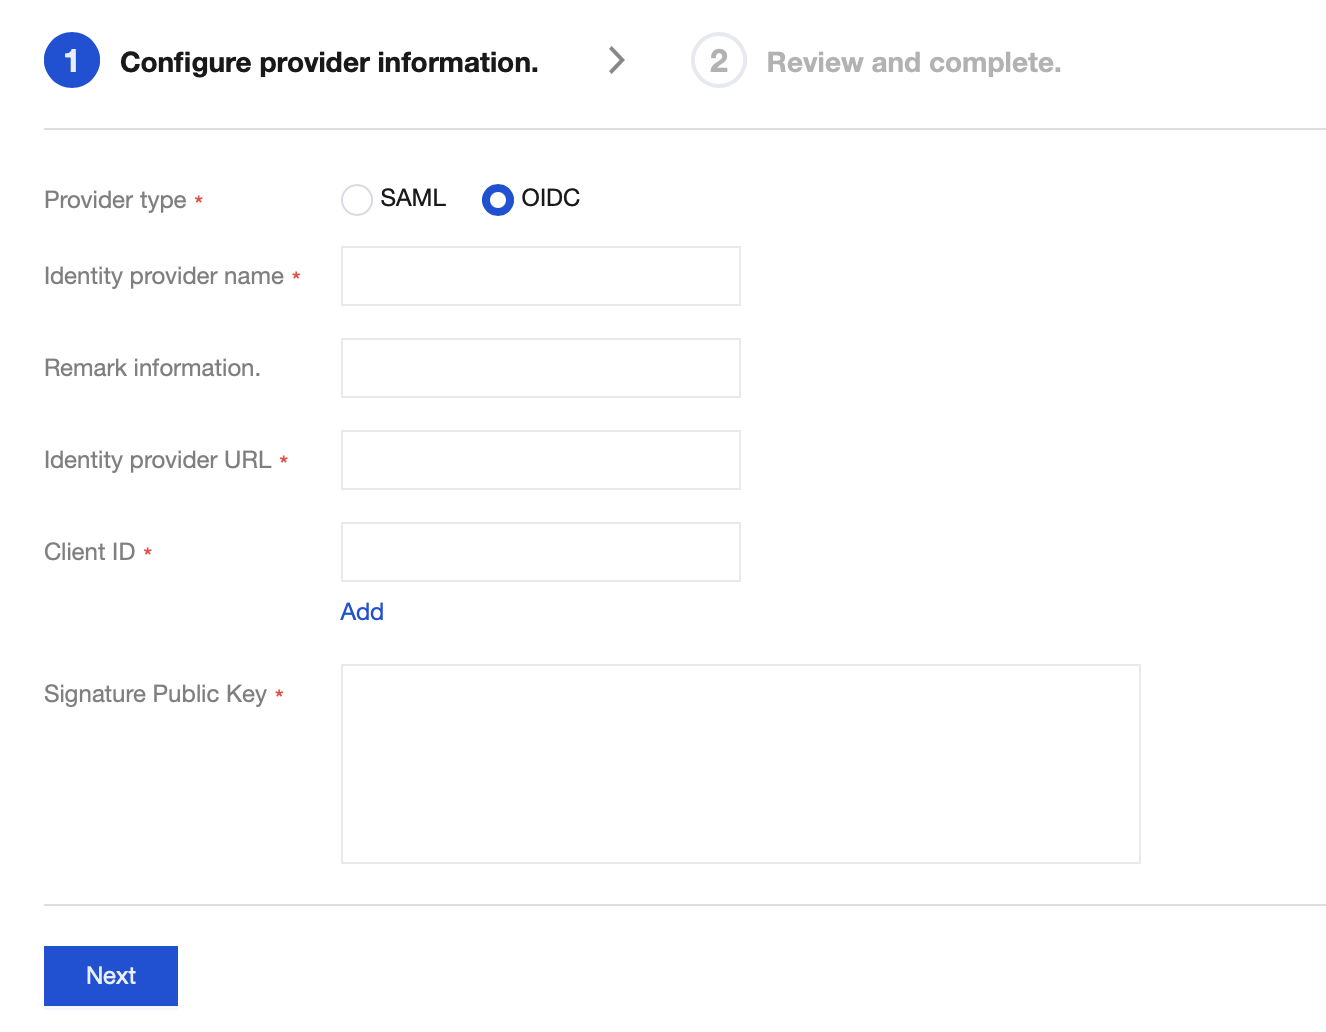
3. 新規作成の身分プロバイダページで、プロバイダタイプをSAMLに選択し、プロバイダ情報を設定して、次へをクリックします。
身分プロバイダ名称:身分プロバイダ名を入力してください。
身分プロバイダURL:OpenID Connect身分プロバイダの識別子です。身分プロバイダが提供するOpenID Connectメタデータドキュメント内の「issuer」フィールドの値に対応します。
クライアントID:OpenID Connect身分プロバイダに登録されたクライアントIDです。Azure Active Directory > エンタープライズアプリケーション > OIDCSSOアプリケーション概要ページで取得できます。
署名公開鍵:身分プロバイダのID Token署名を検証するための公開鍵です。身分プロバイダが提供するOpenID Connectメタデータ文書内の"jwks_uri"フィールドのリンク先の内容(ブラウザでリンクを開いて内容を取得)に対応します。アカウントのセキュリティのため、署名公開鍵を定期的にローテーションすることをお勧めします。
4. 次へをクリックし、入力した身分プロバイダの関連情報を確認し、誤りがないことを確認した後、完了をクリックして身分プロバイダを作成します。
APIによる作成
フィードバック