- Release Notes and Announcements
- Product Introduction
- Purchase Guide
- RocketMQ 5.x
- RocketMQ 4.x
- Product Introduction
- Purchase Guide
- Getting Started
- Operation Guide
- Development Guide
- SDK Documentation
- Migration to Cloud
- API Documentation
- FAQs
- TDMQ FOR ROCKETMQ SERVICE LEVEL AGREEMENT
- Contact Us
Sending and Receiving Transactional Messages
Last updated: 2023-05-16 11:07:52
Overview
This document describes how to use open-source SDK to send and receive transactional messages by using the SDK for Java as an example.
Prerequisites
You have created the required resources. If it is a globally sequential message, you need to create a single-queue topic. For more information, see Resource Creation and Preparation.
You have downloaded the demo here or have downloaded one at the GitHub project.
Directions
Step 1. Install the Java dependent library
Introduce dependencies in a Java project and add the following dependencies to the
pom.xml file. This document uses a Maven project as an example.Note
The dependency version must be v4.9.3 or later, preferably v4.9.4.
<!-- in your <dependencies> block --><dependency><groupId>org.apache.rocketmq</groupId><artifactId>rocketmq-client</artifactId><version>4.9.4</version></dependency><dependency><groupId>org.apache.rocketmq</groupId><artifactId>rocketmq-acl</artifactId><version>4.9.4</version></dependency>
Step 2. Produce messages
Implementing TransactionListener
public class TransactionListenerImpl implements TransactionListener {// After the half message is sent successfully, call back this method to execute the local transaction@Overridepublic LocalTransactionState executeLocalTransaction(Message msg, Object arg) {// Execute the database transaction here. If the execution is successful, it will return success message; otherwise, it will return the unknown status code, perform rollback, or wait for another checkback.return LocalTransactionState.UNKNOW;}// Check back local transaction@Overridepublic LocalTransactionState checkLocalTransaction(MessageExt msg) {// Here query the data status of the local database, and then decide whether to submitreturn LocalTransactionState.COMMIT_MESSAGE;}}
Creating a message producer
//Users need to inplement a TransactionListener instance,TransactionListener transactionListener = new TransactionListenerImpl();// Instantiate a transactional message producerProducerTransactionMQProducer producer = new TransactionMQProducer("transaction_group",// ACL permissionnew AclClientRPCHook(new SessionCredentials(ClientCreater.ACCESS_KEY, ClientCreater.SECRET_KEY)));// Set the Nameserver addressproducer.setNamesrvAddr(ClientCreater.NAMESERVER);producer.setTransactionListener(transactionListener);producer.start();
Parameter | Description |
groupName | Producer group name. It is recommended to use the corresponding topic name. |
nameserver | Cluster access address, which can be obtained from Access Address in the Operation column on the Cluster Management page in the console. Namespace access addresses in new virtual or exclusive clusters can be copied from the Namespace list. |
secretKey | |
accessKey |  |
Sending a message
for (int i = 0; i < 3; i++) {// Construct message instanceMessage msg = new Message(TOPIC_NAME, "your tag", "KEY" + i,("Hello RocketMQ " + i).getBytes(StandardCharsets.UTF_8));SendResult sendResult = producer.sendMessageInTransaction(msg,null);System.out.printf("%s%n", sendResult);}
Step 3. Consume messages
####Creating a consumer
TDMQ for RocketMQ supports two consumption modes: push and pull. Push mode is recommended.
// Instantiate the consumerDefaultMQPushConsumer pushConsumer = new DefaultMQPushConsumer(groupName,new AclClientRPCHook(new SessionCredentials(accessKey, secretKey))); //ACL permission// Set the Nameserver addresspushConsumer.setNamesrvAddr(nameserver);pushConsumer.registerMessageListener((MessageListenerConcurrently) (msgs, context) -> {// Message processing logicSystem.out.printf("%s Receive transaction messages: %s %n", Thread.currentThread().getName(), msgs);// Mark that the message has been successfully consumedreturn ConsumeConcurrentlyStatus.CONSUME_SUCCESS;});
Parameter | Description |
groupName | Producer group name, which can be copied under the Group tab on the Cluster page in the console. |
nameserver | Cluster access address, which can be obtained from Access Address in the Operation column on the Cluster Management page in the console. Namespace access addresses in new virtual or exclusive clusters can be copied from the Namespace list. |
secretKey | |
accessKey |  |
Subscribing to messages
The subscription modes vary by consumption mode.
// Subscribe to a topicpushConsumer.subscribe(topic_name, "*");// Register a callback implementation class to process messages pulled from the brokerpushConsumer.registerMessageListener((MessageListenerConcurrently) (msgs, context) -> {// Message processing logicSystem.out.printf("%s Receive New Messages: %s %n", Thread.currentThread().getName(), msgs);// Mark the message as being successfully consumed and return the consumption statusreturn ConsumeConcurrentlyStatus.CONSUME_SUCCESS;});// Start the consumer instancepushConsumer.start();
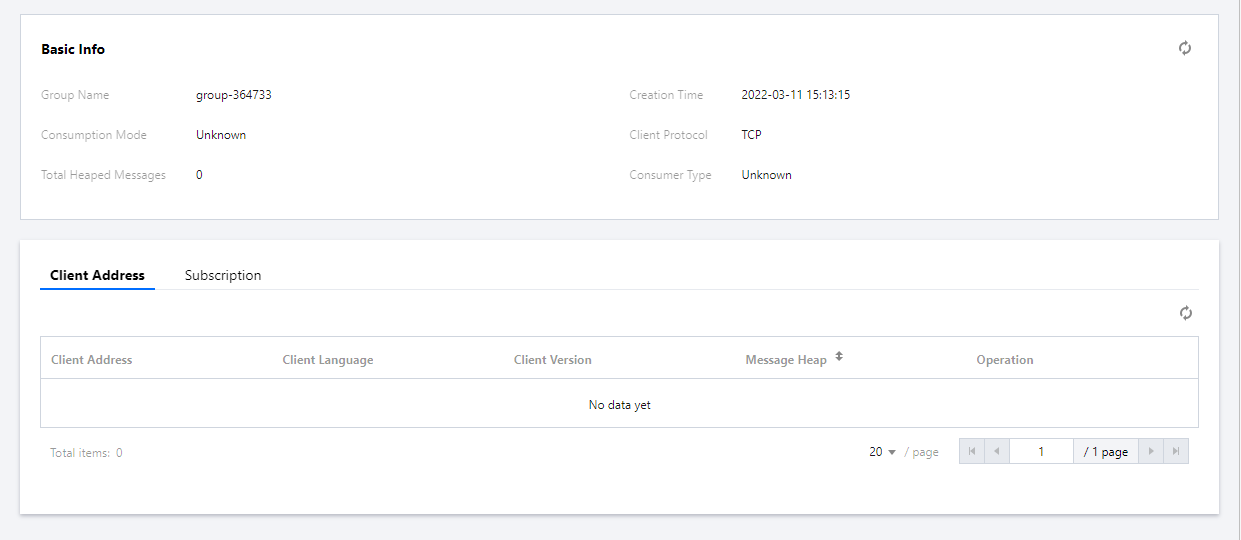
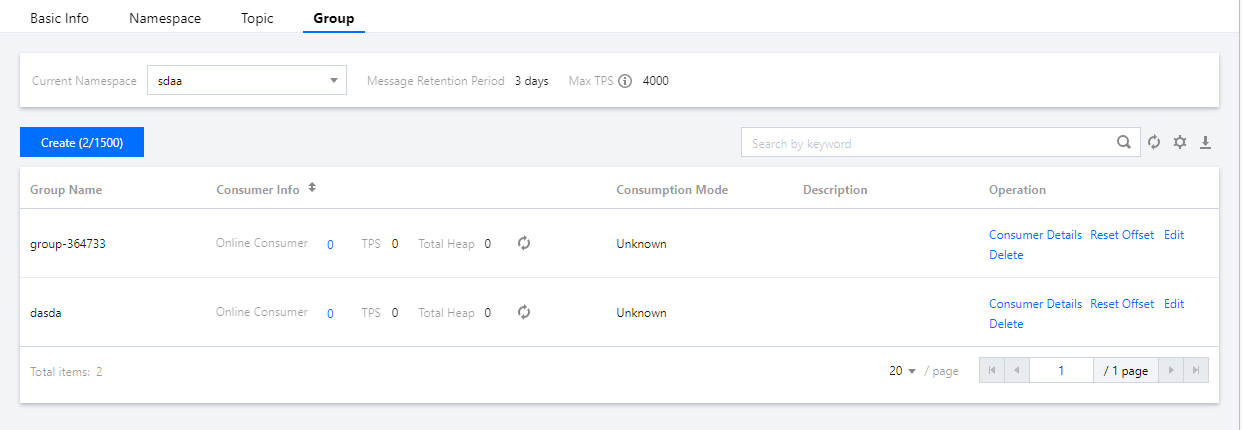
Step 4. View consumption details
Log in to the TDMQ console, go to the Cluster > Group page, and view the list of clients connected to the group. Click View Details in the Operation column to view consumer details.
Note
Above is a brief introduction to message publishing and subscription. For more information, see Demo or RocketMQ documentation.

 Yes
Yes
 No
No
Was this page helpful?