- Release Notes and Announcements
- Product Introduction
- Purchase Guide
- RocketMQ 5.x
- RocketMQ 4.x
- Product Introduction
- Purchase Guide
- Getting Started
- Operation Guide
- Development Guide
- SDK Documentation
- Migration to Cloud
- API Documentation
- FAQs
- TDMQ FOR ROCKETMQ SERVICE LEVEL AGREEMENT
- Contact Us
Overview
This document describes how to use the open-source SDK to send and receive messages with the Spring Boot Starter SDK serving as example, for you to better understand the complete procedure involved in message sending and receiving.
Prerequisites
You have downloaded the Demo or visited the GitHub Project.
Directions:
Step 1: Incorporating Dependencies
Introduce dependencies of to pom.xml.
<dependency><groupId>org.apache.rocketmq</groupId><artifactId>rocketmq-spring-boot-starter</artifactId><version>2.2.2</version><exclusions><exclusion><groupId>org.apache.rocketmq</groupId><artifactId>rocketmq-client</artifactId></exclusion><exclusion><groupId>org.apache.rocketmq</groupId><artifactId>rocketmq-acl</artifactId></exclusion></exclusions></dependency><dependency><groupId>org.apache.rocketmq</groupId><artifactId>rocketmq-client</artifactId><version>4.9.7</version></dependency><dependency><groupId>org.apache.rocketmq</groupId><artifactId>rocketmq-acl</artifactId><version>4.9.7</version></dependency>
Step 2: Preparing Configurations
Add configuration information to the configuration file.
server:port: 8082# rocketmq configuration informationrocketmq:# Service access address of TDMQ for RocketMQname-server: rocketmq-xxx.rocketmq.ap-bj.public.tencenttdmq.com:8080# Producer configurationsproducer:# Producer group namegroup: group111# Role keyaccess-key: eyJrZXlJZC....# Name of the authorized rolesecret-key: admin# Common configurations for the consumerconsumer:# Role keyaccess-key: eyJrZXlJZC....# Name of the authorized rolesecret-key: admin# Custom configurationsproducer1:topic: testdev1consumer1:group: group111topic: testdev1subExpression: TAG1consumer2:group: group222topic: testdev1subExpression: TAG2
Parameter | Description |
name-server | Cluster access address in the basic information of the cluster. Select either the private network or public network access address as needed. 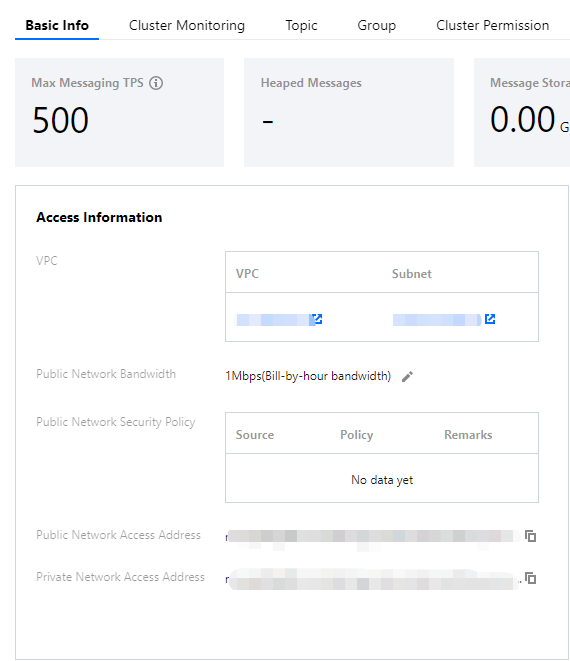 |
group | Producer group name, which can be copied from the Group tab on the console. |
secret-key | Role name, which can be copied from SecretKey on the Cluster Permission page. |
access-key | Role key, which can be copied from accessKey on the Cluster Permission page. 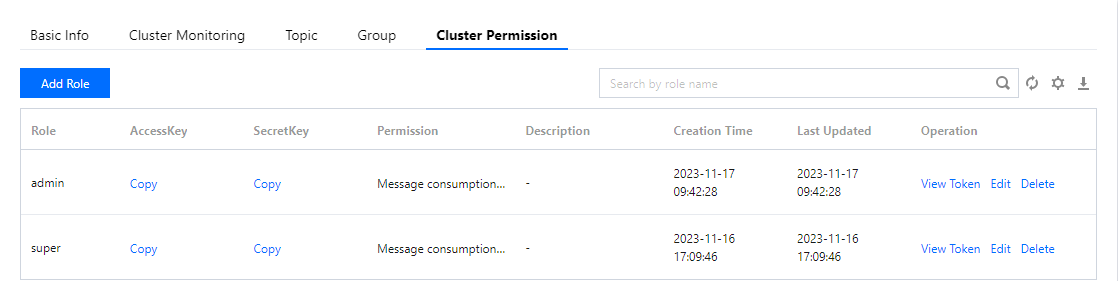 |
topic | Topic name, which can be copied from the Topic tab on the console. |
subExpression | Used to set the message tag. |
Step 3: Sending the Message
1. Inject
RcoketMQTemplate into the class in the message that needs to be sent.@Value("${rocketmq.producer1.topic}")private String topic; // Topic name@Autowiredprivate RocketMQTemplate rocketMQTemplate;
2. Send the message. The message body can either be a custom object or a message object (from the org.springframework.messaging package).
SendResult sendResult = rocketMQTemplate.syncSend(destination, message);/*------------------------------------------------------------------------*/rocketMQTemplate.syncSend(destination, MessageBuilder.withPayload(message).build())
3. The following is a complete sample.
/*** Description: Message producer*/@Servicepublic class SendMessage {// Concatenate the topic name because the full name is required. Alternatively, you can set it by yourself. Format: topic name@Value("${rocketmq.producer1.topic}")private String topic;@Autowiredprivate RocketMQTemplate rocketMQTemplate;/*** Synchronously sending** @param message message content* @param tags subscription tags*/public void syncSend(String message, String tags) {// springboot does not support the use of headers to pass tags. Tags must be appended to the topic name as required. formats: `topicName:tags`. No concatenation indicates that there are no tags.String destination = StringUtils.isBlank(tags) ? topic : topic + ":" + tags;SendResult sendResult = rocketMQTemplate.syncSend(destination,MessageBuilder.withPayload(message).setHeader(MessageConst.PROPERTY_KEYS, "yourKey") // Specify the business key.build());System.out.printf("syncSend1 to topic %s sendResult=%s %n", topic, sendResult);}}
Note:
This example is for synchronous transmission. For information on asynchronous transmission, one-way transmission, and so on, see the Demo or visit the GitHub Project.
Step 4: Consuming the Message
@Service@RocketMQMessageListener(consumerGroup = "${rocketmq.consumer1.group}", // Consumer group. Format: group name// Concatenate full topic name because the full name is required. Alternatively, you can set it by yourself. Format: topic nametopic = "${rocketmq.consumer1.topic}",selectorExpression = "${rocketmq.consumer1.subExpression}" // Subscription expression. If it is not configured, all messages are subscribed to)public class MessageConsumer implements RocketMQListener<String> {@Overridepublic void onMessage(String message) {System.out.println("Tag1Consumer has received the message:" + message);}}
Multiple consumers can be configured based on your business needs. Other consumer configurations can be set as needed.
Note:
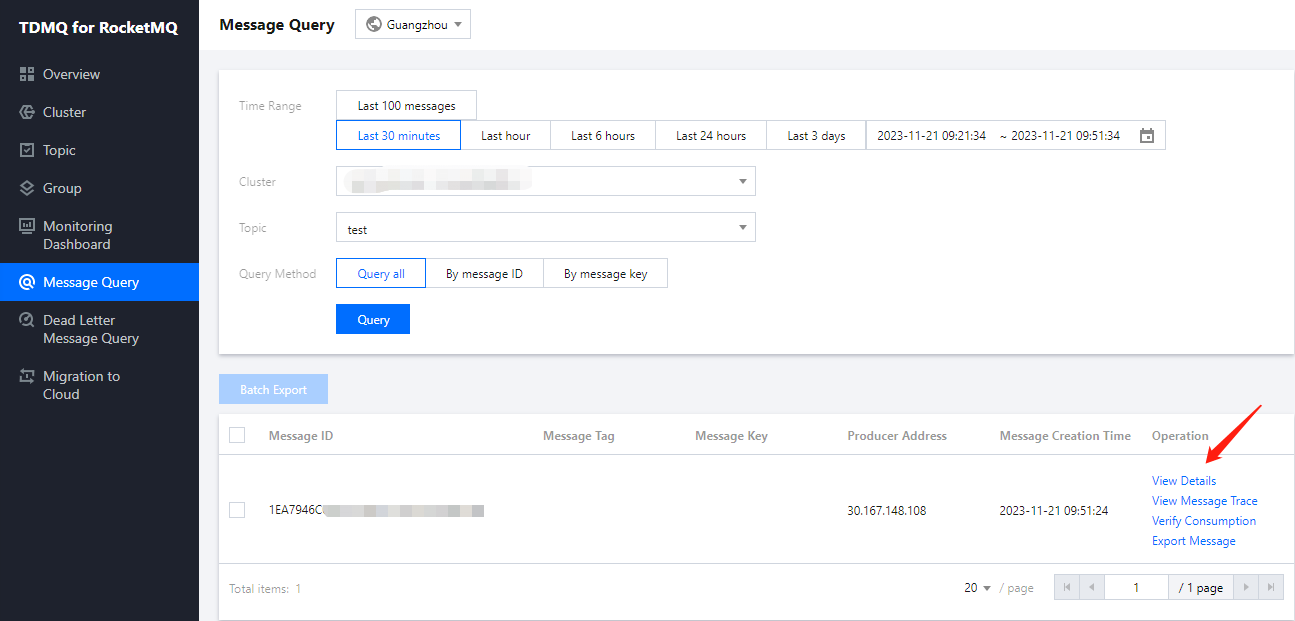
Step 5: Checking Consumption Details
After the message is sent, you will receive a message ID (messageID). Developers can query the recently sent messages on the Message Query page, as shown in the following figure. Information such as details and traces for specific messages is also available. For details, see the Message Query section.

 Yes
Yes
 No
No
Was this page helpful?