This topic mainly introduces how to quickly integrate Cloud Contact Center uni-app SDK into your project.
Environment Requirements
We recommend using the latest HBuilderX editor.
An iOS device running iOS 9.0 or later and supporting audio.
An Android device running on a version not earlier than 4.1 and supporting audio. Simulators are not currently supported. The option that allows debugging must be enabled.
Your iOS/Android device has been connected to the internet.
1. SdkAppId: The application ID users create on the Cloud Contact Center console. You can create up to 20 Cloud Contact Center applications under one Tencent Cloud account, often starting with 140.
2. UserID: The account configured by the agent or administrator in the Cloud Contact Center, usually in the format of an email address. After the application is created for the first time, the main account can go to Internal Message (sub-account requires a subscription to Cloud Contact Center product messages) to view the contact center administrator account and password. Under one SDKAppID, multiple UserIDs can be configured. If the configuration limit is exceeded, more agents need to be purchased in Agent Purchase.
3. SecretId and SecretKey: A certificate needed by developers to call cloud APIs, created on the Tencent Cloud console.
4. Token: Login ticket, which is obtained by calling the Cloud API CreateSDKLoginToken to access. The correct approach is to place the token calculation code and encryption key on your business server, and then the app requests a token calculated in real time from your server when necessary.
Integrating SDK
1. Integrate the TCCC SDK into your uni-app project using npm.
npm i tccc-sdk-uniapp
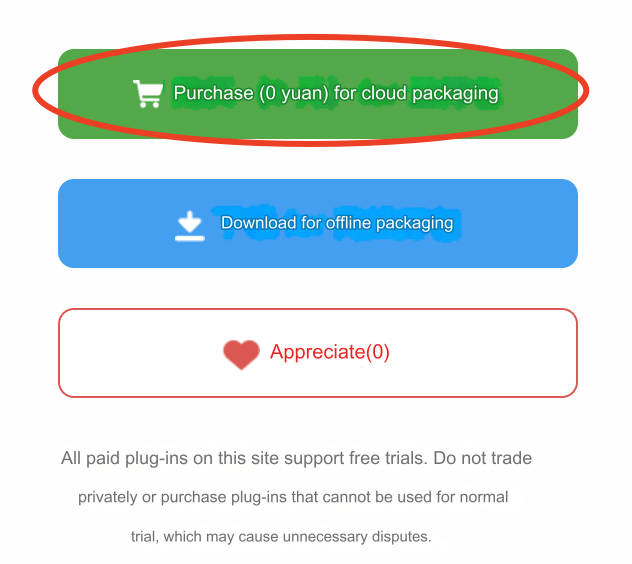
2. Purchase uni-app SDK plugin. Log in to the uni-app native plugin marketplace and make the purchase on the plugin details page (even free plugins can be purchased for 0 on the plugin marketplace). You can use the plugin in cloud packaging only after purchase. When purchasing a plugin, select the right appid and bind the correct package name.
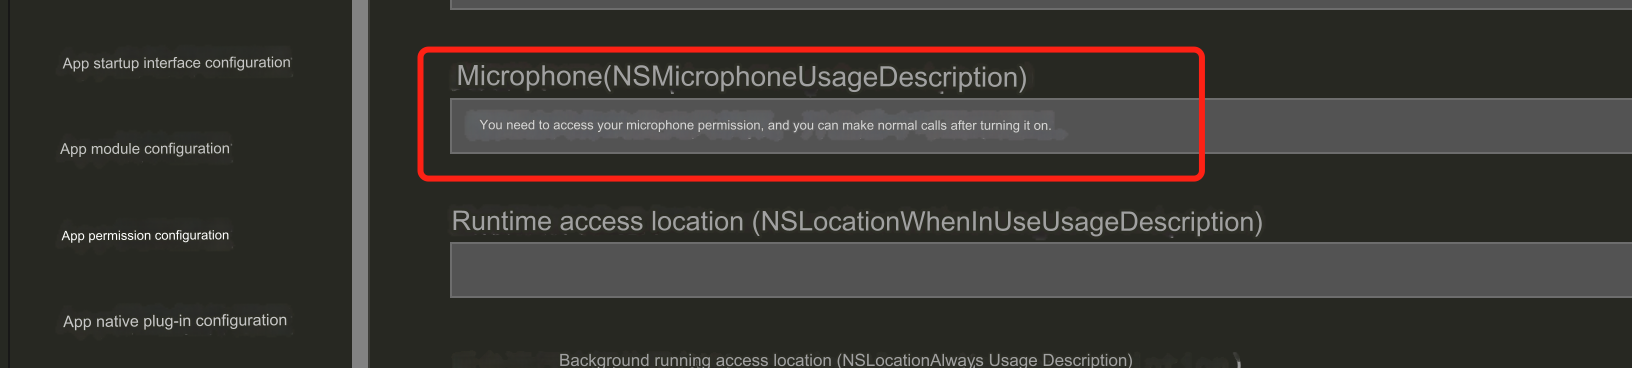
3. Configure permissions. Edit the manifest.json file to configure microphone permissions. The specifics are as follows:
The following permissions are needed on iOS: Privacy - Microphone Usage Description, and fill in the purpose of using the microphone.
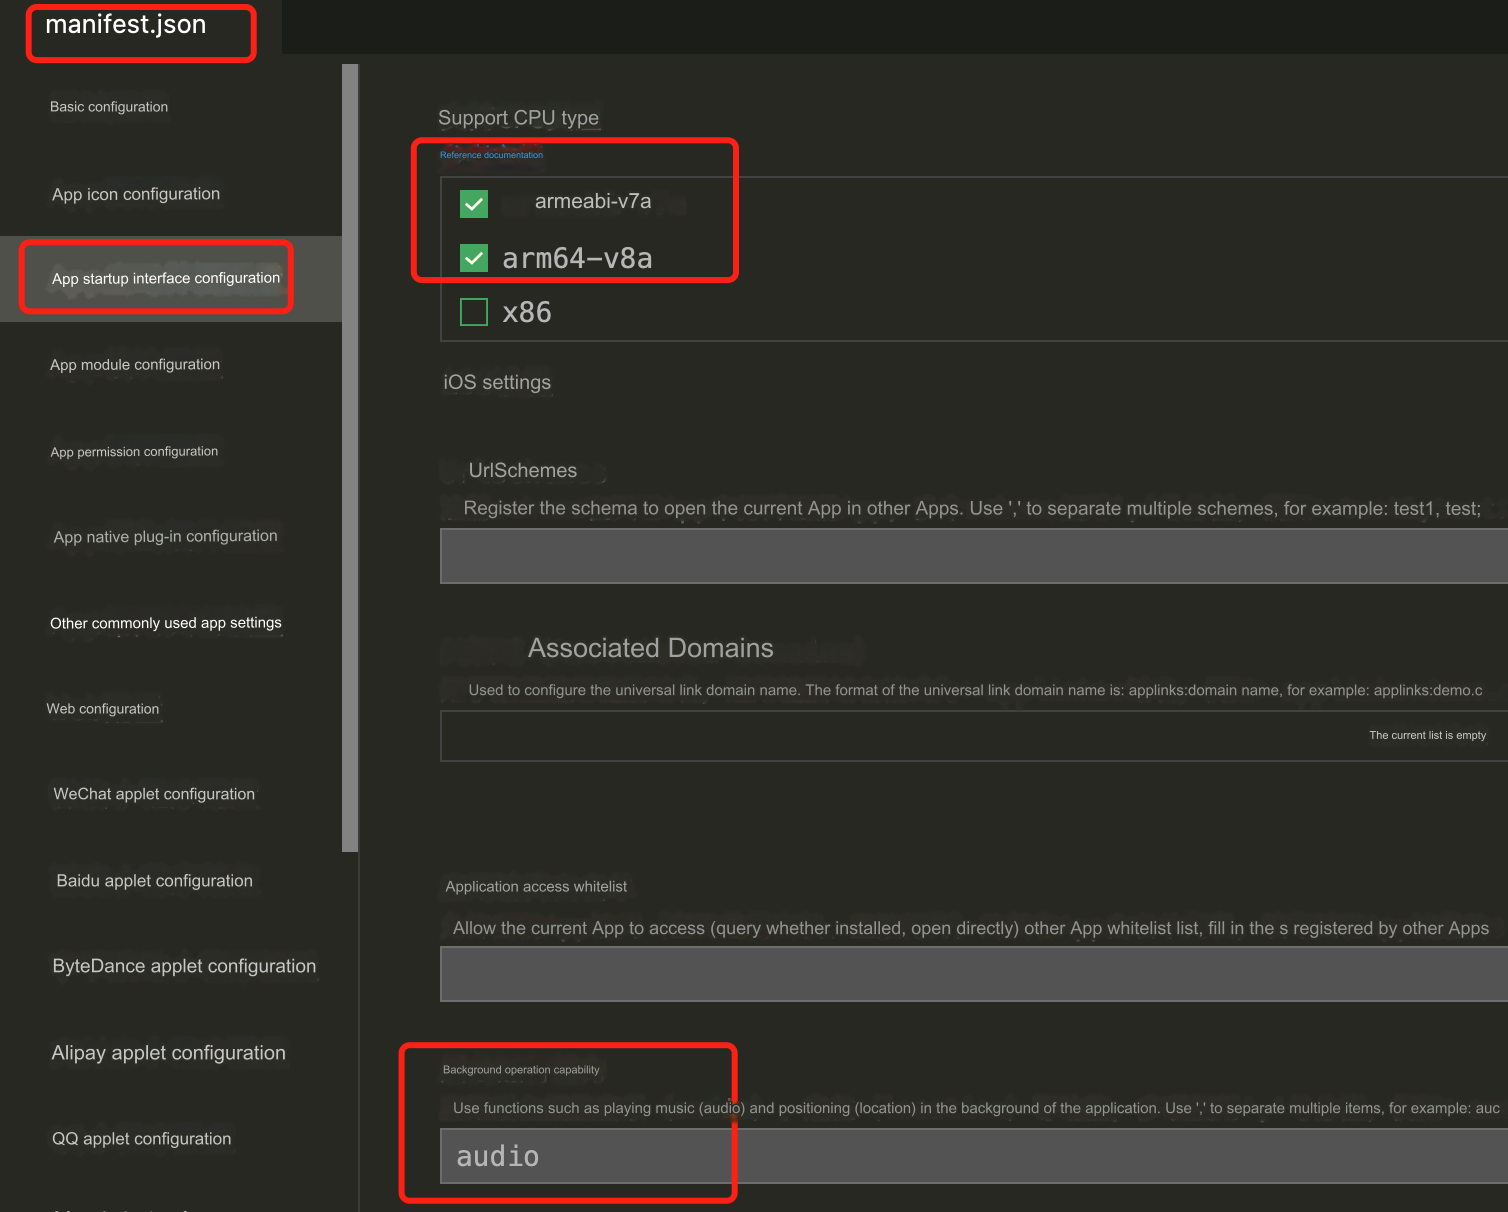
4. Configure audio to run in the background. When the mobile application is switched to the background, the operating system will pause the application's process to conserve resources. This means that all activities of the application will be stopped, including audio playback. On iOS, you need to configure audio background mode to ensure the application will not be terminated when the audio is being affected.
Note:
Without this permission, auto interrupts will occur when the call is switched to the background.
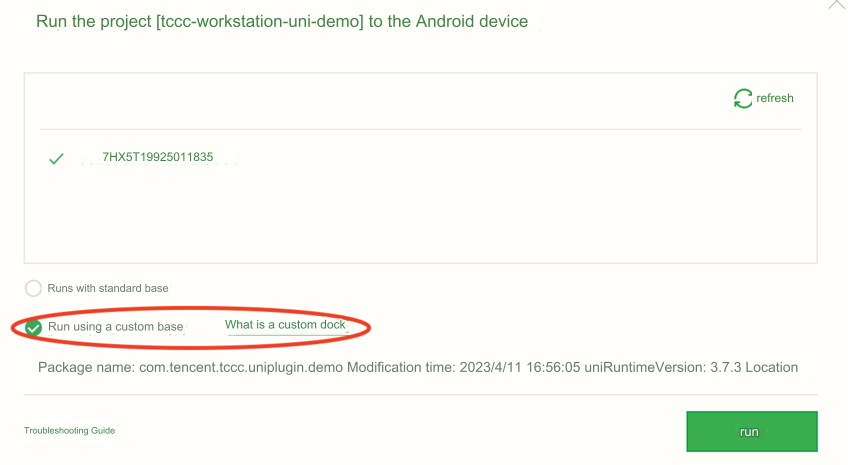
5. Use Self-Defined Stand Packaging Run (do not choose standard stand run), and use physical machine run for the self-defined stand.
Note:
For details on a self-defined debugging stand and how to use it, please refer to the official tutorial.

 Yes
Yes
 No
No
Was this page helpful?