Creating Instances
Download
Focus Mode
Font Size
This document describes how to create a data storage instance.
Note:
To use Tencent Healthcare Data Services, you need to add your user cloud account uin to the allowlist. If needed, please contact us.
Operation Steps
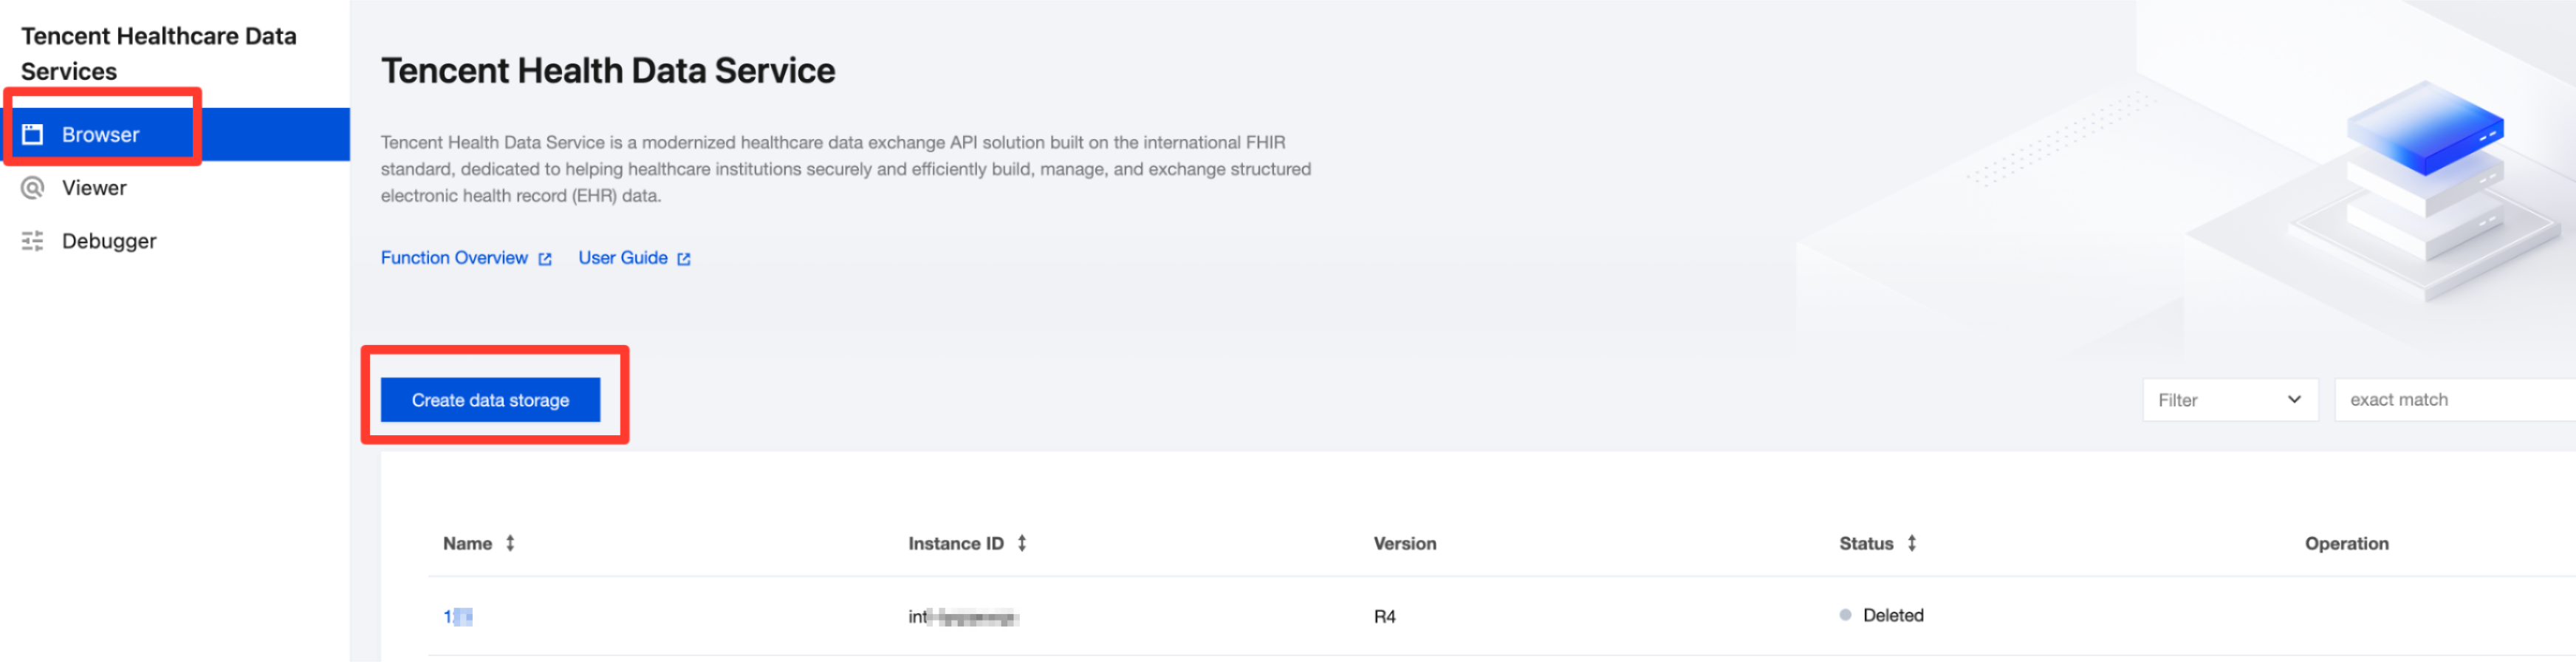
1. Go to the Tencent Healthcare Data Services > Browser page, click Create data storage, and start creating an FHIR instance.
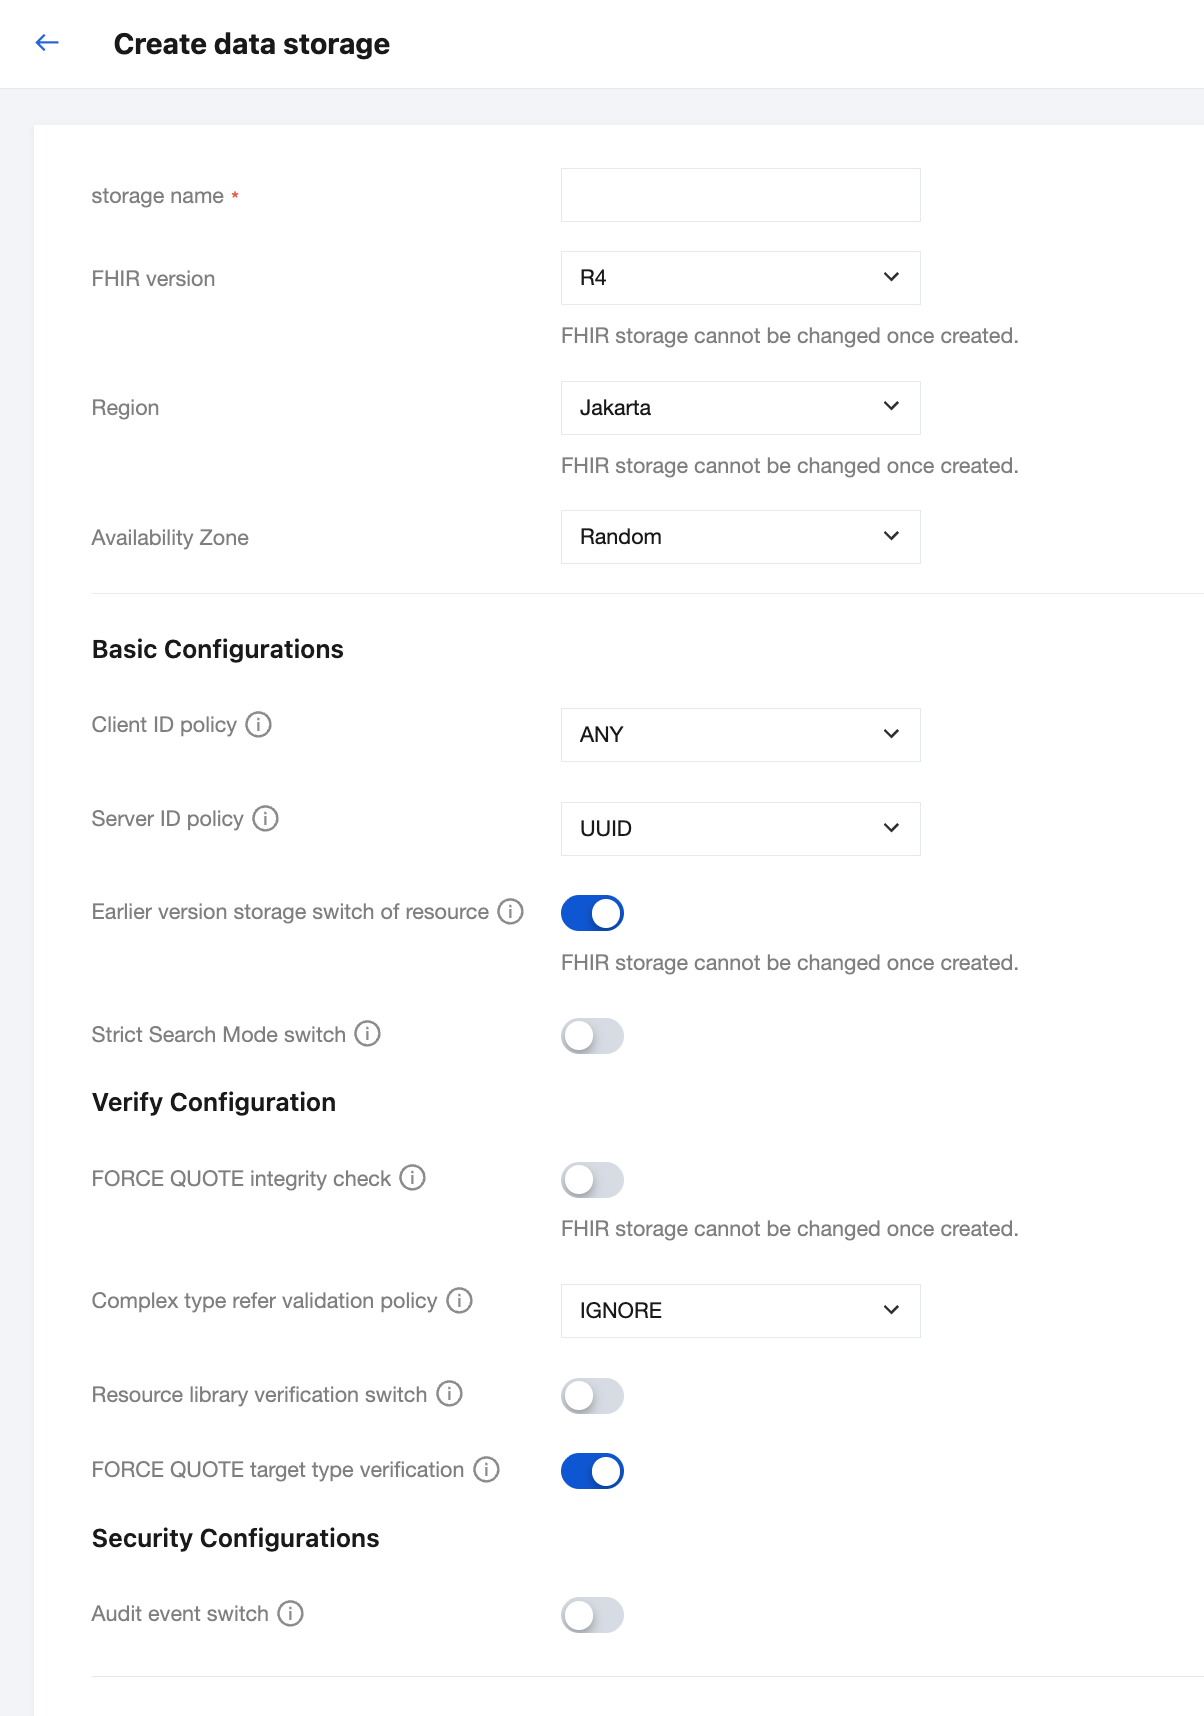
2. Configure the instance.
Configuration Item | Description |
Storage name | Instance name, user-defined. |
FHIR version | The FHIR instance version, which defaults to the R4 version, cannot be changed after the FHIR instance is created. |
Region | The deployment location of the FHIR instance. Currently, Jakarta is available. Other indicates no regional distinction. This setting cannot be changed after the FHIR instance is created. |
Availability Zone | A physically independent area within a region with separate power and network, used for fault isolation and disaster recovery. Currently, random assignment, Jakarta Zone 1, and Jakarta Zone 2 are available. |
Client ID policy | The system supports three ID policies: ANY: Supports custom IDs, and the IDs have no rule restrictions. ALPHANUMERIC: Supports custom IDs, but the IDs must consist of numbers and letters. NOT_ALLOWED: Custom IDs are not supported. |
Server ID policy | The system supports two ID policies, and using UUID is recommended. UUID: The definition and generation rules of UUID follow the internationally recognized RFC4122 specification. It is a universally unique identifier that ensures the global uniqueness of resource identifiers. SEQUENTIAL_NUMERIC: An auto-incrementing sequence ID. |
Earlier version storage switch of resource | Whether to enable the feature for saving historical versions of resource data. This setting cannot be changed after the FHIR instance is created. |
Strict search mode switch | Whether to enable strict search mode. After it is enabled, an error is reported if resources are requested with invalid parameters. |
Force quote integrity check | Whether to enable the feature for verifying reference integrity, which is used to check whether the referenced data exists. After it is enabled, an error is reported if the referenced data does not exist. This setting cannot be changed after the FHIR instance is created. |
Complex type reference validation policy | Whether to enable the policy for validating complex data type references. This feature validates the data types referenced by extended resources. By default, IGNORE is selected, meaning no validation is performed by default. IGNORE: No validation is performed. CHECK_TYPE_IF_EXISTS: Data types are validated only when the data is not empty. CHECK_EXISTS: Checks whether the data is empty. CHECK_EXISTS_AND_TYPE: Validates the data type and whether the data is empty. CHECK_VALID: Validates the data type, whether the data is empty, and whether it complies with applicable Profile constraints. |
Resource library verification switch | Whether to enable the Implementation Guide validation feature. After it is enabled, when a resource is created, the system matches the rules configured in the Implementation Guide. For example, if the Implementation Guide for the instance specifies that the gender element of a patient resource cannot be empty, an error is reported and resource creation fails if it is empty during creation. |
Force quote target type verification | Whether to enable the feature for validating the target type of references. After it is enabled, the system validates whether the referenced type complies with the FHIR standard specification. |
Audit event switch | Whether to enable the audit event feature. After it is enabled, audit data is generated in the AuditEvent resource each time a piece of data is created. |
3. After the instance configuration is complete, click Create to complete the creation of the FHIR instance.
Attention:
After you click Create, the instance status is displayed as Initializing database. You need to wait for several minutes for the instance to be fully created. After the creation is successful, the status is displayed as Running.


Help and Support
Was this page helpful?
You can also Contact sales or Submit a Ticket for help.
Help us improve! Rate your documentation experience in 5 mins.
Feedback