Enabling Public Network Services Through CLB
Download
Focus Mode
Font Size
TencentDB for MySQL supports both private and public network address types. By default, it provides a private network address for you to access instances internally. If you need to use public network access, you can connect to the instance through a Linux or Windows CVM after enabling the public network address. Alternatively, you can enable the public network service through CLB for access. To enable the public network service through CLB, you must configure security group rules.
The following describes how to enable the public network service through CLB and connect to an instance through MySQL Workbench.
Prerequisites
You have applied to use the real server feature. Currently, this feature is in beta testing. To experience this feature, submit a ticket for application.
Note:
The scenario of enabling the public network service through CLB applies only when the CLB instance and the MySQL instance are in the same VPC. Instances in different VPCs are not supported currently.
Step 1: Purchasing a New CLB
Note:
If you already have a CLB instance in the same region as TencentDB for MySQL, you do not need to purchase one.
Attention:
Select the region where TencentDB for MySQL is located.
Step 2: Configuring a CLB
Scenario: CLB and MySQL Instances in the Same VPC
1. Enable the cross-VPC access feature. After it is enabled, CLB supports binding other private IP addresses.
a. Log in to the CLB console, select a region, and click the Instance ID in the instance management list to go to the instance management page.
b. On the Basic Info page, in the Real Server section, click Configure.
c. In the pop-up dialog box, click Submit to enable it.
2. Configure the public network listener port.
a. Log in to the CLB console, select a region, and click the Instance ID in the instance management list to go to the instance management page.
b. On the instance management page, select the Listener management tab, and click Create under TCP/UDP/TCP SSL Listener.
c. In the pop-up dialog box, complete the settings step by step, and then click Submit to complete the creation.
Step 3: Binding a MySQL Instance
1. After creating the listener, on the Listener management page, click the created listener, and then click Bind that appears on the right.
2. In the pop-up dialog box, select the target type as Other Private IPs, enter the IP address and port of the MySQL instance, and click OK to complete the binding.
Attention:
The logged-in account should be a standard account (bandwidth migrated). If it cannot be bound, Submit a Ticket for assistance.
Step 4: Configuring a MySQL Security Group
1. Log in to the TencentDB for MySQL console, select a region, and on the instance list page, click the Instance ID or Manage in the Operation column to go to the instance management page.
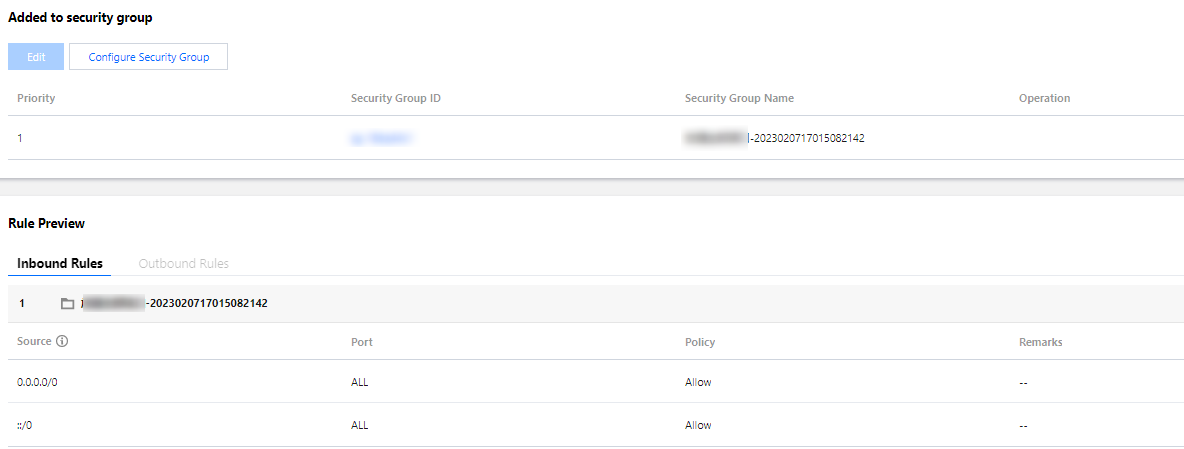
2. On the instance management page, select the Security Group tab, click Configure Security Group, configure the security group rule to allow all ports, and confirm that the security group allows access from external IP addresses. For detailed configuration instructions, see Configuring Security Groups.
Step 5: Connecting to an Instance via MySQL Workbench
1. Install MySQL Workbench. For the official download address, see the MySQL Workbench download page.
2. After going to the download page, click MySQL Workbench.
3. After the page redirects, click Downloads next to Windows (x86, 64-bit), MSI Installer.
4. Click No thanks, just start my download.
5. After the installation is complete, open MySQL Workbench and click the plus sign next to MySQL Connections to add the instance information to be connected.
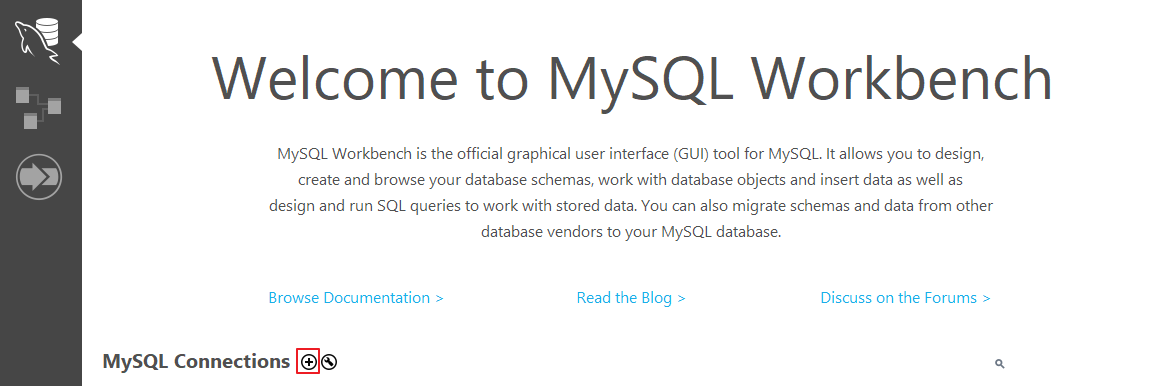
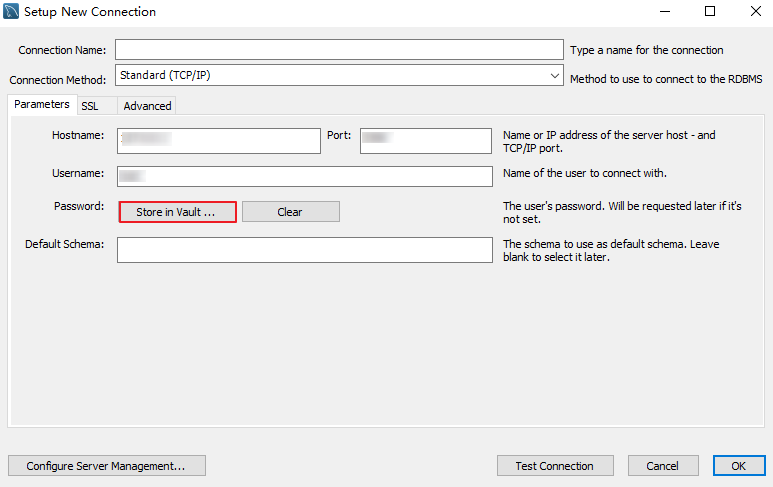
6. In the pop-up window, complete the following configurations, and then click OK.
Parameter | Description |
Connection name | Name this connection. |
Connection Method | For Connection Method, select Standard (TCP/IP). |
Hostname | Enter the CLB instance address. You can query the VIP information under Basic Information on the CLB instance details page. |
Port | Enter the CLB instance port. You can query the TCP port number under CLB Instance Details > Listener management. |
Username | Enter the username of the MySQL instance to connect to. The account is created under Instance Management > Database Management > Account Management. |
Store in Vault... | Enter the password of the MySQL instance to connect to. The password will be saved. For Username, enter the account name. |
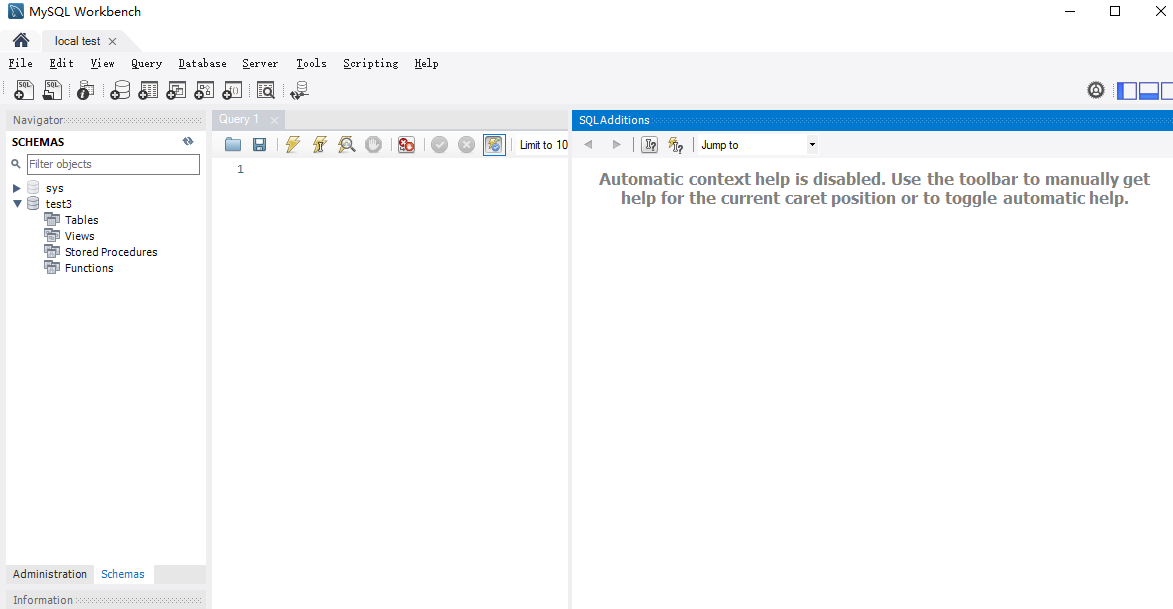
7. Return to the MySQL Workbench home page and click the instance information you just created to connect to the MySQL instance.
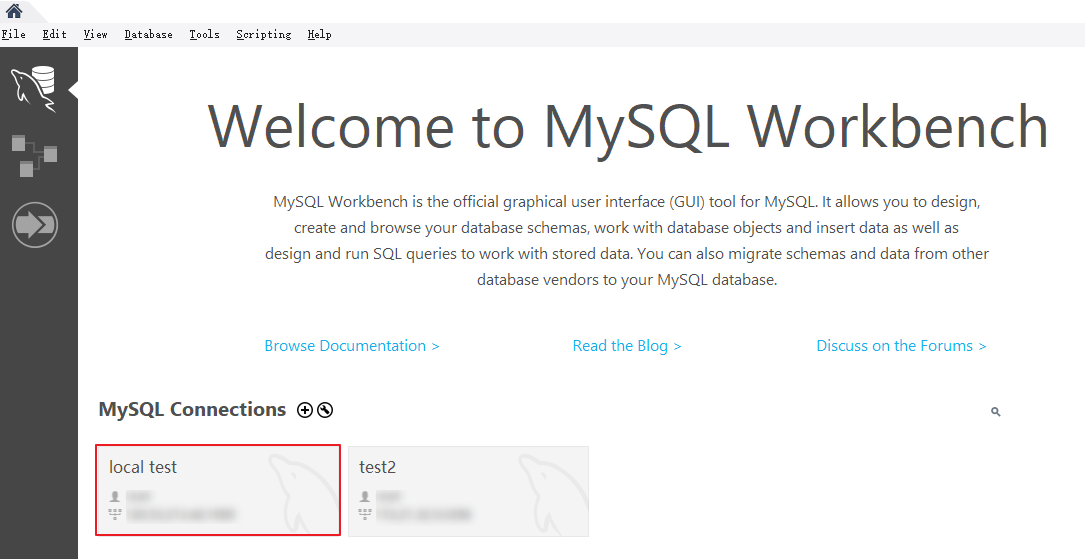
8. The page after a successful connection is shown below.
Help and Support
Was this page helpful?
You can also Contact sales or Submit a Ticket for help.
Help us improve! Rate your documentation experience in 5 mins.
Feedback