This document describes how to create a scaling group in the Auto Scaling console.
Directions
Selecting a region
1. Log in to the Auto Scaling console and click Scaling group in the left sidebar.
2. At the top of the Scaling group page, select the region where a scaling group will be created.
CVM instances and CLB instances must be in the same region as the one specified for launch configuration. For example, if the Guangzhou region is specified for the launch configuration, only CVM instances in Guangzhou will be automatically added to the scaling group. For a scaling group in Guangzhou, you cannot add CVM instances or bind CLB instances from other regions (such as Shanghai, Beijing, Hong Kong (China)).
Configuring the scaling group
1. On the Scaling group page, click Create.
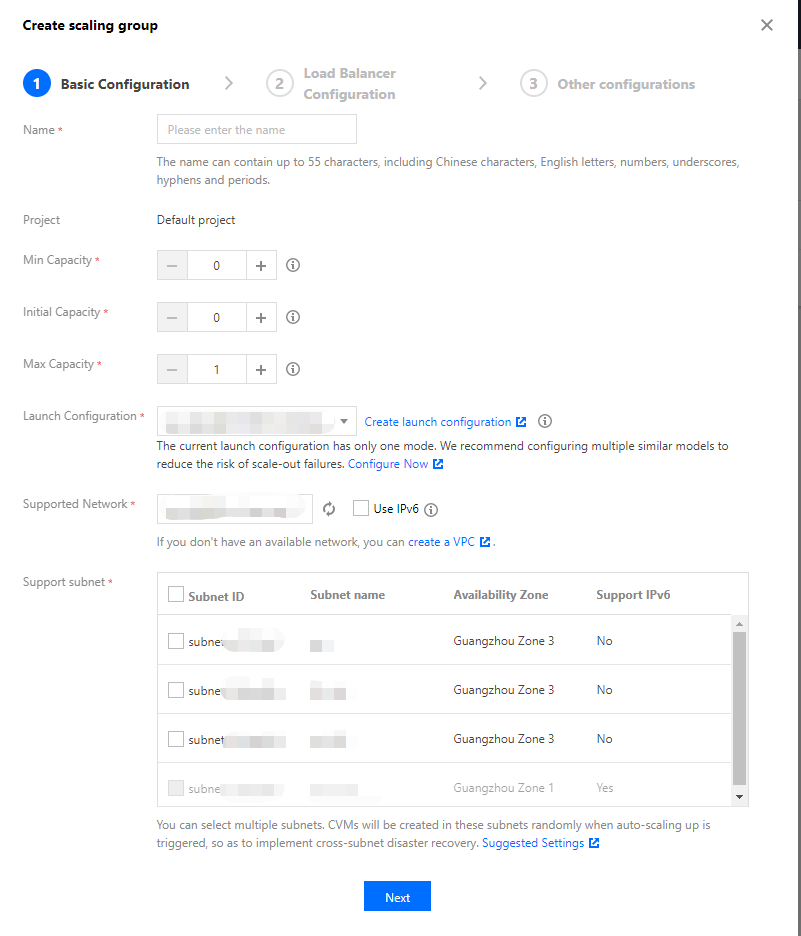
2. In the pop-up window, complete the basic configuration of the scaling group as shown below:
Name: identifies the scaling group with a custom name, such as Website logic layer.
Min Capacity: defines the minimum number of instances in the scaling group.
Initial Capacity: defines the number of automatically created instances when the scaling group is created.
Max Capacity: defines the maximum number of instances in the scaling group.
Launch Configuration: specifies the launch configuration to scale out CVM instances.
Supported Network: specifies the network attribute of the scaled-out CVMs. Select a VPC in which CVM instances will be scaled out.
Support subnet: specifies the subnet in which the CVMs will be scaled out. You can select multiple subnets to locate the CVM instances automatically created for scale-out, implementing cross-subnet disaster recovery.
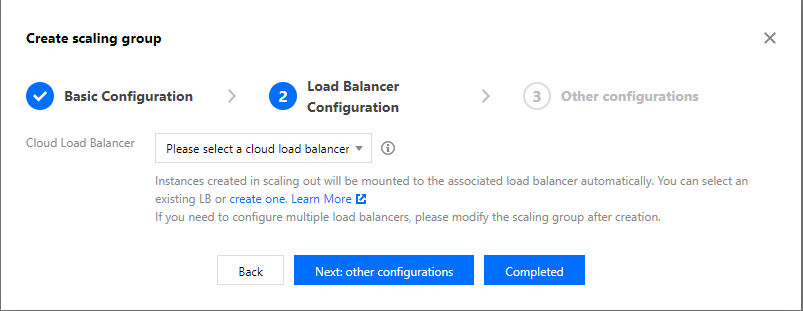
3. Click Next to complete the load balancer configuration as shown below:
You can select an existing CLB or create one. Instances created for scale-out will be mounted to the associated CLB automatically. If you need to configure multiple load balancers, please modify the scaling group after creation.
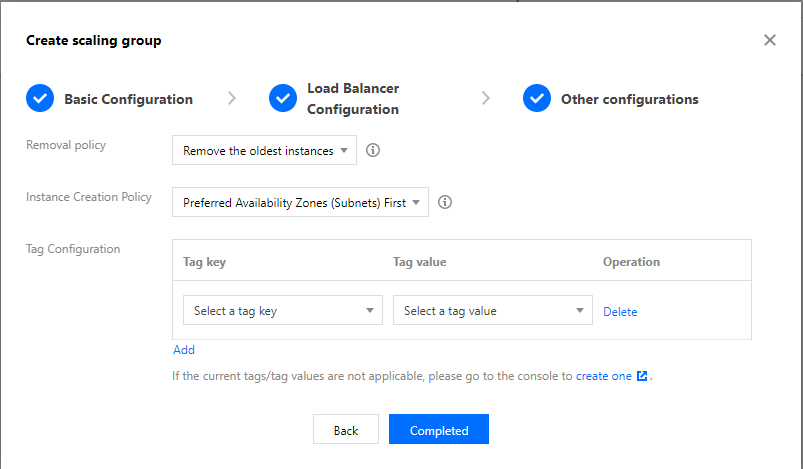
4. (Optional) Click Next: other configurations to complete configurations as shown below or directly click Completed to skip this step.
Removal policy: identifies which instances should be removed first when AS needs to remove instances from the scaling group for scale-in, instances with terminate protection enabled will not be selected:
Remove the oldest instances: removes the earliest added instances in the scaling group. We recommend you choose this option.
Remove the latest instances: removes the latest added instances in the scaling group.
Instance Creation Policy: specifies the policy to add instances in different availability zones of multiple subnets for scaling-out. Available options include:
Preferred Availability Zones (Subnets) First: the availability zones (subnets) will be selected sequentially from top to bottom of the configuration list till success. This mode is suitable for architectures with one primary availability zone and other secondary availability zones.
Multiple Availability Zones (Subnets) Distribution: during scale-out, the system will select availability zones (subnets) with relatively few instances in which to create new instances. This mode is suitable for architectures where instances need to be evenly distributed.
Tag Configuration: categorizes and manages resources with tags. For more information, see Tag.
5. Click Completed.
Subsequent Operations
The scaling group is now created. To implement auto scaling, you need to proceed with the following 3 operations: