Preparation(iOS)
Feature Overview
TUILiveKit is a comprehensive live-streaming component. Once integrated, it allows you to quickly implement the following key functional modules for your Android application:
Host Prepare Page | Host Streaming Page | Live Stream List | Audience Viewing Page |
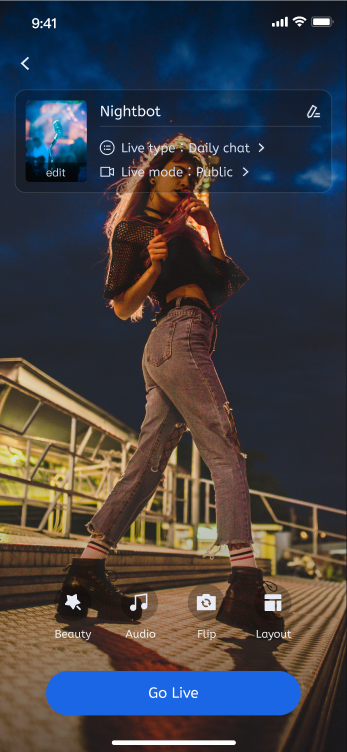 | 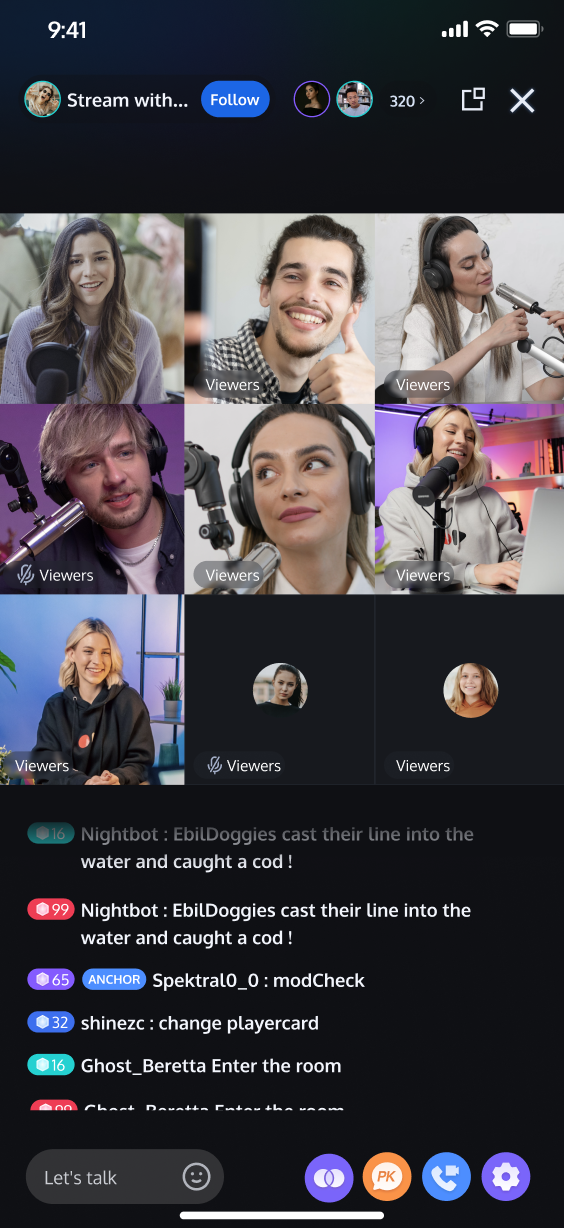 | 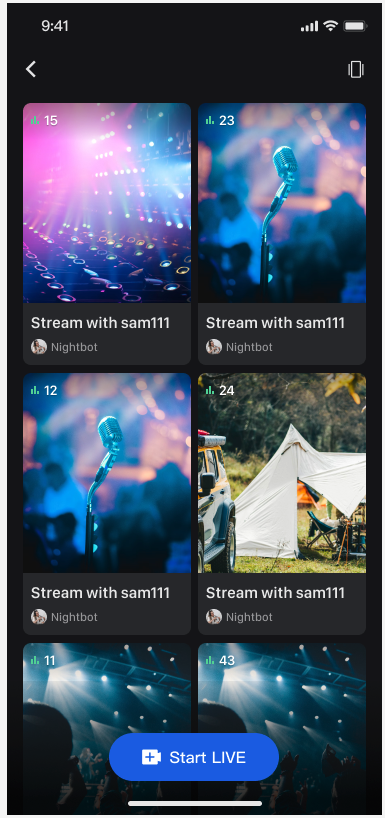 | 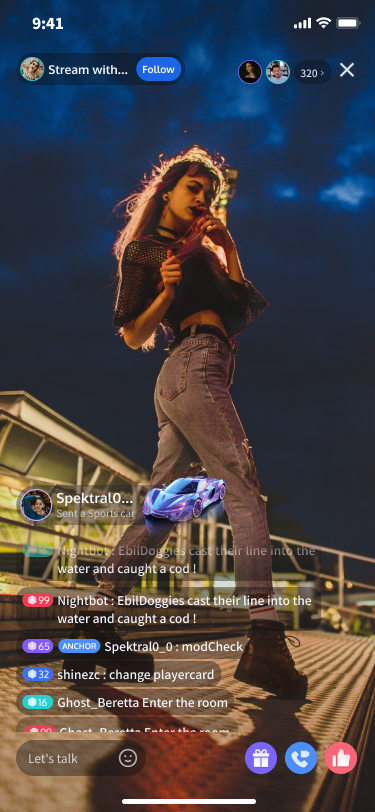 |
Preparations
Activate Service
Before using TUILiveKit, please refer to Activate Serviceto get the TUILiveKit trial version or activate the paid version.
Environment Requirements
Xcode: Requires Xcode 15 or a later version.
iOS: Supports devices running iOS 13.0 or a later version.
CocoaPods environment: A CocoaPods environment must be installed. If you haven't installed it, please refer to the CocoaPods installation guide, or follow these steps:
Install CocoaPods using gem: execute the
sudo gem install cocoapods command in the terminal to install.Note:
During the
sudo gem install cocoapods installation process, you may be prompted to enter your computer's password. Enter the administrator password as prompted.Code Integration
Step 1. Import Components Via CocoaPods
1. Add Pod dependency:
If your project already has a Podfile.
Add the
pod 'TUILiveKit' dependency in your project's Podfile file. For example:target 'YourProjectTarget' do# Other existing Pod dependencies...# Addpod 'TUILiveKit'dependencypod 'TUILiveKit'end
If your project does not have a Podfile.
Switch to your .xcodeproj directory using the
cd command in the terminal, then execute pod init to create the Podfile. After creation, add the pod 'TUILiveKit' dependency to your Podfile. For example:# If your project directory is /Users/yourusername/Projects/YourProject# 1. cd to your.xcodeprojproject directorycd /Users/yourusername/Projects/YourProject# 2. Execute pod init. This command will generate a Podfile in your project directory.pod init# 3. Addpod 'TUILiveKit'dependency in the generatedPodfilefiletarget 'YourProjectTarget' do# Addpod 'TUILiveKit'dependencypod 'TUILiveKit'end
2. Install components:
cd to the directory containing the Podfile in the terminal, then execute the following command to install the component.pod install
Step 2. Project Configuration (Device Permissions)
To use the audio/video features, your application needs to obtain permissions for the microphone and camera. Please add the following two entries to your application's
Info.plist file, and provide corresponding usage descriptions. These descriptions will be displayed to the user when the system requests permission:<key>NSCameraUsageDescription</key><string>TUILiveKit needs camera access to enable video recording with picture</string><key>NSMicrophoneUsageDescription</key><string>TUILiveKit needs microphone permission to enable sound in recorded videos</string>

Complete Login
After code integration, the next step is to complete the login. All TUILiveKit features require a successful login to function properly, so ensure your parameters are configured correctly.
Note:
In the example code, the login API is called directly. However, in a real-world application, it is highly recommended that you call the TUILiveKit login service only after your own user authentication and other internal login processes are complete. This prevents potential business logic confusion or data inconsistency caused by calling the login service too early, and it better aligns with your existing user management system.
//// AppDelegate.swift//// 1. Import TUICoreimport TUICore// 2. The example code completes login in didFinishLaunchingWithOptions. Recommendation for you: call the login service after completing your own login service.func application(_ application: UIApplication, didFinishLaunchingWithOptions launchOptions: [UIApplication.LaunchOptionsKey: Any]?) -> Bool {// 3. Call the login APITUILogin.login(1400000001, // replace with the SDKAppID from the service consoleuserID: "denny", // replace with your UserIDuserSig: "xxxxxxxxxxx") { // You can calculate a UserSig in the console and fill it in this locationprint("login success")} fail: { (code, message) inprint("login failed, code: \\(code), error: \\(message ?? "nil")")}return true}
//// AppDelegate.m//// 1. Import TUICore#import <TUICore/TUILogin.h>// 2. The example code completes login in didFinishLaunchingWithOptions. Recommendation for you: call the login service after completing your own login service.- (BOOL)application:(UIApplication *)application didFinishLaunchingWithOptions:(NSDictionary *)launchOptions {// 3. Call the login API[TUILogin login:1400000001 // replace with the SDKAppID from the service consoleuserID:@"denny" // replace with your UserIDuserSig:@"xxxxxxxxxxx" // You can calculate a UserSig in the console and fill it in this locationsucc:^{NSLog(@"login success");} fail:^(int code, NSString * _Nullable msg) {NSLog(@"login failed, code: %d, error: %@", code, msg);}];return YES;}
Login API Parameter Description
Parameter | Type | Description |
SDKAppID | Int | |
UserID | String | The unique ID for the current user. Must contain only English letters, numbers, hyphens, and underscores. |
userSig | String | A ticket for Tencent Cloud authentication. Please note: Development Environment: You can use the local GenerateTestUserSig.genTestSig function to generate a UserSig or generate a temporary UserSig via the UserSig Generation Tool.Production Environment: To prevent key leakage, you must use a server-side method to generate UserSig. For details, see Generating UserSig on the Server. |
Handling Login Exception Status [Optional]
TUILogin provides a login status callback mechanism to help you handle possible login exceptions, mainly including "kicked offline" and "signature expired" callbacks:
Kicked Offline: If a user is kicked offline while online, the SDK will notify you via the
onKickedOffline callback. At this point, you can display a UI prompt to the user and call TUILogin.login to login again.Signature Expired: If a user receives the
onUserSigExpired callback while online, it means the userSig previously issued for that user has expired. If the user's login session on your backend is still valid, you can have your app request a new userSig from your backend and call TUILogin.login to renew the login session.// YourLoginService represents the business module responsible for loginclass YourLoginService: NSObject {// Listen to login status callbackfunc addLoginListener() {TUILogin.add(self)}// Cancel listening to login status callbackfunc removeLoginListener() {TUILogin.remove(self)}}// Implement login callback TUILoginListenerextension YourLoginService: TUILoginListener {// User kicked offline callbackfunc onKickedOffline() {// Your business code: UI prompt user, then log in again}// User signature expired callbackfunc onUserSigExpired() {// Your business code: If the current user is still logged in on your backend, you can have your app request a new userSig from your backend and call TUILogin.login to renew the login status.}}
@interface YourLoginService() <TUILoginListener>// Listen to login status callback- (void)addLoginListener;// Cancel listening to login status callback- (void)removeLoginListener;@end@implementation YourLoginService// Listen to login status callback- (void)addLoginListener {[TUILogin add:self];}// Cancel listening to login status callback- (void)removeLoginListener {[TUILogin remove:self];}#pragma mark - TUILoginListener// User kicked offline callback- (void)onKickedOffline {// Your business code: UI interaction prompts user, then log in again}// User signature expired callback- (void)onUserSigExpired {// Your business code: UI interaction prompts user, then log in again}@end
Next Steps
Congratulations! You have successfully integrated the TUILiveKit component and completed the login. You can now implement features such as host streaming, viewer watching, and the live stream list. Please refer to the table below for integration guides:
Feature | Description | Integration Guide |
Host Streaming | The complete workflow for a host to start a stream, including pre-stream setup and various in-stream interactions. | |
Audience Viewing | Audience can watch live streaming after entering the anchor's live streaming room, with features like audience mic connection, live room information, online audience, and bullet screen display. | |
Live Stream List | Display the live stream list interface and features, including the live stream list and room information display. |
FAQs
After executing pod install, why can't I find the latest version of TUILiveKit locally?
If you are unable to install the latest version of TUILiveKit, please follow these steps:
1. In the directory where the Podfile is located, delete
Podfile.lock and Pods. You can choose to delete them manually or execute the following command in the terminal:// cd to the directory where Podfile is locatedrm -rf Pods/rmPodfile.lock
2. In the directory where Podfile is located, execute
pod install --repo-update// cd to the directory where Podfile is locatedpod install --repo-update
Do I need to call the login method every time I enter a room?
No. You usually only need to complete one
TUILogin.login call. We recommend associating TUILogin.loginand TUILogin.logout with your own application's login business logic.Is there a sample configuration for the Podfile that I can refer to?
Help and Support
Was this page helpful?
You can also Contact sales or Submit a Ticket for help.
Help us improve! Rate your documentation experience in 5 mins.
Feedback