After an application is created, you can enable the Relay to CDN, On-Cloud Recording, and advanced rights control functions for your application through function configuration. The modification takes effect about 5 minutes after the modification.
Relay to CDN
Notice
TRTC service based on UDP transport protocol connects audio and video streams to CSS through protocol conversion, which is called "Relay to CDN".
The Relay to CDN is disabled by default. CSS must be enabled before the Relay to CDN function is enabled.
When Relay to CDN is used for CDN live viewing, CSS will charge related fees based on the downstream traffic/bandwidth generated by live viewing. For details, see CSS > Traffic Bandwidth Charging Description.
You can use Relay to CDN to push audio and video to CSS. If you use the recording capability of CSS to complete the recording, recording and file storage fees will be incurred. For details, see Billing of On-Cloud Recording and Recording Delivery.
If you live in a console to Relay to CDN forward domain name (xxxx.livepush.myqcloud.com) binding the recording, transcoding, pornographic identification, watermark, such as charging function template, the Relay to CDN would produce the template corresponding value added cost.
Enable the Relay to CDN function
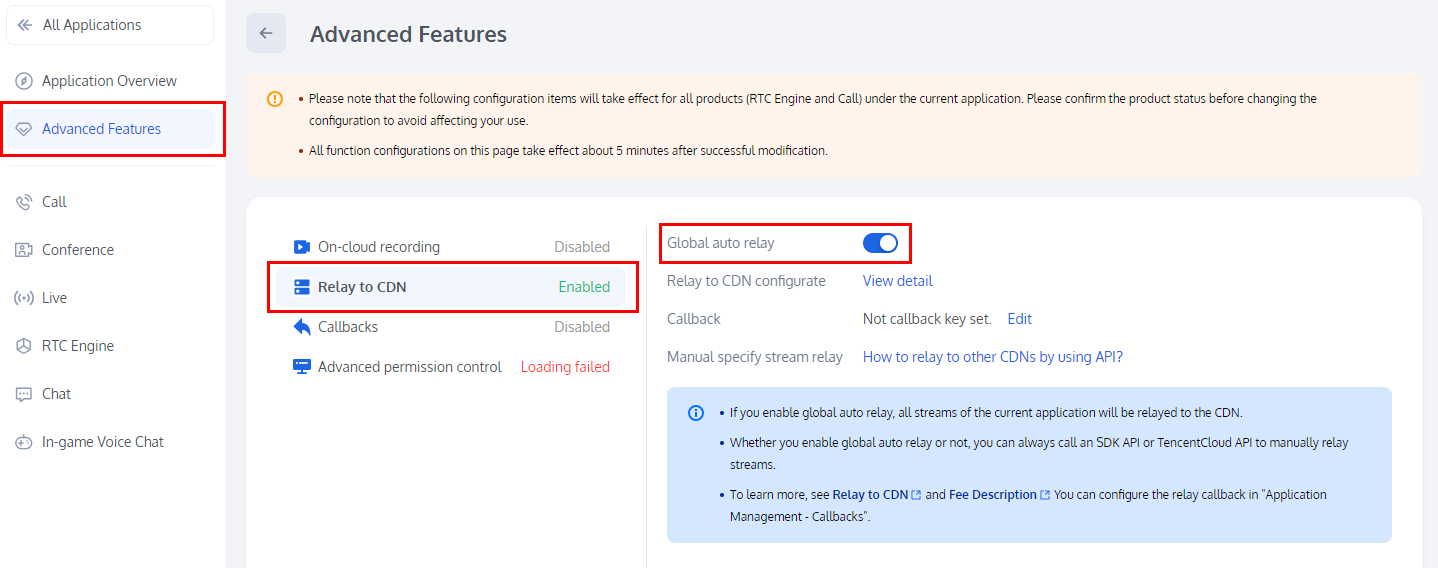
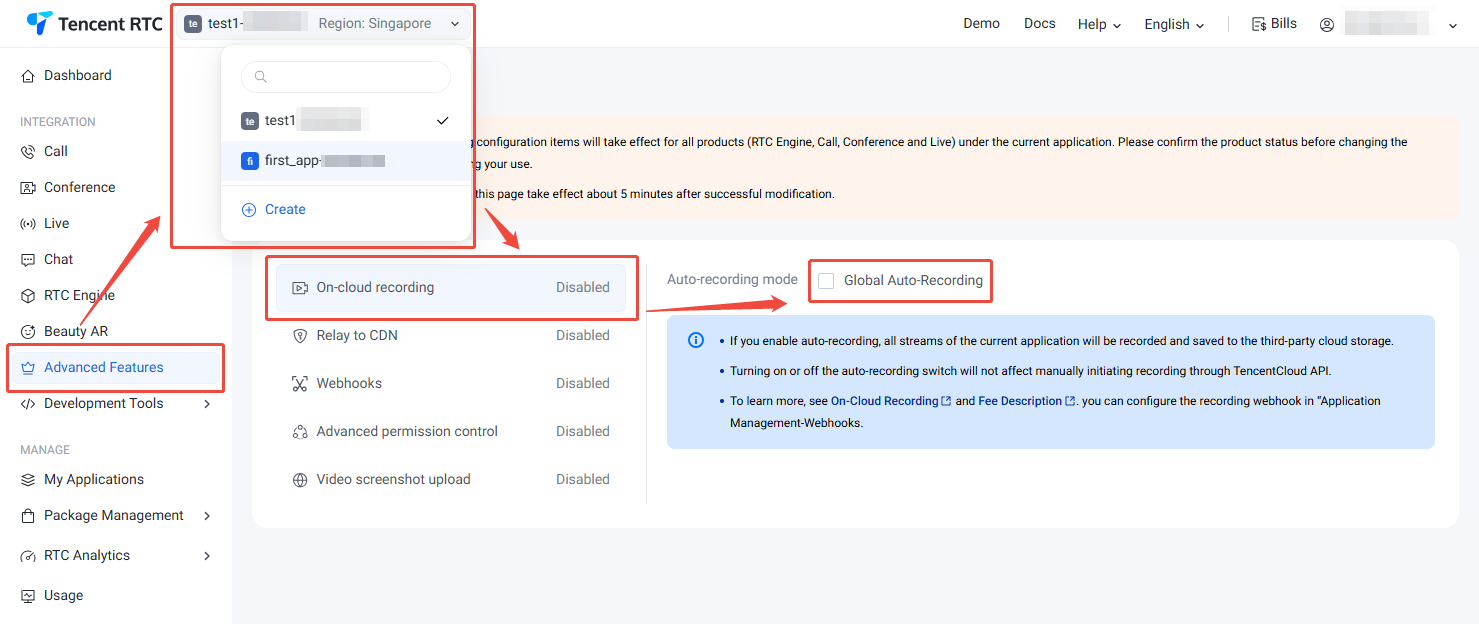
1. Enter Tencent RTC console > Advanced Features, select the target application in the top-left corner . Meanwhile, you can also click Create to quickly create a new application here.
2. Enter the target application's Advanced Features configuration page, click the side button next to Bypass Redirect Configuration under Global Auto Relay.
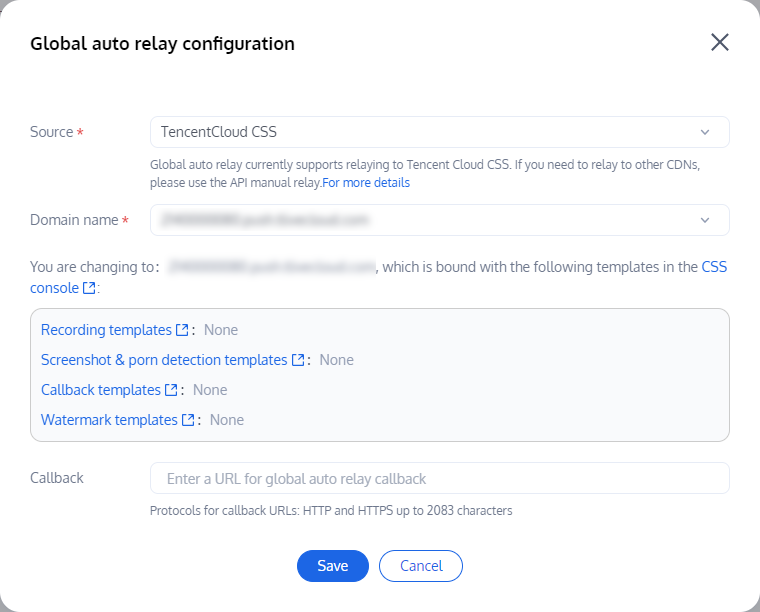
3. In the dialog box that is displayed, read the risk description carefully. If yes, click Save to enable the Relay to CDN.
Switch the Relay to CDN domain name
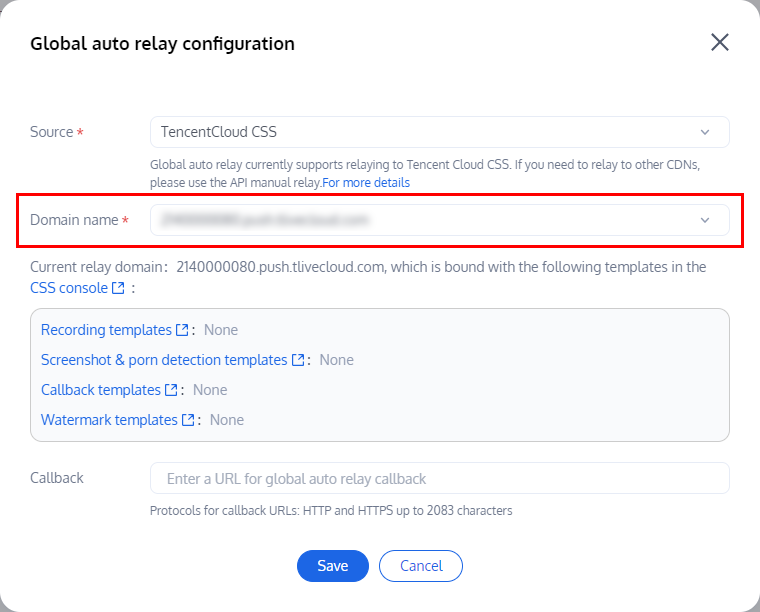
1. Your current default domain name called xxxx.livepush.myqcloud.com/xxx.tlivecloud.com, and support to switch your domain name in CSS console. If you need to switch other domain names, please first go to the CSS console for binding.
Note:
After the default domain name is changed, the recording template, callback template, yellow authentication template, and watermark template bound to the current domain name will become invalid. Bind these templates to the new domain name and then complete the switchover. After the domain name switchover takes effect, the audio and video generated in the new room will be pushed based on the new domain name.
2. Go to the Tencent RTC Console > Applications, select the application whose function configuration you want to modify and click Manage. Select Advanced Features from the project column on the left, then click View Details on Relay to CDN, and switch the Relay to CDN domain name on the configuration page.
Disable Relay to CDN
To disable the Relay to CDN, perform the following steps:
1. Log in to the Tencent RTC Console > Applications, select the application whose function configuration you want to modify and click Manage.
2. Select Advanced Features from the project column on the left, then click the button to the right of Global auto relay within the Relay to CDN section.
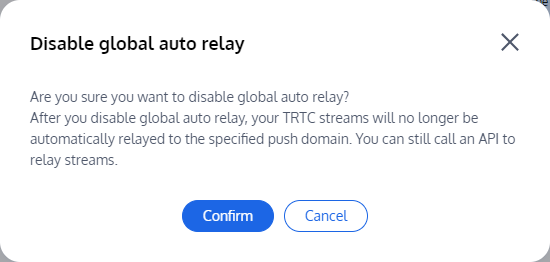
3. In the disable global auto relay dialog box that is displayed, read the risk description carefully. If yes, click Confirm.
On-Cloud Recording Configuration
Notice
The On-Cloud Recording function uses the TRTC capabilities. The recording fee is charged by the TRTC side. For details about the charging rules, see the Cloud Recording Charging Description.
The On-Cloud Recording function is disabled by default. To enable the cloud recording function, you need to enable CSS and VOD first.
Global Auto-Recording
On-Cloud Recording provides an automatic recording method that does not require manual initiation and management of recording tasks. To use this method, you need to configure a global automatic recording template and enable global automatic recording. You do not need to develop or control the initiation and termination of recording tasks. Enable Global Automatic recording. After it takes effect for 5 to 10 minutes, the recording task will be started when the streamers in the TRTC room uplink the audio and video, and the recording task will be stopped when the streamers in the room check out and exceed the set waiting time. Before using cloud recording, go to Tencent RTC Console > Advanced Features, select the target application in the top-left corner Select Target Application (or click Create to quickly create a new application here), and enter the Advanced Features configuration page of the target application to enable cloud recording, as shown below:
On-Cloud Recording supports recording the audio and video of each anchor in the room into an independent file (single-stream recording), and also supports mixing the audio and video of multiple anchors in the room into a file (mixed-stream recording). You can select the single stream and confluence modes for recording at the same time, and it is only valid for newly created rooms after being opened. This function does not take effect for rooms created before automatic recording is enabled. For a detailed implementation, see Achieve cloud recording and playback.
Global Single-Stream Recording
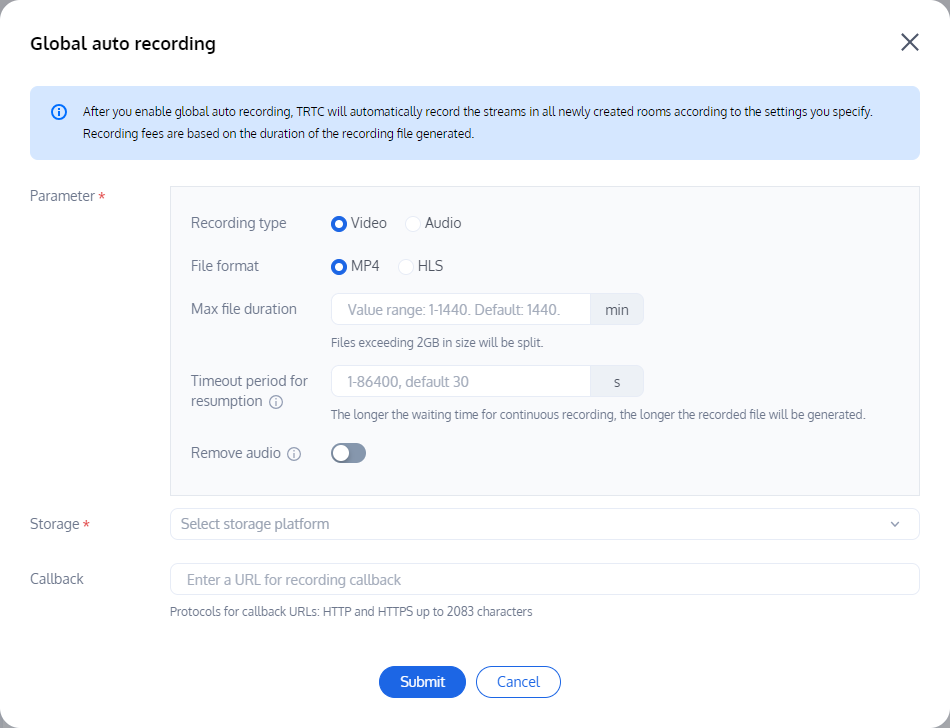
Global single-stream recording format supports audio and video recording, audio recording, video recording, recording files support MP4, HLS and AAC (audio recording format), for details about the recording file slicing policy, see Record file segmentation description.
Features
Description
Recording Mode
single-stream recording: The video footage of each anchor in the room is saved to a separate file.
Audio and video format: Record audio and video streams in the room, suitable for video calls and interactive live broadcast scenarios.
Audio only format: Record only the audio streams in the room.
File Format
Support MP4, HLS and AAC (audio only format).
Recording Duration of A Single File
The value which can be used to specify the recording slicing duration ranges from 1 minute to 1440 minutes. The default value is 1440 minutes.
The Duration of The Continuative Wait
If the interruption interval does not exceed the specified timeout period, only one file is generated for a call (or live broadcast), but the recorded file can be received only after the timeout period expires. The value ranges from 5 to 86400, in seconds. (Audio fee will be charged during the continuation period, please set the duration of the continuation reasonably.)
Notice: In mixed-stream mode, black frames and silent frames continue to be recorded during the waiting period. In single-stream mode, black frames are not recorded. During the continuation waiting period, single-stream and mixed-stream recordings are charged for the duration of the audio.
VOD: Supports the specified VOD application, the storage time of recorded files in the VOD, and the binding of the VOD task flow.
Note:
In single-stream recording mode, the audio and video streams in the room will be recorded separately according to the push parameters, without the need to set transcoding.
The recording robot will continue to wait for the anchor to go up in the room to complete the recording, and it will not end immediately after the anchor checks out. Please set it properly.
Note:
Single stream recording can record a maximum of 25 anchors in a room. If more than 25 anchors are recorded, the first 25 anchors will be recorded according to the check-in time. (If you need to record more than 25 anchors in a single stream, see API Manual recording.)
The default waiting time for continuation is 5s. If the time without anchor in the room exceeds the set continuation time, it will be divided into multiple recording tasks, and the corresponding recording files are also independent. If the time without anchor in the room does not exceed the continuation time, the recording tasks will be maintained and the recording files will not be split.
Manually Customize the Recording
If you only need to use certain rooms to initiate recording tasks, you can do so manually through CreateCloudRecording.
Disable the On-Cloud Recording
After the on-cloud recording function is enabled, 「Manual Custom Recording」 is enabled by default and cannot be disabled. 「Manual Custom Recording」 generates recording usage based on your initiation. If you only need to use 「Manual Custom Recording」, disable 「Global Automatic Recording」.
Recording File Management
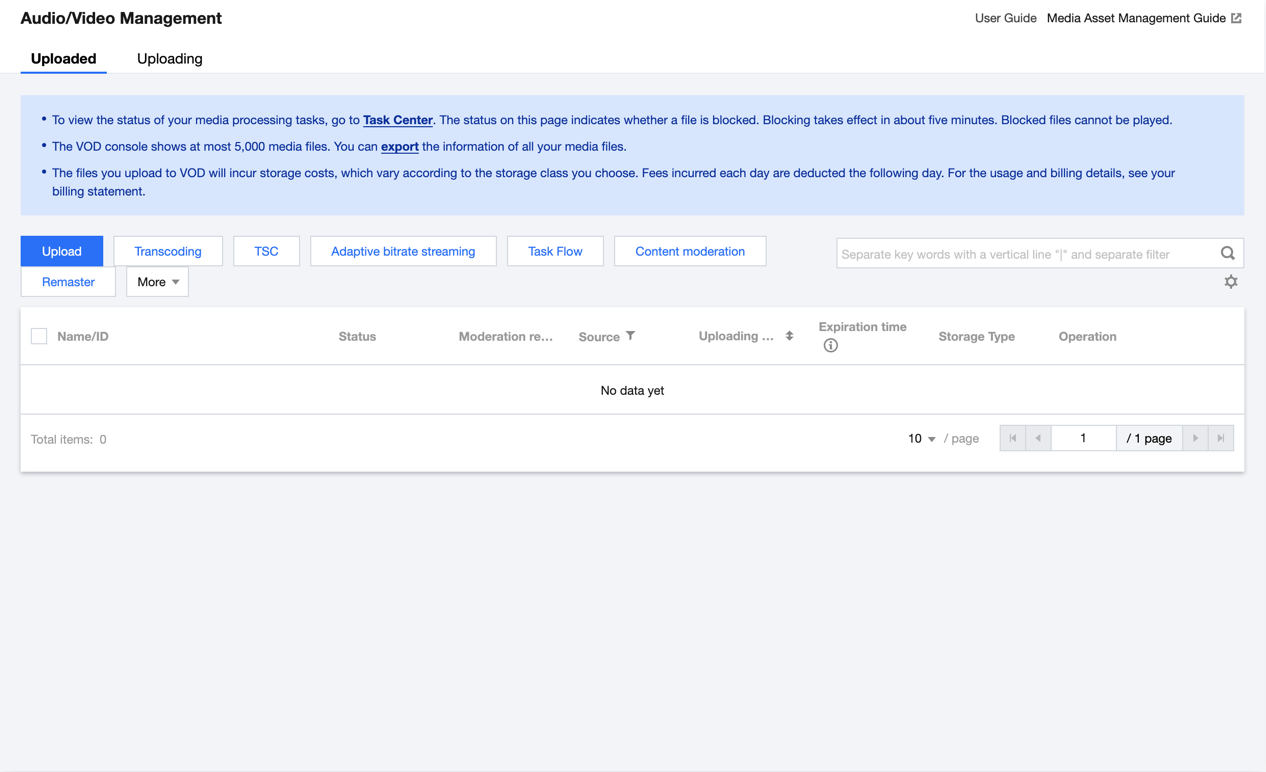
After recording, you can view the recorded file on the VOD audio and video management interface. We will upload the file to the storage location you specify, and you will be able to view it once the upload is complete.
By filtering the VOD applications that you specify, you can view the corresponding recording result files.
By clicking a file name, you can view detailed file information, including preview videos, obtain file urls, and download files.
Note:
Depending on the size of the recorded file, the upload time may be delayed by 30 seconds to several minutes. You can subscribe to the recording callback event to obtain the successful upload time of the file.
Advanced Permission Control
If you want to add room access restrictions or access restrictions to some rooms, that is, only allow specified users to enter the room or access the microphone, and you are worried that the client judge the permission is easy to encounter cracking attacks, then you can consider enabling advanced permission control.
Notice
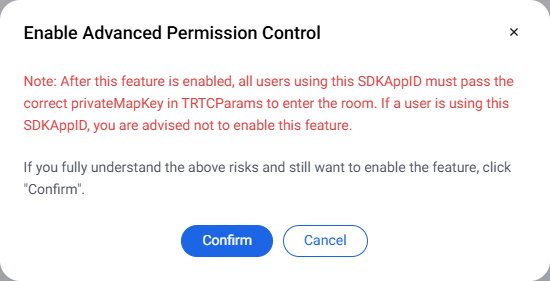
After advanced permission control is enabled, all users of the current SDKAppID need to pass the privateMapKey parameter correctly in TRTCParams in order to successfully enter the room. If there is a user using this SDKAppID online, do not enable this feature.
Enable advanced permission control
1. Go to Tencent RTC console > Advanced Features, select the target application in the top-left corner . Meanwhile, you can also click Create to quickly create a new application here.
2. Enter the Advanced Features configuration page of the target application, click the button on the right of Enable Advanced Permission Control, then click Confirm in the pop-up to complete the enablement.
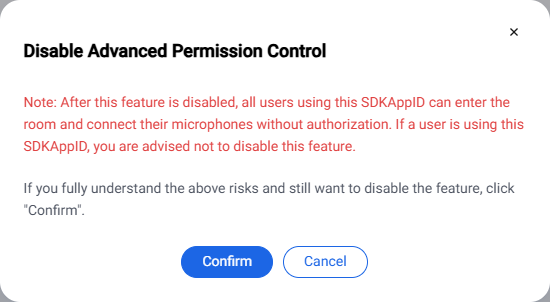
2. Enter the Advanced Features configuration page of the target application, click the button on the right of Enable Advanced Permission Control, then click Confirm in the pop-up to complete the disablement.