Log in to the Chat console, navigate to the target application to access the application management page, and select Chat > Users in the left sidebar. You can manage accounts according to your business needs.
Note:
Live and Instant Messaging (Chat) share the same account system.
Creating an Account
1. On the Account Management page, click Create account.
2. Configure the following parameters in the pop-up dialog box:
Account Type: Select General or Admin. The role of app admin has the highest level of management permissions. It can call RESTful APIs to perform operations such as creating or disbanding a group, and sending messages to all members. Each app supports up to 10 admins.
Username: Enter the user ID. This field is required.
Nickname: Enter the nickname. This field is optional.
Profile Photo: Enter the URL to the user's profile photo. This field is optional.
3. Click Confirm.
4. After the account is created, you can see the account's username, nickname, type, profile photo, and creation time in the account list.
Deleting Accounts
1. By default, account deletion is not permitted. However, this restriction can be lifted to allow for account deletion. To do so, click on Click here to remove the restriction. In the confirmation dialog that appears, after acquainting yourself with the associated risks, click Confirm to lift the restriction.
2. On the Account Management page, select the account(s) you wish to delete from the list and click Batch Delete.
3. In the confirmation dialog that appears, after understanding the associated risks, click Confirm to delete the account. Please be aware that once deleted, the data cannot be recovered. Exercise caution in this operation.
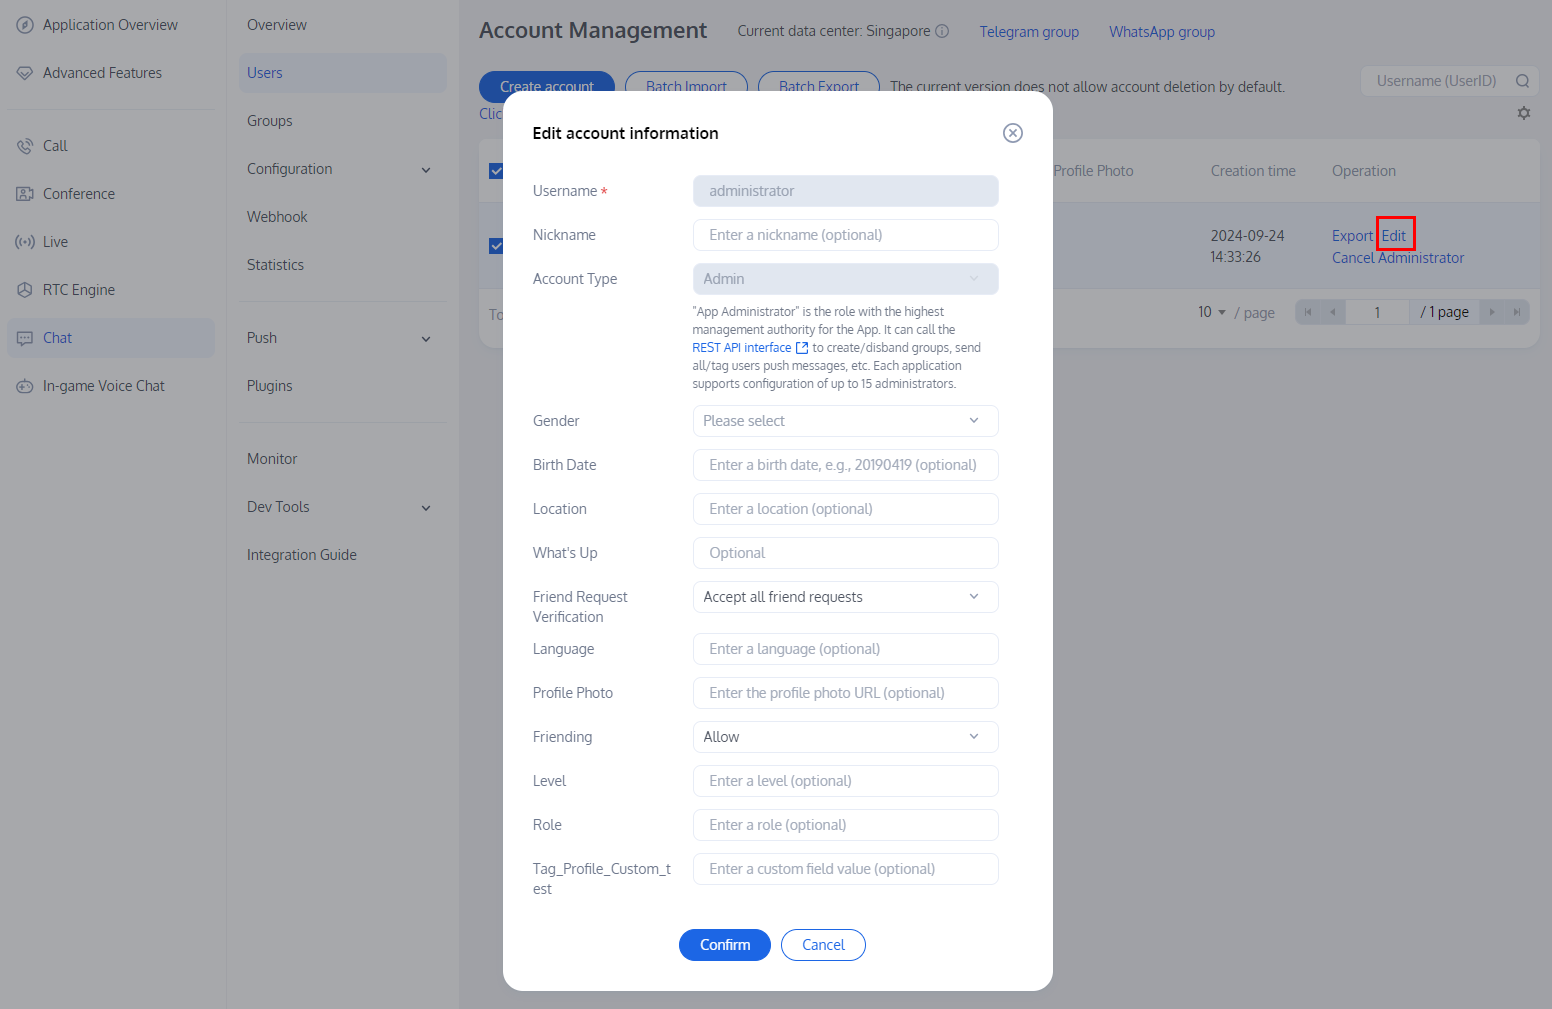
Editing an Account
1. On the Account Management page, locate the account to edit and click Edit in the Operation column.
2. Configure the following parameters in the pop-up dialog box:
Username: This field cannot be edited.
Nickname: You can edit the user's nickname. This field is optional.
Account Type: This field cannot be edited.
Gender: You can edit the user's gender. This field is optional.
Birth Date: You can edit the user's birthday. This field is optional.
Location: You can edit the location. This field is optional.
What's Up: You can edit the status. This field is optional.
Friend Request Verification: You can edit the friend request verification mode.
Language: You can edit the language. This field is optional.
Profile Photo: You can edit the profile photo. This field is optional.
Message settings: You can select message settings. This field is optional.
Friending: You can specify whether the admin prohibits the user from initiating a friend request. This field is optional.
Level: You can edit the level. This field is optional.
Role: You can edit the role. This field is optional.
3. Click Confirm.
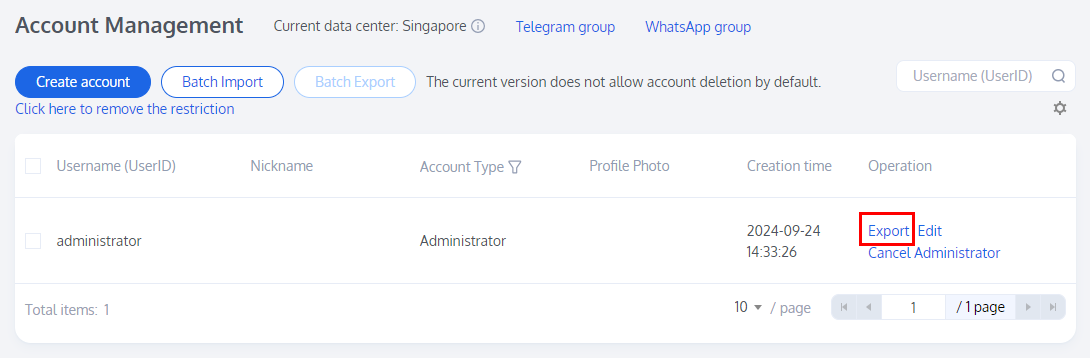
Exporting Accounts
1. Single account export: On the Account Management page, locate the account to export and click Export in the Operation column.
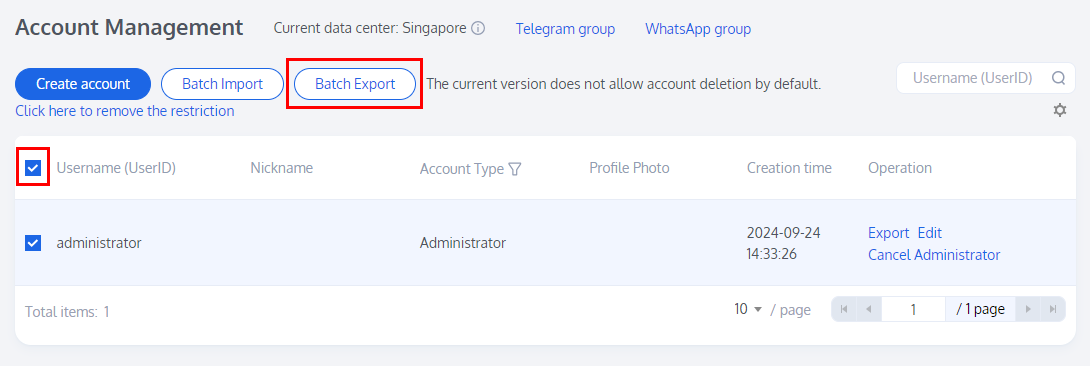
2. Batch export: On the Account Management page, select the accounts to export and click Batch Export above the account list.
3. In the pop-up dialog box that reads Export successful, click Download.