One-Click Connectivity Checker
Download
Focus Mode
Font Size
If the connection to Tencent Cloud Distributed Cache fails, it is recommended that you use the One-Click Connectivity Checker to locate the cause. This article introduces the potential causes and solutions for connection failures using the connectivity checker.
When a private network connection fails, see Private Network One-Click Connectivity Check to quickly locate the issue. If the problem persists, further analyze the cause of the inability to connect by following the Guide to Troubleshooting Private Network Connectivity Issues.
For public network connection failures, see Public Network One-Click Connectivity Check.
Private Network One-Click Connectivity Check
The Private Network One-Click Connectivity Check will inspect the following:
Whether theDistributed Cacheand CVM instances are normal.
Whether CVM and Distributed Cache belong to the same VPC.
Whether the inbound rules of the Distributed Cache security group allow the IP address of CVM, and whether the outbound rules of the CVM security group allow the private IP address of Distributed Cache.
Note:
In the Classic Network, the security group bound to the CVM cannot filter data packets to or from No SQL Database (Redis, Memcached). Use the One-Click Connectivity Checker for the Classic Network security group's configuration. If the check results are abnormal, please perform manual inspection and verification.
Directions
1. Log in to the Tencent Cloud Distributed Cache console.
2. Select the instance you want to troubleshoot, click Instance ID to open the instance details page.
3. On the instance details page, go to the Connection Check > Private Network Check page.
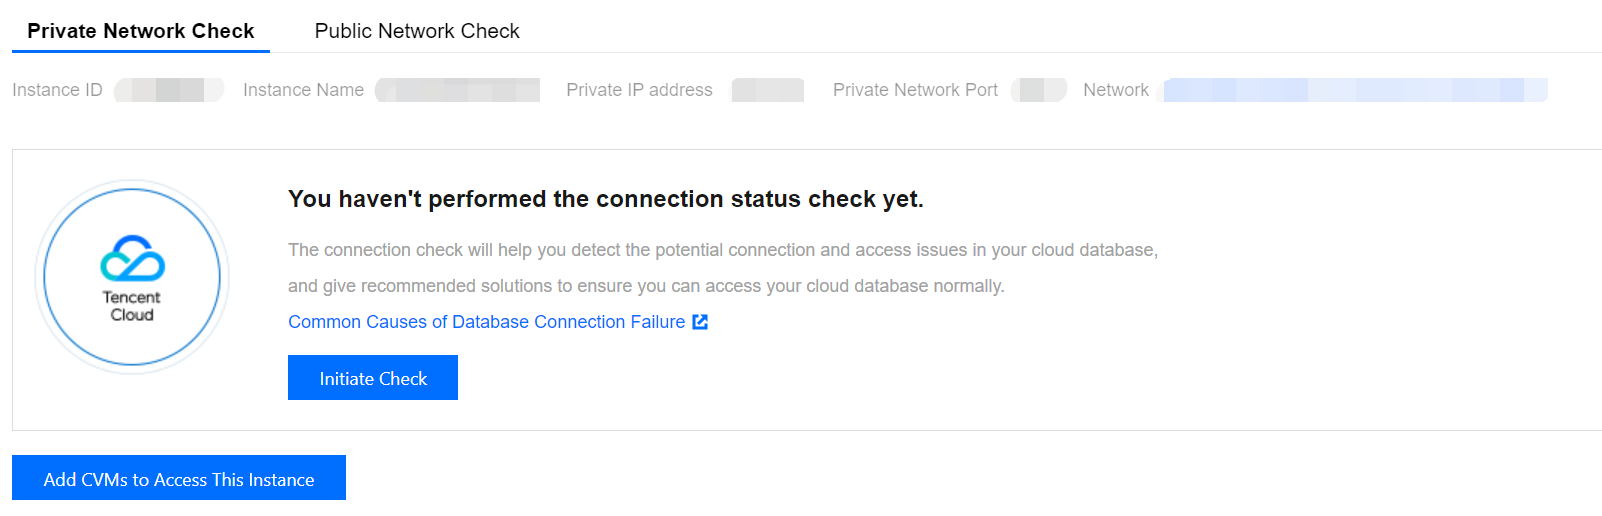
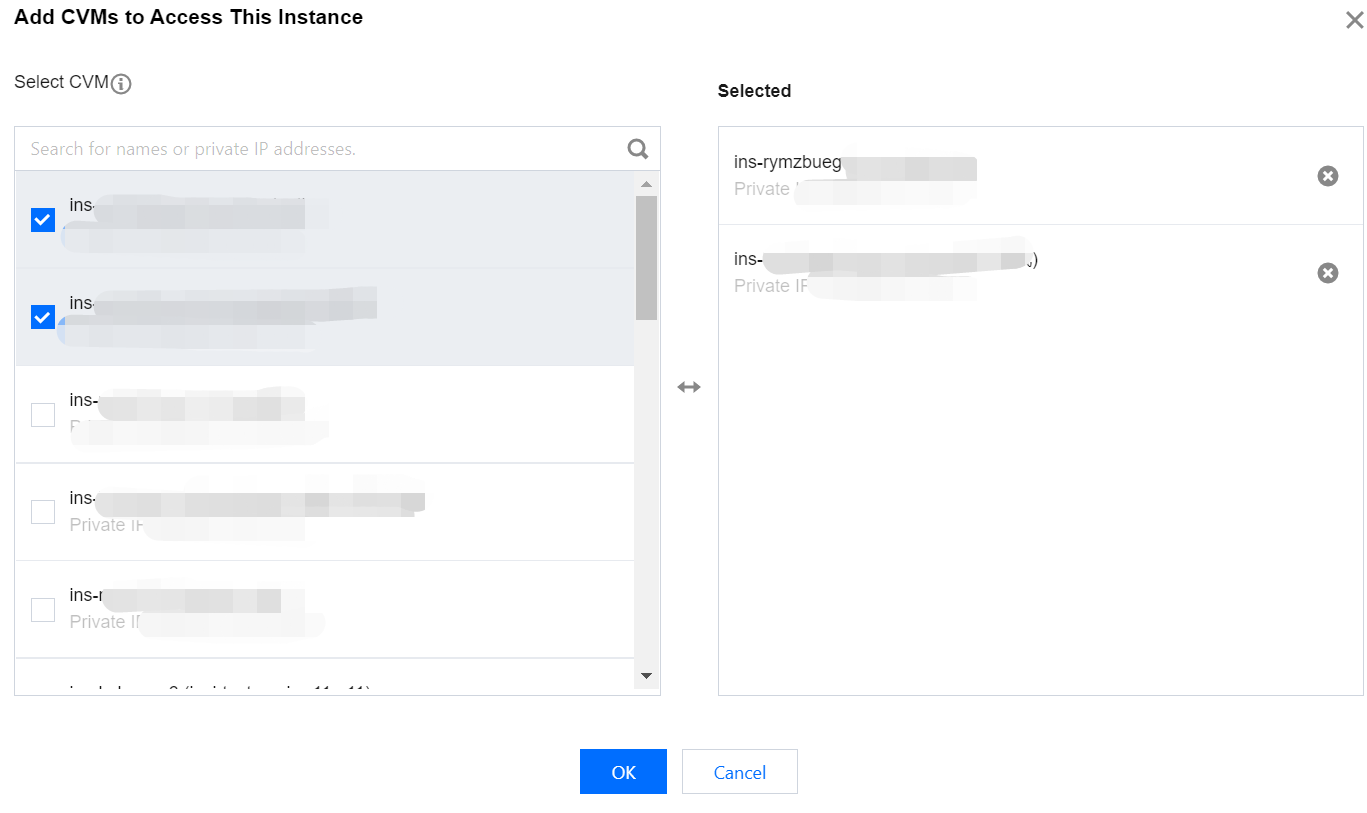
4. Click Add CVMs to Access This Instance, in the following displayed window, all CVMs in the same region as the instance will automatically be displayed. Select the CVM used to access this Redis instance and click OK.
Note:
By default, only cloud services in the same region are provided. Cloud services across regions do not support configuration checks.
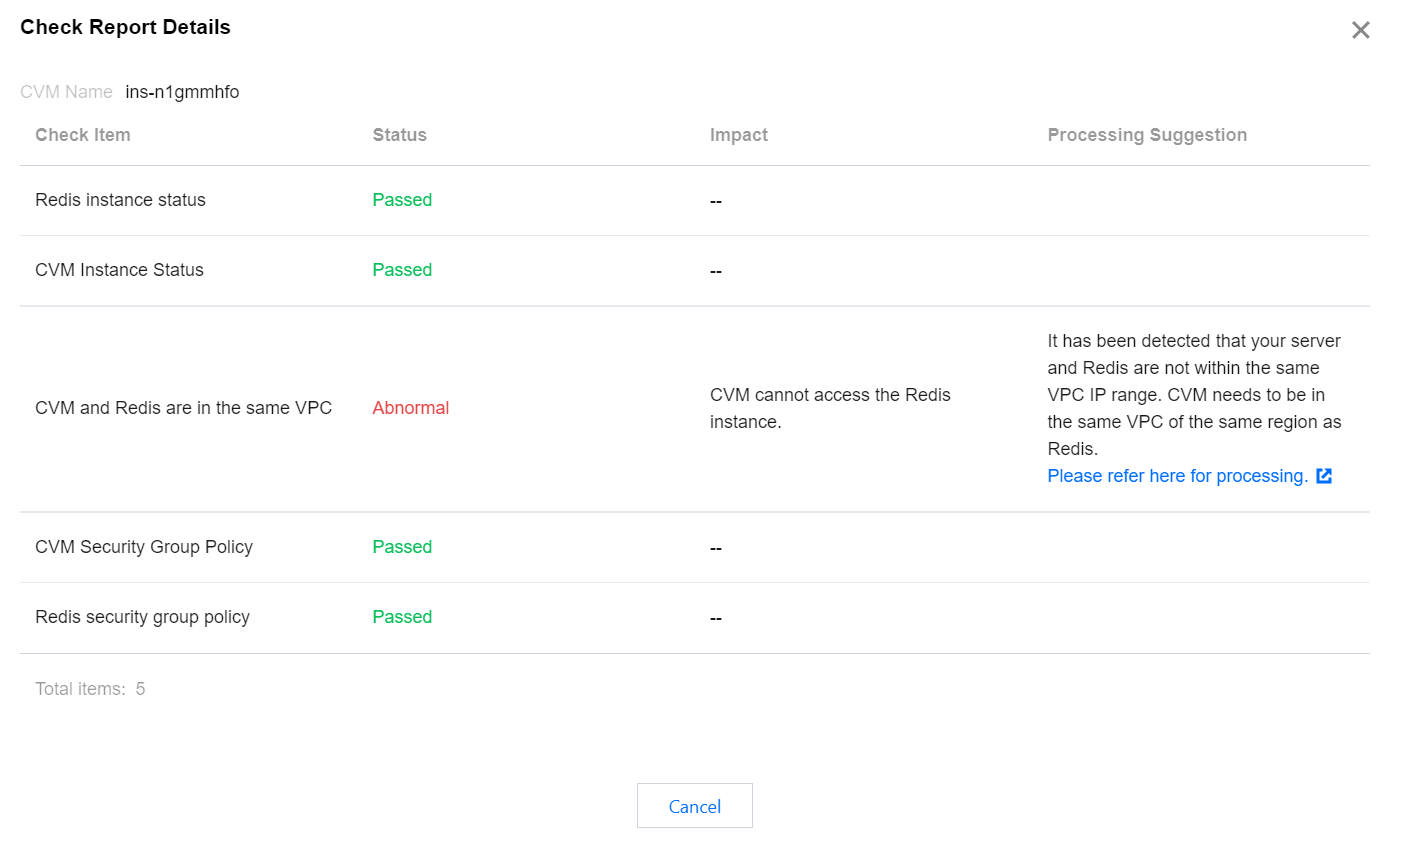
5. Click Initiate Check, wait for the check to complete. Then a check report will be generated, as shown in the following figure.

6. In the Operation column, click Peek Report. Based on the check report, locate the issues and make adjustments according to the recommended solutions before attempting to reconnect to Distributed Cache.
Exception Analysis and Measures
Check Items | Status | Impact | Suggestion | Solution |
Redis instance status | Abnormal | Redis instance unreachable | Isolated:
Your Redis instance has been isolated. If you need to continue using this Redis instance, please go to the Redis Recycle Bin to restore the isolated instance. It is detected that your instance has been isolated. If you need to continue using this instance, please go to the recycle bin to restore the isolated instance. | |
CVM instance status | Abnormal | CVM instance unreachable | Isolated:
Your CVM instance has been isolated. If you need to continue using this CVM instance, please go to the CVM Recycle Bin to restore the instance. Shutdown:
Your CVM instance has been shut down. If you need to continue using this CVM instance, please go to the CVM console to start the CVM instance. | Isolated:
For specific operations, see Instance Repossession or Recovering. Shutdown:
For specific operations, see Starting Up Instances. |
CVM and Redis are in the same VPC | Abnormal | Redis instance unreachable from the CVM | Your server and the Redis instance are detected to be in different VPC IP ranges. The CVM instance needs to be in the same region and the same VPC as the Redis instance. | To modify the network information of Distributed Cache, see Configuring Network. To modify the network information of CVM, see Switching to VPC. |
Redis security group policy | Abnormal | Redis instance unreachable from the CVM | It has been detected that the inbound rules of the security group bound with your Redis have not allowed access to the CVM's internal network IP address and ports. | 1. Log in to the CVM console, in the instance list under the Maste IPv4 Address column, verify the internal network IP address of the CVM connecting to Distributed Cache. For specific operations, see Viewing Instance Information. 2. Please go to the Tencent Cloud Distributed Cache console, under the Security Group tab to the Rule Preview section, check Inbound Rules. For specific operations, see Configuring Security Group. |
CVM security group policy | Abnormal | Redis instance unreachable from the CVM | It has been detected that the outbound rules of the security group affiliated with your CVM have not allowed access to Redis's internal network IP address and ports. | 1. Log in to the CVM console, on the Security Group management page, verify the Outbound Rules. For specific operations, see Viewing Security Groups. 2. Modify the outbound rules of the security group to allow access to Redis's internal network IP address and ports. For specific operations, see Modifying Security Group Rules. |
Public Network One-Click Connectivity Check
The Public Network One-Click Connectivity Checker will inspect the following:
Whether the status of the Distributed Cache instance is normal.
Whether the instance is enabled with the public network access feature.
Whether the Distributed Cache security group allows access to external network addresses and ports.
Directions
1. Log in to the Tencent Cloud Distributed Cache console.
2. Select the instance you want to troubleshoot, click on the Instance ID to enter the instance details page.
3. On the instance details page, go to the Connection Check > Public Network Check page.
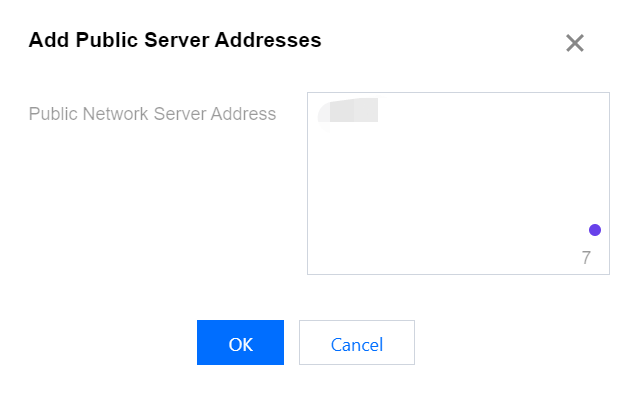
4. Click Add the Public server Addresses accessing this instance. In the Public Server Addresses input field, enter the required external network server address according to the instructions, and then click OK.
Note:
The required format for the added external network server are as follows:
1. IP address format: xx.xx.xx.xx. Other formats will result in an error prompt.
2. Multiple IP address separators: Please use line break, comma, semicolon, or space.
3. Quantity limit: Up to 20 external network server addresses can be added for each check.
5. Click Initiate Check, and wait for the check to complete. Then a check report will be generated.
6. In the Operation column, click Peek Report. Based on the check report, locate the issues and make adjustment according to the recommended solutions before attempting to reconnect to Redis.

Exception Analysis and Measures
Check Items | Status | Impact | Suggestion | Solution |
Redis instance status | Abnormal | Redis instance unreachable | Isolated:
Your Redis instance has been isolated. If you need to continue using this Redis instance, please go to the Redis Recycle Bin to restore the isolated instance. | |
Public network access status | Abnormal |
Public network servers are unable to access the Redis instance.
| It has been detected that your Redis instance's public network is not enabled. To enable it, see Configuring Public Network Address. | Note: Currently, only the Chengdu, Beijing, Shanghai, and Guangzhou regions support public network addresses. |
Redis security group policy | Abnormal | Public network servers are unable to access the Redis instance. |
It has been detected that the inbound rules of the security group bound to your Redis instance have not allowed access to 1.1.1.1 and TCP protocol port 6379. If you have not configured it purposely, it may prevent your public network servers from accessing the Redis instance properly. | Note: After public network access is enabled, it will be governed by the security group network access policy. Please configure the source information for database access in the security group's inbound rules and enable the protocol ports (both private and public network ports need to be enabled, and the default private network port is 6379). |
Help and Support
Was this page helpful?
You can also Contact sales or Submit a Ticket for help.
Help us improve! Rate your documentation experience in 5 mins.
Feedback