This document describes how to configure Lightweight Directory Access Protocol (LDAP) authentication in ES, so that users with LDAP roles can access ES resources.
Use Limits
LDAP authentication is an advanced feature provided by Elasticsearch X-Pack and is currently only supported for Platinum Edition clusters. If you want to use this feature for other clusters, upgrade them to Platinum Edition first.
Configuring LDAP Authentication
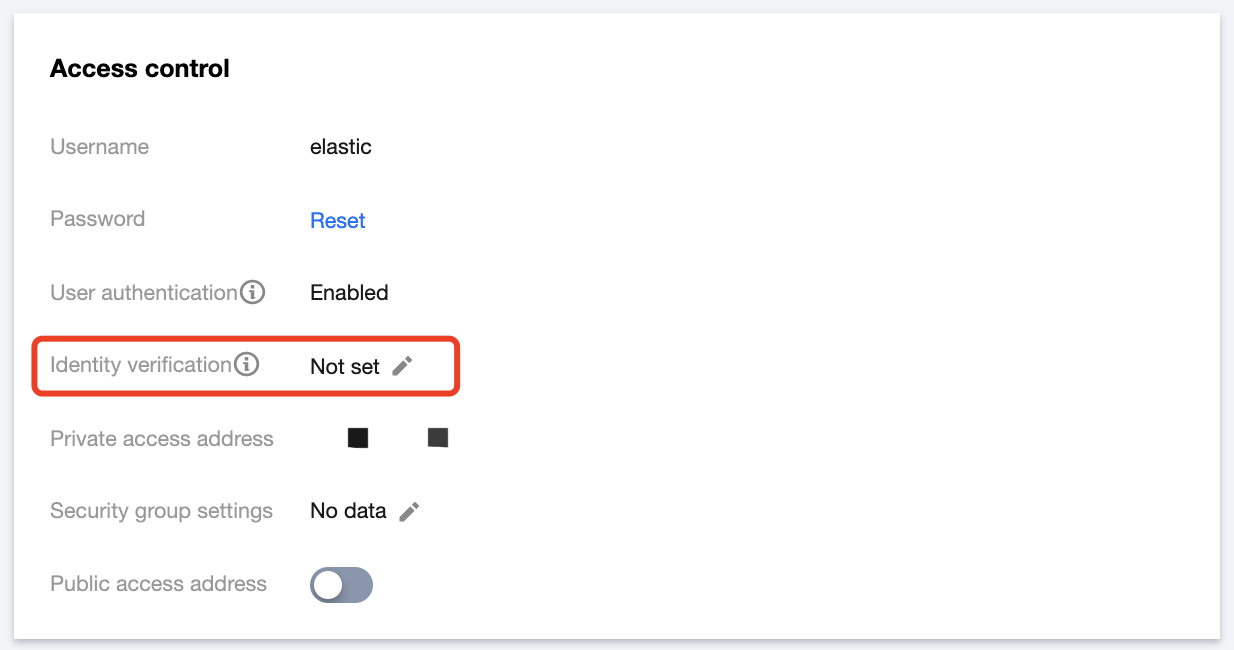
1. Log in to the ES console and click Cluster Name of the target cluster to enter its Basic Configuration page.
2. In the Access Control module, click the edit icon after Authentication to enter the authentication configuration page.
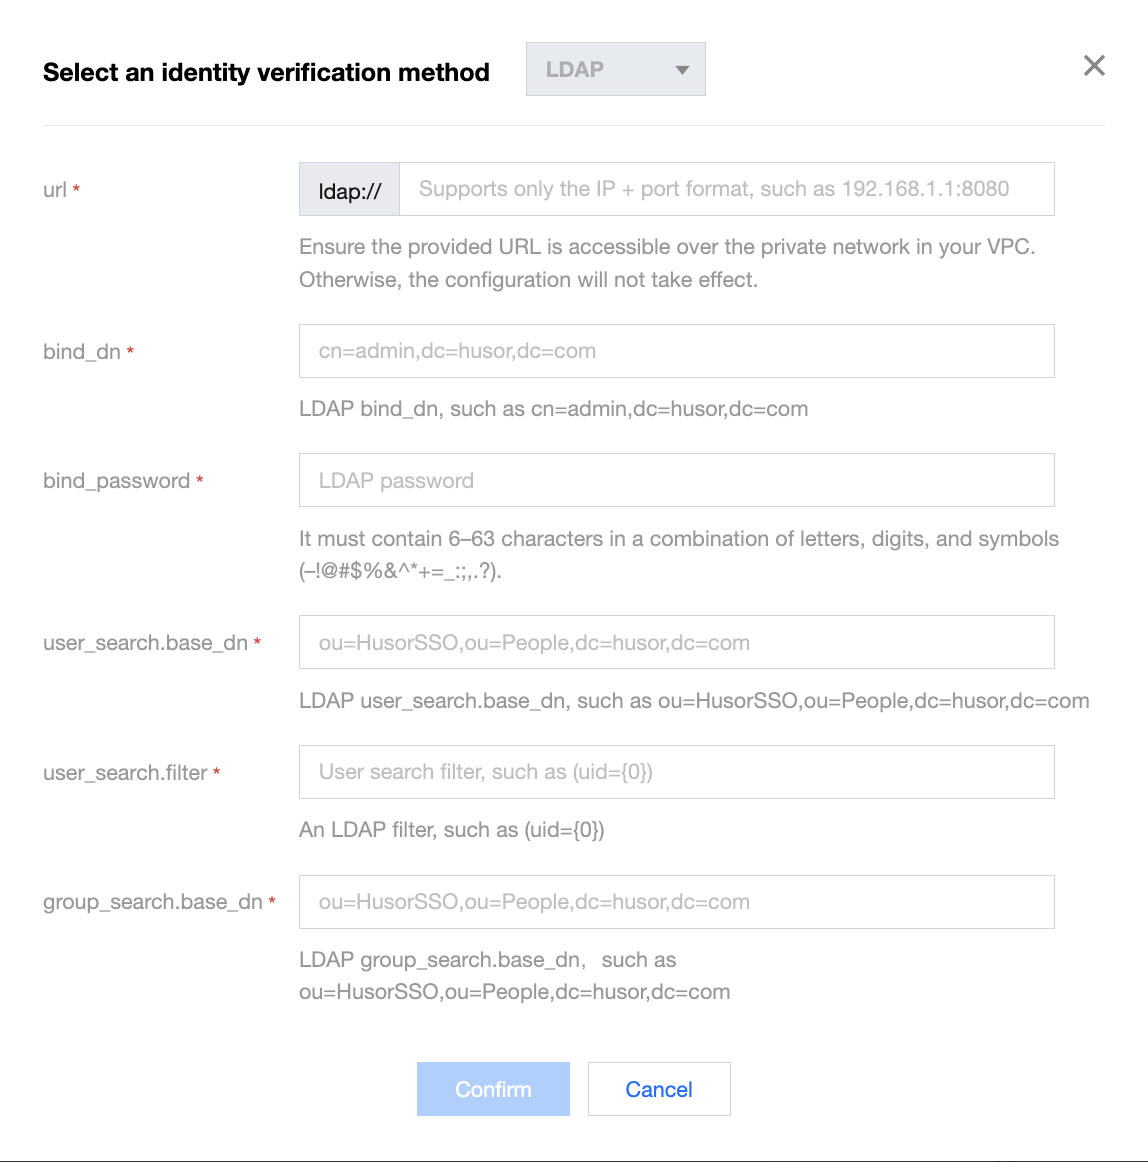
3. Set configuration items.
url: LDAP server address, which must start with "ldap://" followed by the domain name or IP address. Make sure that the entered URL is accessible over the private network in your VPC; otherwise, this configuration will not take effect.
bind_dn: Member DN used for LDAP server authentication, which must be in the DN hierarchical syntax structure (e.g., cn=admin,dc=husor,dc=com) and can contain up to 200 characters.
bind_password: LDAP server connection password, which can contain 6–63 letters, digits, or special symbols -!@#$%&^*+=_:;,.?.
user_search.base_dn: Base DN used to search for bound LDAP members, which must be in the DN hierarchical syntax structure (e.g., ou=HusorSSO,ou=People,dc=husor,dc=com) and can contain up to 200 characters.
user_search.filter: Search filter, by which the system will filter eligible binding relationships, such as (uid={0}).
group_search.base_dn: Base DN used to search for bound LDAP user groups, which must be in the DN hierarchical syntax structure (e.g., ou=HusorSSO,ou=People,dc=husor,dc=com) and can contain up to 200 characters.
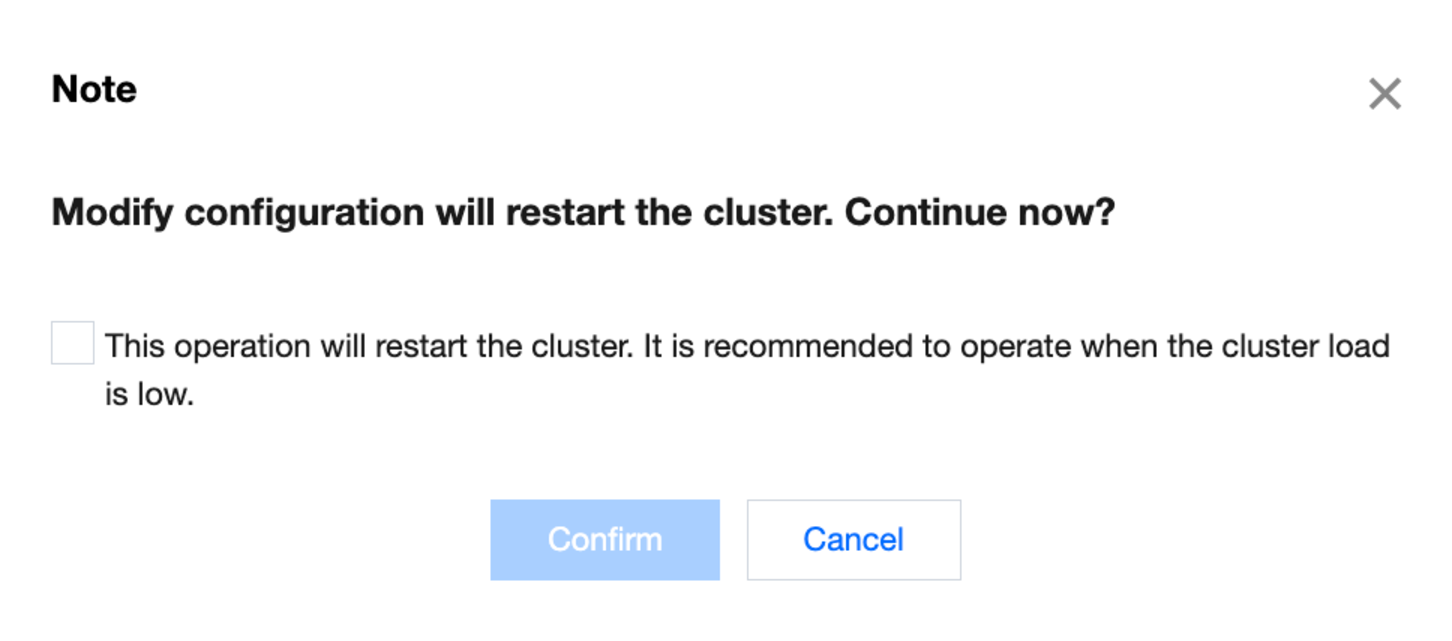
4. After confirming that everything is correct, click OK. In the pop-up window, read the notes and click OK. Then, the cluster will be restarted. You can view the change progress in Cluster Change History.
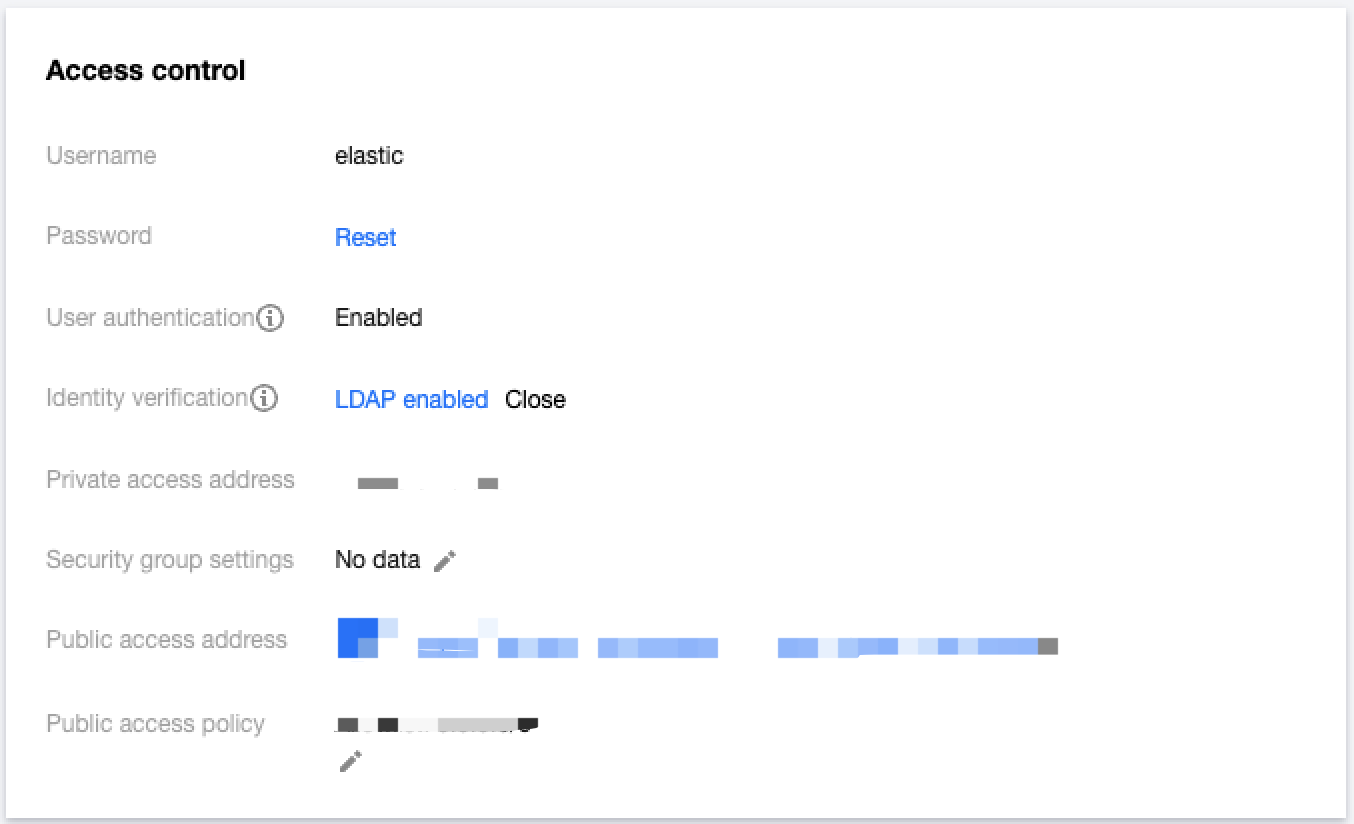
5. After successful configuration, you will see LDAP enabled after Authentication. To modify the LDAP authentication configuration, click LDAP enabled to make changes.
Configuring LDAP Role Permission
1. After LDAP authentication is configured, an LDAP user has not been granted any permissions and cannot access the ES cluster/Kibana via LDAP. Therefore, you need to perform role mapping for the LDAP user in Kibana.
2. Log in to the ES console, go to the Kibana homepage of the cluster, and enter the Dev Tools page of Kibana.
3. Create the mapping between the LDAP user and role as instructed in Create or update role mappings API. The example below grants the LDAP user zhangsan the permissions of the superuser role.
POST _xpack/security/role_mapping/ldap_role_mapping_zhangsan?pretty
{
"roles":["superuser"],
"enabled": true,
"rules":{
"any":[
{
"field":{
"username":"zhangsan"
}
}
]
}
}
Disabling LDAP Authentication
1. Log in to the ES console and click Cluster Name of the target cluster to enter its Basic Configuration page.
2. In the Access Control module, click Disable after Authentication. In the pop-up window, read the notes and click OK. Then, the LDAP disabling operation will start, and the cluster will be restarted. You can view the change progress in Cluster Change History.
Notes
If the cluster health status is YELLOW or RED, there will be a greater risk in modifying the configuration. You must fix the cluster status problem first before proceeding.
If there is an index with no replicas in the cluster, you will be prompted to force restart the cluster when you try to modify the configuration. In this case, there will be a greater risk in the operation, and some data may be temporarily inaccessible. We recommend you add replicas for all indexes first before proceeding.