Traffic Scheduling Management
Download
Focus Mode
Font Size
Overview
Traffic scheduling management is a multi-CDN smart resolution and scheduling tool provided by EdgeOne. It supports custom traffic scheduling policies between the origin and service providers to implement smooth canary migration of traffic and flexible allocation of services, thereby ensuring a high service availability.
Use cases
Canary migration: When a new service provider is added, canary switch is required to ensure the service availability and smooth migration.
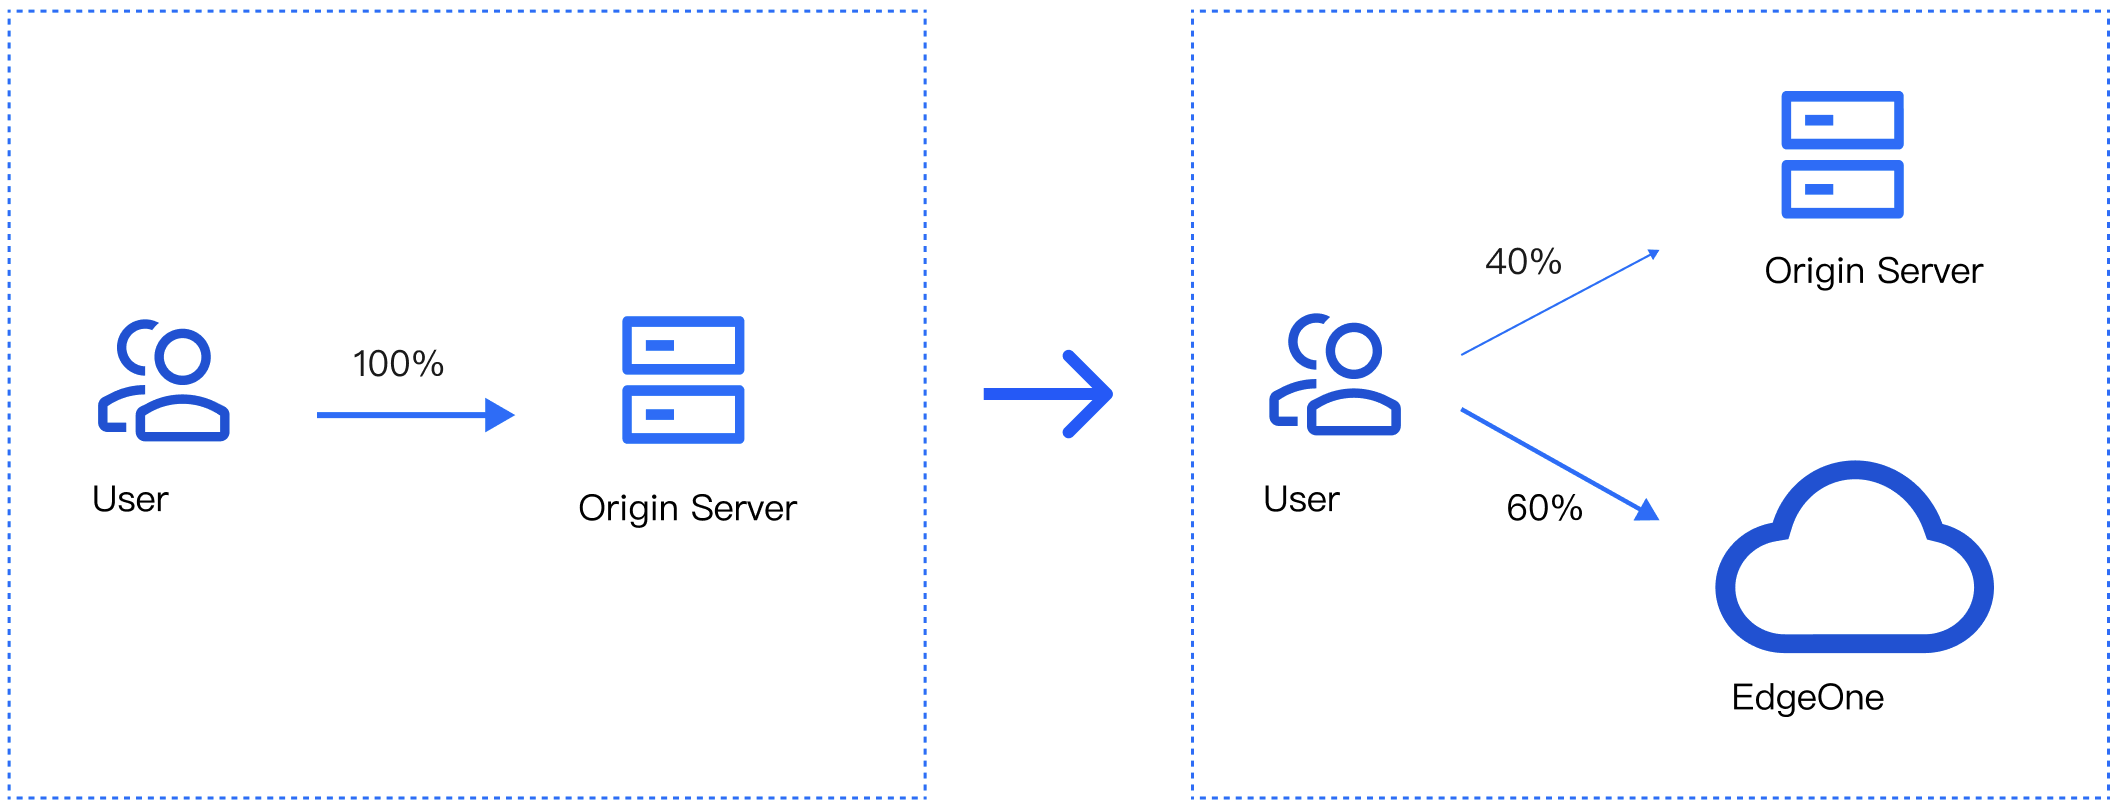
Cross-vendor scheduling: For large-scale services that contain sensitive data, it’s recommended to distribute traffic to multiple vendors for disaster recovery.
Features
Simple management: Select a domain name, add service providers, and add scheduling policies.
Quick access: Add the CNAME record assigned by EdgeOne at your DNS service provider
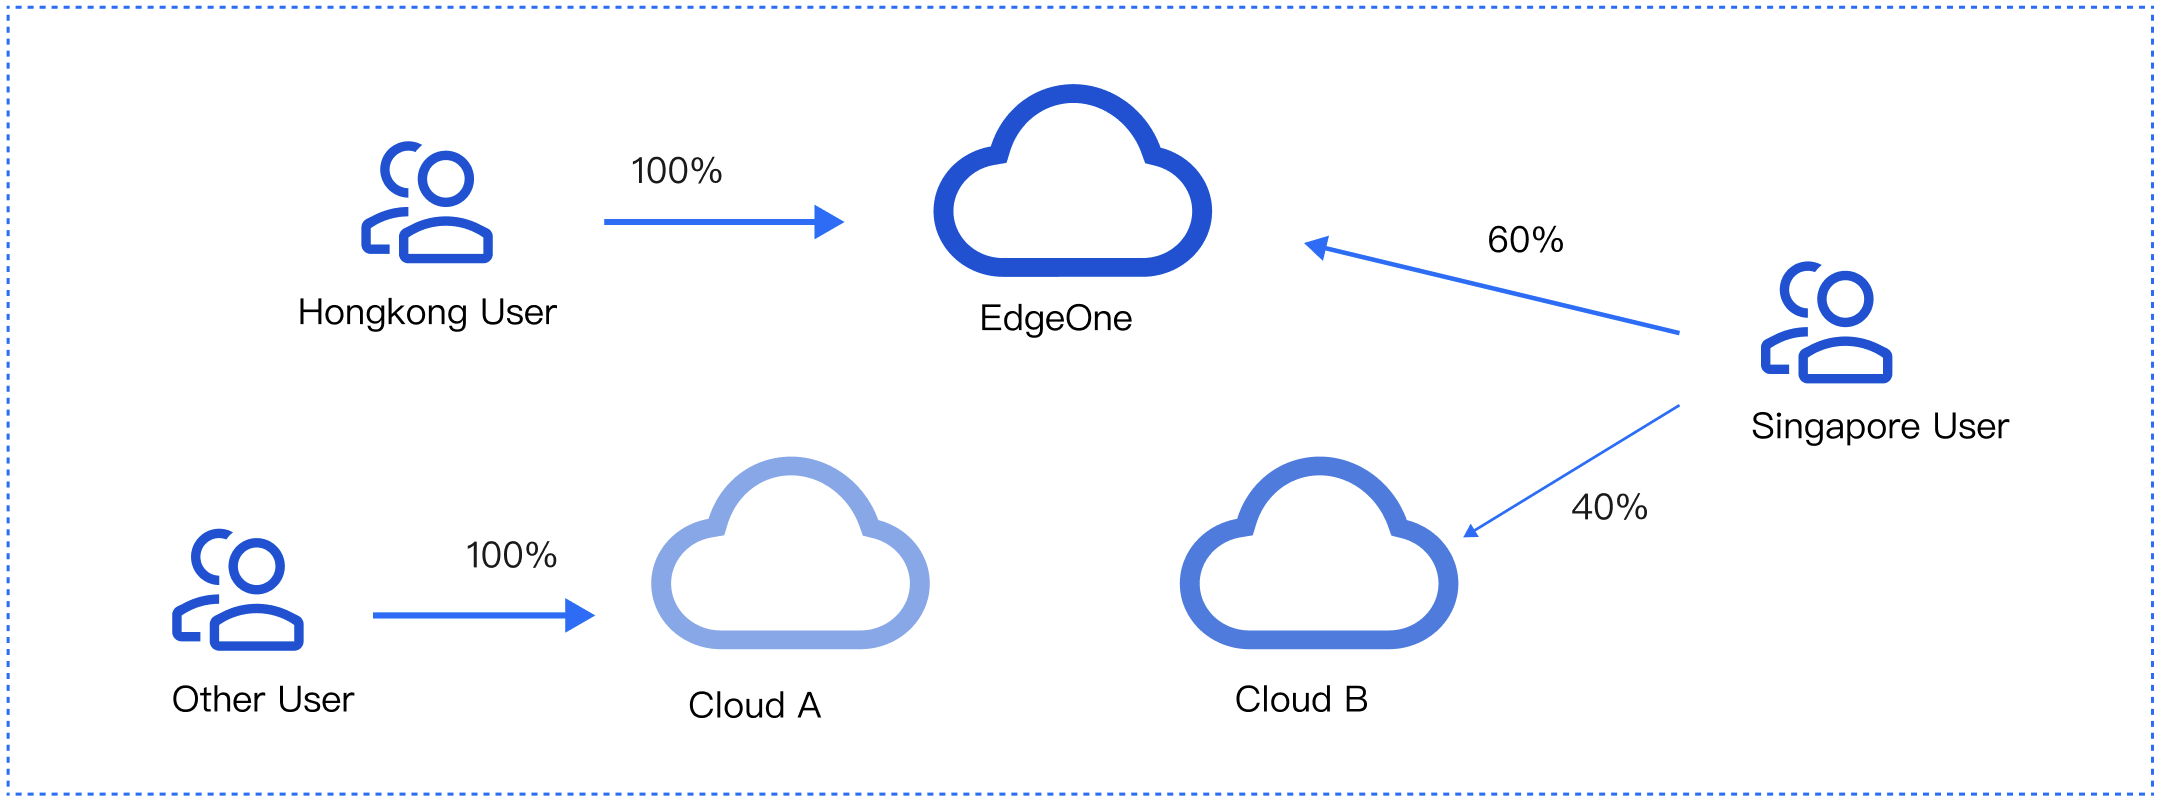
Scheduling modes: Support ratio-based and region-based scheduling.
Multiple scenarios: You can use either the origin or services provided by other CDN vendors, implement canary switch, and use services from different vendors at the same time.
Prerequisites
Adding Traffic Scheduling Policies
1. Log in to the Tencent Cloud EdgeOne console, enter Service Overview in the left menu bar, and click the site to be configured under Website Security Acceleration.
2. On the site details page, click Domain Name Service > Traffic Management.
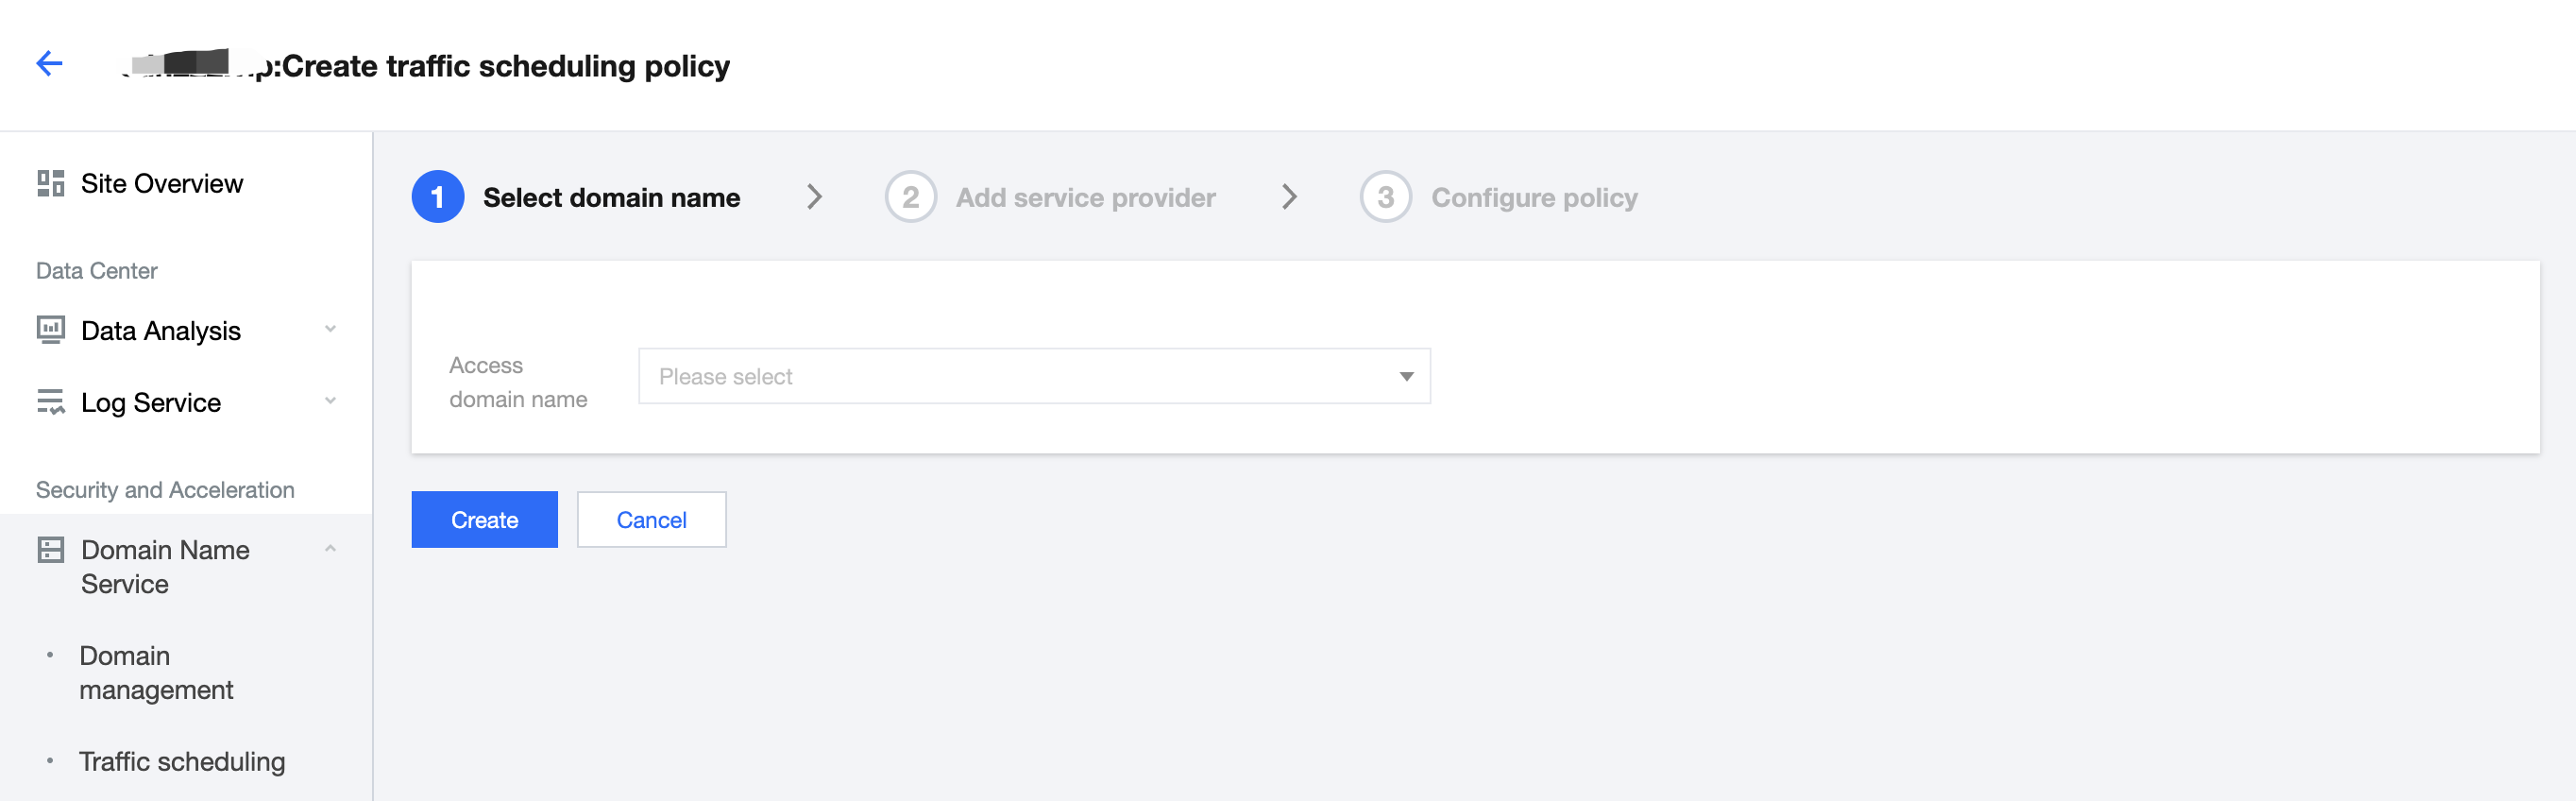
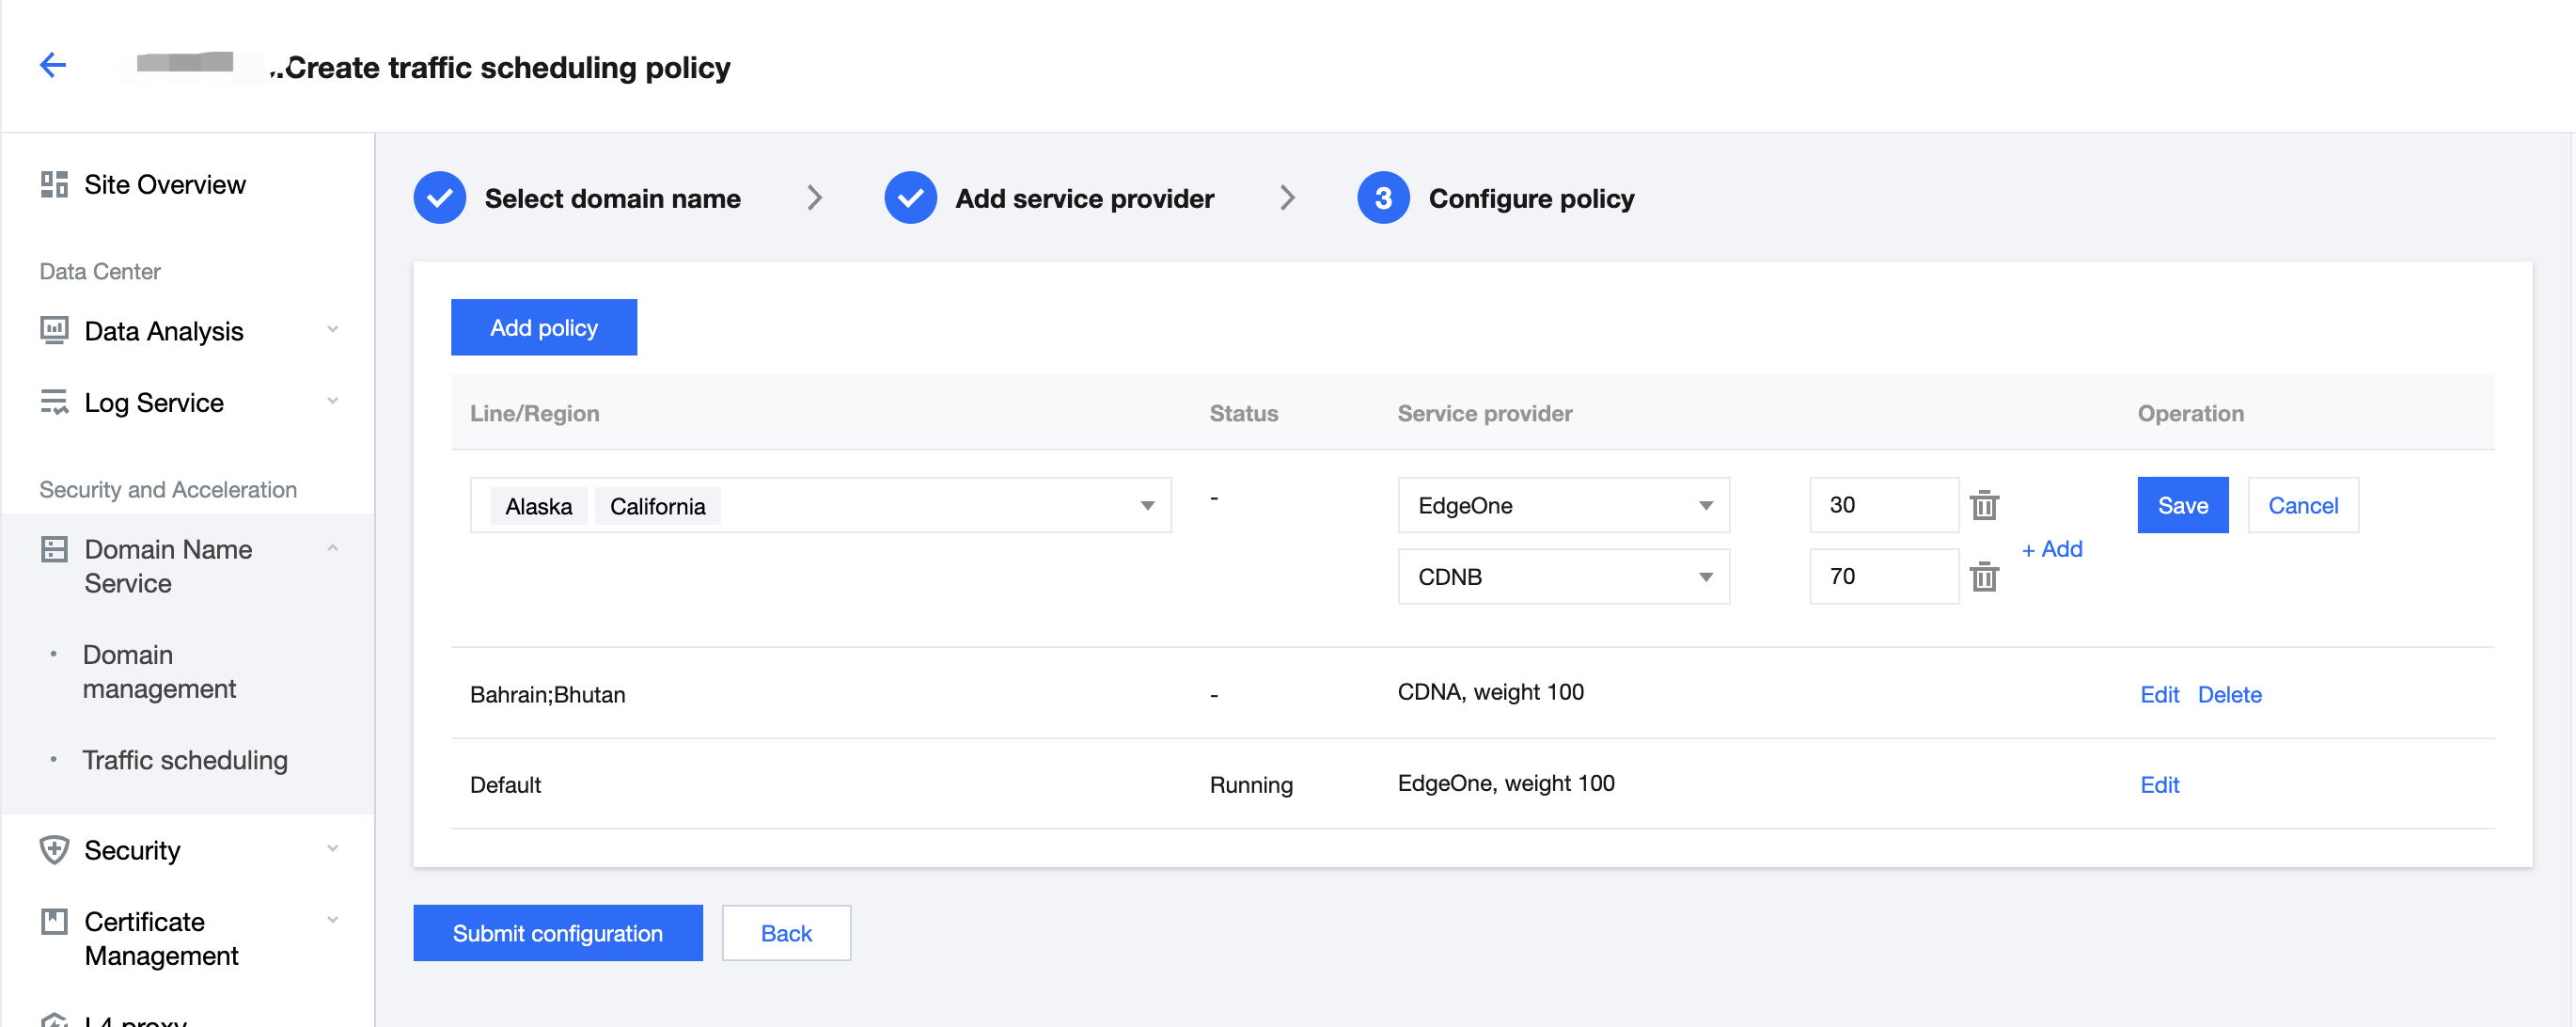
3. On the Traffic scheduling tab, click Add scheduling policy. On the page that appears, select the target domain name and click Create.
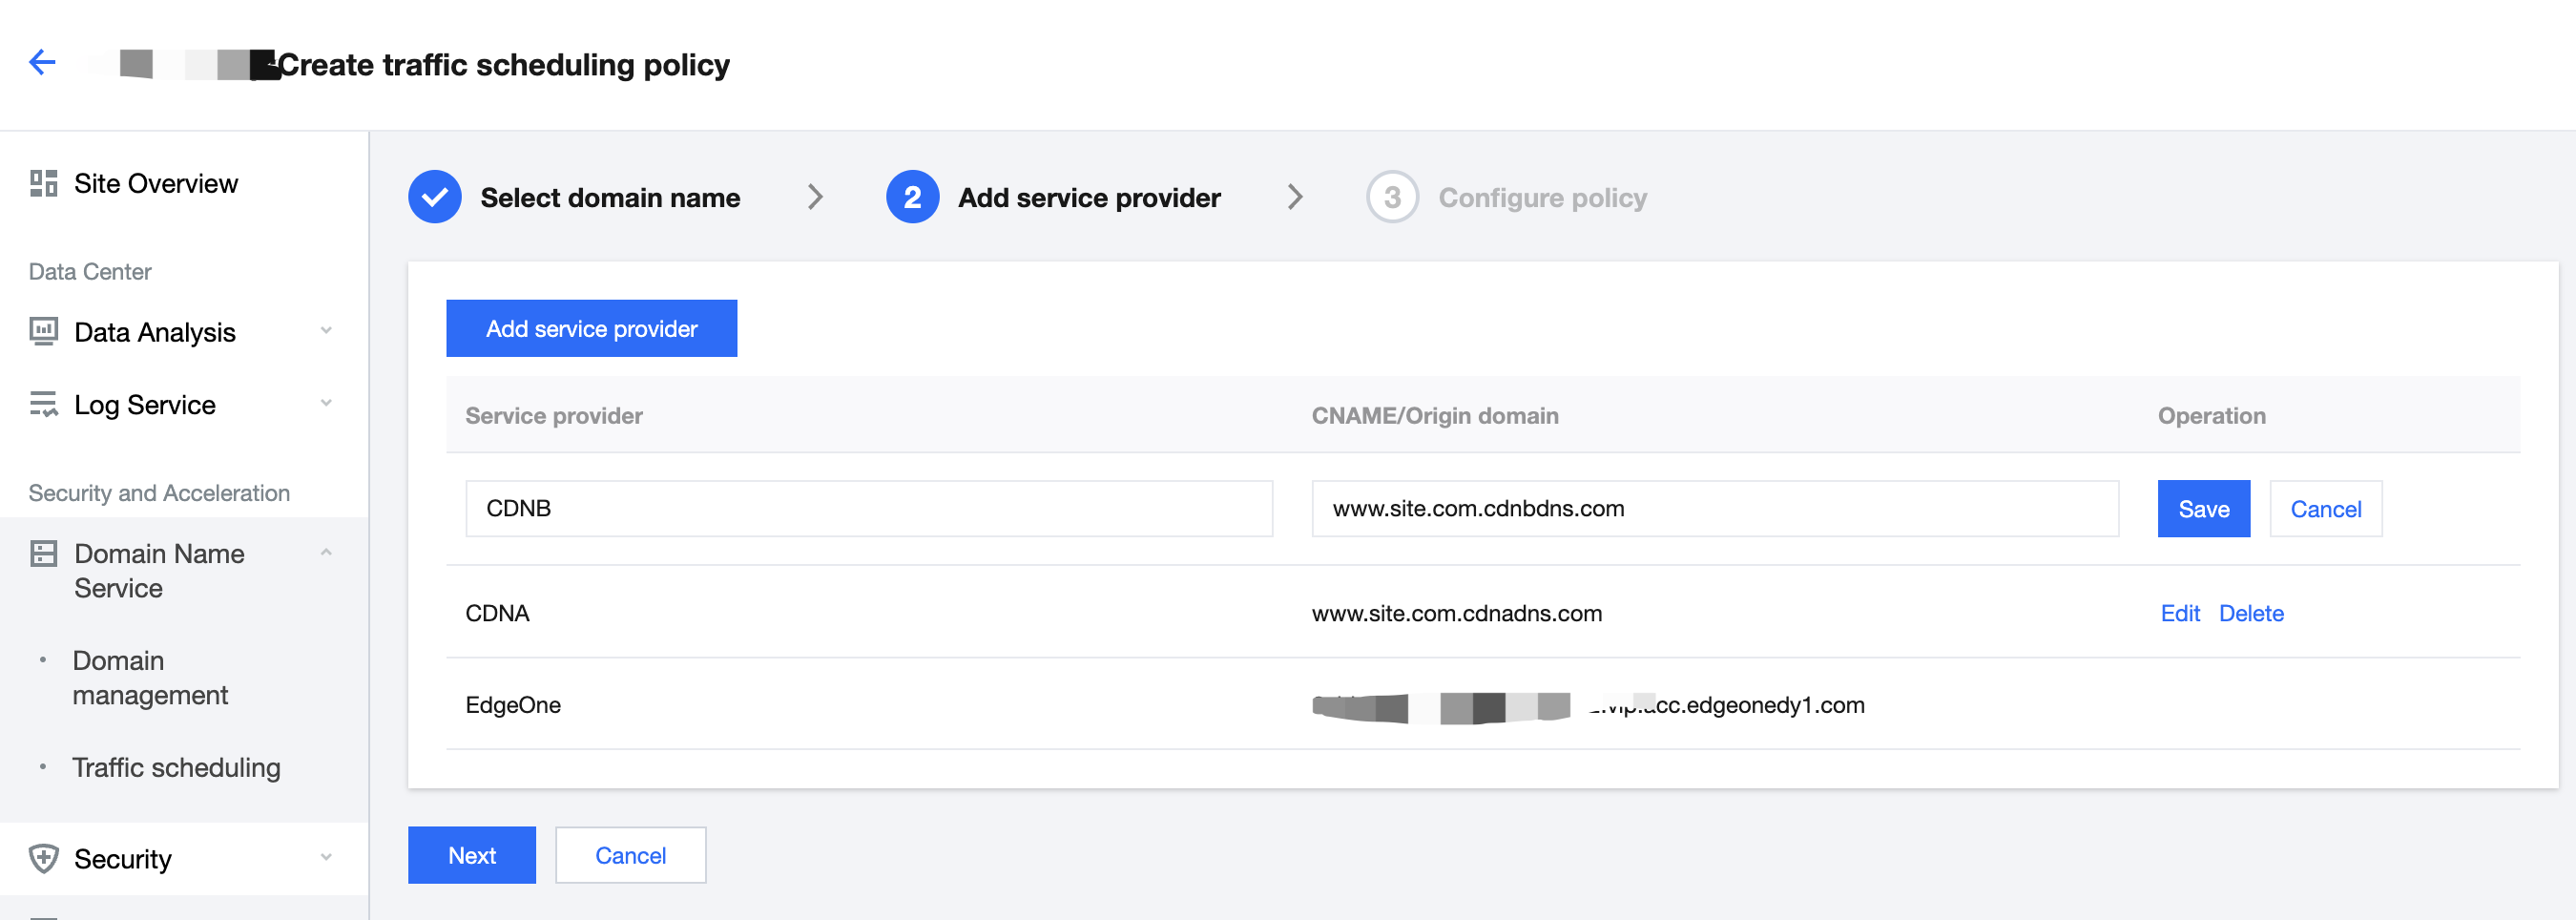
4. Click Add service provider, configure parameters such as the service provider name and CNAME record as needed, and click Next.
Note:
The default service provider is EdgeOne, which cannot be modified or deleted. You can add the domain name of origins or the CNAME domain name of other CDN service providers.
5. Click Add policy, select the line/region, and complete the policy configuration. You can select multiple service providers and specify their weights to configure a multi-service provider scheduling policy. After the configuration is complete, click Submit configuration.
Note:
By default, all traffic passes EdgeOne. This is the base policy, which cannot be deleted but can be changed to another service provider.
Line/Region can be countries/regions, ISPs and provinces in the Chinese mainland, and states in the US and India.
A policy with a more specific regional division takes the higher priority. For example, if you set Origin domain for Beijing, Service provider A for the Chinese mainland, and Service provider B for the default line, then requests from Beijing go to the origin, requests from other Chinese mainland regions go to Service provider A, and requests from regions outside the Chinese mainland go to Service provider B.
6. If the domain name resolution has been migrated to EdgeOne, the policy takes effect automatically. Otherwise, you need to switch the domain name resolution at your DNS service provider.
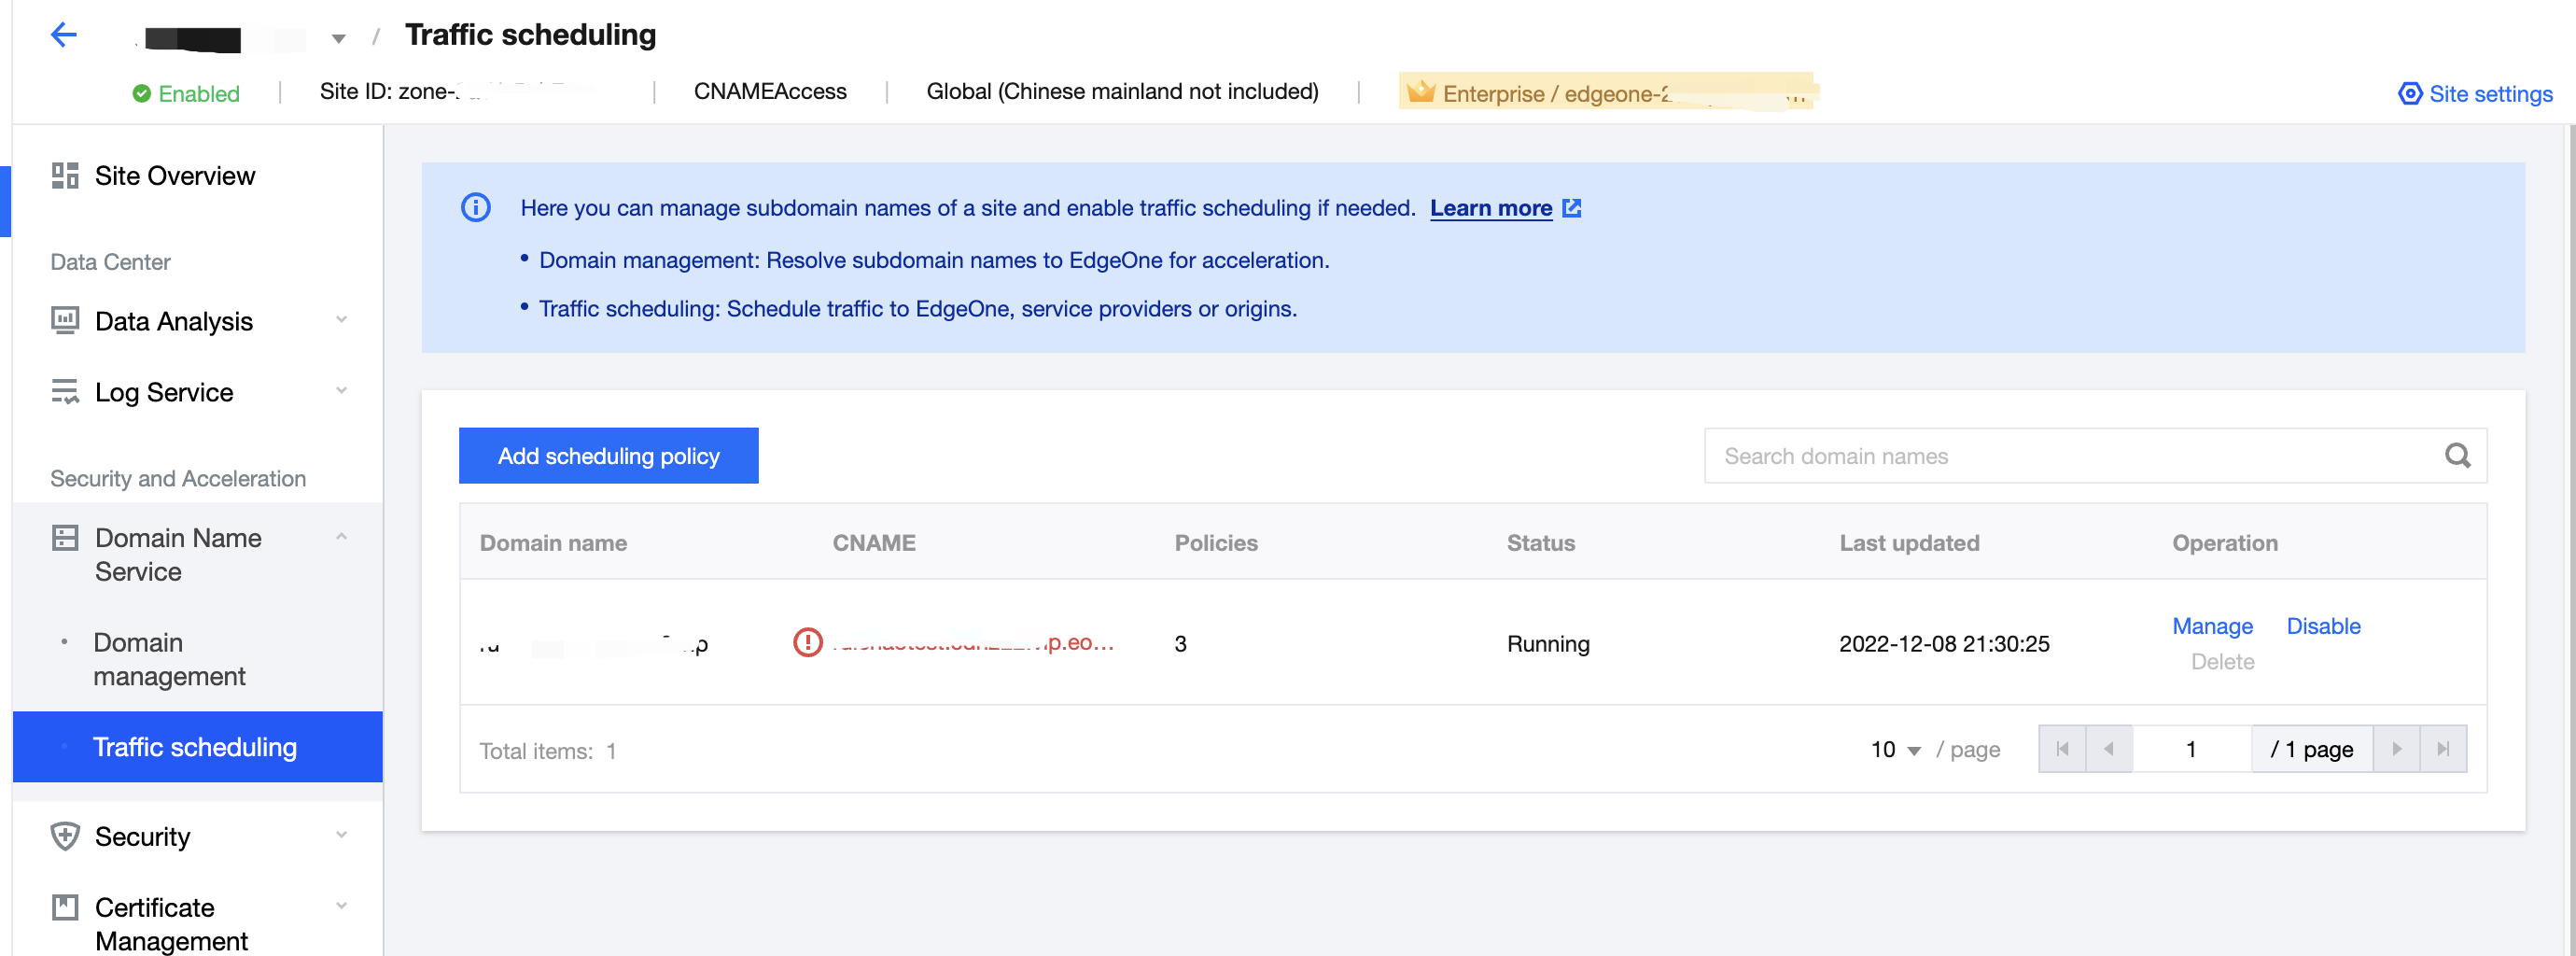
Managing Traffic Scheduling Policies
1. Log in to the EdgeOne console, and click Site List in the left sidebar. In the site list, click the target site to enter the site details page.
2. On the site details page, click Domain Name Service > Traffic Scheduling Management.
3. On the Traffic Scheduling Management page, you can edit, disable, enable, and delete the policies.
Disabling a policy
When the traffic scheduling policy is disabled, all traffic is scheduled to EdgeOne nodes by default.
Enabling a policy
When the traffic scheduling policy is enabled, the traffic is scheduled as configured, rather than going to EdgeOne nodes.
Deleting a policy
After a policy is disabled, you can delete it. This does not affect the service. But the policy cannot be recovered.
Editing a policy
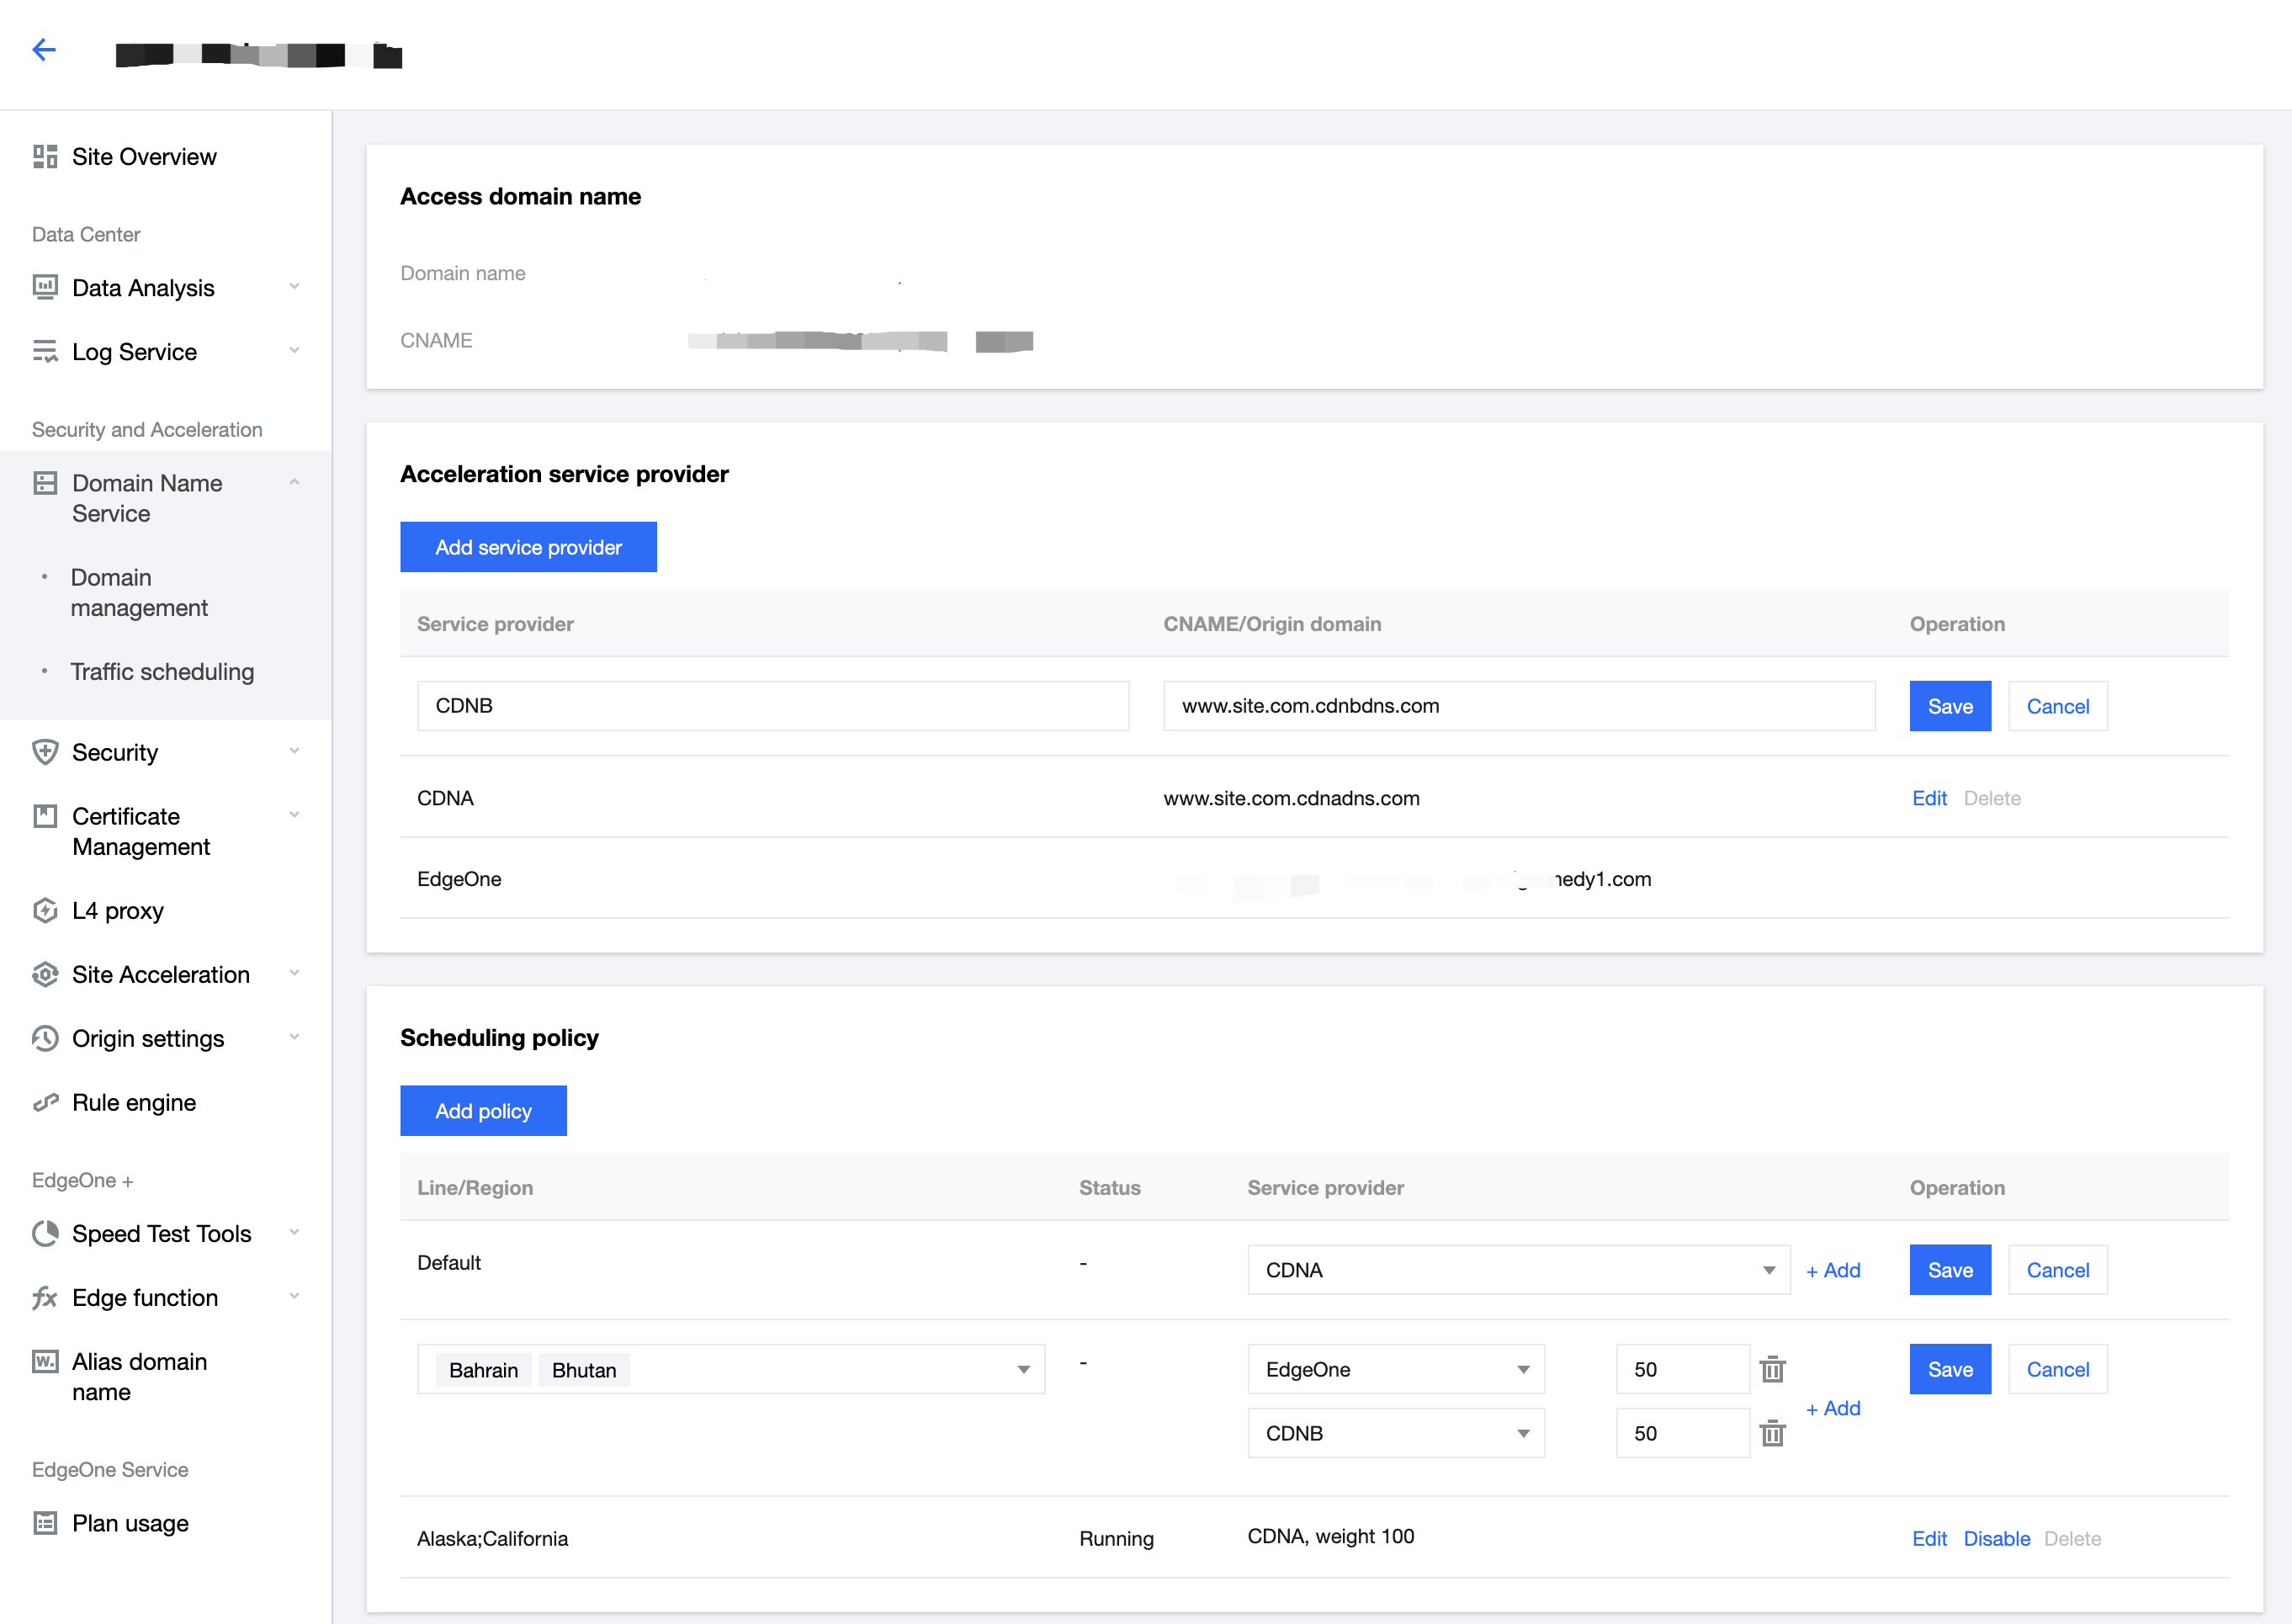
Click Manage to enter the scheduling policy management page, where you can add, delete, modify, and disable service providers and scheduling policies for a domain name.
Note:
Changing the service provider referenced by a policy takes effect immediately.
Deleting, modifying, enabling, and disabling a policy take effect immediately.
A service provider cannot be deleted if it is referenced by a policy.
Help and Support
Was this page helpful?
You can also Contact sales or Submit a Ticket for help.
Help us improve! Rate your documentation experience in 5 mins.
Feedback