Step 2: Local testing
Unduh
Mode fokus
Ukuran font
Before DNS resolution is modified, it is recommended to validate the connectivity and protection features of the Web Application Firewall (WAF) through local testing. This helps avoid production service interruptions caused by directly adjusting public network DNS records. This document guides you in performing traffic redirection tests by modifying the local hosts file.
Operation Steps
1. Log in to the Web Application Firewall (WAF) Console, and switch the console region at the top of the left sidebar to where your instance resides (Chinese mainland/non-Chinese mainland).
2.
In the left sidebar
, choose Connection Management > Domain Onboarding, and in the Access information column of the domain list, view the CNAME address of waf.example.com.
3.
Copy
the CNAME address obtained in step 2. Open a terminal and run the following command to retrieve the Virtual IP address (VIP) for the corresponding domain:ping <CNAME address>
The IP address returned by the command is the VIP (Virtual IP) that needs to be bound subsequently (such as x.x.x.112).

4.
Bind
the VIP address obtained in step 3 to the domain name protected by SaaS WAF in the local hosts file, using the format: <WAF VIP address> <space> <domain name accessing WAF>.Windows system
: Locate the hosts file at C:\\Windows\\System32\\drivers\\etc\\hosts, right-click and open it with Notepad as administrator, then add the binding record in this file and save it.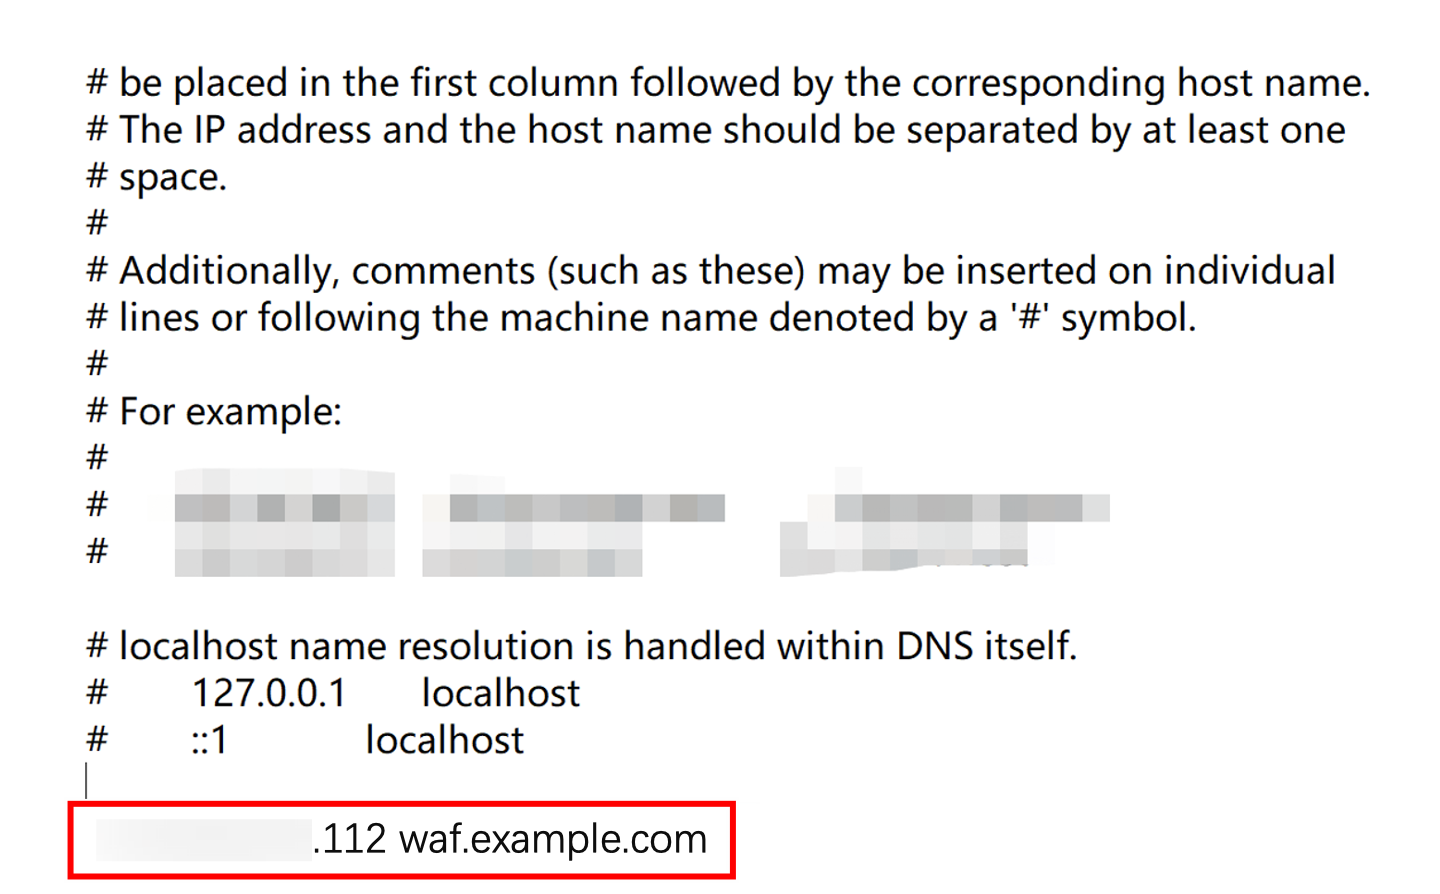
Linux / macOS systems:
Regular users: Open a terminal and run the following command to edit the hosts file:
sudo vi /etc/hosts
After entering the password, press the i key to enter edit mode, add the binding record (same as the Windows system), then press Esc and enter
:wq followed by Enter to save and exit.root user: Open a terminal and run the following command to edit the hosts file:
vi /etc/hosts
Directly press the i key to enter edit mode, add the binding record (same as the Windows system), then press the Esc key, enter
:wq , and press Enter to save and exit.5. Verify line connectivity:
Windows / macOS systems: Access the domain name protected by SaaS WAF
waf.example.com in your local browser. If the site opens properly, it indicates normal line connectivity between WAF and the origin server.Linux system: Run the following command to check whether the site response can be obtained normally (status code 200 or business-specific normal response code):
curl -I http://waf.example.com
Returning an HTTP status code (such as 200 OK) indicates normal line connectivity.
6. Verify protection feature:
Windows / macOS systems: Enter the test URL
http://waf.example.com/?test=alert(123) in the browser's address bar and access it. If the browser returns the WAF block page, it indicates that the protection feature is effective.Linux system: Run the following command to send a request containing test attack parameters (such as alert(123)) and observe the returned results:
curl "http://waf.example.com/?test=alert(123)"
Returning the HTTP block page content (such as the 403 Forbidden status code or WAF default block message) indicates that protection is effective.
7. After completing the test, be sure to delete the added binding record in the hosts file (that is, the VIP-to-domain mapping added in Step 4).
Note:
If not cleaned up in time, it may cause abnormal access to the domain name protected by SaaS WAF locally.
Following Steps
After completing local testing, you can perform the following steps:
Bantuan dan Dukungan
Apakah halaman ini membantu?
Anda juga dapat Menghubungi Penjualan atau Mengirimkan Tiket untuk meminta bantuan.
masukan