配置传统型负载均衡
Download
聚焦模式
字号
创建传统型负载均衡实例后,您需要为实例配置监听器。监听器负责监听负载均衡实例上的请求,并依据均衡策略来分发流量至后端服务器上。
前提条件
注意:
目前腾讯云账户分为标准账户类型和传统账户类型,2020年6月17日零点后注册的账户均为标准账户类型,该时间点前注册的账户请在控制台查看您的账户类型,具体操作请参见 判断账户类型。标准账户类型不再支持传统型负载均衡,所购买的实例均为负载均衡。
配置监听器
步骤1:打开监听器管理页面
1. 登录 负载均衡控制台。
2. 在左侧导航栏,选择实例管理。
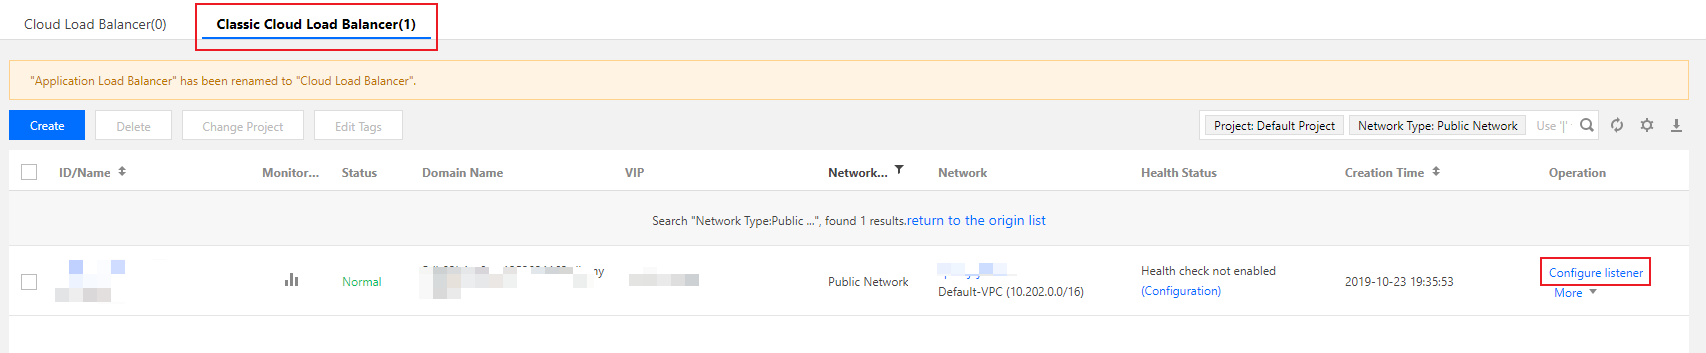
3. 在实例列表页单击需配置的实例 ID,进入实例详情页。
4. 单击监听器管理标签页,您也可以在列表页的操作栏中单击配置监听器。
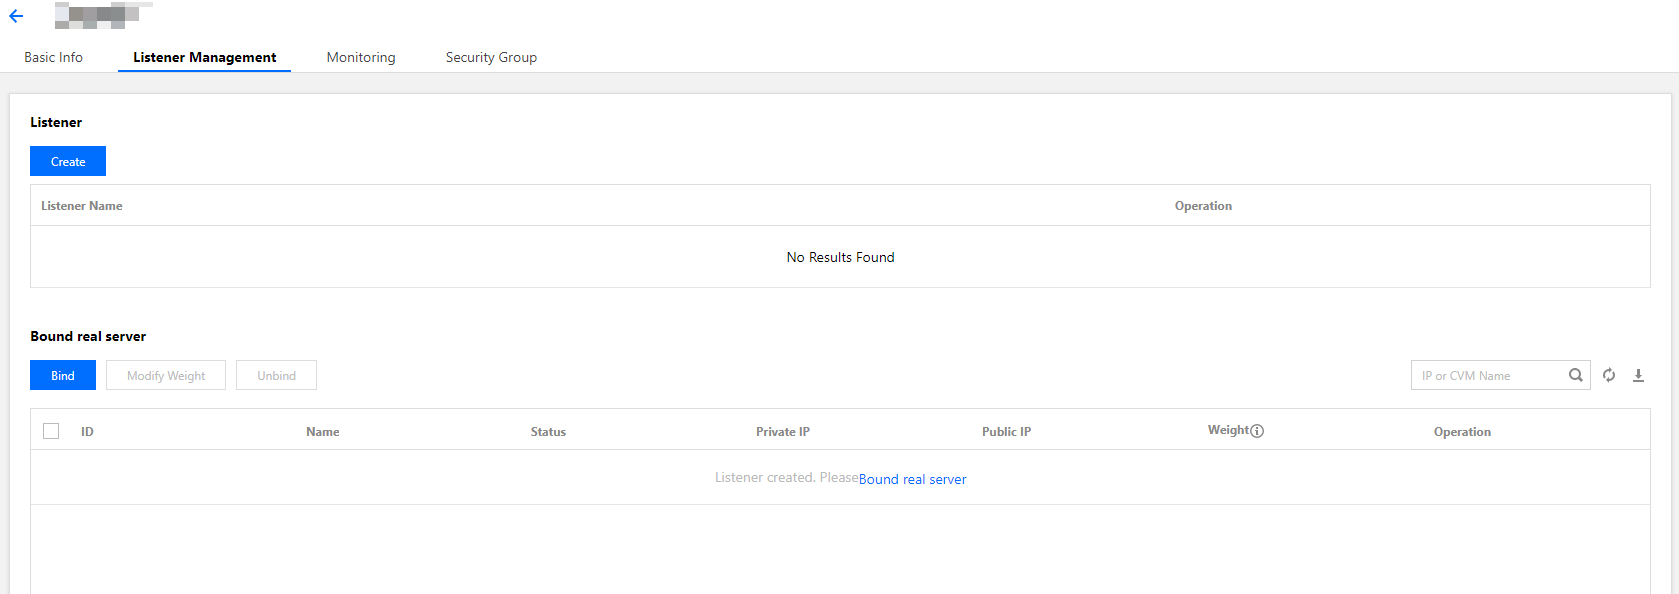
5. “监听器管理”页面如下图所示。
步骤2:配置监听器
在“监听器”模块下,单击新建,在弹出框中配置 TCP 监听器。
1. 基本配置
监听器基本配置 | 说明 | 示例 |
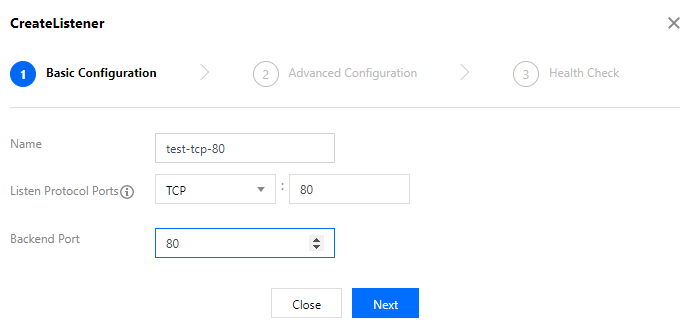
名称 | 监听器的名称 | test-tcp-80 |
监听协议端口 | 监听器的协议和监听端口 监听协议:CLB 支持的协议包括 TCP、UDP、HTTP、HTTPS,本例选择 TCP。 监听端口:用来接收请求并向后端服务器转发请求的端口,端口范围为1 - 65535。 同一个负载均衡实例内,监听端口不可重复。 | TCP:80 |
后端端口 | 云服务器提供服务的端口,接受并处理来自负载均衡的流量 | 80 |
创建 TCP 监听器具体基本配置如下图所示:
2.高级配置
高级配置 | 说明 | 示例 |
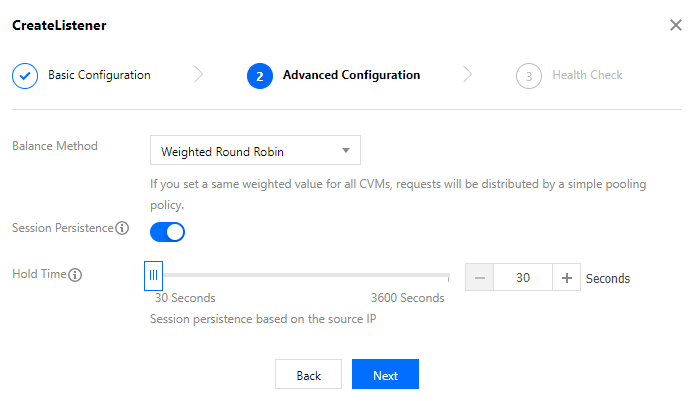
均衡方式 | TCP 监听器中,负载均衡支持加权轮询(WRR)和加权最小连接数(WLC)两种调度算法 加权轮询算法:根据后端服务器的权重,按依次将请求分发给不同的服务器。加权轮询算法根据新建连接数来调度,权值越高的服务器被轮询到的次数(概率)越高,相同权值的服务器处理相同数目的连接数。 加权最少连接数:根据服务器当前活跃的连接数来估计服务器的负载情况,加权最小连接数根据服务器负载和权重来综合调度,当权重值相同时,当前连接数越小的后端服务器被轮询到的次数(概率)也越高。 | 加权轮询 |
会话保持状态 | 开启或关闭会话保持 开启会话保持后,负载均衡监听会把来自同一客户端的访问请求分发到同一台后端服务器上。 TCP 协议是基于客户端 IP 地址的会话保持,即来自同一 IP 地址的访问请求转发到同一台后端服务器上。 加权轮询调度支持会话保持,加权最小连接数调度不支持开启会话保持功能。 | 开启 |
会话保持时间 | 会话保持时间 当超过保持时间,连接内无新的请求,将会自动断开会话保持。 可配置范围30 - 3600秒。 | 30s |
具体配置如下图所示:
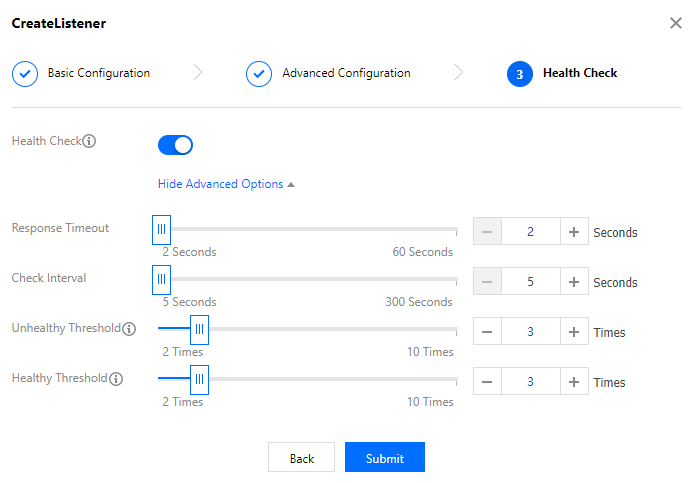
3. 健康检查
健康检查配置 | 说明 | 示例 |
健康检查状态 | 开启或关闭健康检查。TCP 监听器中,负载均衡实例向指定的服务器端口发 SYN 包进行健康检查。 | 开启 |
检查协议 | 待补充 | 待补充 |
检查端口 | 待补充 | 待补充 |
响应超时 | 健康检查响应的最大超时时间。 如果后端云服务器在超时时间内没有正确响应,则判定为健康检查异常。 可配置范围:2 - 60秒,默认值2秒。 | 2s |
检测间隔 | 负载均衡进行健康检查的时间间隔。 可配置范围:5 - 300秒,默认值5秒。 | 5s |
不健康阈值 | 如果连续 n 次(n 为填写的数值)收到的健康检查结果失败,则识别为不健康,控制台显示为异常。 可配置范围:2 - 10次,默认值3次。 | 3次 |
健康阈值 | 如果连续 n 次(n 为填写的数值)收到的健康检查结果为成功,则识别为健康,控制台显示为健康。 可配置范围:2 - 10次,默认值3次。 | 3次 |
健康检查具体配置如下图所示:
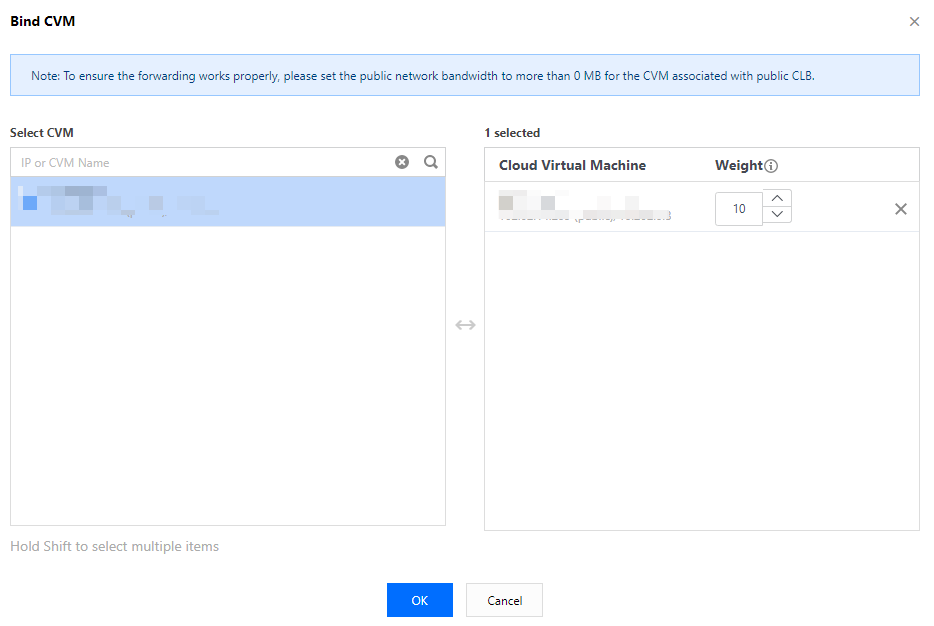
步骤3:绑定后端云服务器
在“监听器管理”页面,单击绑定按钮,在弹出框中选择需绑定的后端云服务器,绑定详情如下:
配置完毕的截图如下所示:
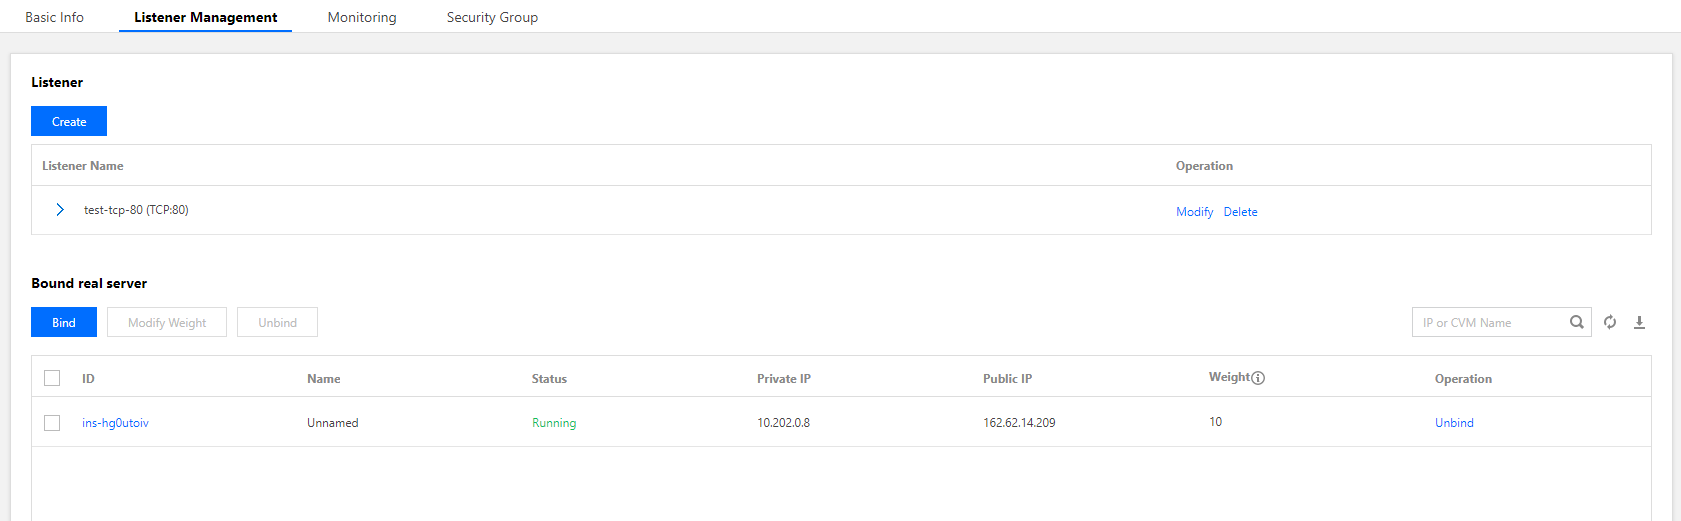
说明:
在传统型负载均衡中,如果您配置了多个监听器,绑定了多个后端云服务器,那么每个监听器都会按其配置转发给所有后端服务器。
步骤4:安全组(可选)
步骤5:修改/删除监听器(可选)
如果您需要修改或删除已创建的监听器,请在“监听器管理”页面,选择已创建完毕的监听器,选择修改或删除来完成操作。

文档反馈