You can get started with CloudAudit easily in the Tencent Cloud console, where you can view operation records, create and delete a tracking set, edit its storage location, and disable its logging feature.
Signup and Login
Sign up for a Tencent Cloud account if you don't have one yet, and then complete identity verification as instructed in Identity Verification Guide.
If you have already signed up for a Tencent Cloud account and completed identity verification, you can directly log in to the Tencent Cloud console and click Products > Management and Audit > CloudAudit to enter the CloudAudit page.
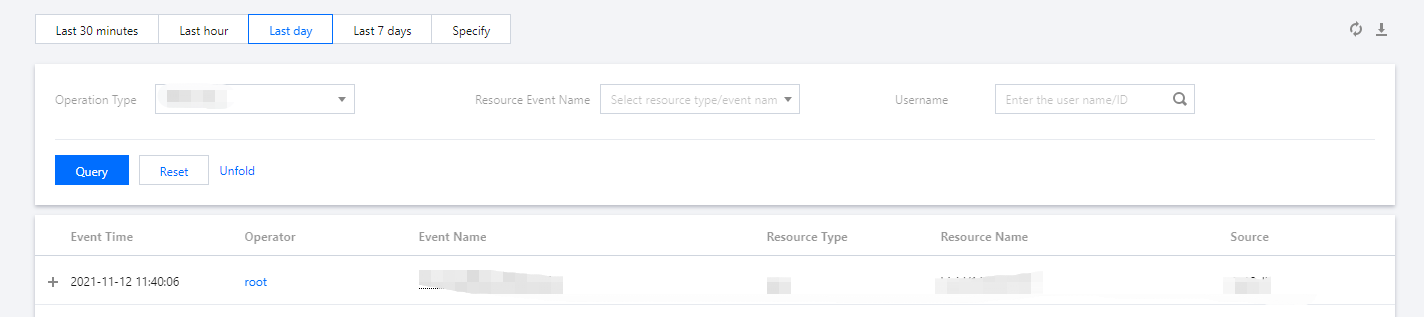
2. Click Event history in the left sidebar to enter the event history page.
3. On the event history page, you can view related operation records by username, operation type, resource event name, resource name, resource ID, API error code, key IP, and corresponding operation event time. The queried operation records will be displayed in a list. By default, only partial data is displayed as shown below:
Details
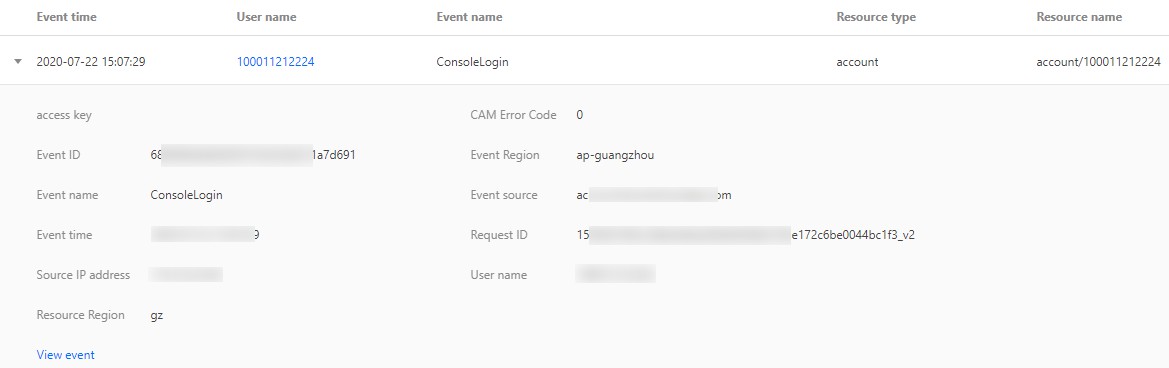
In the operation record list, you can click
on the left of an operation to get its details, including event time, username, event name, access key, event ID, source IP address, resource region, CAM error code, event region, event source, and request ID. You can also click View Event to view the details of the event as shown below:
Using Tracking Set
1. Create a tracking set
1. Log in to the CloudAudit console and select Tracking Set > Create on the left sidebar to enter the tracking set creation page.
2. On the Tracking Set page, click Create as shown below:
Note:
You can create up to 5 tracking sets.
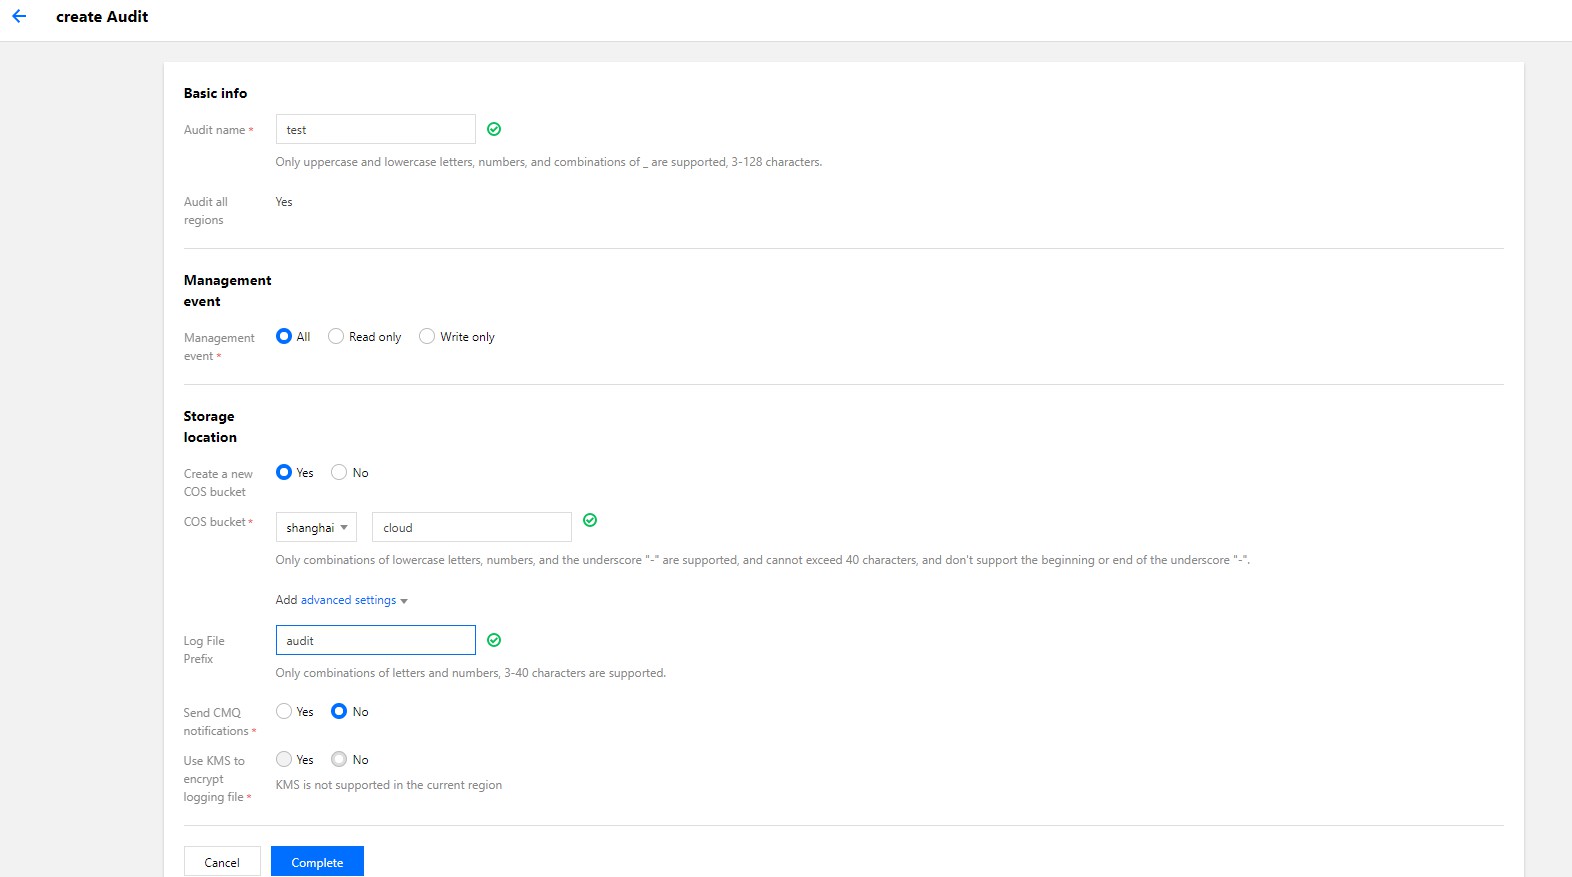
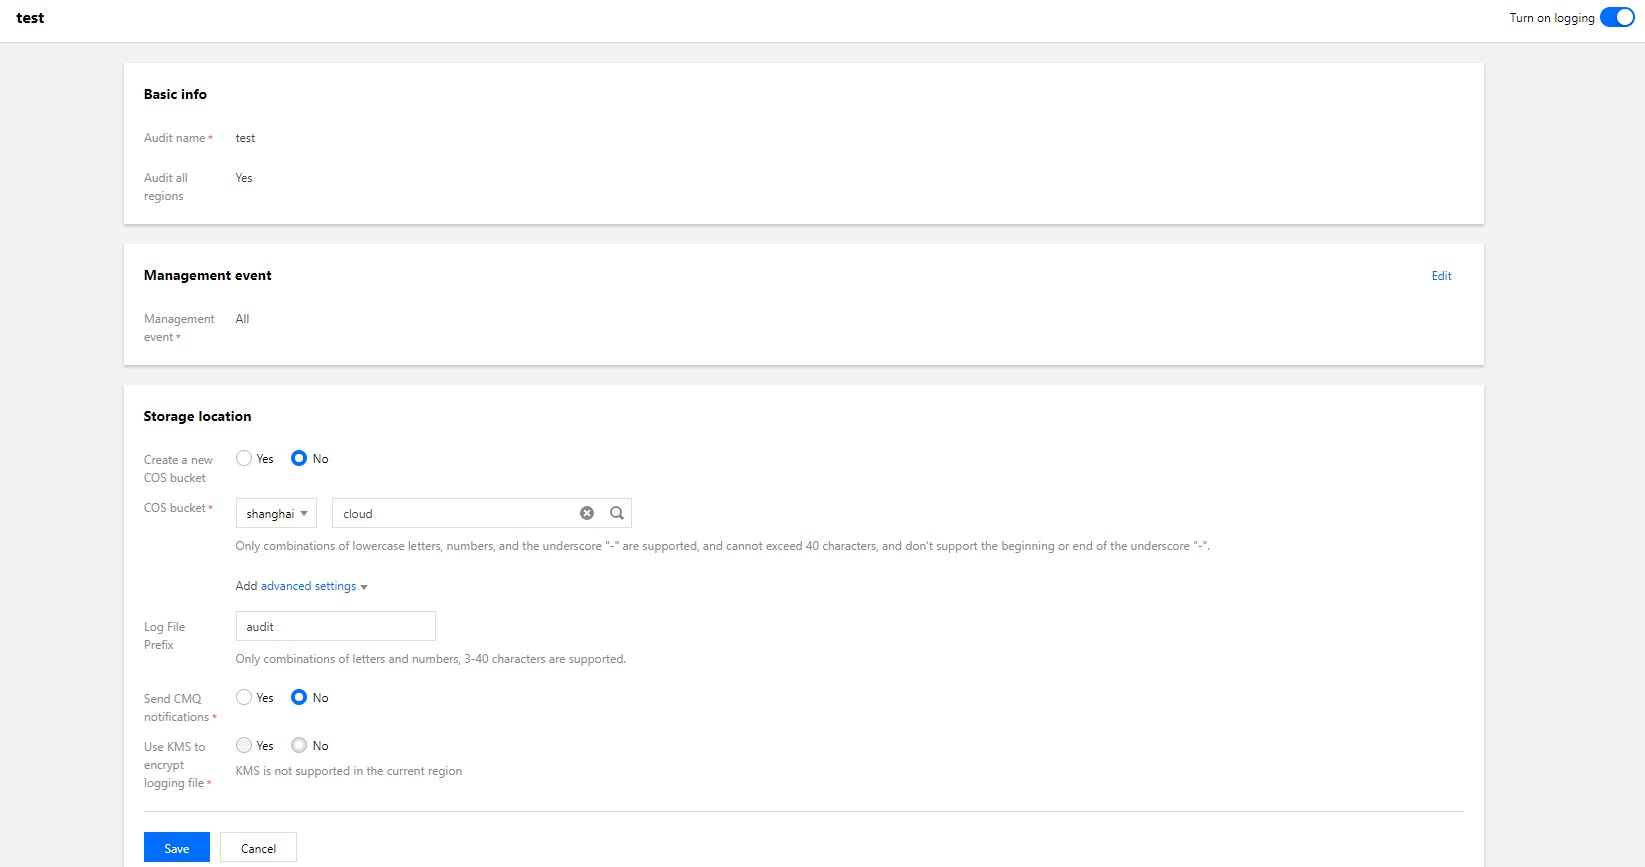
3. Enter the tracking set name, storage location, and other relevant information on the page and click Creation completed as shown below:
4. Disable/Enable the tracking set's logging feature
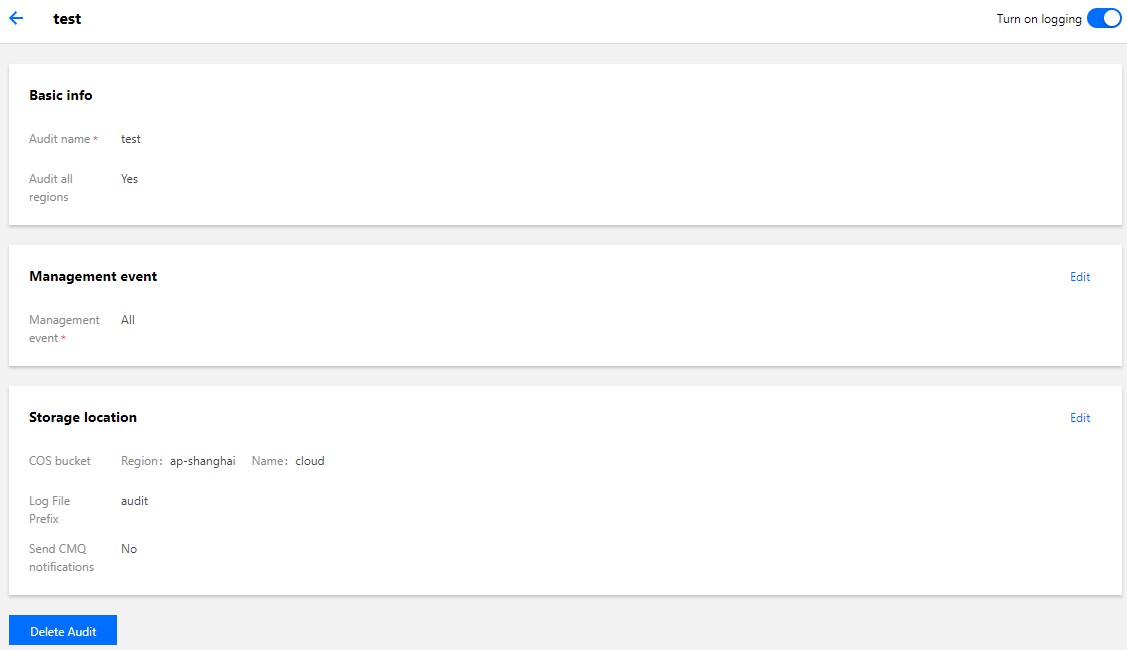
5. After you successfully create a tracking set, it is Enabled by default as shown below:
6. Click the name of the tracking set in the Name column or Edit on the right on the tracking set row to enter the tracking set details page as shown below:
7. Click
on the right of Enable Logging in the top-right corner of the page to disable or enable the tracking set's logging feature (which is enabled in the screenshot).
8. Edit the storage location
Click Edit in the Shipping Location section on the tracking set details page. You can choose to ship to a COS bucket or CLS. After editing, click Save as shown below:
9. Delete the tracking set
Click Delete on the right on a tracking set row on the Tracking Set page or click Delete Tracking Set on the tracking set details page.