The Cloud Streaming Services console provides the Live Video Caster (LVC) system. This document describes how to use LVC for online broadcasting after activating the LVC feature.
Note:
Billable items of LVC include broadcast output duration and third-party relay. Billing is based on usage duration. For more information, see Live Video Caster Pricing Overview.
LVC is incompatible with Internet Explorer and Firefox browsers. We recommend using Chrome.
Use Limits
Each account can create up to five LVC instances. If there are already five instances under your account, you must delete an existing instance before you can add a new one. To add more instances, please submit a ticket.
You can add up to five VOD files to the VOD input playback list.
Third-party relay supports up to three streams, one of which is relayed to the current CSS account by default, and the other two can be relayed to third-party vendors. For more information, see Relay.
2. Find the caster you want to edit and click its ID or click Open on the right to enter the caster editing page.
3. In the input source area, click Add input to add a video input.
4. In the window that pops up, set the input type and enter the URL of the source video. The following four input types are available:
Live
On demand(Support editing)
lmage
Publish local stream
Dynamic Overlays
Add input
Edit input
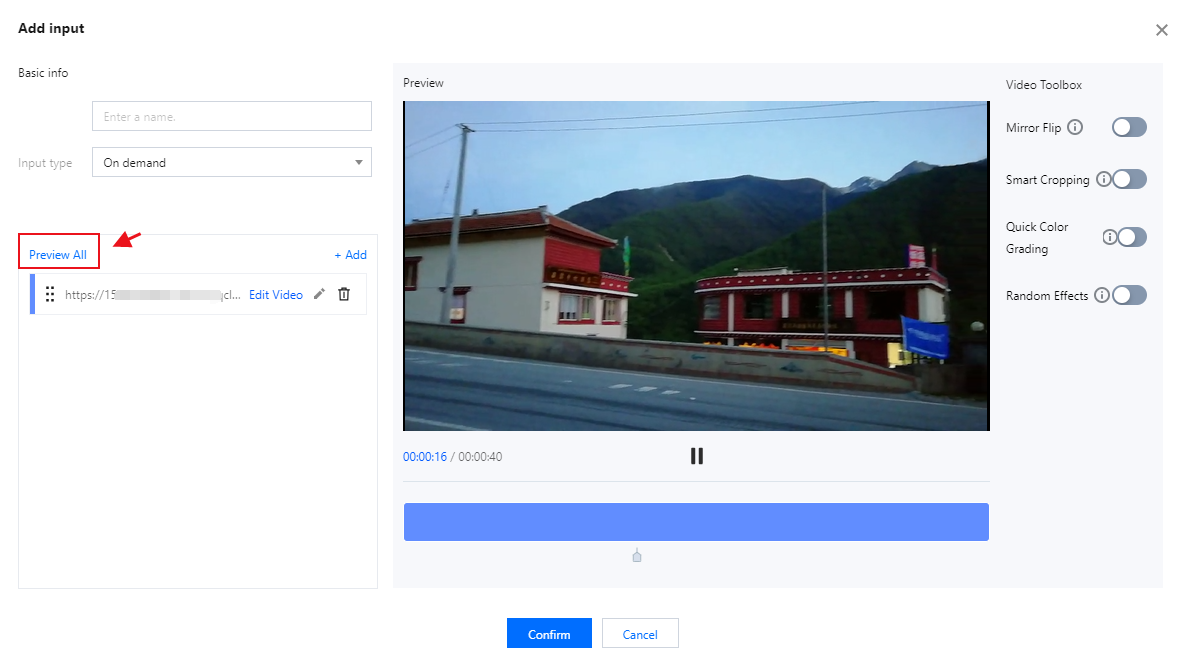
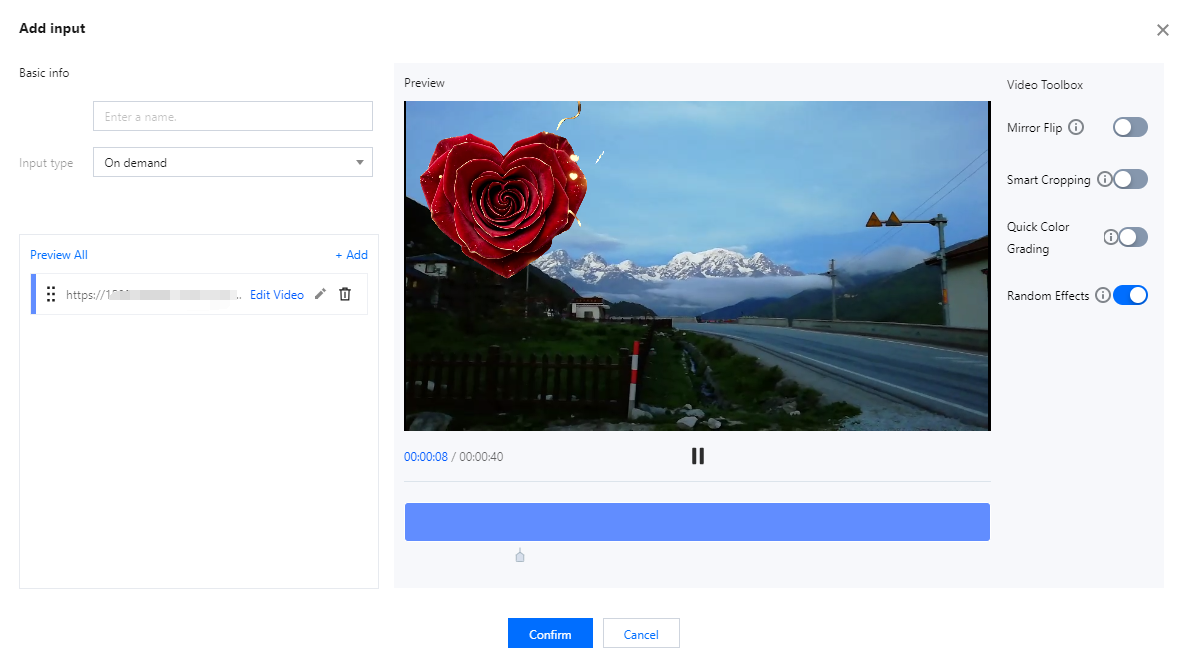
Click Preview All(The Video Toolbox on the right currently offers four tools for you to choose from—Mirror Flip, Smart Cropping, Quick Color Grading, and Random Effect)which can be optionally enabled for use.
Input type
Description
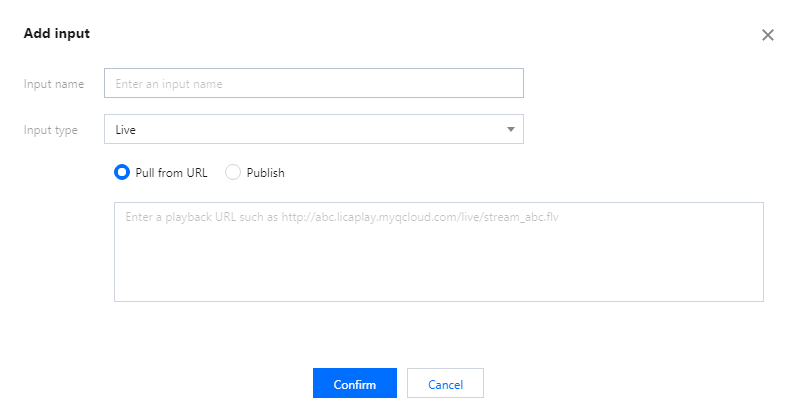
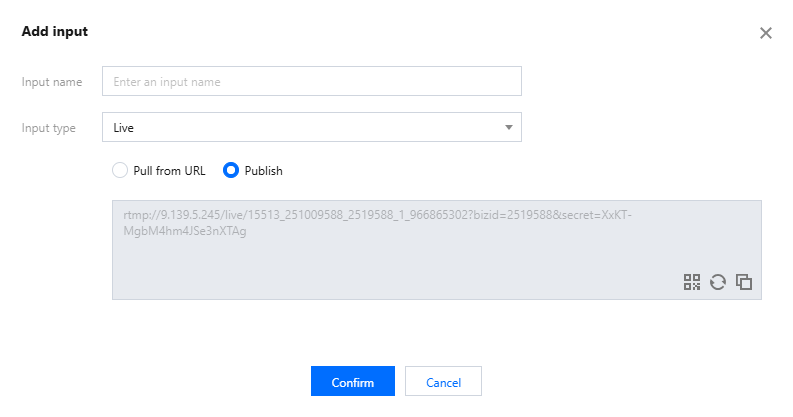
Live
Input name: Custom
Input type: Live
Pull from URL: The live stream is pulled from a URL to LVC. The RTMP, HLS, SRT, and HTTP-FLV protocols are supported.
Publish: Media files are pushed to LVC using the RTMP protocol.
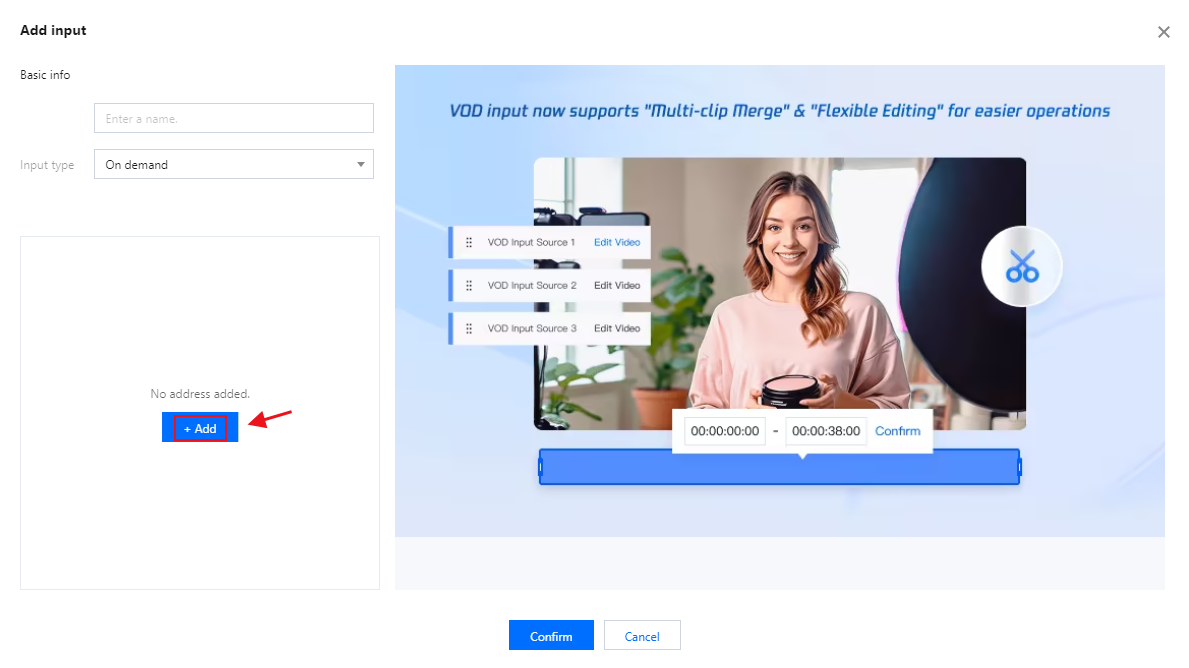
On demand(editable)
Input name: Custom
Input type: On demand URL. Click Add URL.
Supports media files stored in Tencent Cloud COS and media files stored by other providers.
Supports the MP4, HLS, and FLV formats.
You can enter multiple on-demand file URLs separated with semicolons (;). The console automatically cycles through the files in the list.
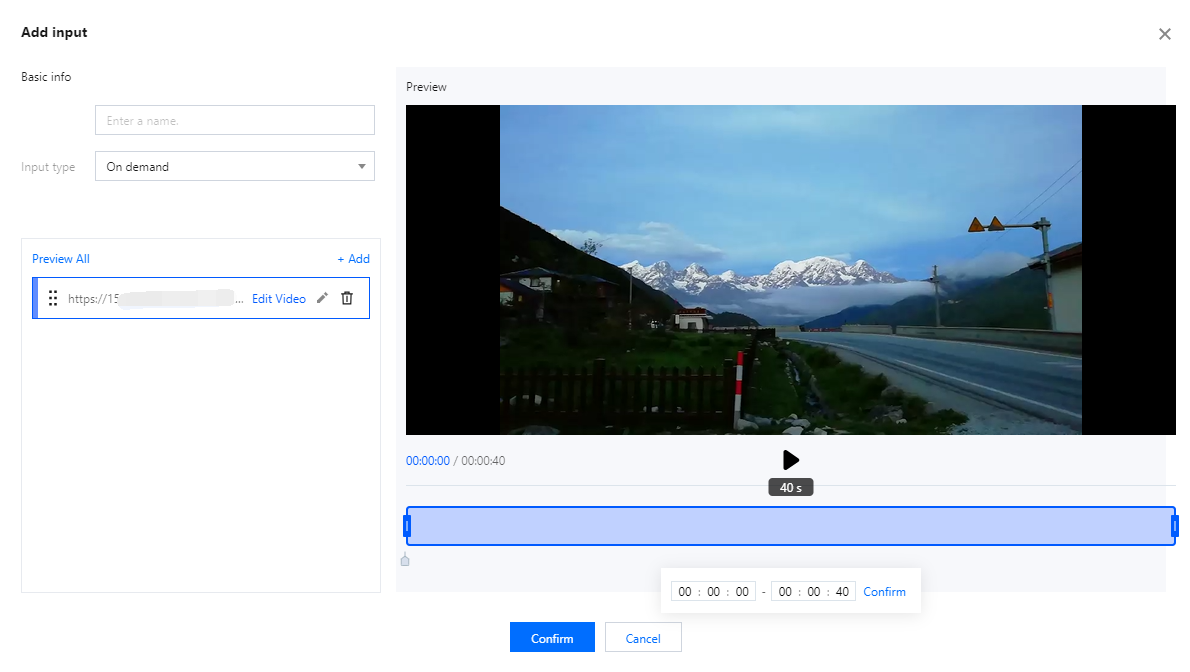
Click on any on-demand source to edit it; you can then modify the selected on-demand file. The playback progress and total duration are displayed in the bottom-left corner of the video. The editing bar located beneath the video allows you to make adjustments by dragging the markers or by entering specific time values into the input fields. Click the Play button to preview your edits.
Multiple VOD file URLs are supported; please separate them using semicolons (;). The console will automatically play the files within the list in a loop.
Edit Input Source
Click Preview All(The Video Toolbox on the right currently offers four tools for you to choose from—Mirror Flip, Smart Cropping, Quick Color Grading, and Random Effect)which can be optionally enabled for use.
Mirror Flip:Flips the video horizontally for a mirror effect.
Smart Cropping:Auto-frames the shot around the main subject.
Quick ColorGrading:Applies a cool color tone to the video.
Random Effects:Adds random special effects and gifts to the video.
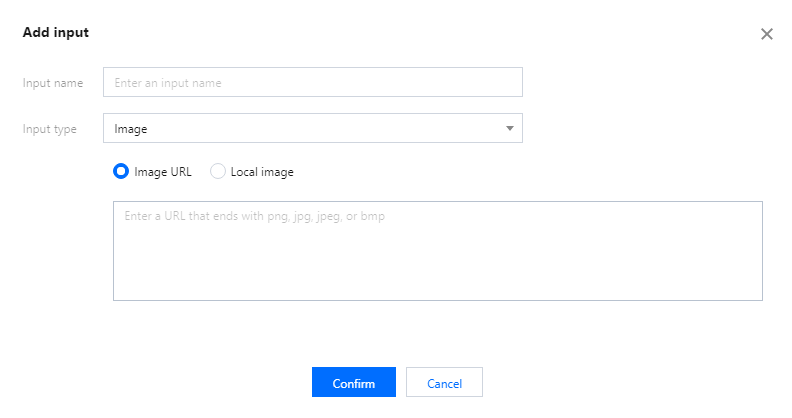
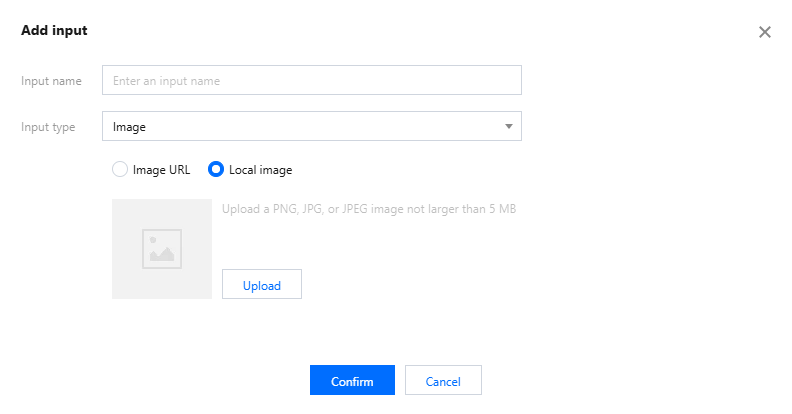
Image
Input name: Custom
Input type: Image
Image URL: Supports JPEG, JPG, PNG, and BMP images not larger than 1920x1080 pixels.
Local image: Supports uploading PNG, JPG, and JPEG images not larger than 5MB.
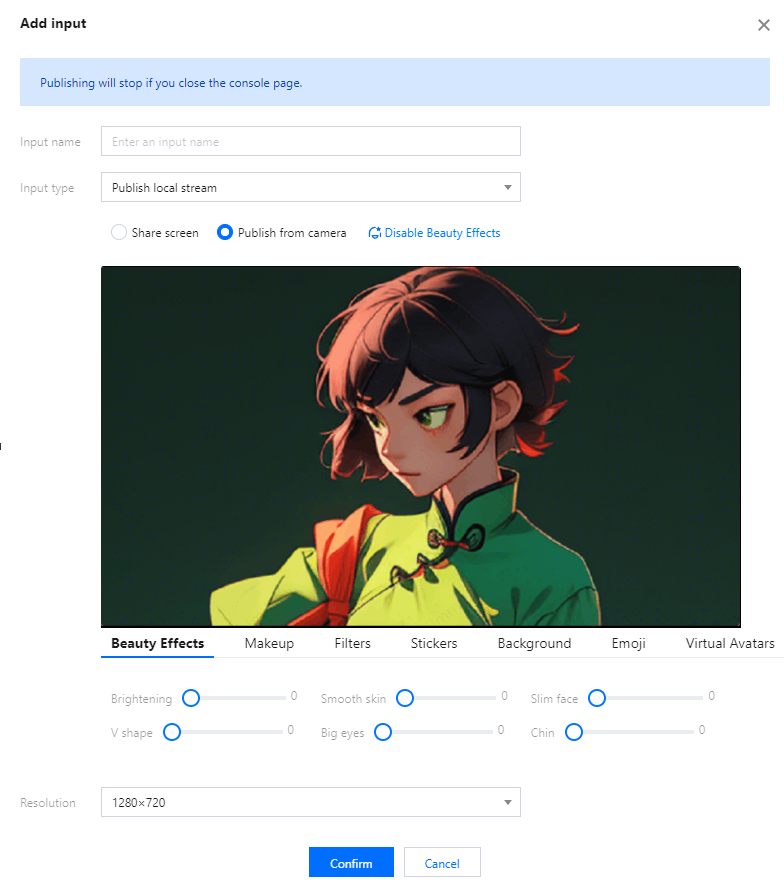
Publish local stream
Input name: Custom
Input type: Publish local stream
Screen Sharing: The input can be a shared screen (an application window or desktop). Supported resolutions include 1920x1080, 1280x720, 640x480, and 640x360.
Publish from camera: Supports using the local camera as an input source, supporting resolutions of 1920x1080, 1280x720, 640x480, and 640x360.
In the local camera streaming scenario, the beauty effect feature is turned off by default. According to your business needs, you can choose to manually turn this feature on or off.
Parameter adjustment: You can customize the beauty effect parameters to improve your personal appearance.
Various personalized settings are provided to meet your special needs, including:
Beauty Effects and Makeup: These can help to clear skin blemishes, enhance skin texture, and add various makeup effects.
Filters and Stickers: You can add various fun filters and stickers.
Background and Emoji: You can change the video background or add emojis.
Virtual Avatars: You can transform your appearance into various virtual avatars.
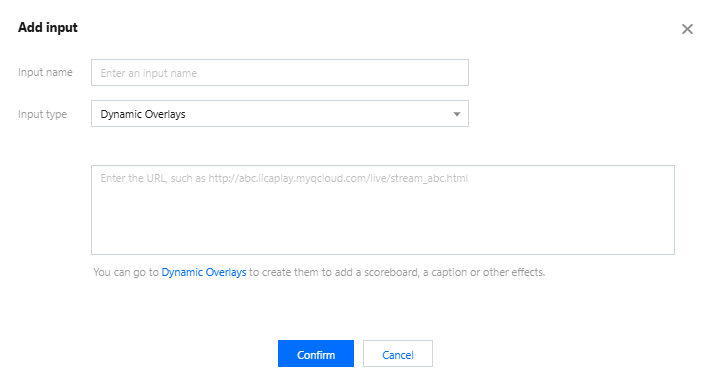
Dynamic Overlays
Input name: Custom
Input type: Dynamic Overlays
Based on your business needs, you can overlay Dynamic Overlays on the live stream from the broadcasting side. You can go to Dynamic Overlays to create them to add a scoreboard, a caption or other effects.
Note:
Ensure that each on-demand/live URL you input is accessible. Otherwise, the input will not be playable.
If the input source is interrupted, the output will display a black screen.
5. Click Confirm to finish adding the input source. The system will automatically play the video.
Note:
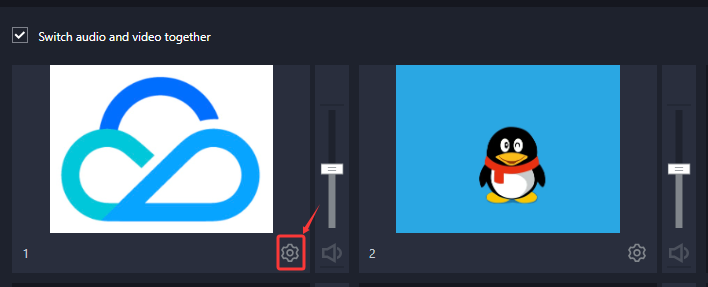
To modify an input source, click
at the bottom of the input source to enter the input source editing page, fill in the information you need to modify, and click Confirm to save the modification.
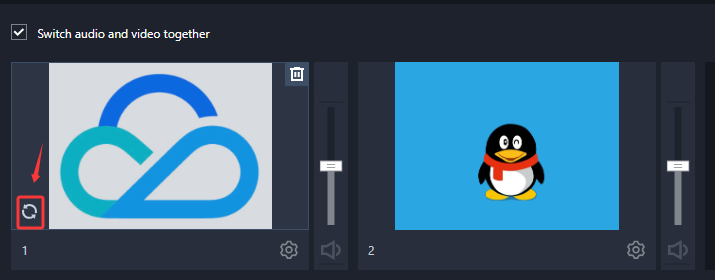
After modification, click
in the lower-left corner of the video source to refresh. After refreshing, you can see the modified input source displayed.
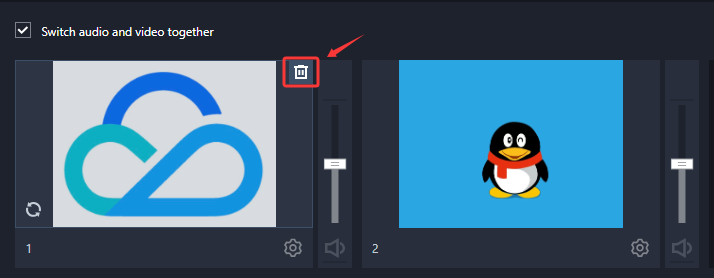
To delete an input source, click
on the top of the input source. A dialog box pops up asking for confirmation. Click Confirm to delete the input source.
When you modify or delete an input source, the input source cannot be used in a preview (PVW) or main monitor (PGM) layout.