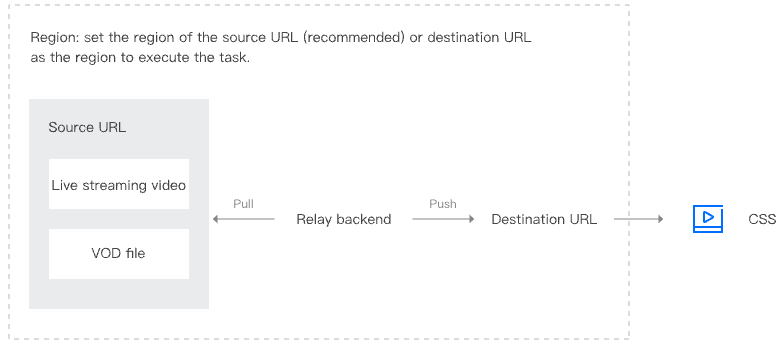
If your live streaming source does not have the capability to push streams or if you want to stream on-demand videos, you can use the relay feature to quickly pull content from an existing live streaming source or video and then deliver it to the destination. You don’t need to push streams yourself.
Prerequisites
You have activated CSS and logged in to the CSS console.
You can create up to 200 relay tasks. If your relay business has a substantial volume and you require a larger task quota, contact us by submitting a service ticket, or seek assistance from our business manager.
The relay feature is charged based on the duration of relay tasks. For details, see Relay.
CSS is only responsible for pulling and relaying content. Please make sure that your content is authorized and complies with relevant laws and regulations. In case of copyright infringement or violation of laws or regulations, CSS will suspend its services for you and reserves the right to seek legal remedies.
The local relay mode became a paid feature starting from 00:00 on November 23, 2022. To learn more, see Extended Features.
For relay, when pulling or pushing global streams, you need to set the task region to outside Chinese mainland.
You can use the relay recording function by binding a cloud streaming recording template, which will generate recording costs. The recording templates bound to the relay function only support templates that record the original stream content. To modify the recording template during a relay task, you need to halt the current task for 30 seconds before restarting it, only then can the new recording template take effect.
After the relay is bound to the transcoding template, the stream will first be pushed to CSS for transcoding, and then forwarded to the objective address of the task. The stream ID style of the push stream used for transcoding is "pp_relay task id", example: pp_12345678. Additional upstream push charges may be incurred. For the upstream push billing rules, please refer to Upstream Push Billing Instructions.
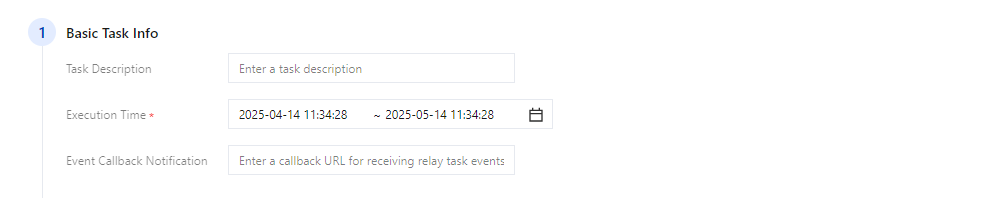
By default, it is from Current Time to Current Time + 24 Hours. The optional range of execution time is any time within one year of the current time, but the duration cannot exceed 30 days.
Assuming the current time is 11:34:28 on April 14, 2025, then:
The optional time is from 11:34:28 on April 14, 2025 to 11:34:28 on May 14, 2025.
The end time cannot exceed 11:34:28 on May 14, 2025.
Event Callback Notification
Enter a callback URL for receiving relay event notifications.
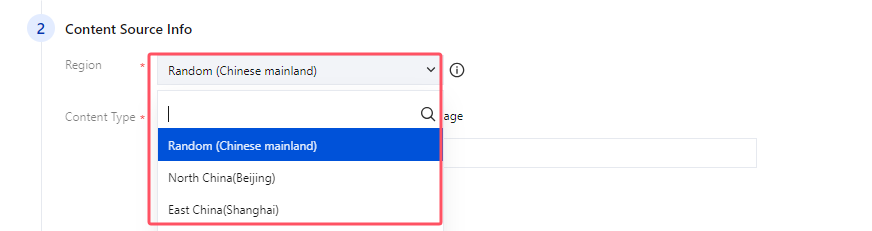
3. Provide the source information.
Region: Random (Chinese mainland), North China(Beijing), East China (Shanghai), South China (Guangzhou), Southeast Asia (Singapore), Southeast Asia (Bangkok), Northeast Asia(Tokyo), Northeast Asia (Seoul), Hong Kong/Macao/Taiwan (China) Hong Kong (China), West US(Silicon Valley),East US(Virginia),Europe(Frankfurt).
If you select Random (Chinese mainland), the system will assign a region that is nearby.
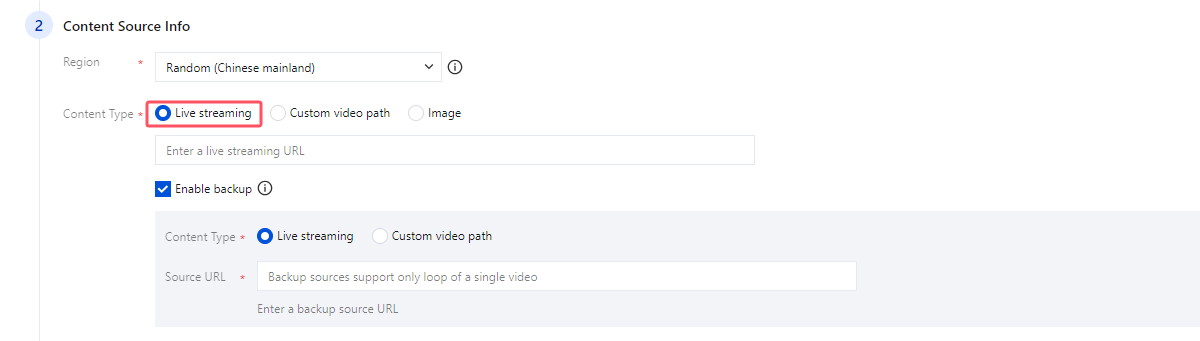
4. For Content Type, you can select Live streaming, Custom video path, or Image.
4.1 Live streaming:
Enter a live streaming URL (only one is allowed).
You can select Enable backup.
In the event that the primary input source fails to retrieve content, an automatic switch to the backup input source will be initiated for content acquisition. If the backup input source's content type is live streaming, a manual switch back to the primary input source is required once it is restored. However, if the backup input source's content type is a custom video, the system will automatically revert to the primary input source upon completion of the current custom video playback cycle. The backup input source only supports the continuous loop playback of a single video.
Application scenarios: The backup source function is ideal for long-term live streaming tasks, preventing black screen viewing due to stream interruption, and providing backup sources and padding. For manual real-time switching of live streaming scenarios, it is recommended to use the cloud director station function.
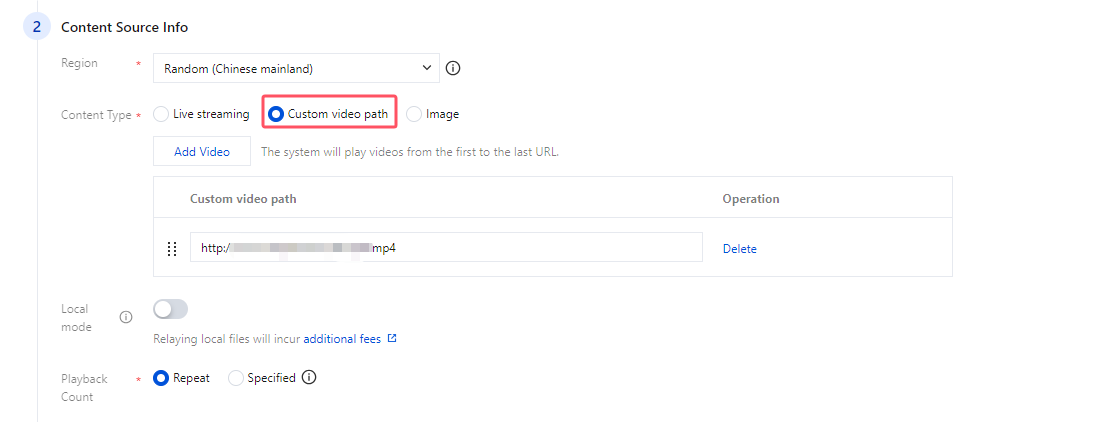
4.2 Custom video path:
You can enter multiple (max 30) source URLs.
Select Repeat to repeat the playback indefinitely or Specified to specify the number of times (1-100) to play the content.
If you enable local mode, sources in MP4 format will be cached to the local node before they are relayed. This ensures smoother and more reliable playback.
Note:
The system will stop a relay task either when the playback count reaches the specified value or when the task reaches its end time.
In case of task modification:
If you change only the playback count, after the new value is applied, the count will start from 2.
If you change both the source URL and playback count, after the new configuration takes effect (whether immediately or after the current playback ends), the count will start from 1.
If you change the destination URL, the playback count will be reset.
Relaying a locally cached MP4 file will incur additional fees, which are based on the duration of the file relayed.
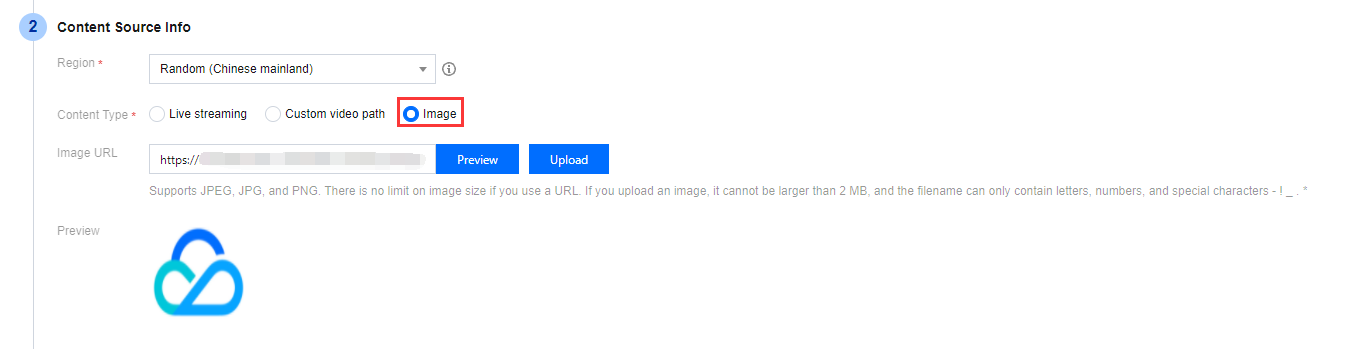
4.3 Image:
Upload an image or enter an image URL. You can click Preview to preview the image.
Images in JPEG, JPG, PNG, or BMP format are supported. If you enter an image URL, there is no limit on image size. If you upload an image, it cannot exceed 2 MB.
The file names of images to be uploaded only support letters, digits, and the following characters: - ! _ . *
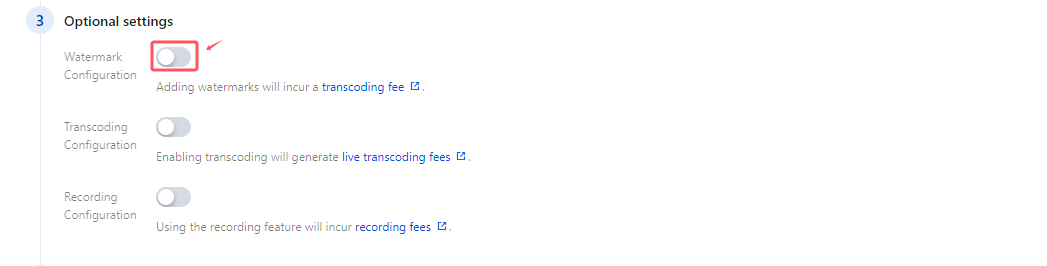
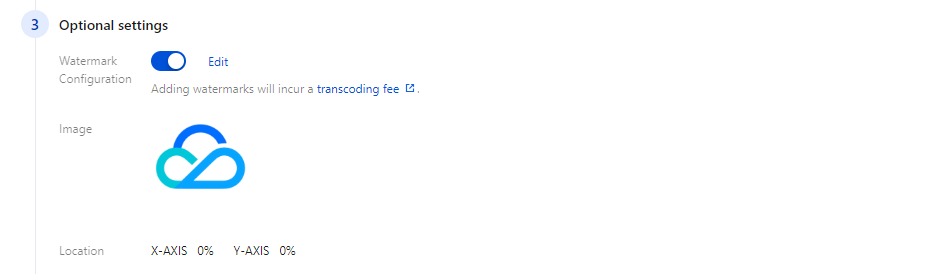
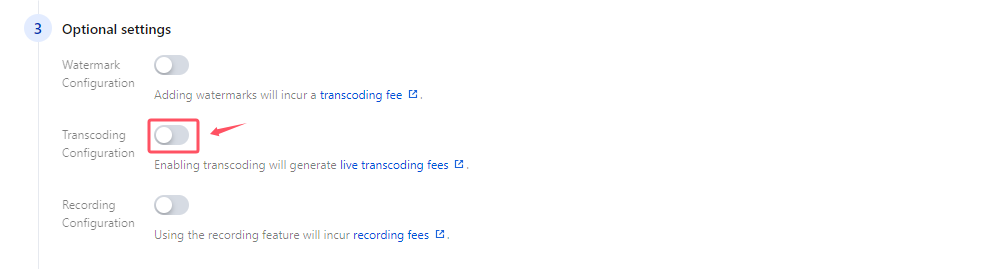
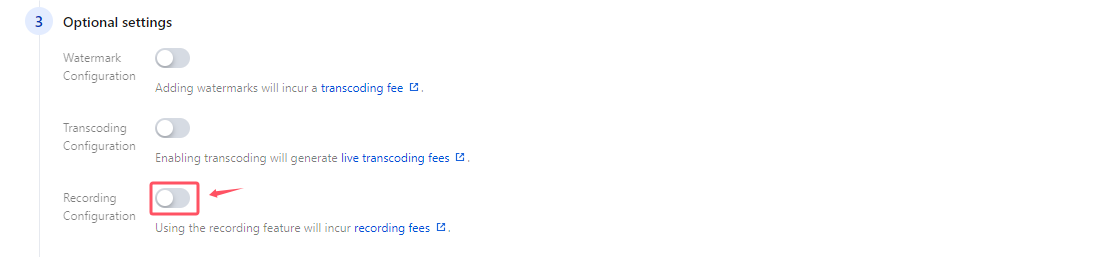
5. You can select Watermark Configuration ,Transcoding Configuration, and Recording Configuration. The configuration methods are as follows:
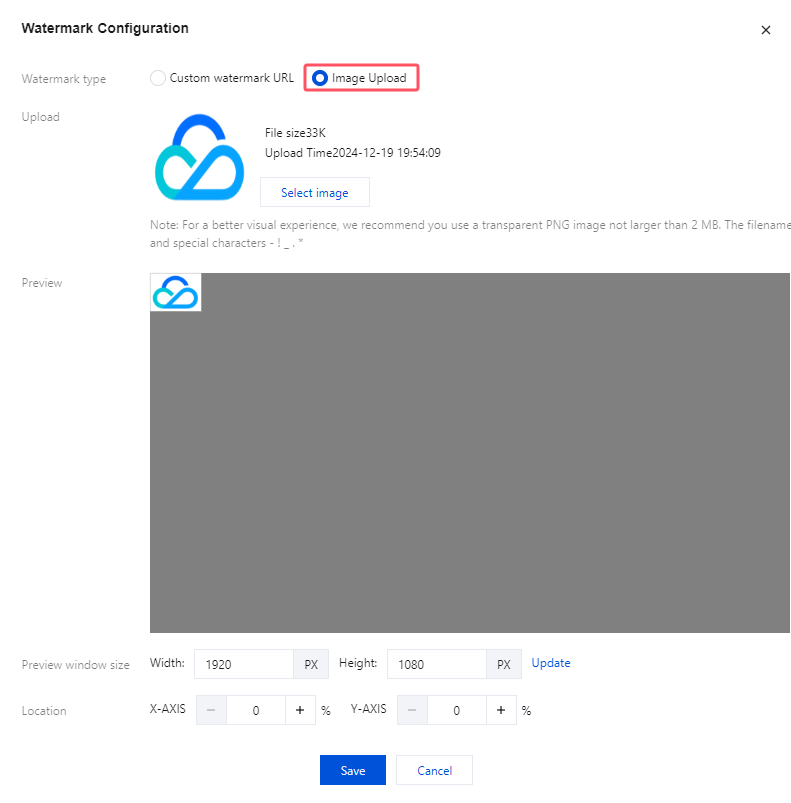
5.1 Watermark Configuration:
Click
to enable the watermark configuration. The PNG, JPG, and GIF watermark image formats are supported.
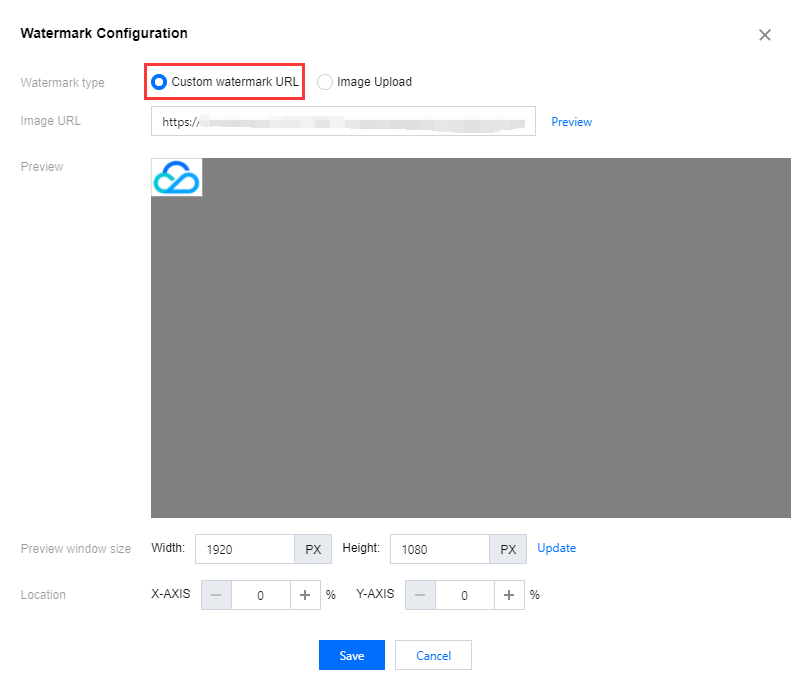
Set Watermark Type. You can select Custom watermark URL and Upload image.
For optimal visual effect, the watermark should be a transparent PNG image, with a file size less than 2 MB.
The file names of images to be uploaded only support letters, digits, and the following characters: - ! _ . *
Custom watermark URL
Upload image
Select Custom watermark URL, Enter the URL of the watermark image in the image address input field. By clicking on Preview, you can view the watermark in the preview section.
When modifying the watermark, it takes effect immediately for live streaming source tasks, and for on-demand video source tasks, it takes effect starting from the next file. Modifying the watermark can cause playback to stutter. Usage scenario: It is recommended to use when relaying to a third-party origin server that does not have a watermark feature. For example, if you relay to CSS, you can use the live watermarking feature of CSS.
5.2 Transcoding Configuration:
Click
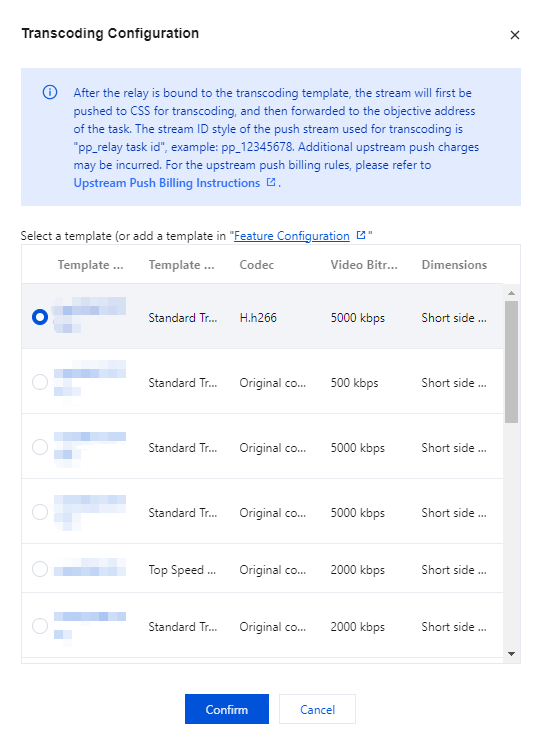
, select to enable the transcoding configuration, select a transcoding template, and click Confirm.
After the relay is bound to the transcoding template, the stream will first be pushed to CSS for transcoding, and then forwarded to the objective address of the task. The stream ID style of the push stream used for transcoding is "pp_relay task id", example: pp_12345678. Additional upstream push charges may be incurred. For the upstream push billing rules, please refer to Upstream Push Billing Instructions.
Turning on, off, or changing the transcoding template will take immediate effect. Modifications to the currently bound transcoding template in the pull task will only take effect after the task is restarted.
5.3 Recording Configuration
Click
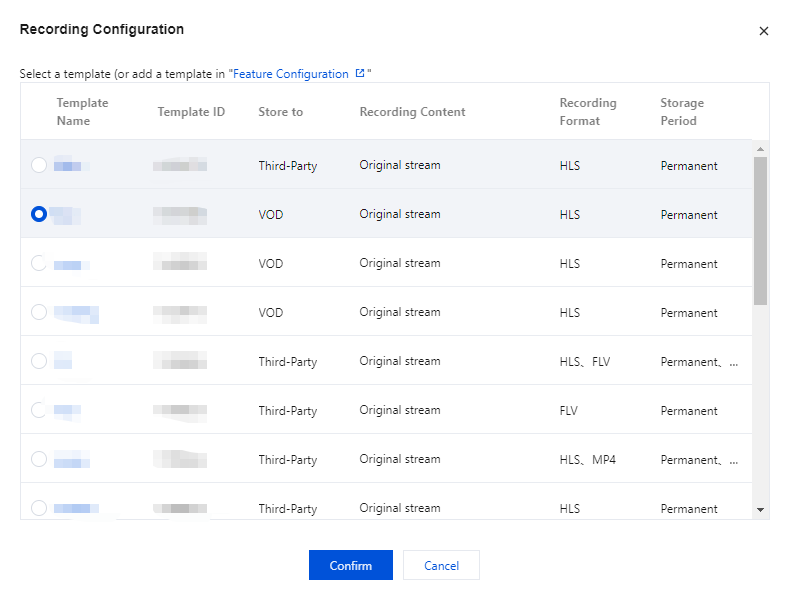
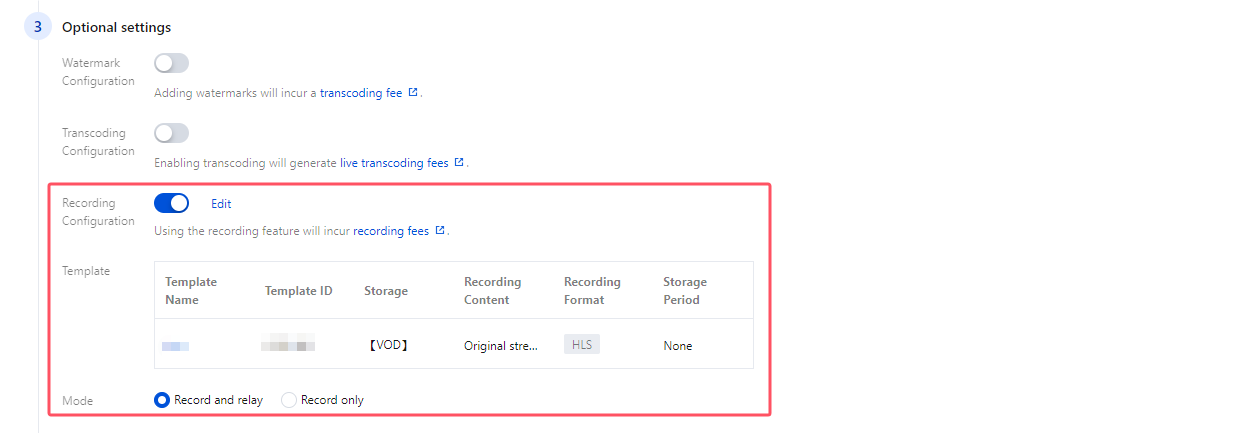
to enable the recording configuration, select a recording configuration template, and click Confirm.
Select a recording mode. You can select Record and relay or Record only.
The recording templates bound to the relay function only support templates that record the original stream content. Templates for watermark streams and transcoding streams are not supported.
To modify the recording template during a relay task, you need to halt the current task for 30 seconds before restarting it, only then can the new recording template take effect.
If the recording template has been associated, it must first be unbound before being deleted. For unbinding procedures, refer to the unbinding recording configuration.
6. Enter a destination URL.
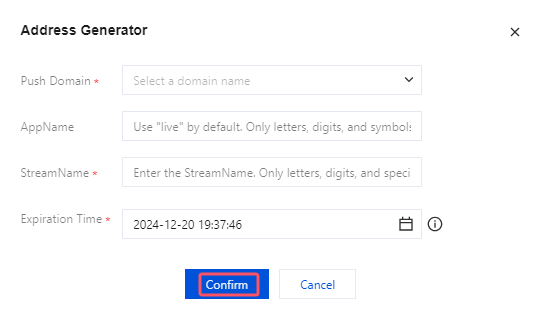
6.1 Click Address Generator to enter the URL generation page.
Click Add to add destination address 2.
6.2 Select an existing push domain, enter the Appname, StreamName, and expiration time, and click Confirm to generate a push URL, which will be auto-filled as Destination Address.
Note:
The URL expiration time must be later than the task end time. If you change the destination URL after the task starts, it will stop and restart.
7. Upon completing all configuration details, simply click Save to proceed.
Managing Tasks
Viewing Task Details
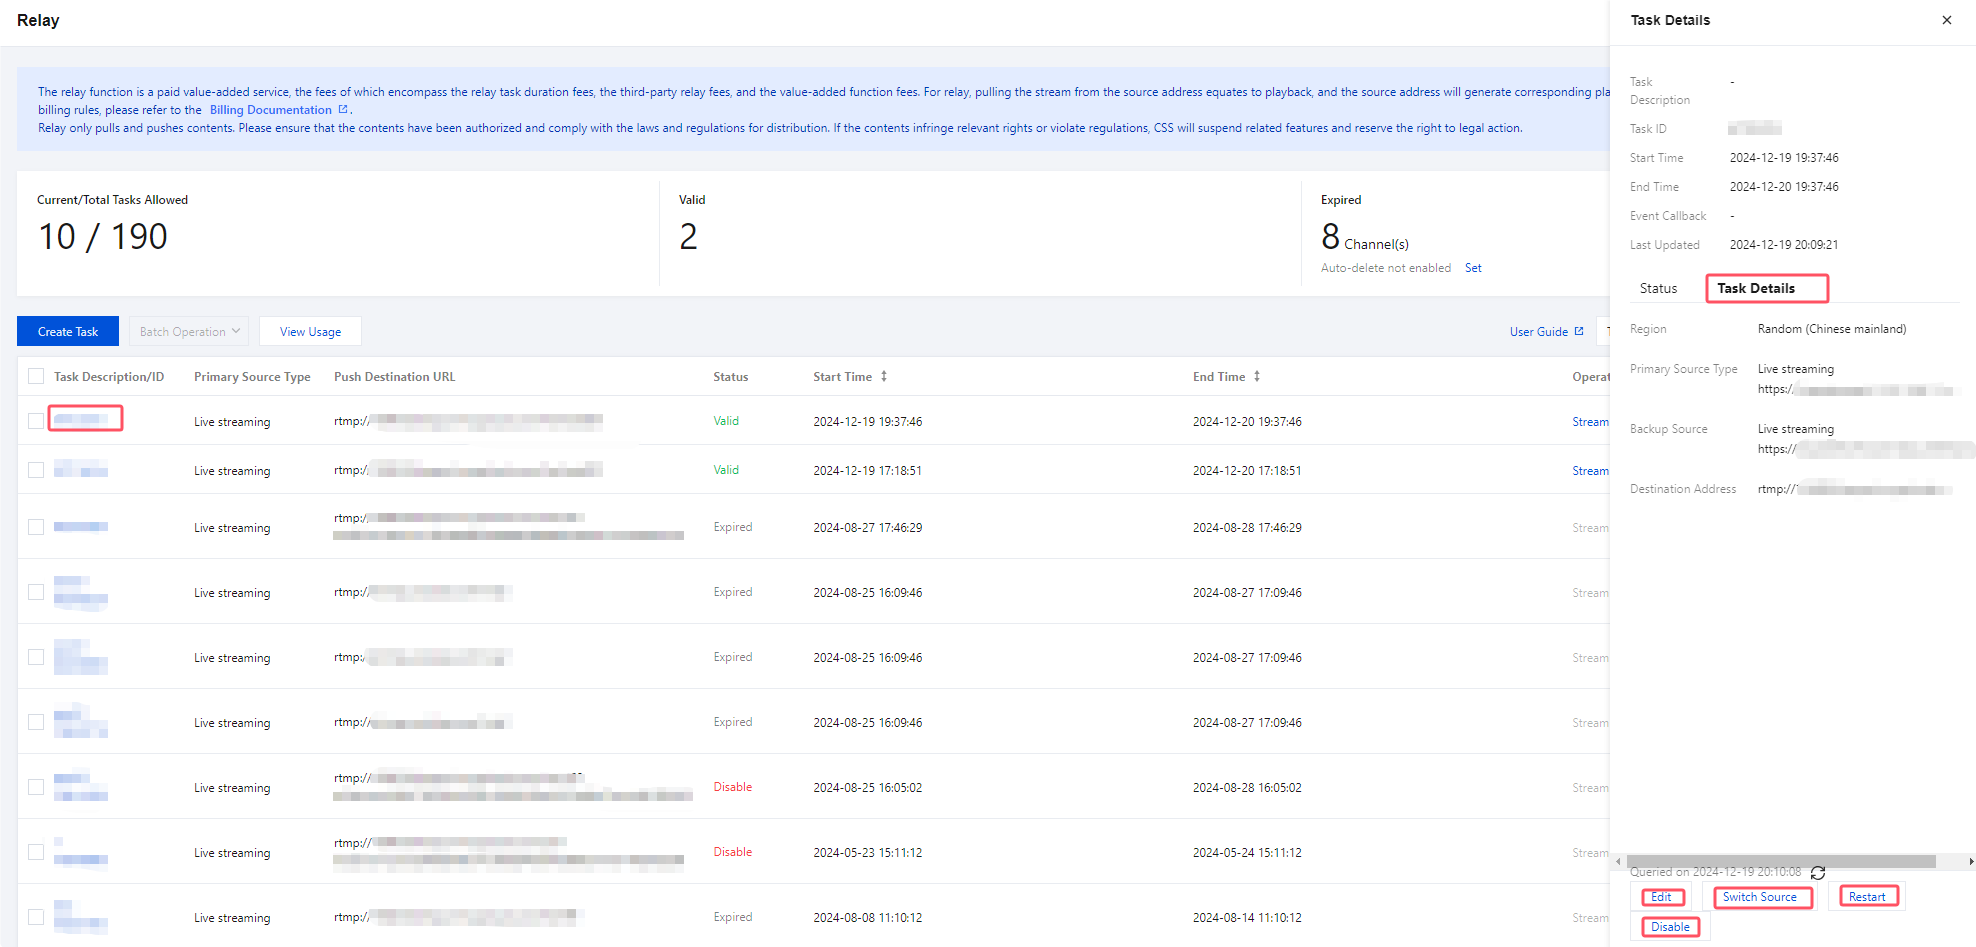
In the task list, find your task, and click its description/ID to view task details in the pop-up window.
Note:
You can click the buttons at the bottom of the pop-up window to edit the task, switch sources, restart the task, or disable the task.
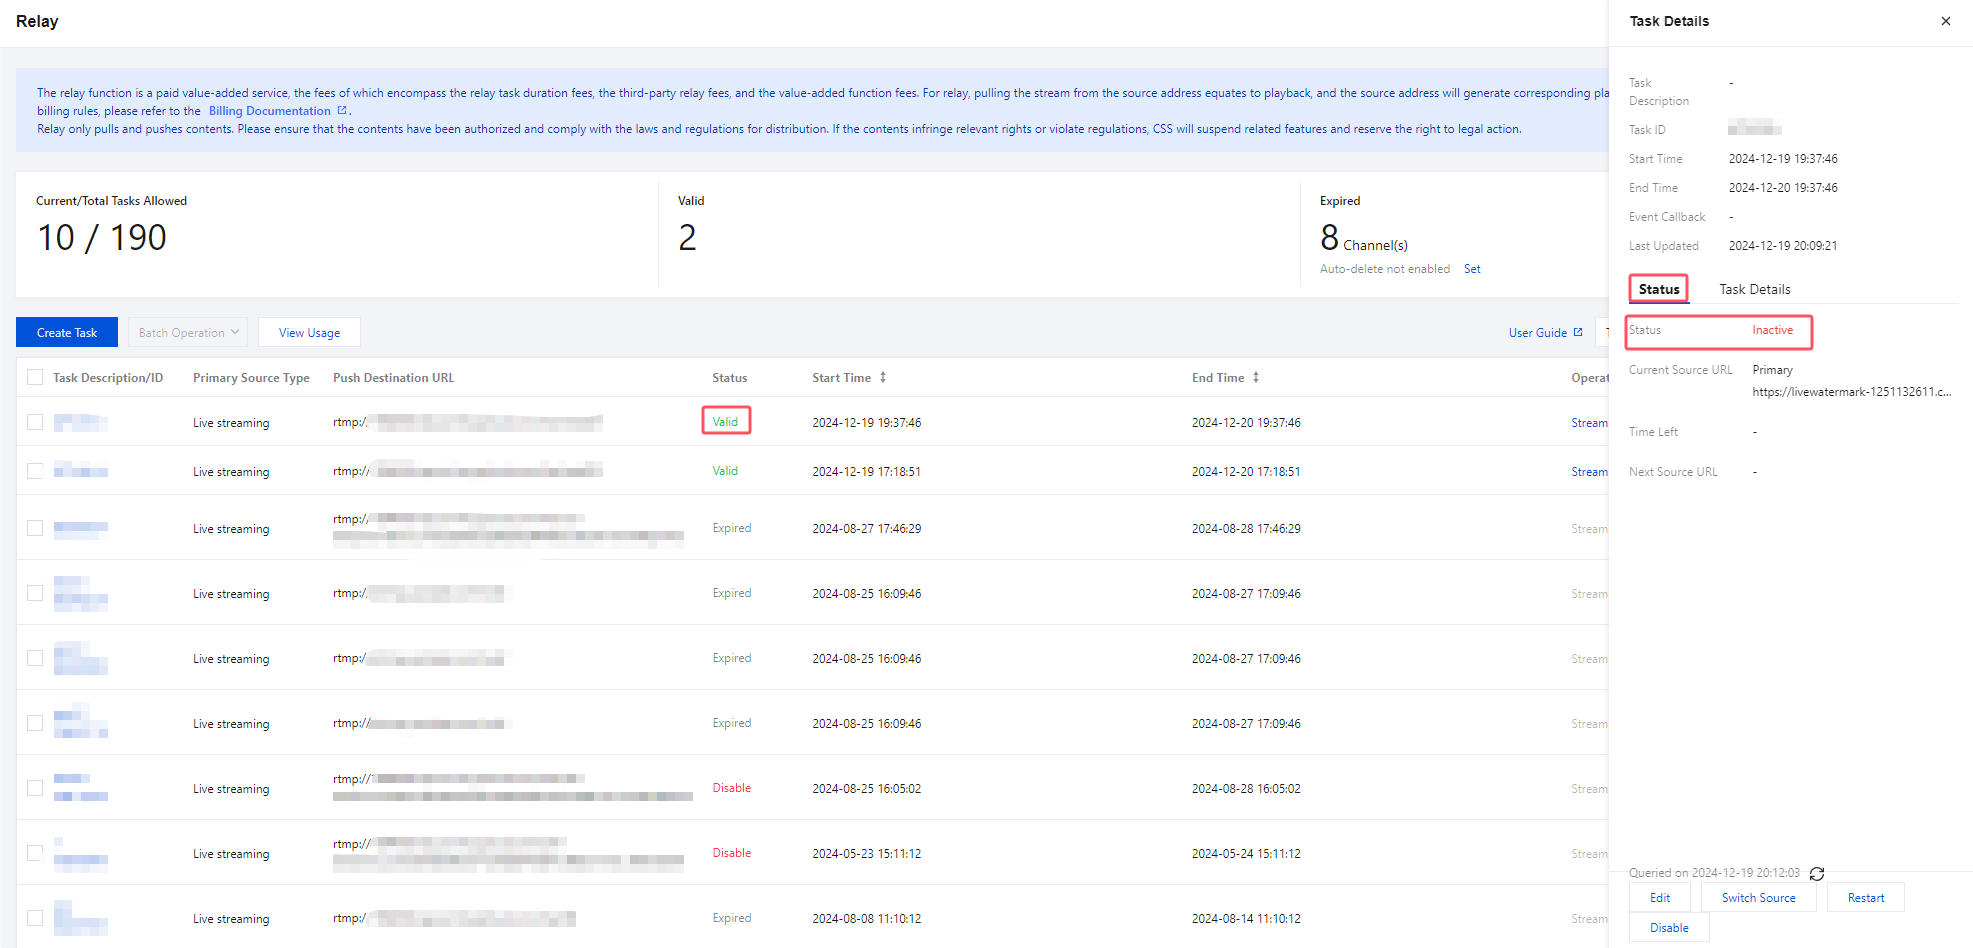
Viewing Task Status
In the task list, find your task, and click its description/ID to view its execution status in the pop-up window.
Task Status
Field Value
Description
Not started
Inactive
The task has not started yet.
Valid
Active
The task has started and is executed as expected.
Inactive
The task has started but is not executed as expected.
Disabled
Inactive
The task is disabled.
Expired
Inactive
The task has expired.
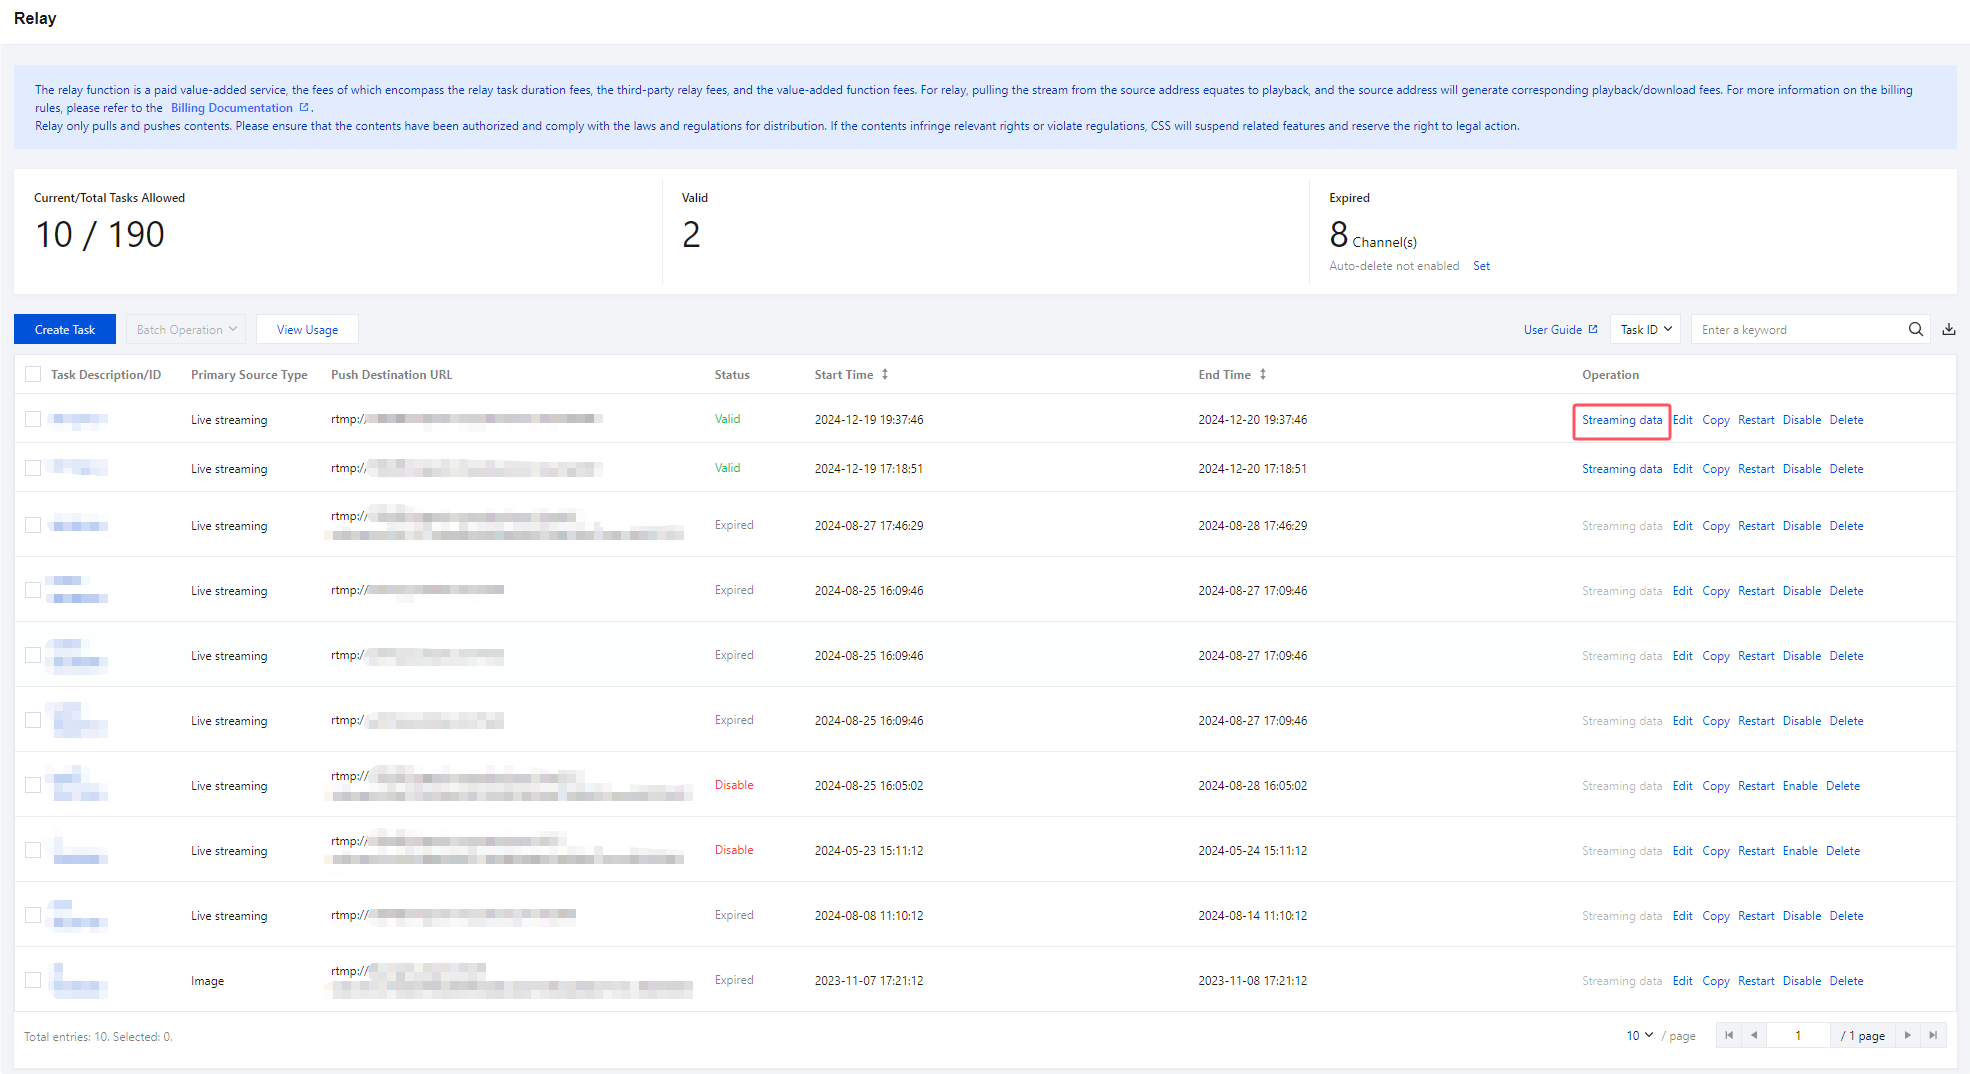
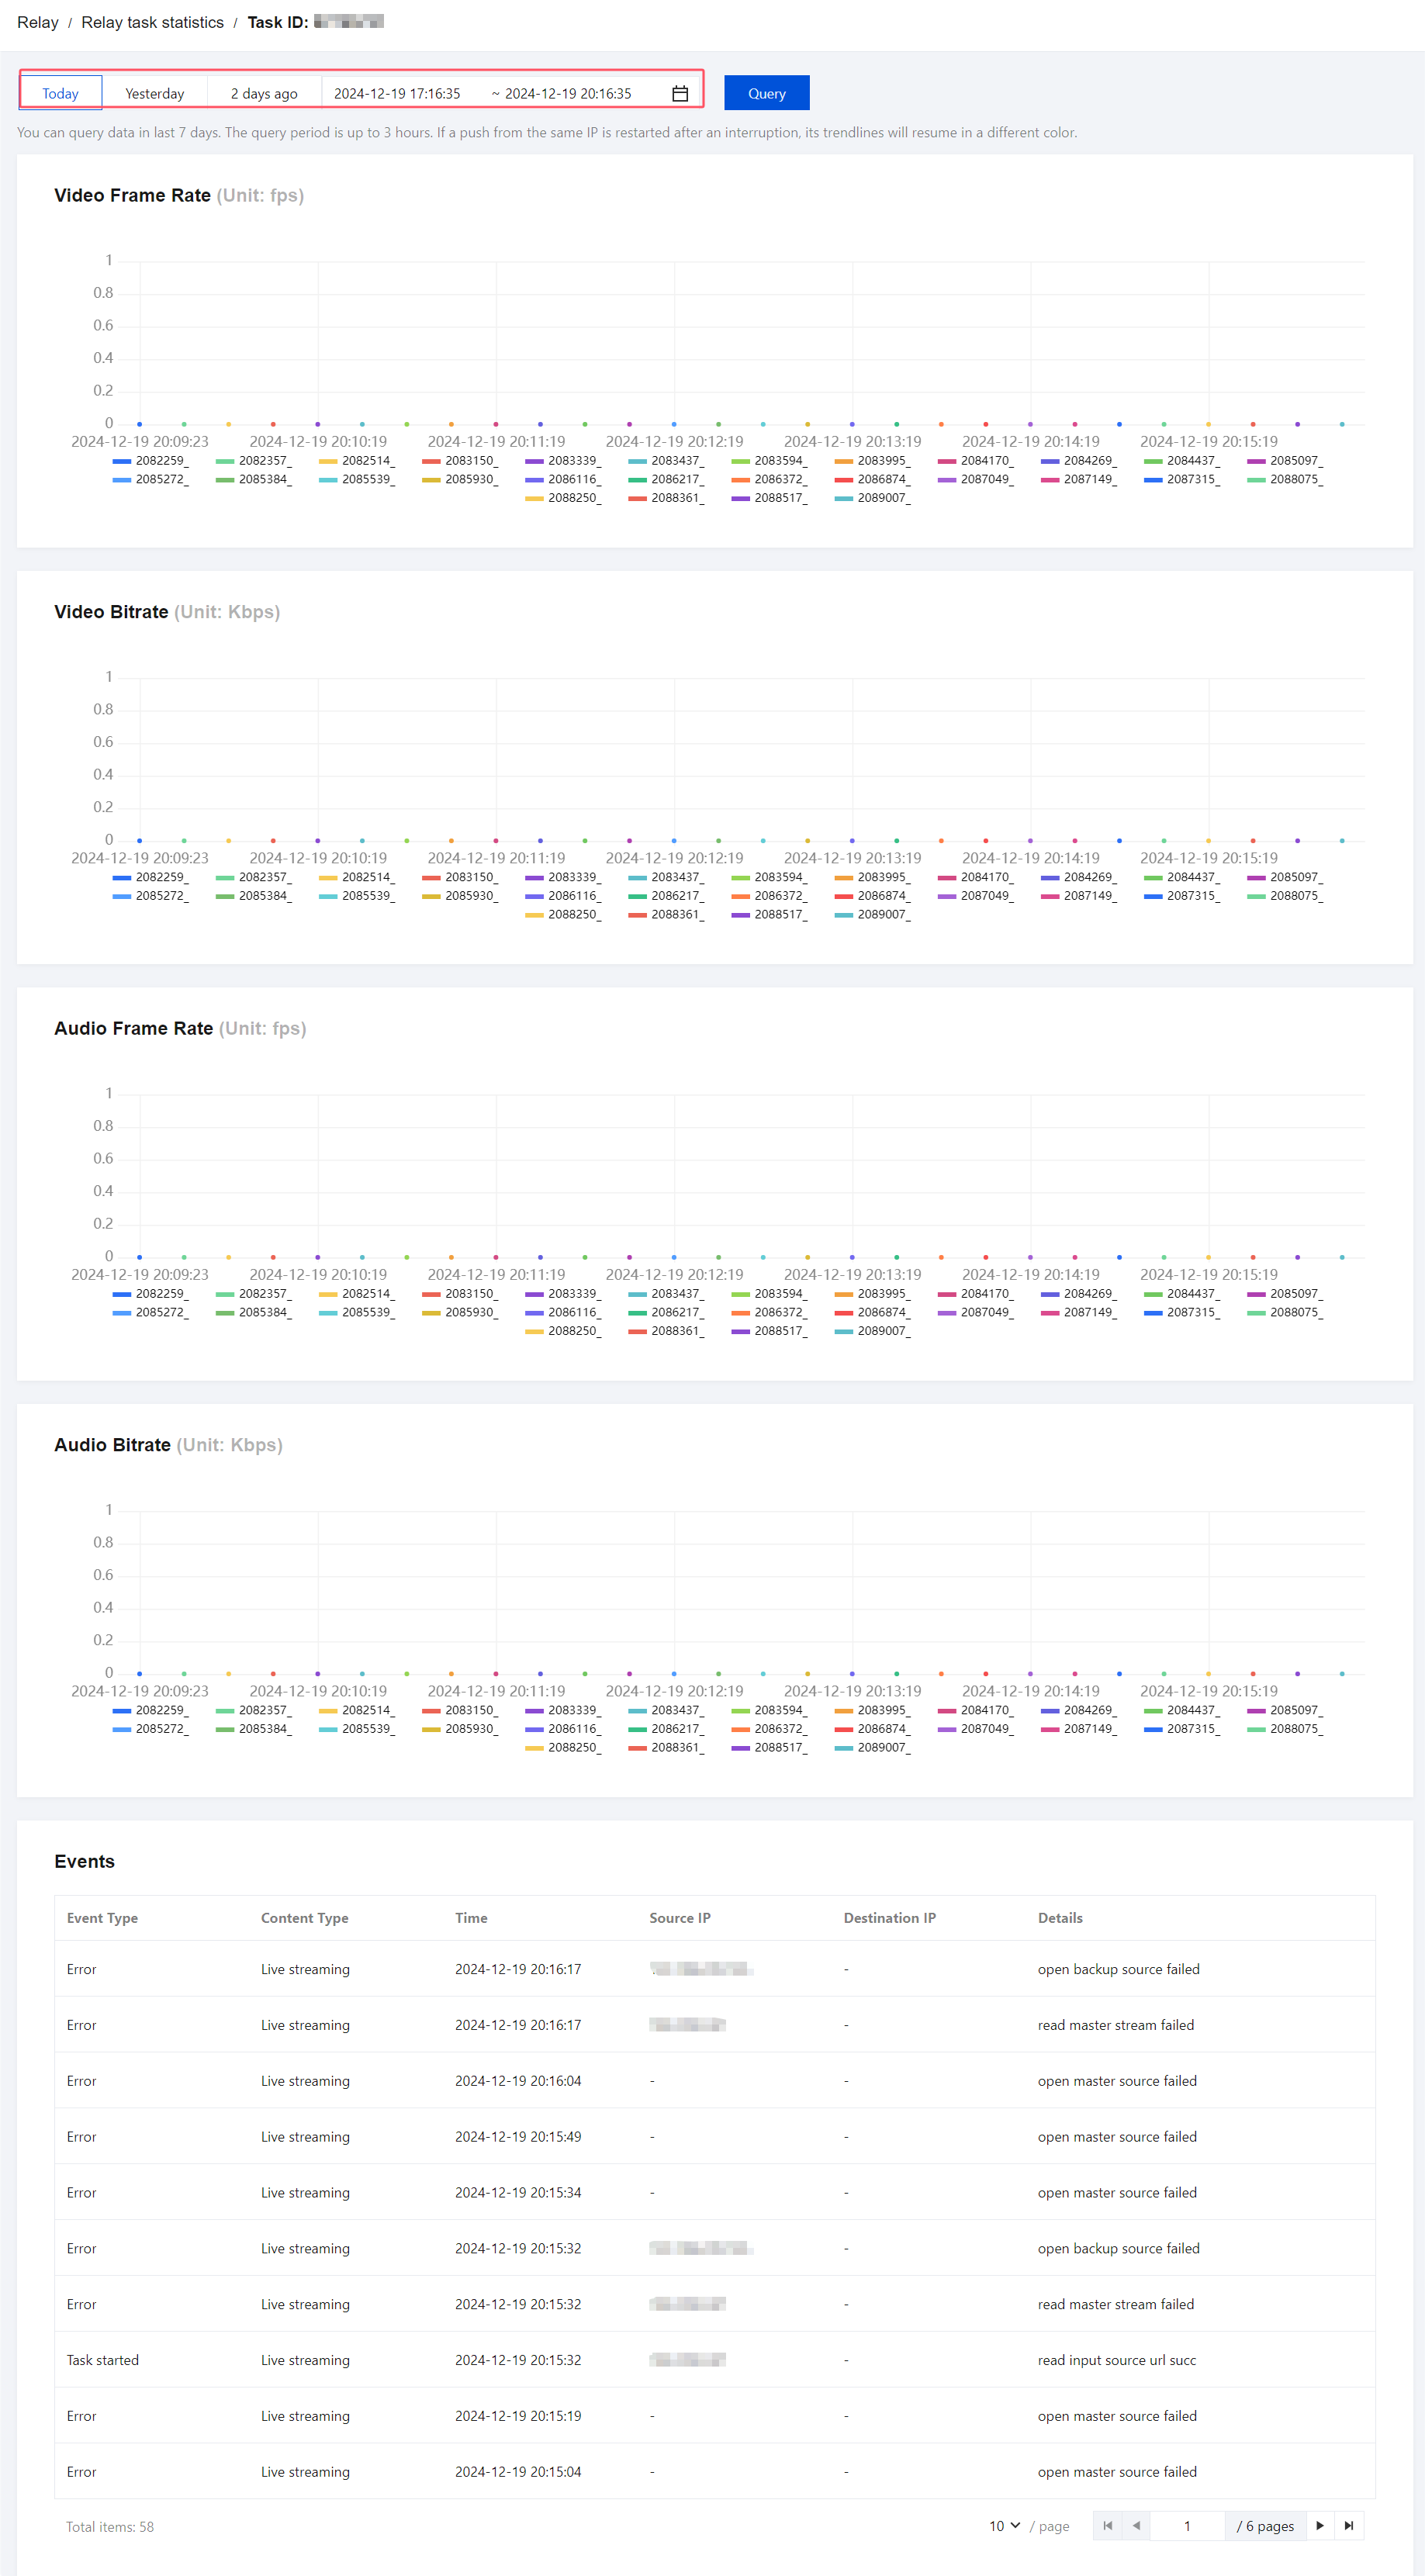
Querying Streaming Data
In the task list, select the successfully created relay task, and click Streaming data in the Operation column on the right to query the streaming data of the relay task. The event display information includes the event type, content type, time, source IP, target IP, and detailed information.
The streaming data query page of a relay task allows you to query the data of a single stream in the past seven days, including the video frame rate, video bit rate, audio frame rate, and audio bit rate.
The interval between the start and end time of the query should not exceed 3 hours.
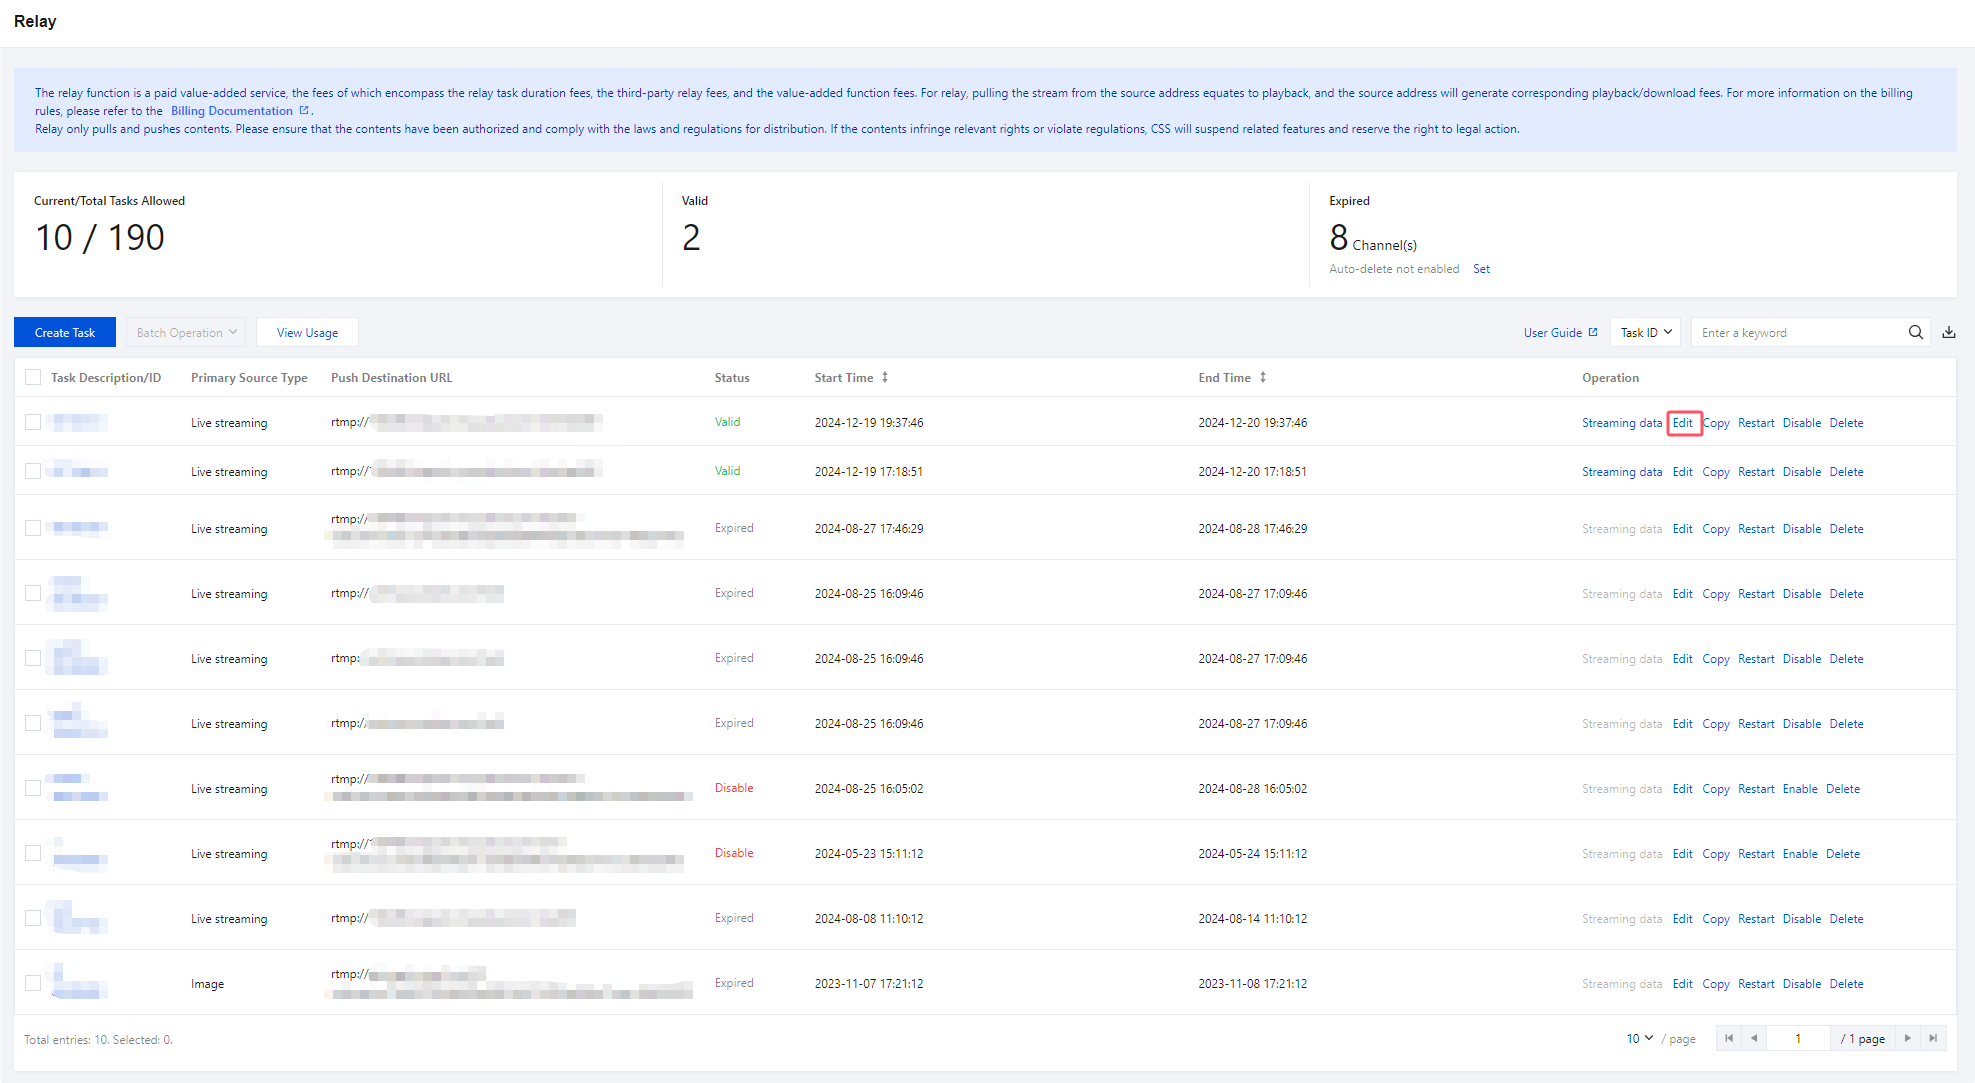
Modifying a Task
1. In the task list, find the task you want to modify, and click Edit.
2. Modify the task information, and then click Save.
You cannot change the region or content type.
When modifying the task end time, make sure that the destination URL is valid until the task ends. Modifying the destination URL will cause the task to stop and restart.
If you change watermark settings for a live streaming source, the modifications will take effect immediately. For an on-demand video source, modifications to watermark settings will take effect starting from the next video. Modifying watermark settings may cause playback to stutter. We recommend you use the watermark feature for relay only if you relay to third-party sites that do not have watermarking capabilities. If you relay to CSS, you can use the live watermarking feature of CSS.
The recording templates bound to the relay function only support templates that record the original stream content. To modify the recording template during a relay task, you need to halt the current task for 30 seconds before restarting it, only then can the new recording template take effect.
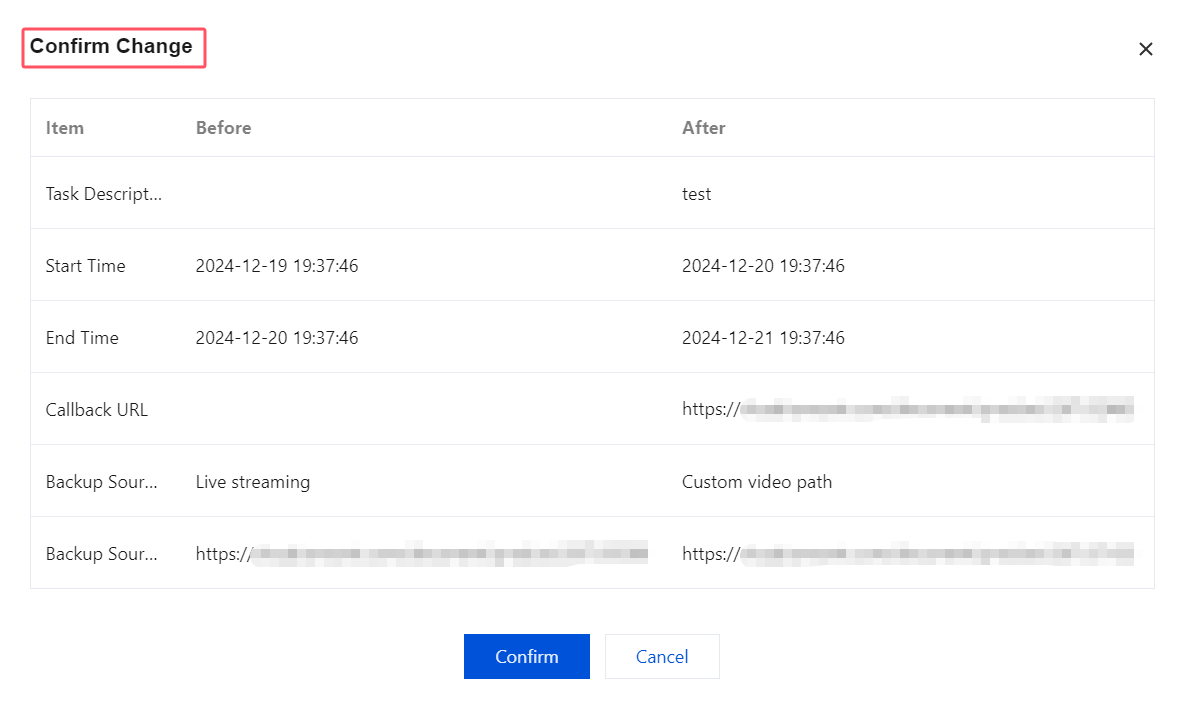
3. In the pop-up window, check the information:
Suppose you modified the start time, end time, and playback count of a task. You would see the following information in the pop-up window:
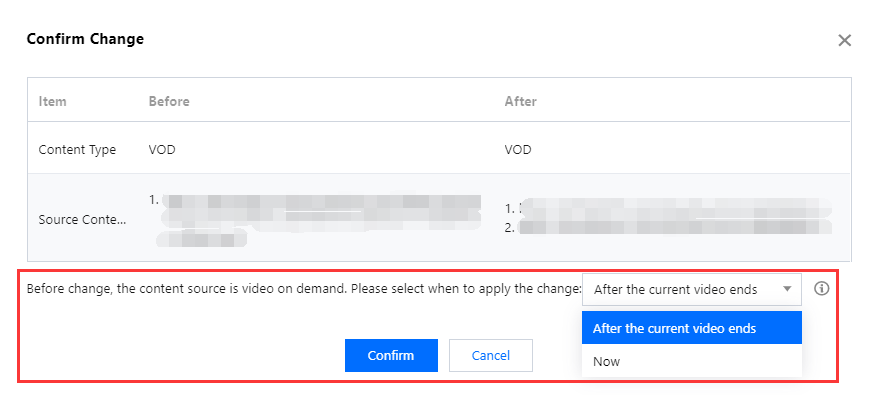
If the source URLs for Custom video path are changed, you need to select whether to apply the change After the current video ends (default) or Now. After the changes take effect, relay will restart from the first source URL.
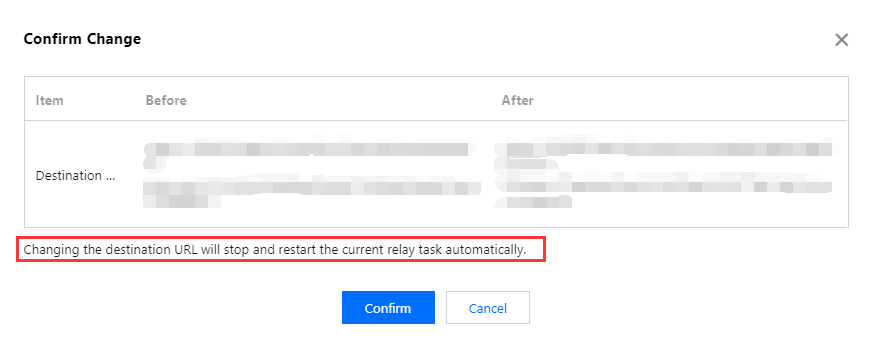
If Destination Address is changed, the system will remind you that after you click Confirm, the current relay task will stop and restart.
4. After checking, click Confirm.
Copying a Task
1. In the task list, find the relay task you want to copy, and click Copy. You will be directed to the task creation page.
2. The information of the copied task will be auto-filled. You can modify it as needed.
3. Click Save to create a new relay task.
Restarting a Task
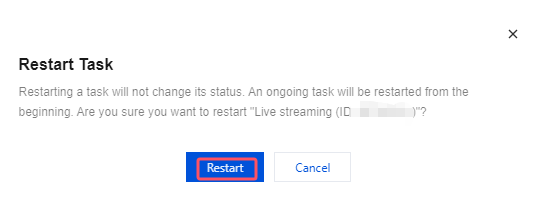
Restarting a task will not change its status. An ongoing task will be restarted from the beginning. Perform the following to restart a task:
1. In the task list, find the relay task you want to restart, and click Restart.
2. In the pop-up window, click Restart.
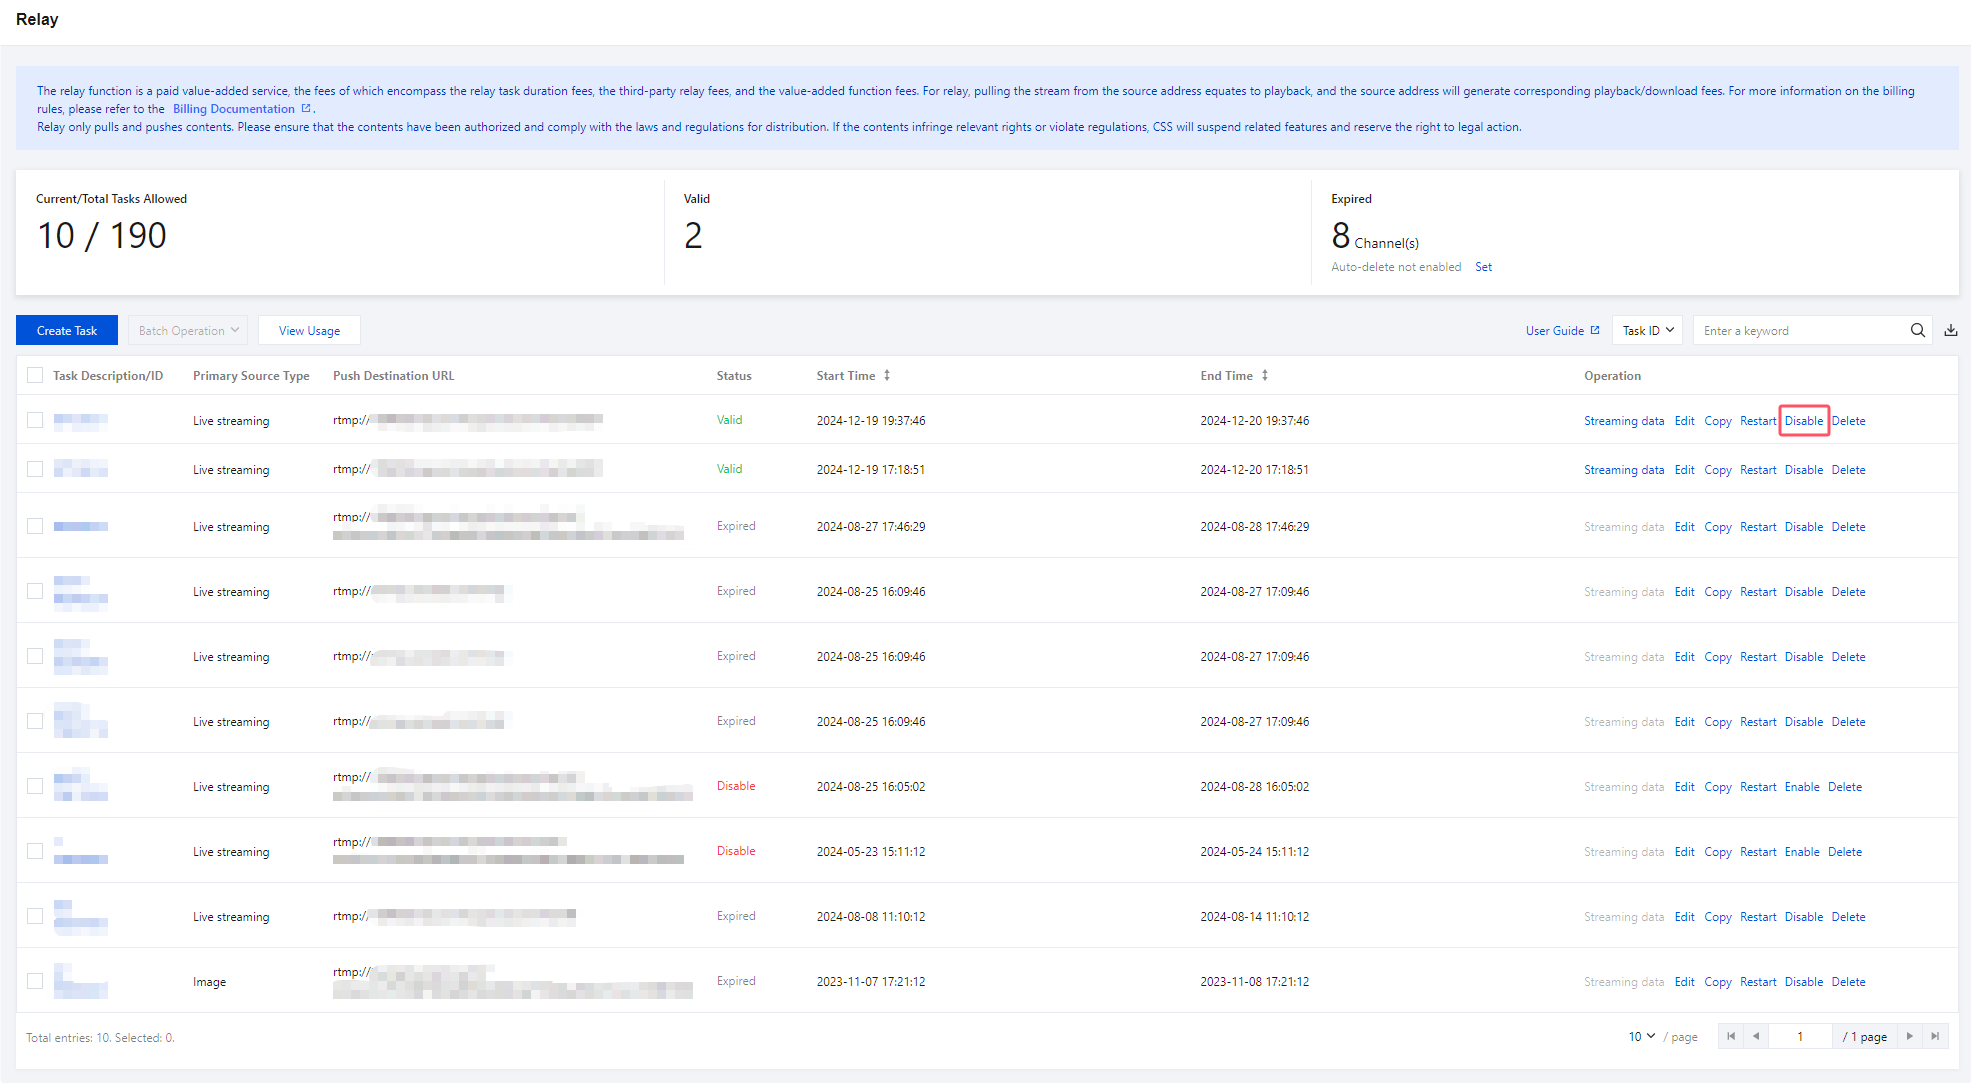
Disabling a Task
If you disable a task, the task will stop. You can click Enable to start it again. Perform the following to disable a task:
1. In the task list, find the relay task you want to disable, and click Disable.
2. In the pop-up window, click Disable.
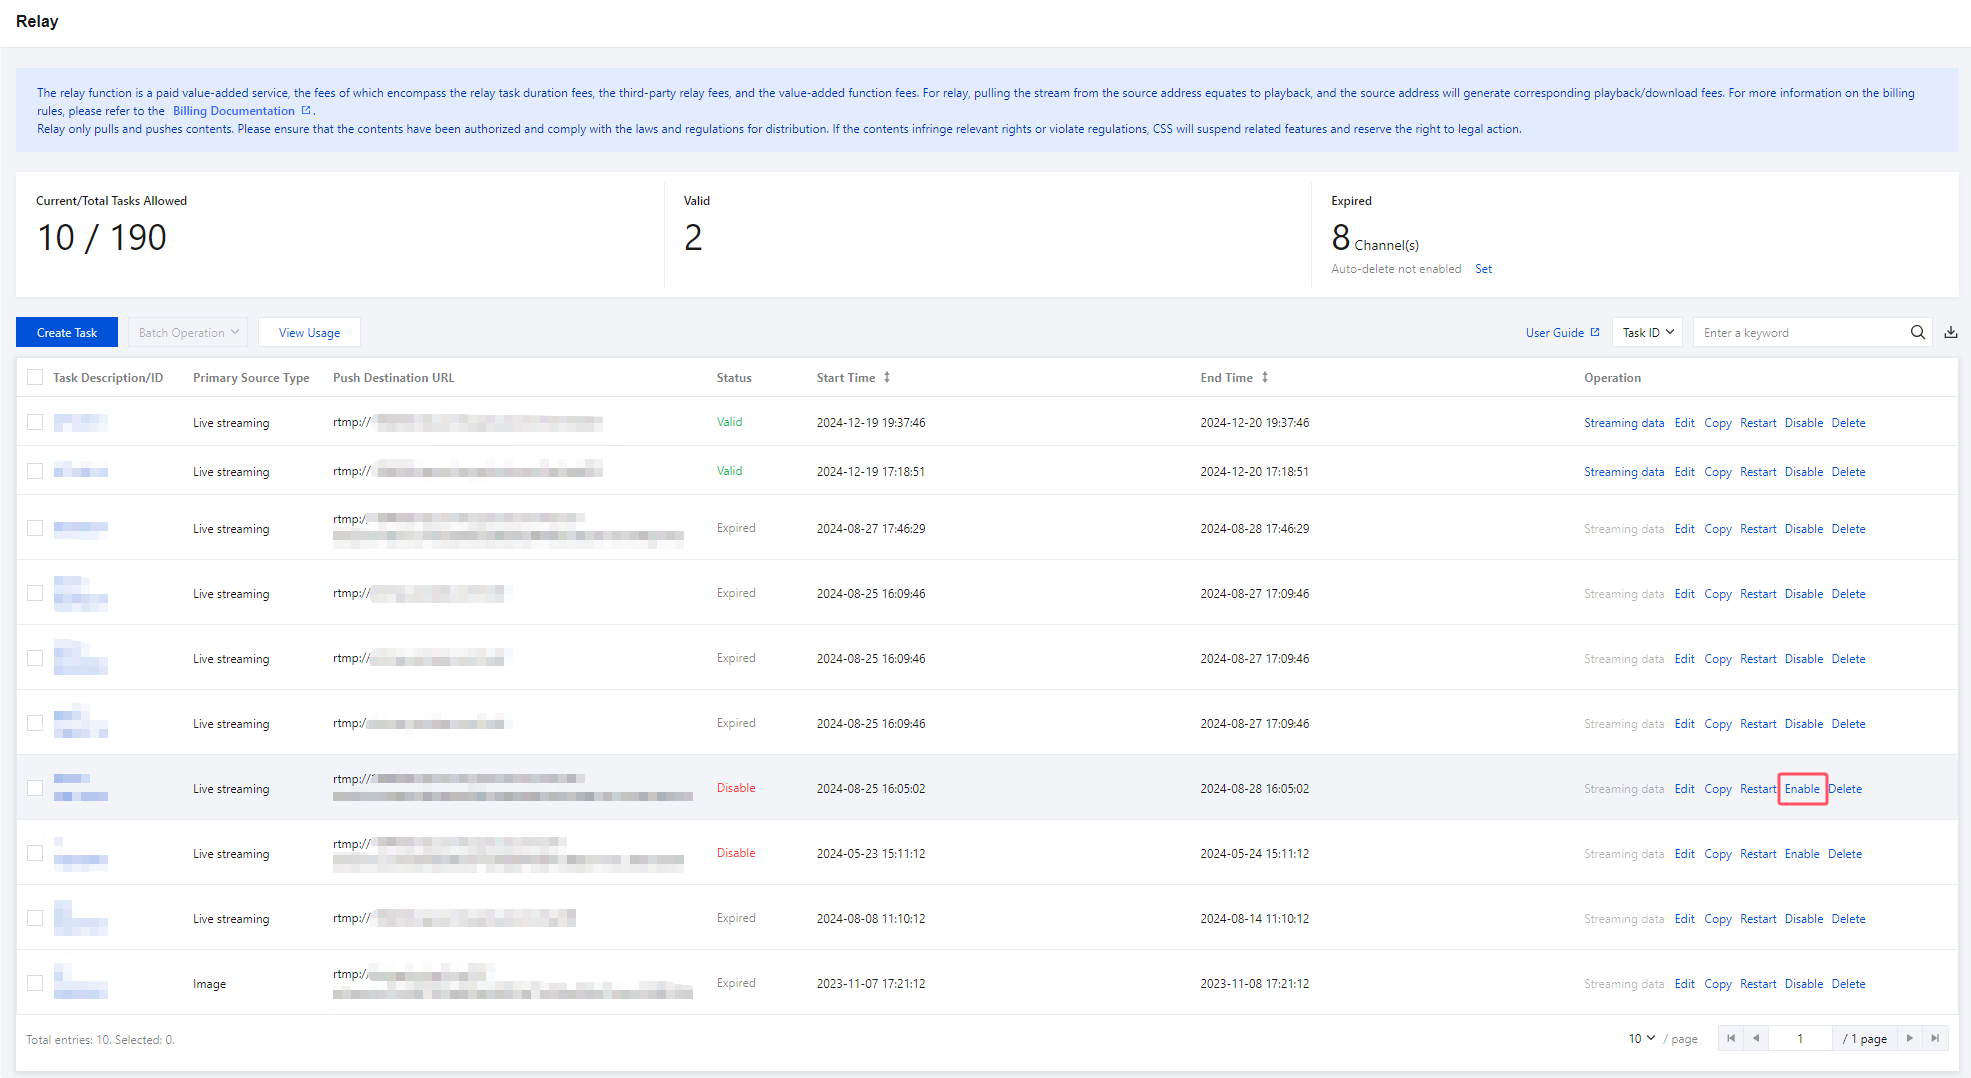
Enabling a Task
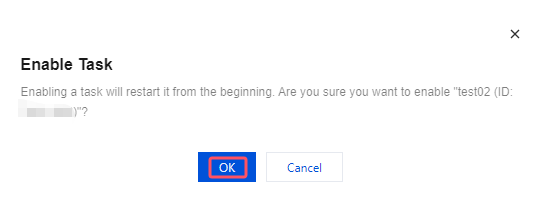
If you enable a task, the task will start from the beginning. Perform the following to enable a task:
1. In the task list, find the relay task you want to enable, and click Enable.
2. In the pop-up window, click OK.
Deleting a Task
Deleted tasks cannot be recovered. Perform the following to delete a task:
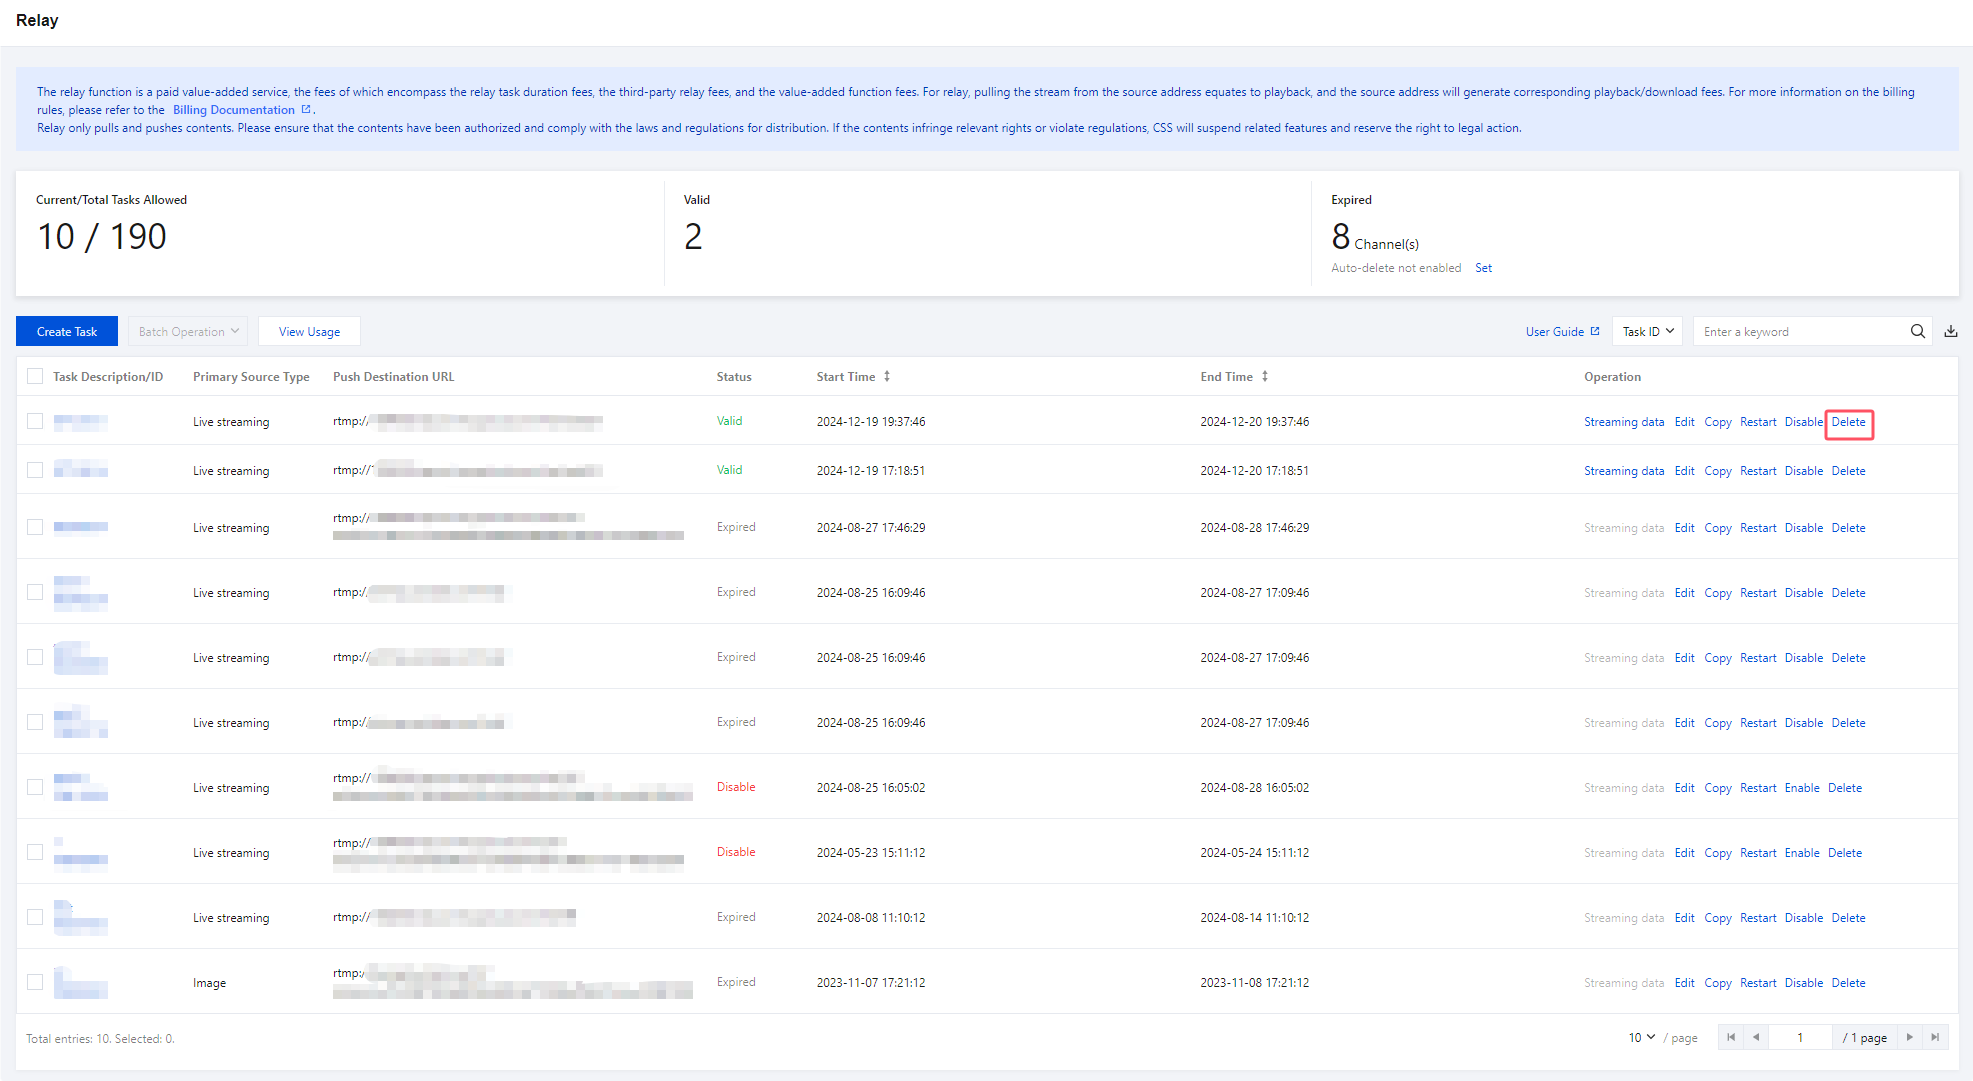
1. In the task list, find the relay task you want to delete, and click Delete.
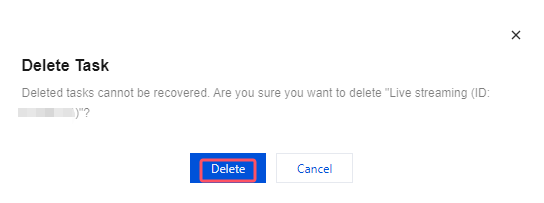
2. In the pop-up window, click Delete.
Batch Operations
You can delete, disable, and enable up to 10 relay tasks at a time.
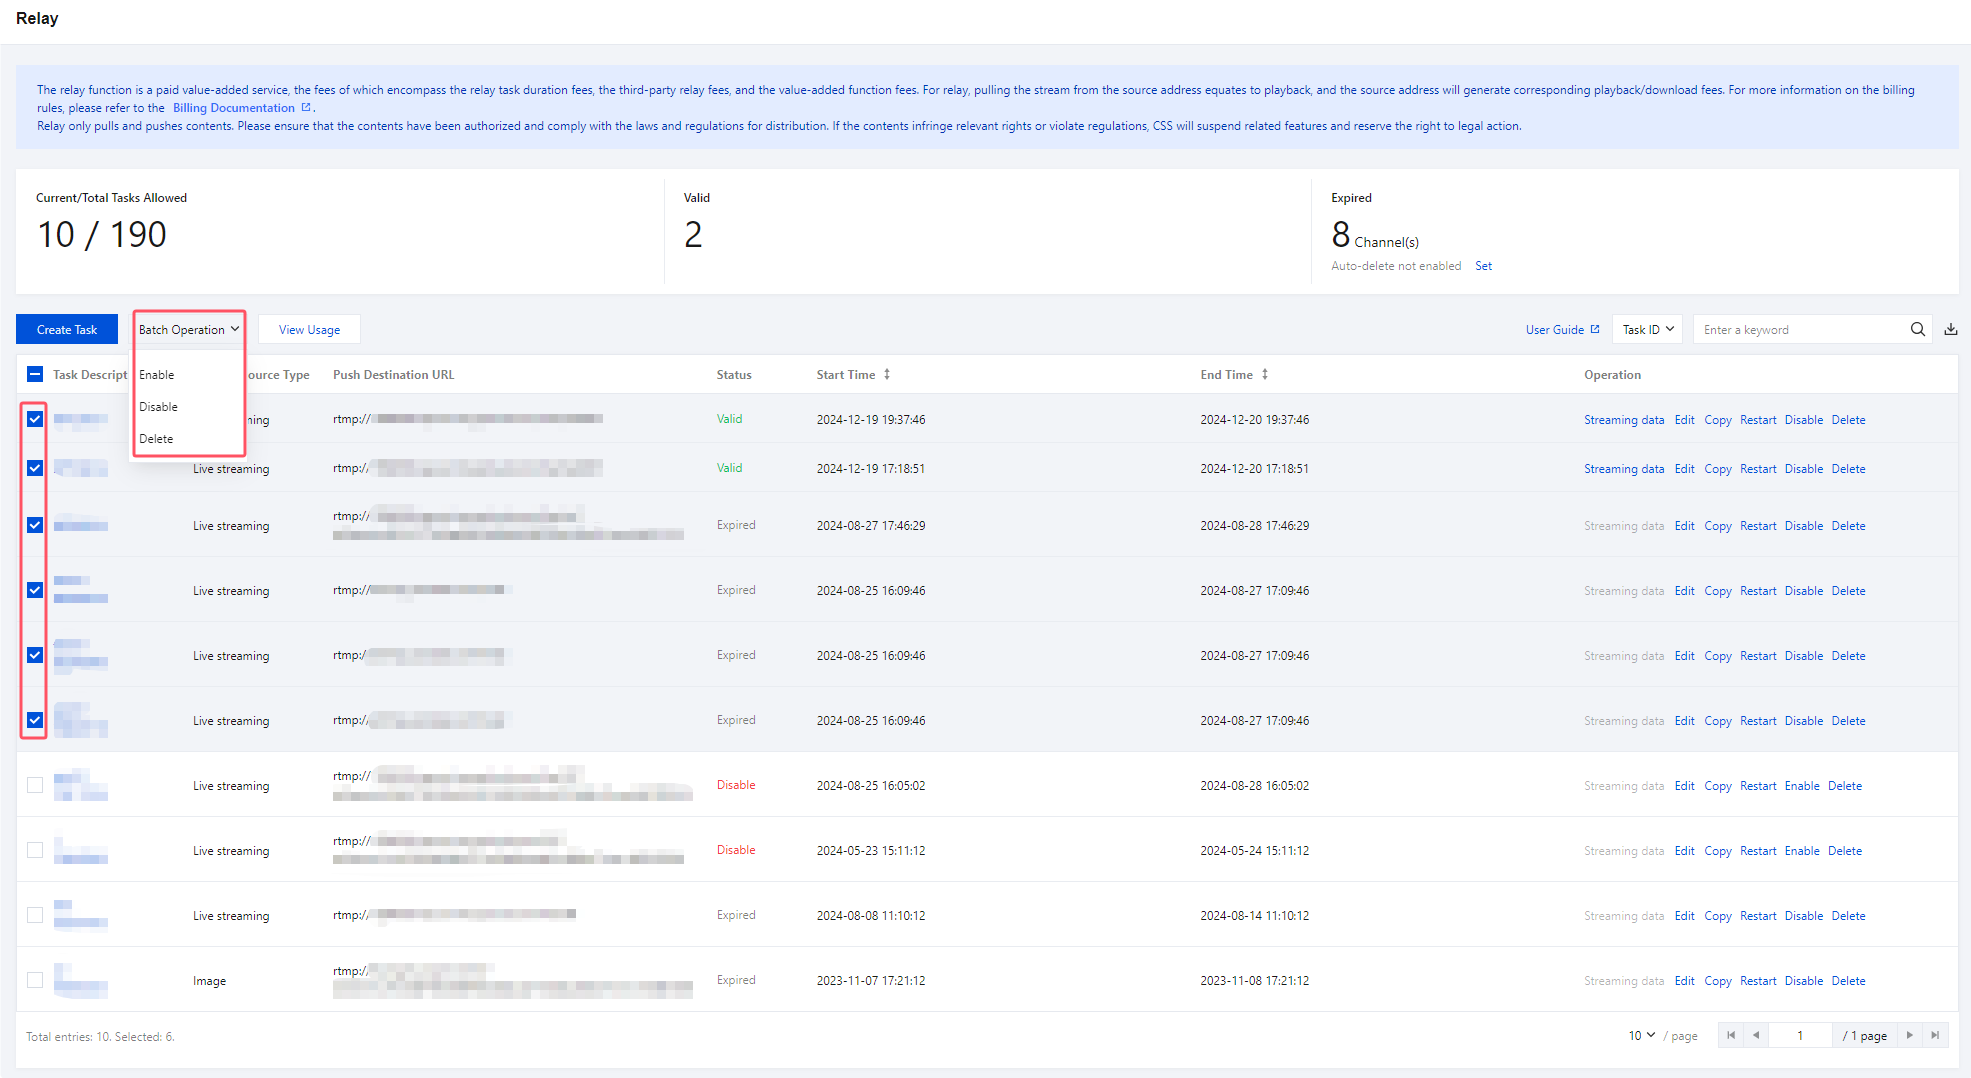
1. In the task list, select the relay tasks you want to delete, disable, or enable.
2. Click Batch Operation, and select Enable, Disable or Delete.
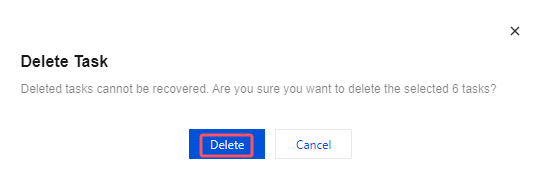
3. In the pop-up window, click Enable, Disable or Delete.
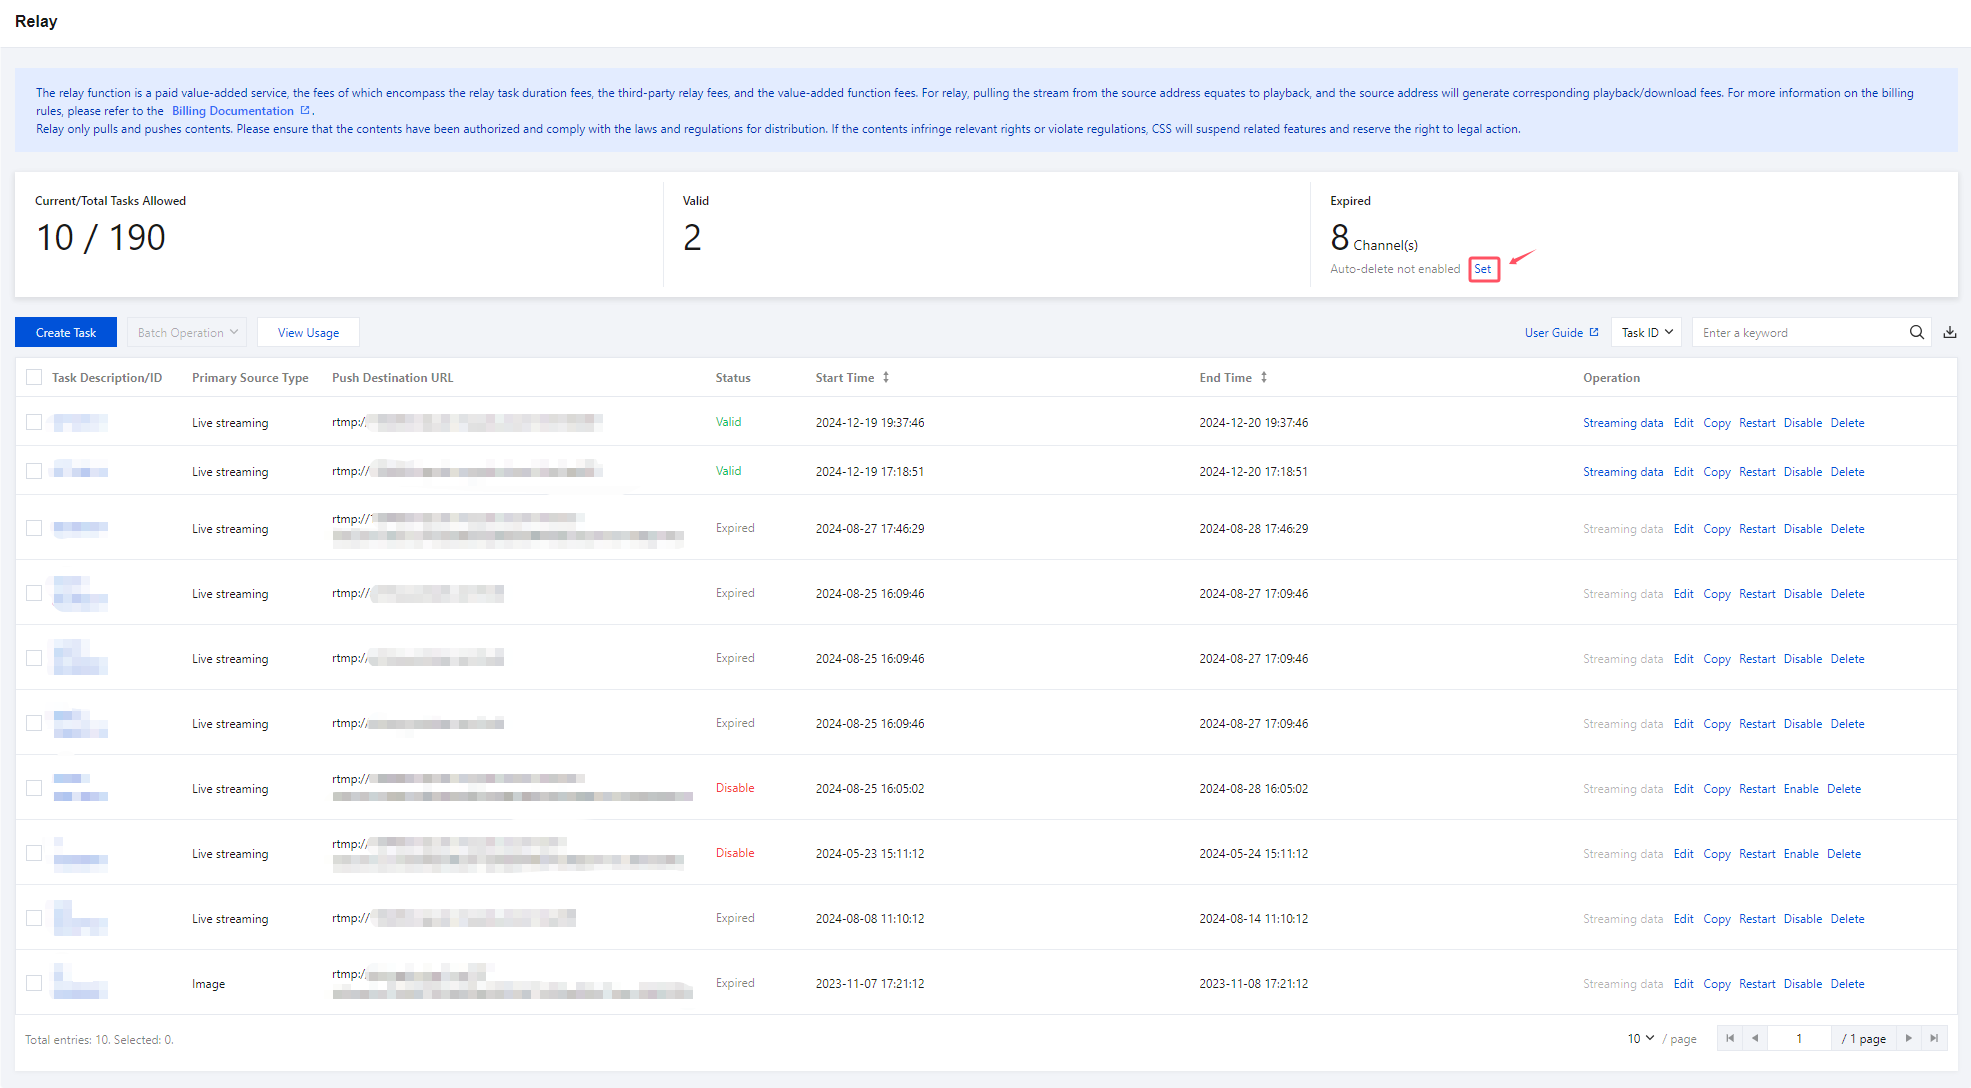
Auto-Deleting Expired Tasks
A task expires after its end time. If you have too many relay tasks, you may fail to create new ones. To avoid this, you can enable auto-delete for the system to delete expired tasks automatically at the specified time. Deleted tasks cannot be recovered.
1. Go to Relay, and click Set in the Expired area.
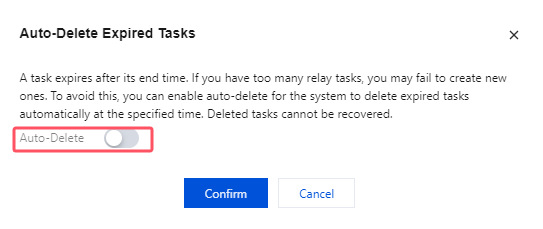
2. Click
to enable auto-delete.
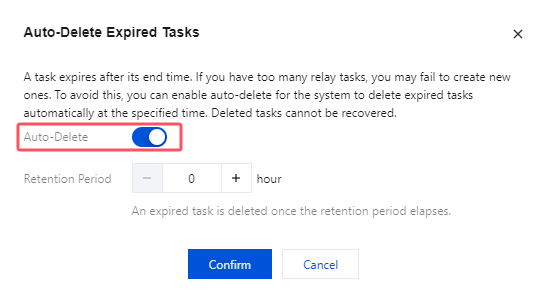
3. Specify a period (1-24 hours) to retain expired tasks before they are deleted.