Normally, live streaming domain names use the Hypertext Transfer Protocol (HTTP). HTTP can be converted to Hyper Text Transfer Protocol over Secure Socket Layer (HTTPS) using SSL/TLS protocol for encrypted data transmission. You can go to Certificate Management to query and configure SSL certificates for domain names.
How to Configure
The purpose of configuring an SSL certificate for a domain name is to encrypt key user data for secure transmission. A Secure Sockets Layer (SSL) certificate allows a site to switch from HTTP (HyperText Transfer Protocol) to its SSL-based encrypted version HTTPS (HyperText Transfer Protocol over Secure Socket Layer). Currently, only the playback domain name supports the configuration of SSL certificates.
Configuring Certificate
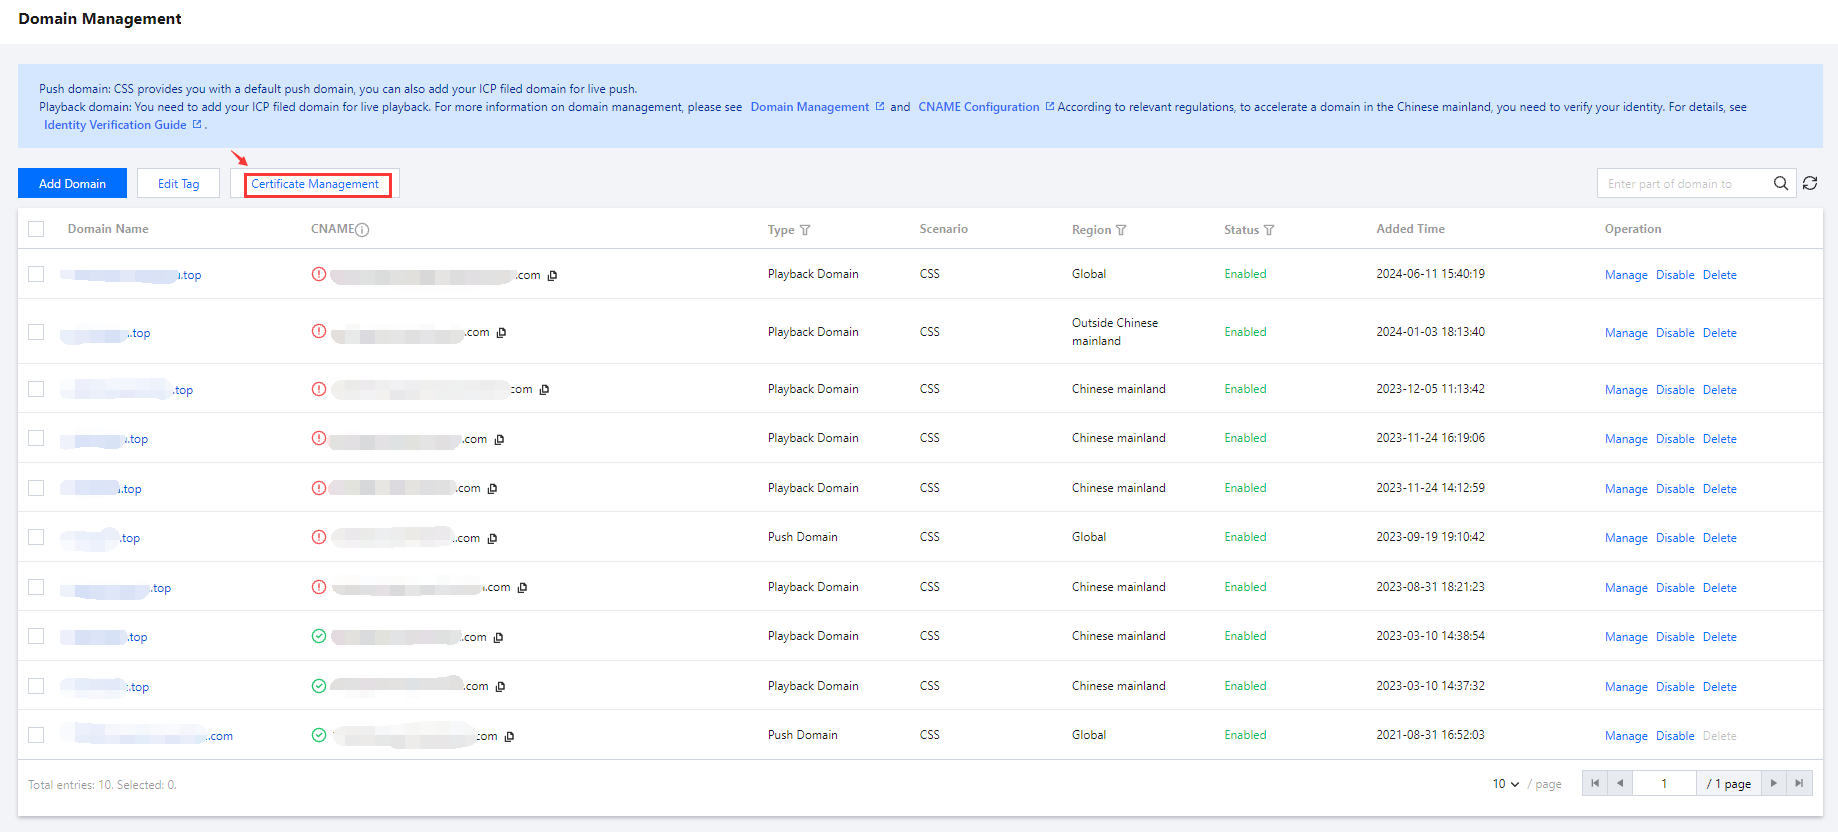
1. Go to Domain Management in the CSS console, and click Certificate Management to go to the certificate management page.
2. Click Configure Certificate to add a certificate configuration.
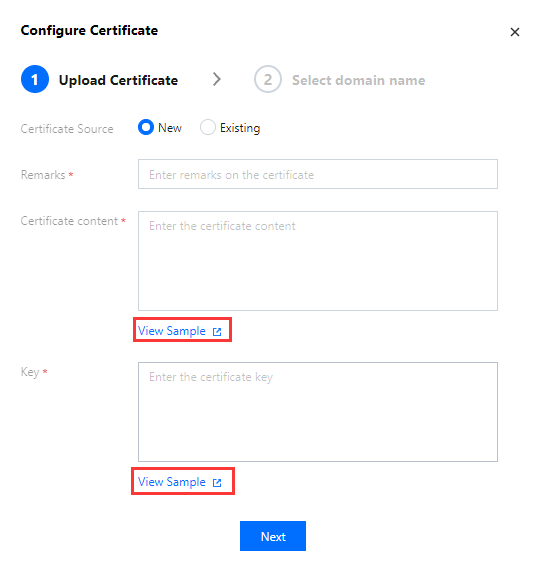
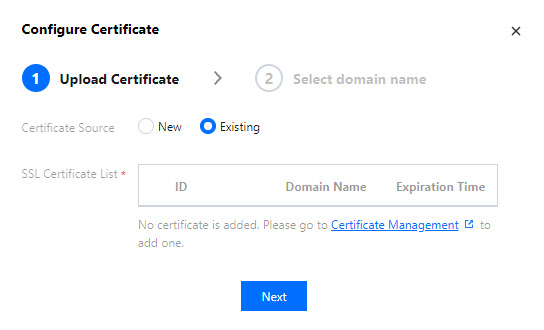
3. In the certificate configuration pop-up window, select a certificate source:
Self-owned certificate: enter remarks, content, and key of this certificate. After the configuration is saved, the certificate info will be synced to Certificate Management in the SSL Certificate Service console. For details about how to set the certificate content and key, please see HTTPS Configuration.
Tencent Cloud-hosted certificate: select a certificate you purchased in the SSL Certificate Service console.
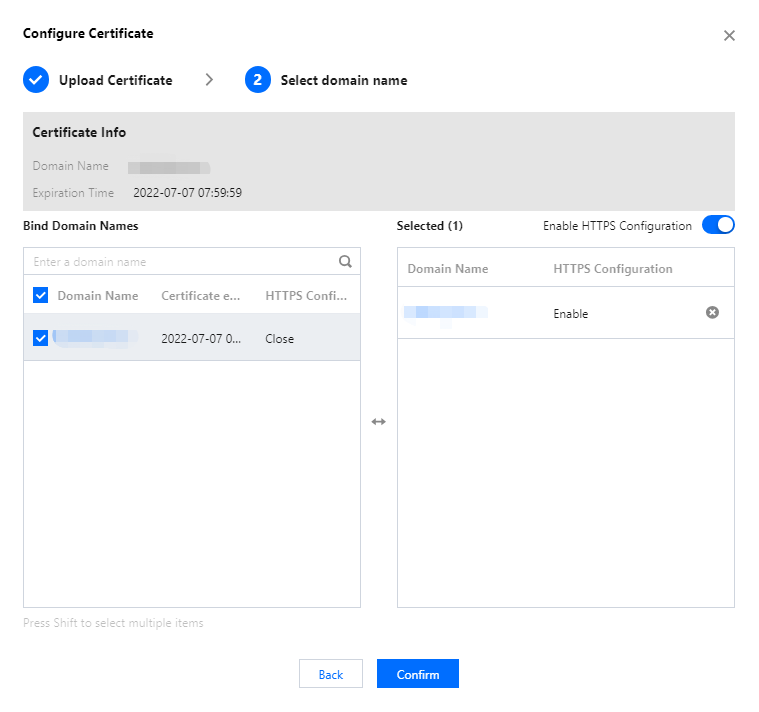
4. After the certificate is confirmed to be available, click Next to enter the domain name configuration page.
5. In Bind Domain Names, select one or more playback domain names which match the certificate. If a selected domain name is already bound to a certificate, the new certificate will apply.
6. In Selected, you can view selected domain names and whether their HTTPS configuration is enabled.
7. Choose whether to enable HTTPS Configuration for selected domain names:
Note:
Toggling Enable HTTPS Configuration on will enable HTTPS configuration for the domain names.
Enable HTTPS Configuration is enabled by default. If you toggle this button off, the HTTPS configuration status of the domain names will not change after binding, with only their certificate updated.
8. Click Confirm.
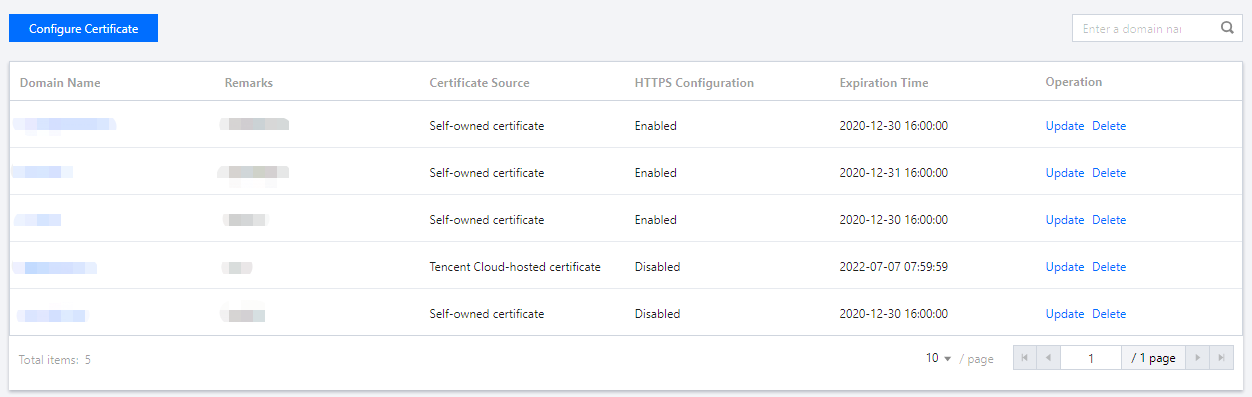
Viewing Certificate Configuration
After you configure a certificate, you can go to Certificate Management to view its configuration, including the domain name, remarks, source, HTTPS configuration, and expiration time.
Updating Certificate Configuration
1. Go to Certificate Management, find the target certificate configuration in the list, and click Update on its right.
2. On the certificate configuration page, configure the certificate again.
3. Click Confirm.
Deleting Certificate Configuration
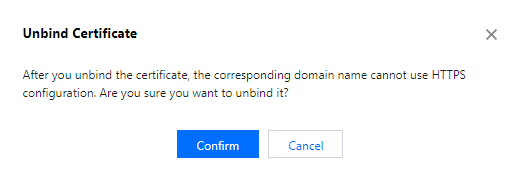
1. Go to Certificate Management, find the target certificate configuration in the list, and click Delete on its right.
2. In the confirmation pop-up window, click Confirm.
Note:
After you unbind the certificate, the domain names cannot use HTTPS configuration.