Custom Definition Click Redirect
Download
Focus Mode
Font Size
Feature Overview
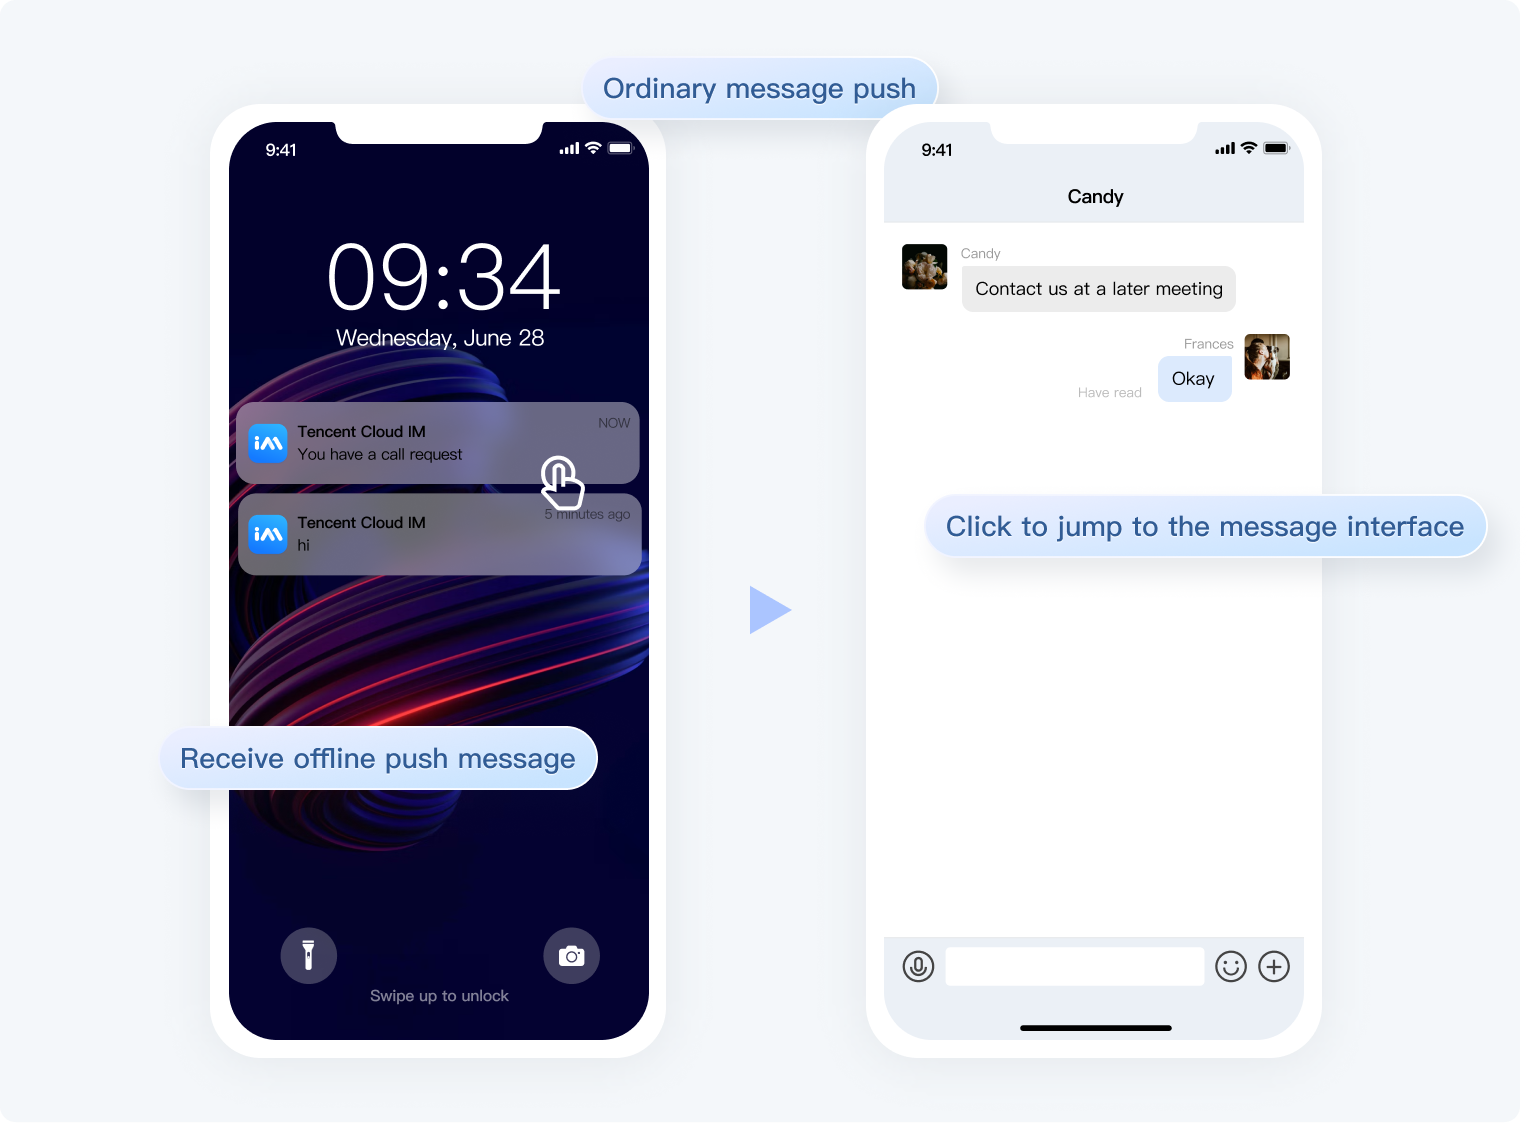
Custom click actions let you pass specific parameters (like custom payload fields) in push notifications, so your app can perform targeted navigation—such as deep linking to specific pages or triggering specific features. This guide covers support for custom click actions across different push notification channels and implementation details.
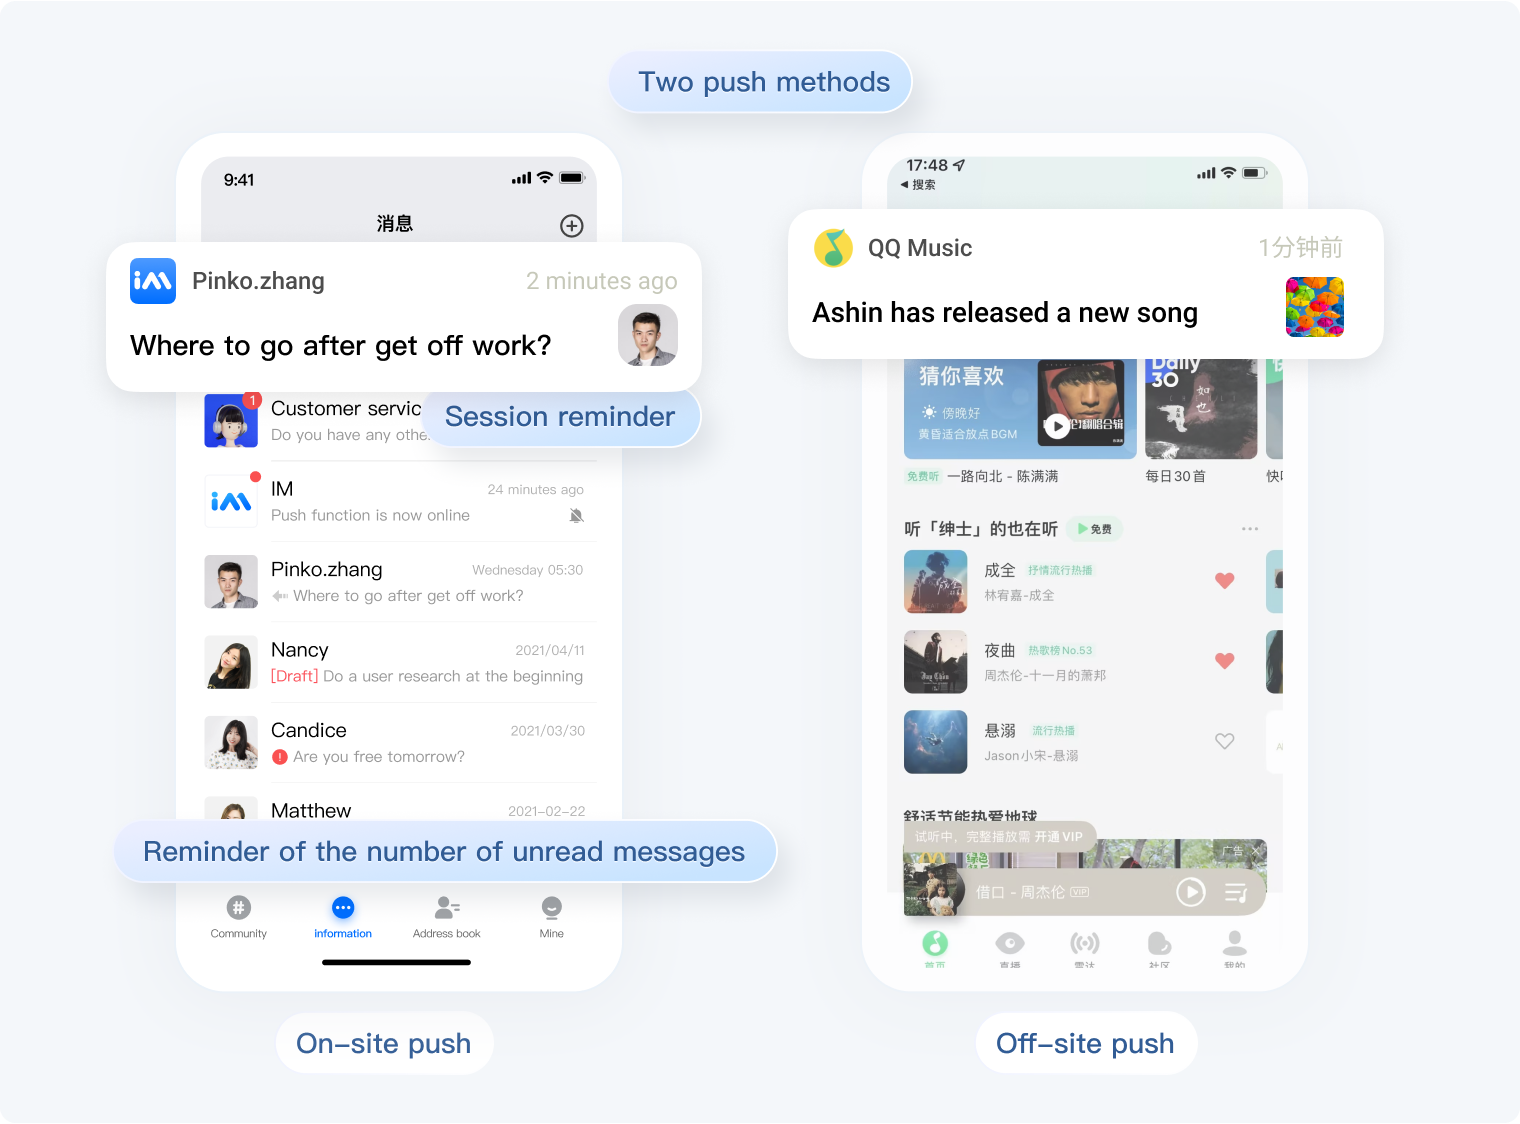
Effect Example
 |  |
Vendor Channel Support
Device type. | Whether custom redirect is supported |
iOS | Supported |
Huawei | Supported |
Honor | Supported |
Xiaomi | Supported |
vivo | Supported |
OPPO | Supported |
Meizu | Supported |
FCM | Supported |
Implementation
After receiving an offline push, the notification bar will display the push message as shown. Clicking on the notification bar can custom open the application interface.
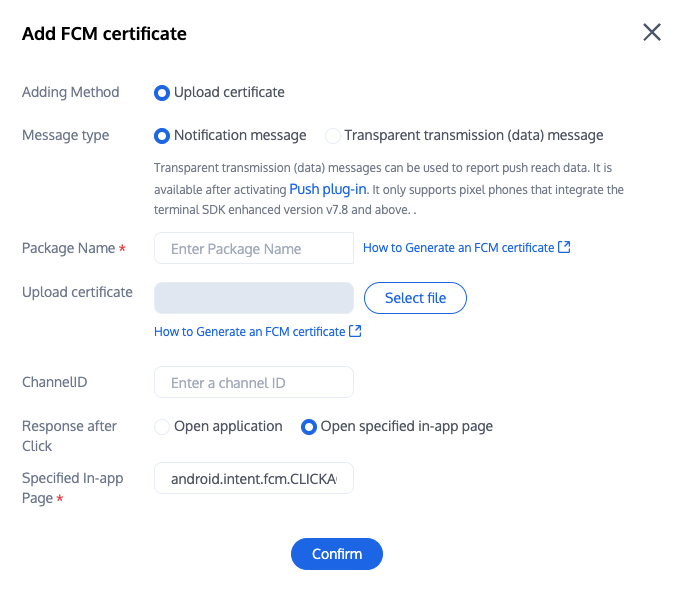
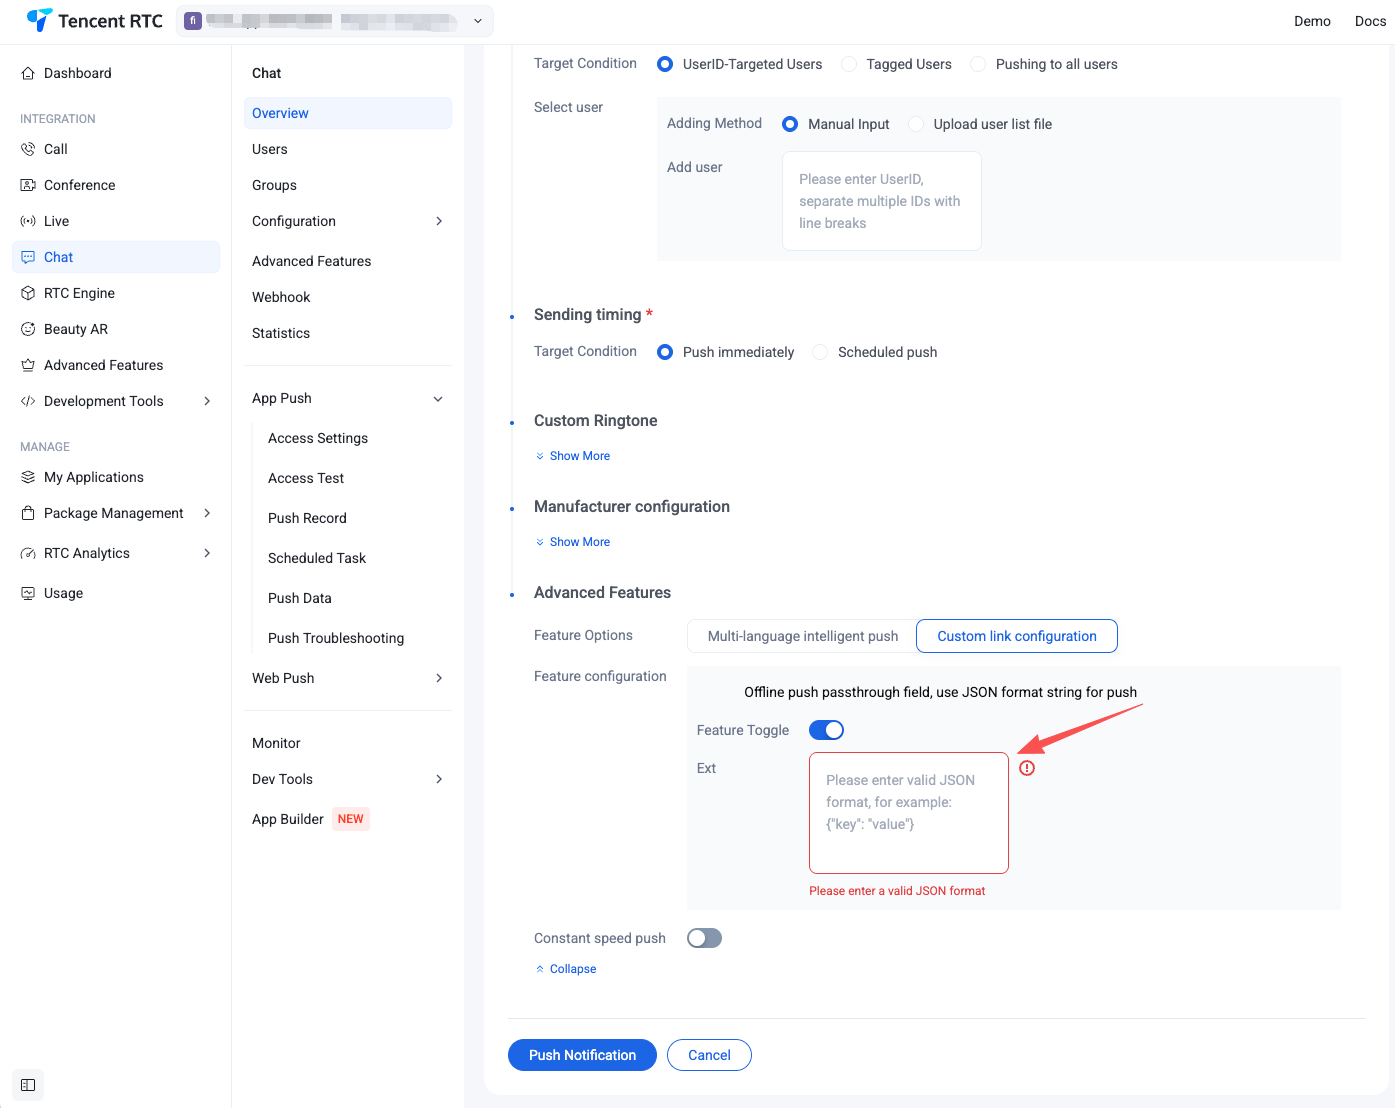
1. For console configuration, click on 'Subsequent Actions' and configure as follows, choose Open the specified interface within the app, and the plugin users will by default fill in the jump parameters.
2. Send message fill pass-through parameter
{"MsgBody": [...] // Related description here"OfflinePushInfo": {"PushFlag": 0,"Title":"Offline Push Title""Desc": "offline push content""Ext": "{\\"entity\\":{\\"key1\\":\\"value1\\",\\"key2\\":\\"value2\\"}}" // passthrough field, push uses string in json format}}
V2TIMOfflinePushInfo v2TIMOfflinePushInfo = new V2TIMOfflinePushInfo();v2TIMOfflinePushInfo.setTitle("Push Title");v2TIMOfflinePushInfo.setDesc("push content");OfflinePushExtInfo offlinePushExtInfo = new OfflinePushExtInfo();offlinePushExtInfo.getBusinessInfo().setSenderId("senderID");offlinePushExtInfo.getBusinessInfo().setSenderNickName("senderNickName");if (chatInfo.getType() == V2TIMConversation.V2TIM_GROUP) {offlinePushExtInfo.getBusinessInfo().setChatType(V2TIMConversation.V2TIM_GROUP);offlinePushExtInfo.getBusinessInfo().setSenderId("groupID");}// Pass-through field fillv2TIMOfflinePushInfo.setExt(new Gson().toJson(offlinePushExtInfo).getBytes());final V2TIMMessage v2TIMMessage = message.getTimMessage();String msgID = V2TIMManager.getMessageManager().sendMessage(v2TIMMessage, isGroup ? null : userID, isGroup ? groupID : null,V2TIMMessage.V2TIM_PRIORITY_DEFAULT, false, v2TIMOfflinePushInfo, new V2TIMSendCallback<V2TIMMessage>() {@Overridepublic void onProgress(int progress) {}@Overridepublic void onError(int code, String desc) {TUIChatUtils.callbackOnError(callBack, TAG, code, desc);}@Overridepublic void onSuccess(V2TIMMessage v2TIMMessage) {TUIChatLog.v(TAG, "sendMessage onSuccess:" + v2TIMMessage.getMsgID());message.setMsgTime(v2TIMMessage.getTimestamp());TUIChatUtils.callbackOnSuccess(callBack, message);}});
3. After receiving the push message, clicking the notification bar will trigger the component to callback the click event and pass through the offline message.
Note:
It is recommended to place the registration callback timing in the onCreate() function of the application.
TIMPushManager.getInstance().addPushListener(new TIMPushListener() {@Overridepublic void onNotificationClicked(String ext) {Log.d(TAG, "onNotificationClicked =" + ext);// Getting ext for Definition redirect// Example: navigate to the corresponding chat interfaceOfflinePushExtInfo offlinePushExtInfo = null;try {offlinePushExtInfo = new Gson().fromJson(extString, OfflinePushExtInfo.class);if (offlinePushExtInfo.getBusinessInfo().getChatAction() == OfflinePushExtInfo.REDIRECT_ACTION_CHAT) {String senderId = offlinePushExtInfo.getBusinessInfo().getSenderId();if (TextUtils.isEmpty(senderId)) {return;}TUIUtils.startChat(senderId, offlinePushExtInfo.getBusinessInfo().getSenderNickName(), offlinePushExtInfo.getBusinessInfo().getChatType());}} catch (Exception e) {Log.e(TAG, "getOfflinePushExtInfo e: " + e);}}});
The component will notify the application in the form of a callback or broadcast, and the application can configure the app's page jump in the callback.
Note:
It is recommended to place the registration callback timing in the onCreate() function of the application.
1. The callback method is as follows:
TUICore.registerEvent(TUIConstants.TIMPush.EVENT_NOTIFY, TUIConstants.TIMPush.EVENT_NOTIFY_NOTIFICATION, new ITUINotification() {@Overridepublic void onNotifyEvent(String key, String subKey, Map<String, Object> param) {Log.d(TAG, "onNotifyEvent key = " + key + "subKey = " + subKey);if (TUIConstants.TIMPush.EVENT_NOTIFY.equals(key)) {if (TUIConstants.TIMPush.EVENT_NOTIFY_NOTIFICATION.equals(subKey)) {if (param != null) {String extString = (String)param.get(TUIConstants.TIMPush.NOTIFICATION_EXT_KEY);// Getting ext for Definition redirect}}}}});
2. The broadcast method is as follows:
// Dynamic Broadcast RegistrationIntentFilter intentFilter = new IntentFilter();intentFilter.addAction(TUIConstants.TIMPush.NOTIFICATION_BROADCAST_ACTION);LocalBroadcastManager.getInstance(context).registerReceiver(localReceiver, intentFilter);// Broadcast Receiverpublic class OfflinePushLocalReceiver extends BroadcastReceiver {public static final String TAG = OfflinePushLocalReceiver.class.getSimpleName();@Overridepublic void onReceive(Context context, Intent intent) {DemoLog.d(TAG, "BROADCAST_PUSH_RECEIVER intent = " + intent);if (intent != null) {String ext = intent.getStringExtra(TUIConstants.TIMPush.NOTIFICATION_EXT_KEY);// Getting ext for Definition redirect} else {Log.e(TAG, "onReceive ext is null");}}}
If you need to customize the parsing of received remote push notifications, you can implement it as follows:
1. Send message fill pass-through parameter
{"MsgBody": [...] // Related description here"OfflinePushInfo": {"PushFlag": 0,"Title":"Offline Push Title""Desc": "offline push content""Ext": "{\\"entity\\":{\\"key1\\":\\"value1\\",\\"key2\\":\\"value2\\"}}" // passthrough field, push uses string in json format}}
#import <TUICore/OfflinePushExtInfo.h>V2TIMOfflinePushInfo *pushInfo = [[V2TIMOfflinePushInfo alloc] init];pushInfo.title = @"Push Title";pushInfo.desc = @"push content";BOOL isGroup = groupID.length > 0;NSString *senderId = isGroup ? (groupID) : ([TUILogin getUserID]);NSString *nickName = isGroup ? (conversationData.title) : ([TUILogin getNickName] ?: [TUILogin getUserID]);OfflinePushExtInfo *extInfo = [[OfflinePushExtInfo alloc] init];OfflinePushExtBusinessInfo * entity = extInfo.entity;entity.action = 1;entity.content = @"push content";entity.sender = senderId;entity.nickname = nickName;entity.faceUrl = [TUILogin getFaceUrl] ?: @"";entity.chatType = [isGroup ? @(V2TIM_GROUP) : @(V2TIM_C2C) integerValue];entity.version = kOfflinePushVersion;// Pass-through fieldpushInfo.ext = [extInfo toReportExtString];

2. Click the offline push message, and the component will Webhook the click event and pass-through fill parameters.
Note:
It is recommended to place the registration callback timing in the didFinishLaunchingWithOptions function of the AppDelegate.
- (BOOL)application:(UIApplication *)application didFinishLaunchingWithOptions:(NSDictionary *)launchOptions {[TIMPushManager addPushListener:self];return YES;}#pragma mark - TIMPushListener- (void)onNotificationClicked:(NSString *)ext {// Getting ext for Definition redirect}
You need to implement the
- onRemoteNotificationReceived method in the AppDelegate.m file.#pragma mark - TIMPush- (BOOL)onRemoteNotificationReceived:(NSString *)notice {//- If YES is returned, TIMPush will not execute the built-in TUIKit offline push parsing logic, leaving it entirely to you to handle.//NSString *ext = notice;//OfflinePushExtInfo *info = [OfflinePushExtInfo createWithExtString:ext];//return YES;//- If NO is returned, TIMPush will continue to execute the built-in TUIKit offline push parsing logic and continue to callback - navigateToBuiltInChatViewController:groupID: method.return NO;}
Step 1: Manufacturer Configuration
For console configuration, click on 'Subsequent Actions' and configure as follows, choose Open the specified interface within the app, and the plugin users will by default fill in the jump parameters.

Step 2: Client Code Configuration
Step 3: Handle Message Click Callback and Parse Parameters
If you need to customize the parsing of received remote push notifications, you can implement it as follows:
Note:
It is recommended to register the callback in the main() function at the program entry.
TIMPushListener timPushListener = TIMPushListener(onNotificationClicked: (String ext) {debugPrint("ext: $ext");// Getting ext for Definition redirect});tencentCloudChatPush.addPushListener(listener: timPushListener);
Please define a function to accept push message click callback events.
Define the function with the parameter format
{required String ext, String? userID, String? groupID}.Among them, the ext field carries the complete ext information specified by the sender. If not specified, there is a default value. You can parse this field to navigate to the corresponding page.
The userID and groupID fields are automatically parsed by the plugin from the ext JSON String to get the single chat userID and group chat groupID information. If you do not customize the ext field, the ext field is specified by the SDK or UIKit by default, and you can use this default parsing. If parsing fails, it will be null.
You can define a function to receive this callback and use it to navigate to the corresponding Session Page or your Business Page.
Example below:
void _onNotificationClicked({required String ext, String? userID, String? groupID}) {print("_onNotificationClicked: $ext, userID: $userID, groupID: $groupID");if (userID != null || groupID != null) {// Redirect to the corresponding Message page based on userID or groupID.} else {// Based on the ext field, write your own parsing method to redirect to the corresponding page.}}
Please note, do not call in the main method of the Flutter program entry.
After successfully calling the
TencentCloudChatPush().registerPush method, you can receive offline push notifications.TencentCloudChatPush().registerPush(onNotificationClicked: _onNotificationClicked,sdkAppId: Your sdkAppId,appKey: "client key",apnsCertificateID: Your configured Certificate ID);
Help and Support
Was this page helpful?
You can also Contact sales or Submit a Ticket for help.
Help us improve! Rate your documentation experience in 5 mins.
Feedback