tencent cloud

Chat

News and Announcements
Release Notes
Announcements
Product Introduction
Overview
Basic Concepts
Scenarios
Features
Account System
User Profile and Relationship Chain
Message Management
Group Related
Official Account
Audio/Video Call
Use Limits
Purchase Guide
Billing Overview
Pricing
Purchase Instructions
Renewal Guide
Service Suspension Explanation
Refund Policy
Development Guidelines
Demo Zone
Activate Service
Free Demos
Quick Run
Download
SDK and Demo Source Code
Update Log
Chat Interaction (UI Included)
TUIKit Introduction
Getting Started
Full-feature Integration
Single-function Integration
Build with AI
Build Basic Interfaces
More Features
Customizing Appearance
Internationalization
Push Service
Overview
Noun explanation
Activate the Service
Quick Start
Manufacturer Channel
Statistics
Troubleshooting Tool
Client APIs
REST API
Push Callback
Advanced Features
Release Notes
Error Codes
FAQS
Desk
Overview
Quick Start
Integration Guide
Admin Operation Manual
Agent Manual
More Practices
Live Streaming Setup Guide
AI Chatbot
Super Large Entertainment and Collaboration Community
Discord Implementation Guide
How to Integrate Chat into Games
WhatsApp Channel-style Official Account Integration Solution
Send Red Packet
Firewall Restrictions
No UI Integration
Quick Start
SDK Integration
Initialization
Login and Logout
Message
Conversation
Group
Community Topic
User Profile and Relationship Chain
Offline Push
Cloud Search
Local Search
Official Channel Management
Client APIs
JavaScript
Android
iOS & macOS
Swift
Flutter
Electron
Unity
React Native
C APIs
C++
Server APIs
Secure authentication with UserSig
RESTful APIs
Webhooks
Console Guide
New Console Introduction
Creating and Upgrading an Application
Basic Configuration
Feature Configuration
Account Management
Group Management
Official Channel Management
Webhook Configuration
Usage
Viewing Guide for Resource Packages
Real-Time Monitor
Auxiliary Development Tools
Access Management
Advanced Features
FAQs
uni-app FAQs
Purchase
SDK
Account Authentication
User Profile and Relationship Chain
Message
Group
Audio-Video Group
Nickname and Profile Photo
Security Compliance Certification
Service Level Agreement
Security Compliance Certification
Chat Policies
Privacy Policy
Data Privacy and Security Agreement
Migration
Migration Solutions
Migration Solutions Lite
Error Codes
Contact Us

Quick Start

PDF
Focus Mode
Font Size
Last updated: 2025-02-28 17:32:39

Overview

Tencent Cloud Desk is divided into three components: user side, agent side, and management side, tailored respectively for your users, agents, and administrators. You can follow this document to complete the process of activating, configuring, and integrating Intelligent Customer Service.

Integration Guide

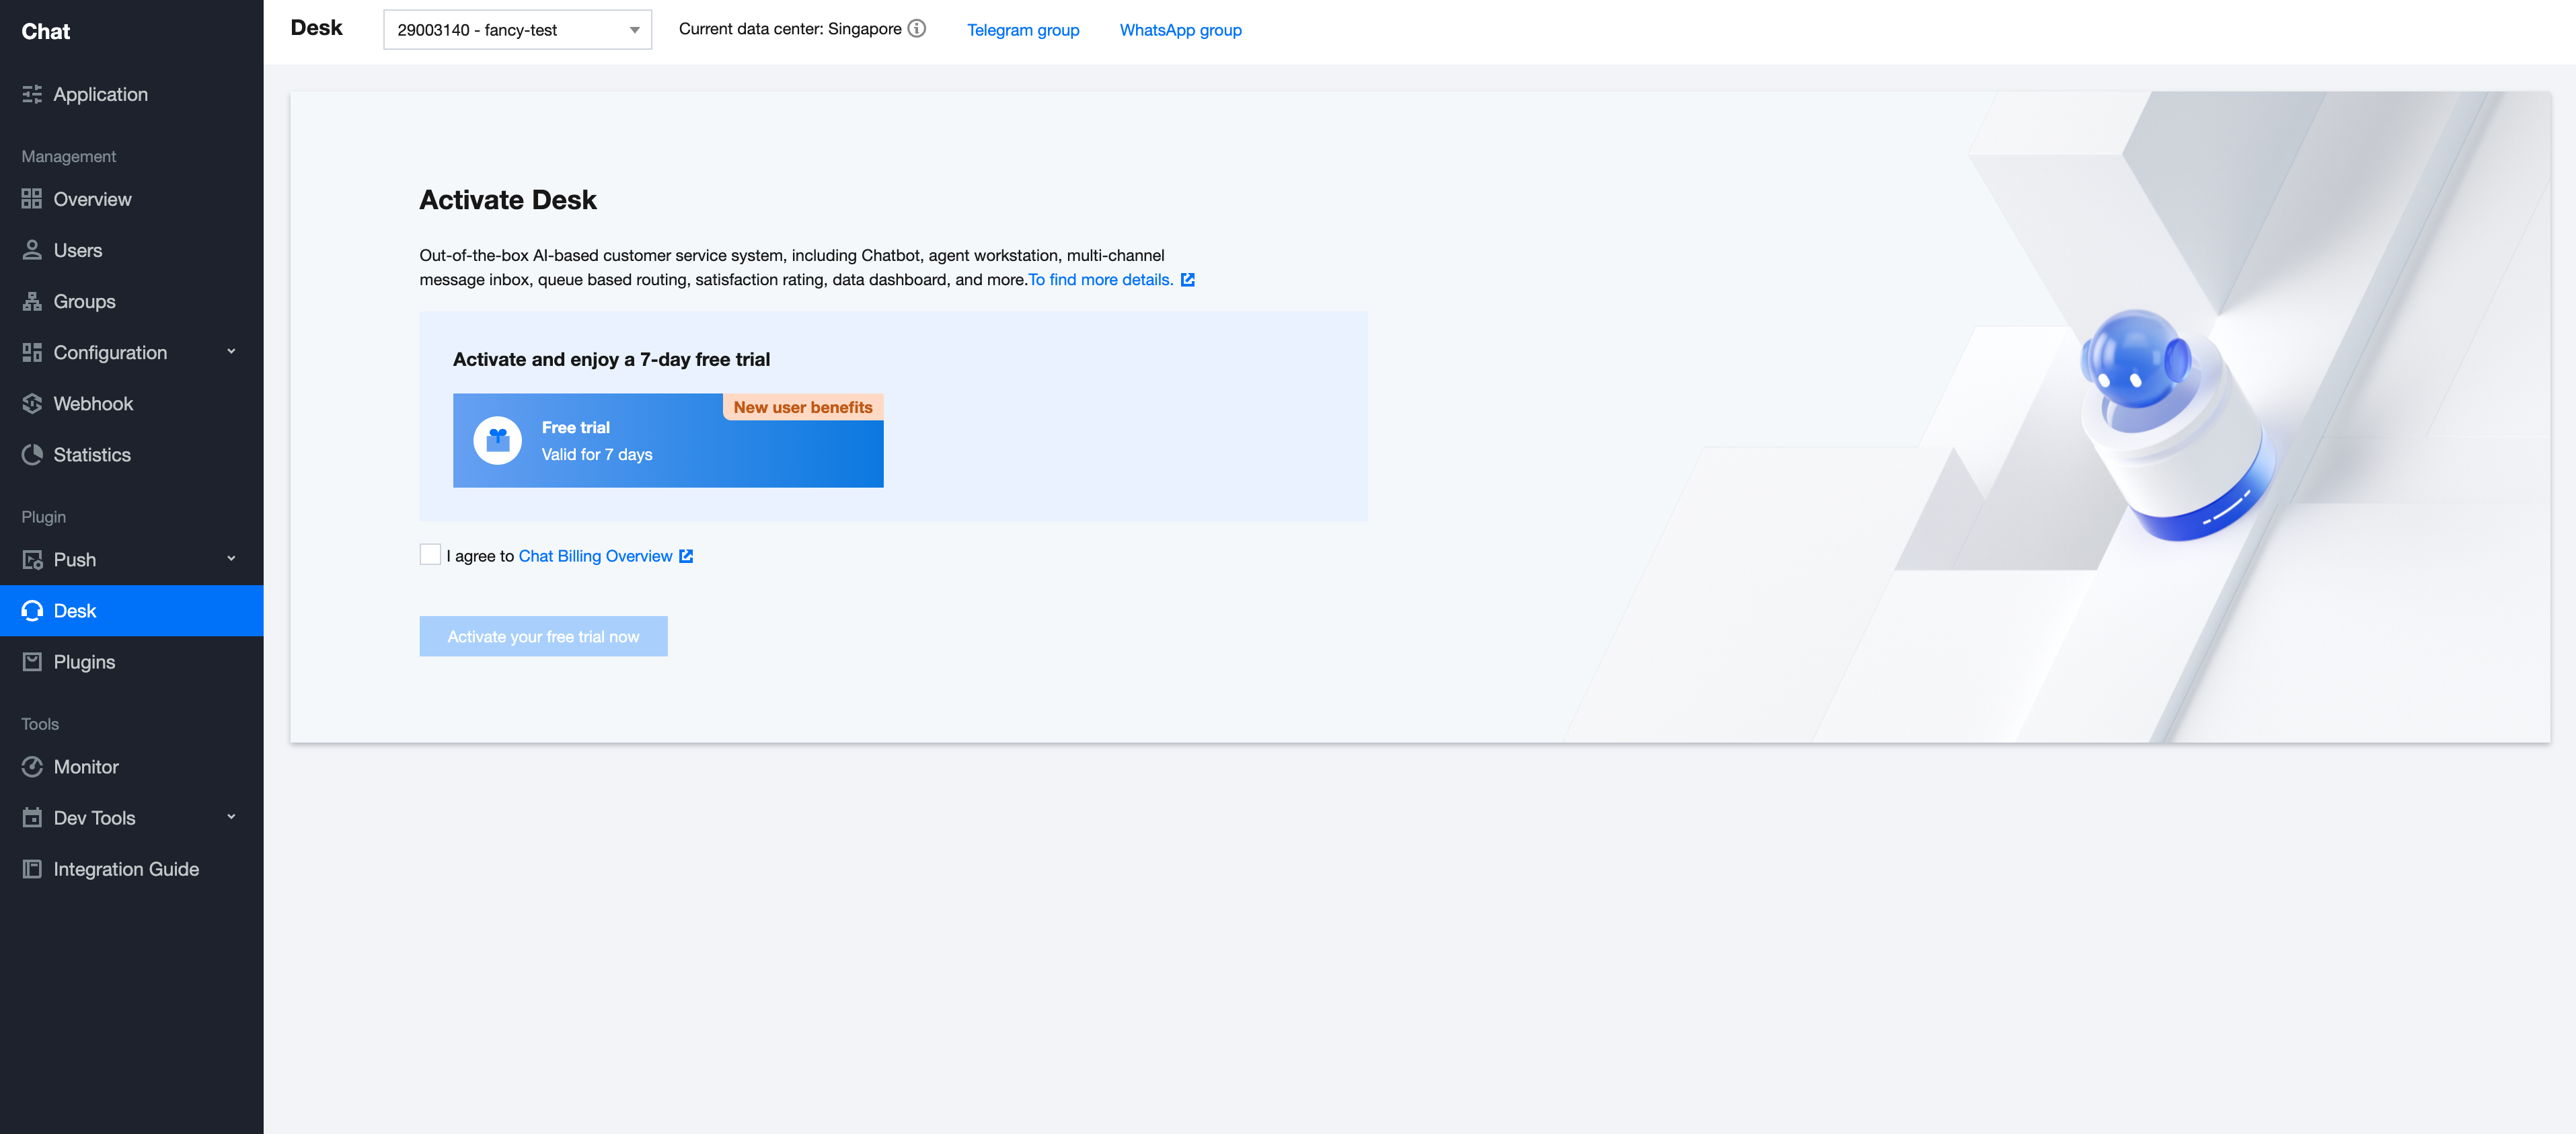
Activating Tencent Cloud Desk

Create a Chat application, proceed to the Chat Console to activate the Desk.


Logging into the Desk Management Panel

Method One: After activation, click Go to management panel within the manage configuration for password-free access to the management panel.


Method Two: After activating Desk, you will receive the login credentials via Tencent Cloud internal messages, which you can use to directly log into the management panel.

Configuring the User End

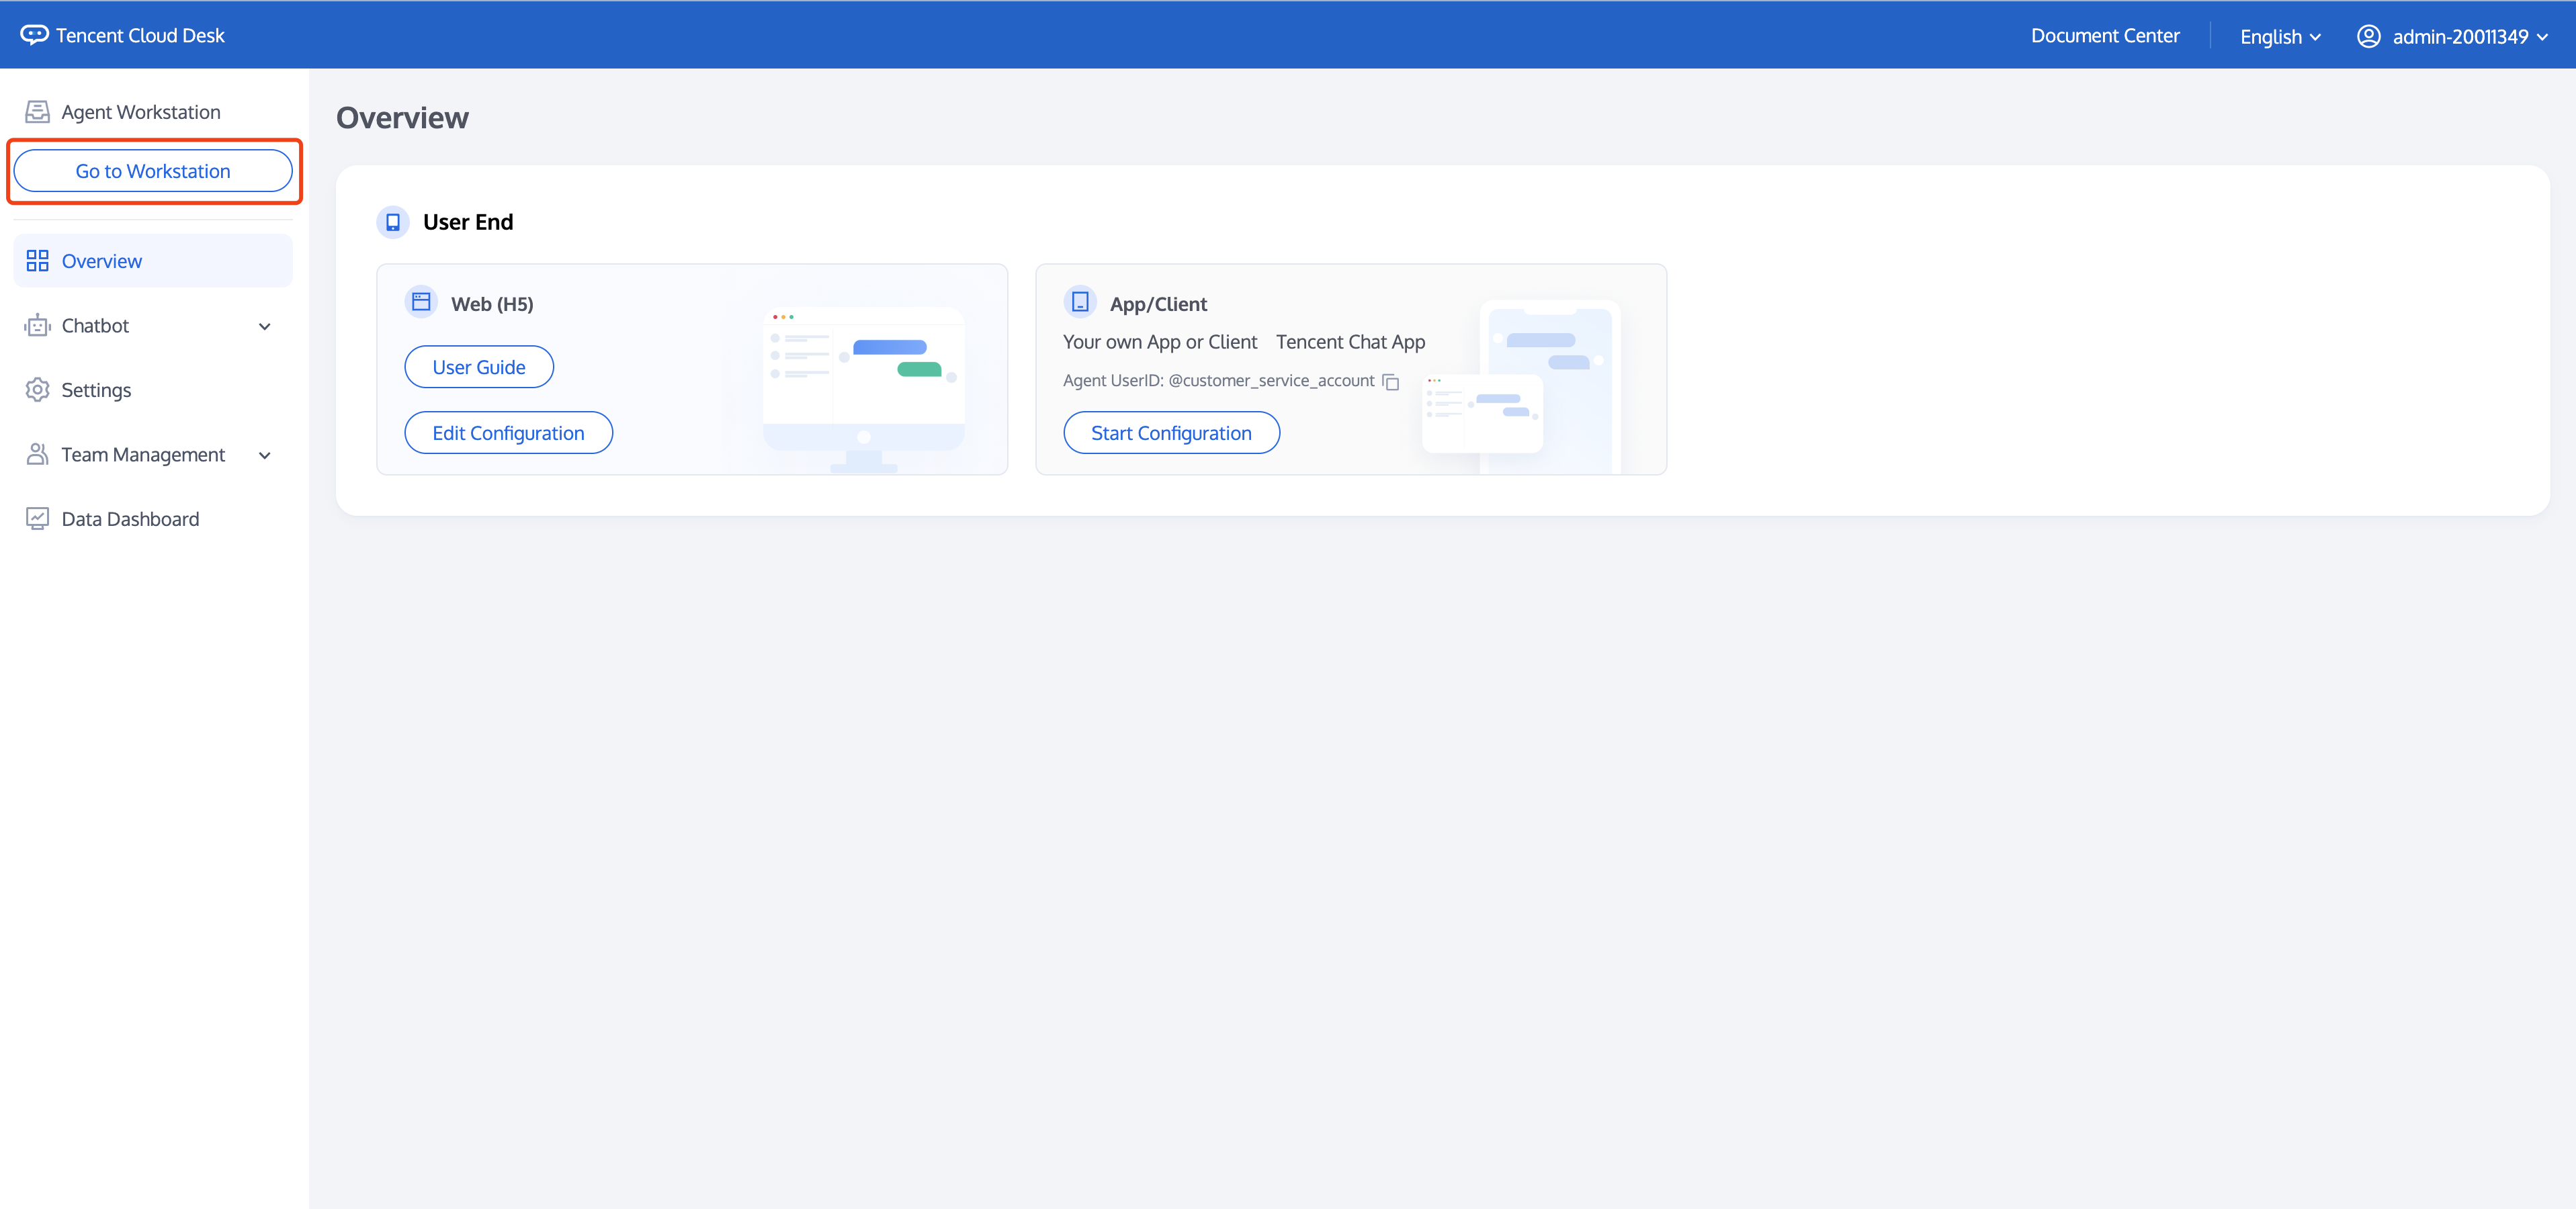
Based on your scenario, select the appropriate user interface and complete its configuration:
User Inquiry Channels
Suitable Scenarios
Web (H5)
No development required, directly configure a web-based customer service page that can be embedded or linked to any part of your website. Supports both web and H5, but the UI is not customizable.
Integrate customer service functionality within your Chat application.
Your users send inquiries to the Chat customer service virtual number, which are routed to available agents.
After completing the Application Configuration, use the customer service UserID for setup.

Configuring the Chatbot

The Chatbot, powered by Tencent Cloud's cutting-edge artificial intelligence technology, provides advanced FAQ capabilities. You can quickly implement a multi-platform, cross-terminal chatbot. Once Desk is activated, the Chatbot function is enabled by default; if you need to disable the Chatbot or check its status, please see Basic Configuration.


For further management of the knowledge base, basic configuration, etc., please go to the management panel, as detailed in the Administrator's Manual.

Initiating Conversations

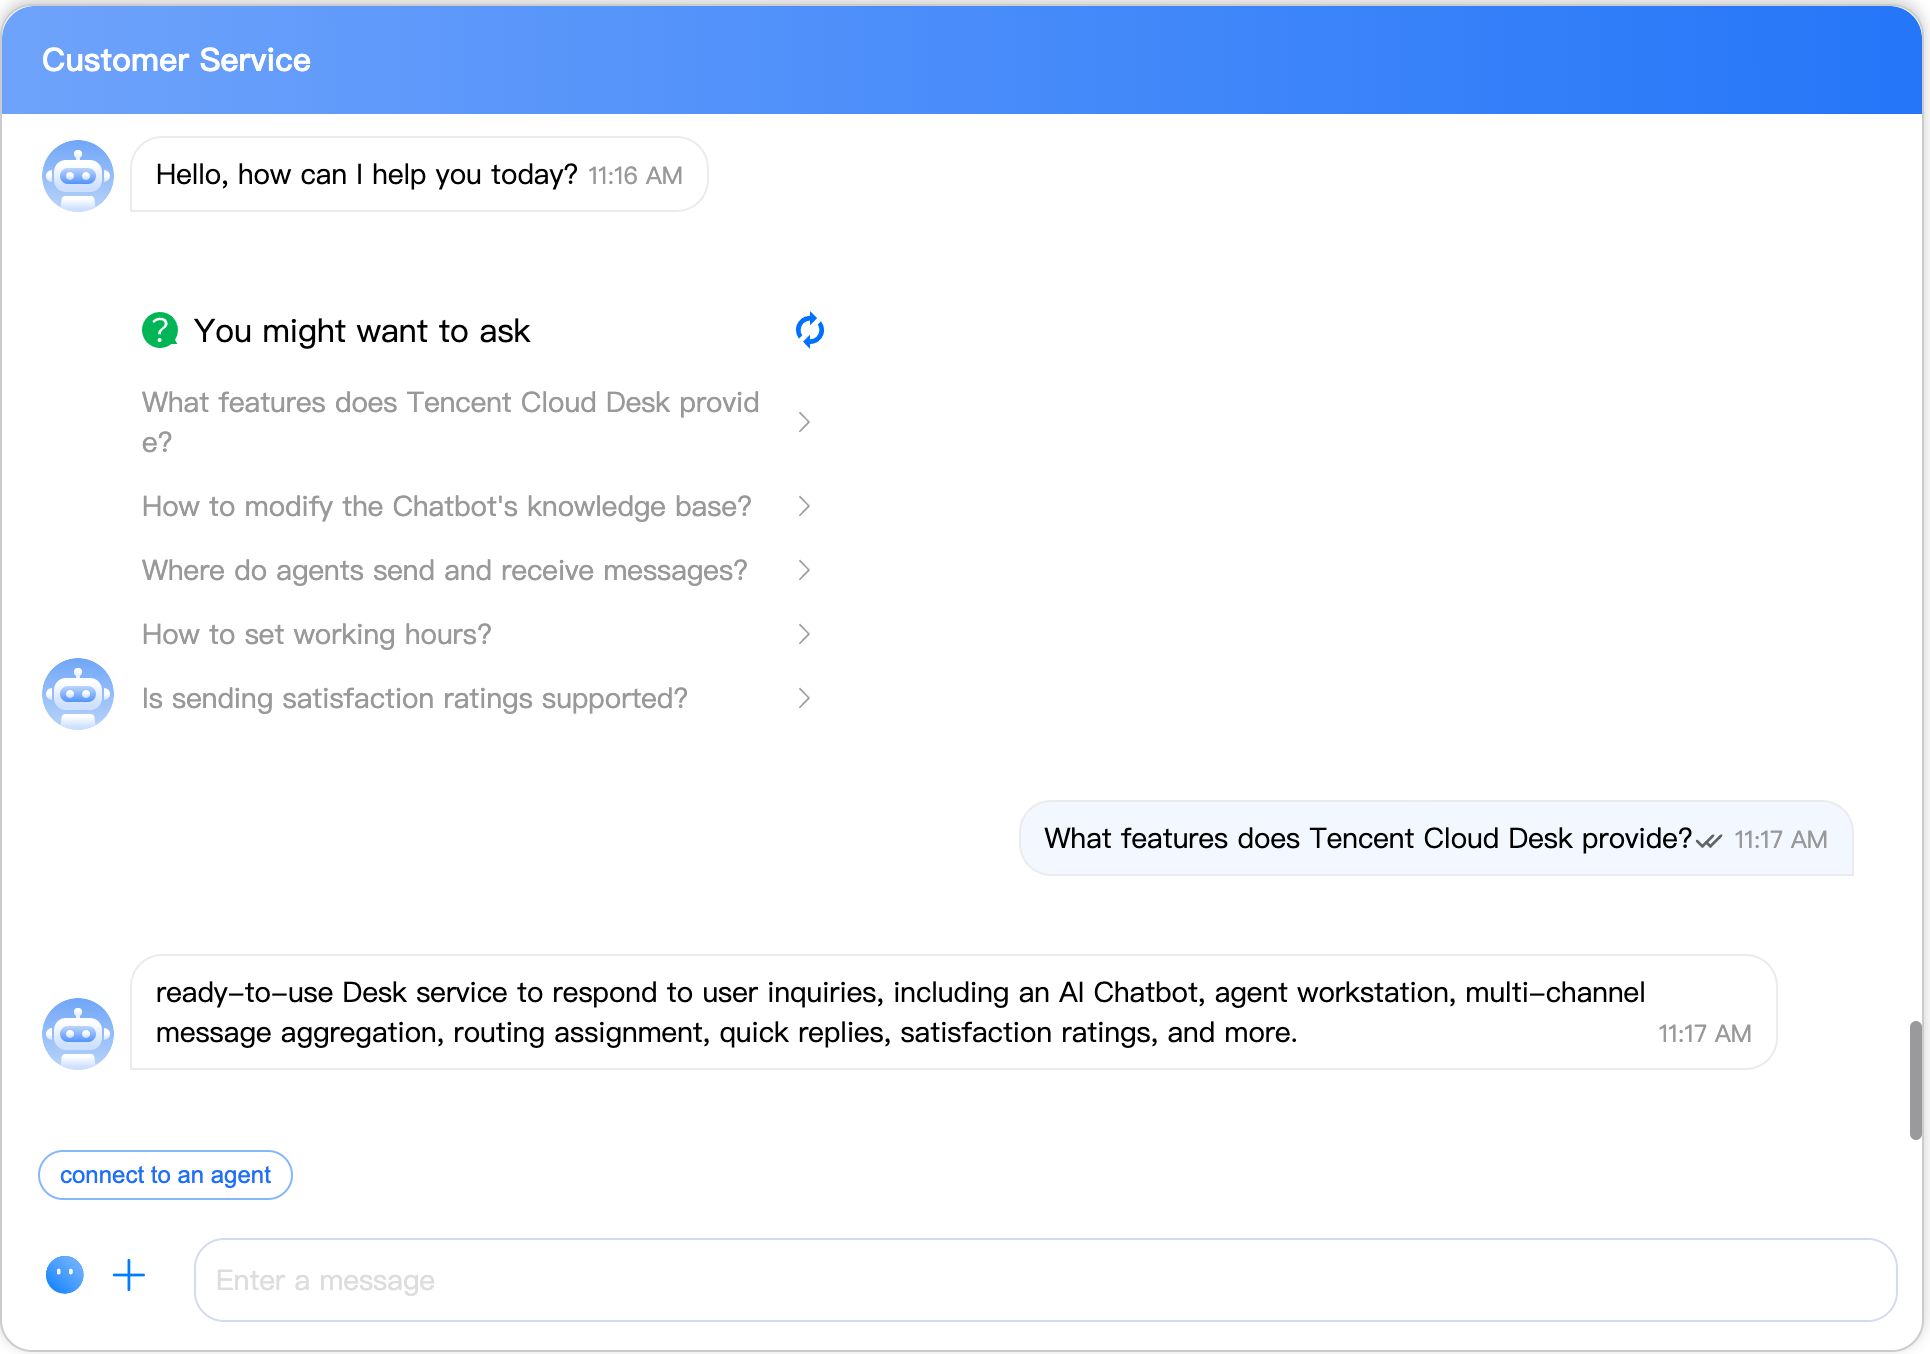
After completing the integration of the user end, you can directly start conversations with the Chatbot on the respective user interface.
If you need to initiate a conversation manually, click "Go to Workstation" in the management panel for password-free access to the workstation.


In the conversation, after choosing to connect to an agent, send messages and conduct customer service consultation at the workstation, as detailed in the Agent Manual.


For further management of agents or sessions, such as team management and session settings, please go to the management panel, as detailed in the Administrator's Manual.

Terminology Explanation

Management Panel: A management platform for managing team member-related information, such as creating adding agents and session settings. For more details, see the Management Panel documentation.
Workstation: A platform where customer service agents handle user inquiries and respond to messages. For more details, see the Agent documentation.
Agent: Refers to personnel who complete user service tasks through online sessions.
User End: Different access mediums for customer service inquiries, supporting both Instant Messaging Chat and web access.


Help and Support

Was this page helpful?

Help us improve! Rate your documentation experience in 5 mins.

Feedback