iOS
Download
Focus Mode
Font Size
This article will guide you in building the audio and video call feature.
Display Effect
The video call effect is shown in the following figure:
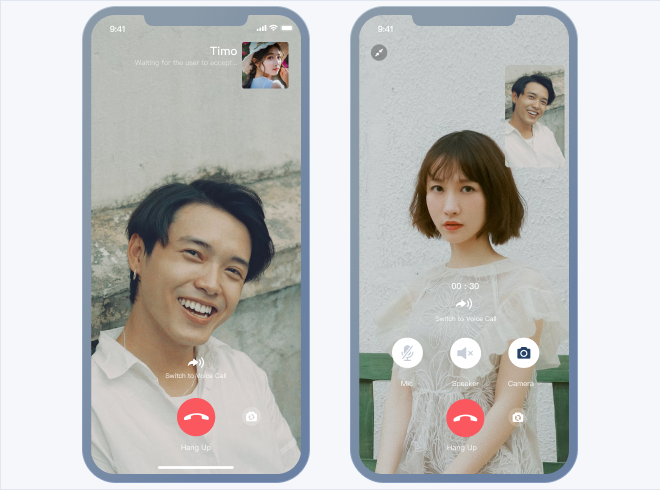
The audio call effect is shown in the following figure:

Environment Requirements
Xcode 10 or later
iOS 9.0 or later
Preconditions
Before building the interface, please ensure that you have completed the following 4 things:
1. Created an application in the console.
2. Created some user accounts in the console.
3. Integrated with
TUICallKit.4. Called the
login API in TUILogin to log in to the component.Note:
1. All components use this API to log in. You can log in once every time you start the application.
2. Please make sure that the login is successful, and we recommend that you do the following in the callback of successful login.
If you haven't completed the above 4 steps, please refer to the corresponding steps in Getting Started first, otherwise you may encounter obstacles when implementing the following features.
If you have already completed them, please continue reading below.
Integration steps
1. log in to Chat Console to activate the audio and video service. For detailed steps, refer to the document: Activate Service.
2. In the pop-up dialog to activate the TRTC
TRTC service, click "Confirm". The system will create a TRTC application with the same SDKAppID as the current Chat application in the TRTC console, allowing reuse of accounts and authentication.3. Integrate the
TUICallKit component. In the podfile, add the following content:// Integrate the TUICallKit componentpod 'TUICallKit_Swift'
After integrating the
TUICallKit component, "Video Call" and "Voice Call" buttons will automatically appear on the chat interface and contact profile screen. When users click on these buttons, TUICallKit will display the call invitation UI and send a call invitation request to the other party.When a user receives a call invitation online,
TUICallKit automatically displays the call receiving UI, allowing the user to accept or reject the call.When a user receives a call invitation offline, offline push capabilities must be utilized to wake up the app call.
Starting a call from the message page is shown in the figure below:
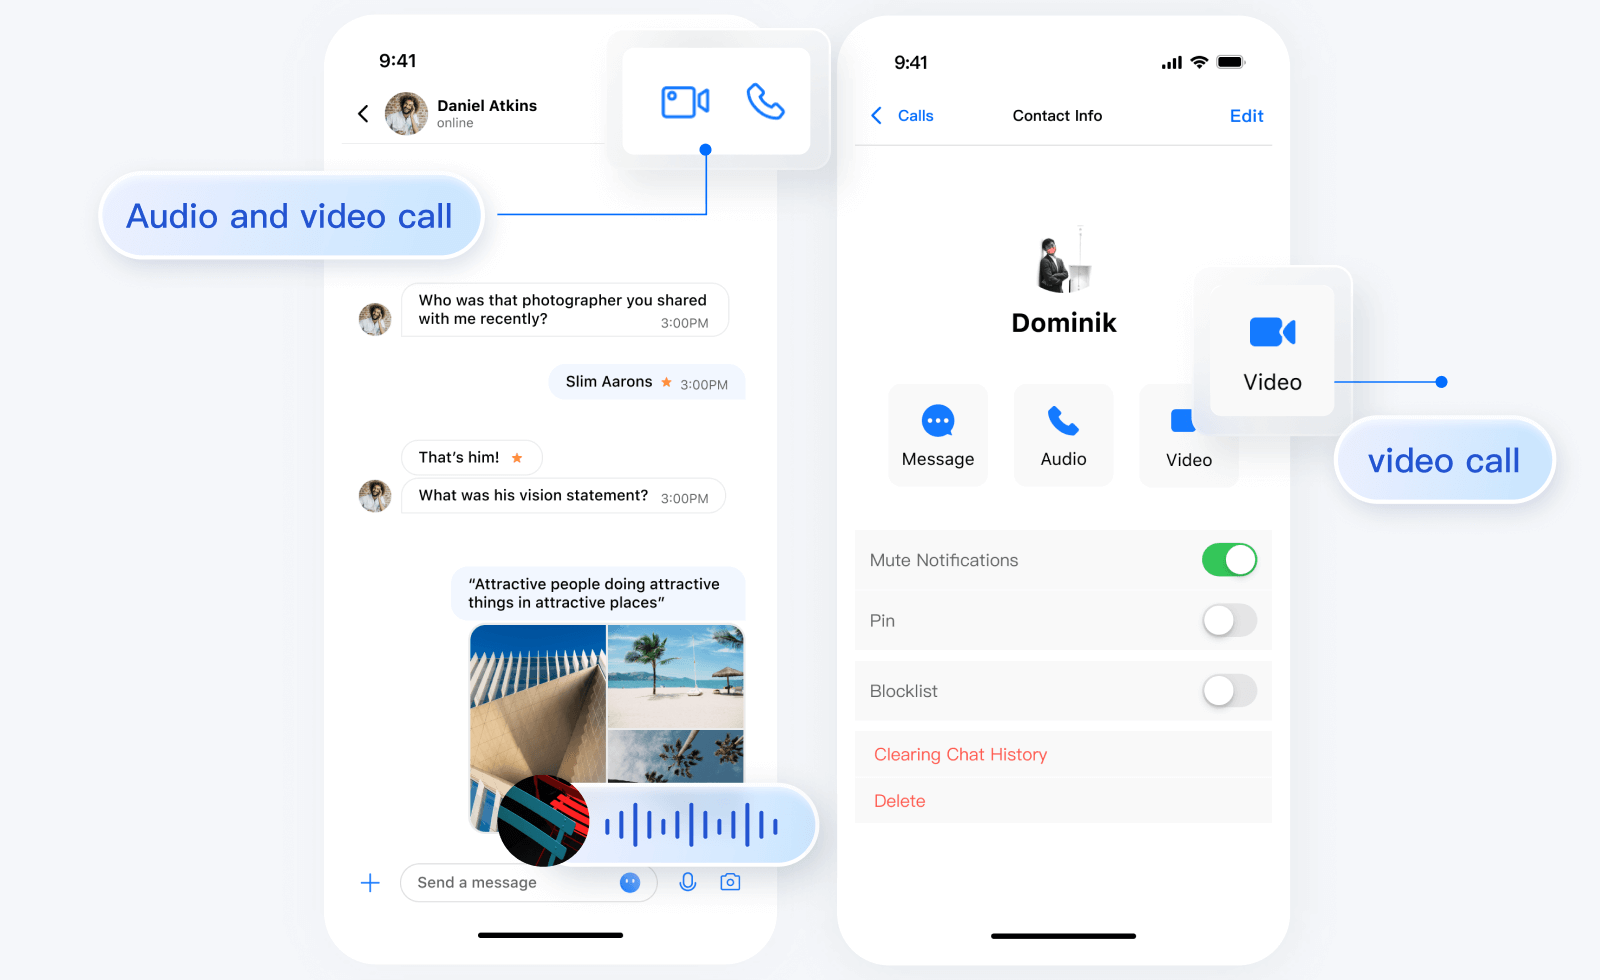
Starting a call from the contacts page is shown in the figure below:

Add Offline Push Notifications
For details, refer to the documentation: Offline Push. After configuration, when you click a received audio and video call notification pushed offline,
TUICallKit will automatically open the audio/video call invitation interface.Add AI Noise Reduction
After integrating
TUIChat and TUICallkit components, when you send a VMS in the chat interface, you can record VMS with AI noise reduction and automatic gain control. Below is a comparison of VMS recorded simultaneously with two phones:
Note:
1. This feature requires the purchase of the Pro edition 、Pro Plus edition or Enterprise edition. After the plan expires, VMS recording will switch to the system API for recording.
2. Only supported in SDK 7.0 and later versions.
More practices
Contact Us
If you have any questions about this article, feel free to join the Telegram Technical Group, where you will receive reliable technical support.
Help and Support
Was this page helpful?
You can also Contact sales or Submit a Ticket for help.
Help us improve! Rate your documentation experience in 5 mins.
Feedback