You can configure a security group in the TencentDB for MongoDB console to control the outbound/inbound traffic.
Overview
Security group serves as a stateful virtual firewall with filtering feature for configuring network access control for one or more TencentDB instances. It is an important network security isolation tool provided by Tencent Cloud. Instances with the same network security isolation demands in one region can be put into the same security group, which is a logical group. TencentDB and CVM share the security group list and are matched with each other within the security group based on rules. For specific rules and limitations, see Security Group Overview.
Note:
TencentDB security groups currently only support network access control for VPCs but not the classic network.
As TencentDB doesn't have any active outbound traffic, outbound rules don't apply to it.
TencentDB for MongoDB security groups support primary instances, read-only instances, and disaster recovery instances.
TencentDB for MongoDB supports the security group feature which is implemented based on the allowlist. To use this feature, submit a ticket.
2. Select Security Group on the left sidebar, select a region above the instance list on the right, and click Create.
3. In the pop-up window, set the following configuration items, confirm that everything is correct, and click OK.
Template: Select a security group template in the drop-down list.
Open all ports: All ports are opened to the public and private networks. This may present security issues. Security group rules are added by default. You can click a security group template below to view its Outbound Rules* and Inbound Rules**.
Open ports 22, 80, 443, and 3389 and the ICMP protocol: Ports 22, 80, 443, and 3389 and the ICMP protocol are opened to the internet. All ports are opened to the private network. Security group rules are added by default. The port of TencentDB for MongoDB is 27017 by default. You can ignore this template.
Custom: You can create a security group and then add custom rules.
Name: Custom name of the security group.
Project: Select a project for easier management. By default, Default Project is selected.
Notes: A short description of the security group for easier management.
Advanced Configuration: You can add tags for the security group.
4. If you select Custom for Template, click Set Now in the Note window and perform the following steps.
Step 2. Set inbound rules in the security group
1. On the Inbound Rule tab of the Security Group Rules page, click Add Rules.
2. In the Add Inbound Rules pop-up window, set the rules.
Type: Select Custom as the default type.
Source: Set the source for database access, i.e., the inbound source. The following formats are supported:
Source Format
Format Description
CIDR notation
A single IPv4 address or an IPv4 range is represented in CIDR notation, such as 203.0.113.0, 203.0.113.0/24, or 0.0.0.0/0, where 0.0.0.0/0 indicates all IPv4 addresses will be matched.
A single IPv6 address or an IPv6 range is represented in CIDR notation, such as FF05::B5, FF05:B5::/60, ::/0, or 0::0/0, where ::/0 or 0::0/0 indicates all IPv6 addresses will be matched.
Security group ID
Reference a security group ID to match the IP address of the server associated with the security group.
Parameter template
Reference IP address object or IP address group object in a parameter template.
Protocol Port: Enter the protocol type and port for the client to access TencentDB for MongoDB. You can view the port information in the Private Network Address column in the instance list. The default port is 27017.
Policy: Allow or Reject. Allow is selected by default.
Allow: Traffic to this port is allowed.
Reject: Data packets will be discarded without any response.
Notes: A short description of the rule for easier management.
3. Click Complete.
Step 3. Bind the security group to an instance
Note:
Currently, security groups can be configured only for TencentDB for MongoDB instances in VPC.
2. In the MongoDB drop-down list on the left sidebar, select Replica Set Instance or Sharded Cluster Instance. The directions for replica set instances and sharded cluster instances are similar.
3. Above the Instance List on the right, select the region.
4. In the instance list, find the target instance.
5. In the Operation column of the target instance, select More > Security Group.
You can also click the target instance name, select the Data Security tab, and click Configure Security Group.
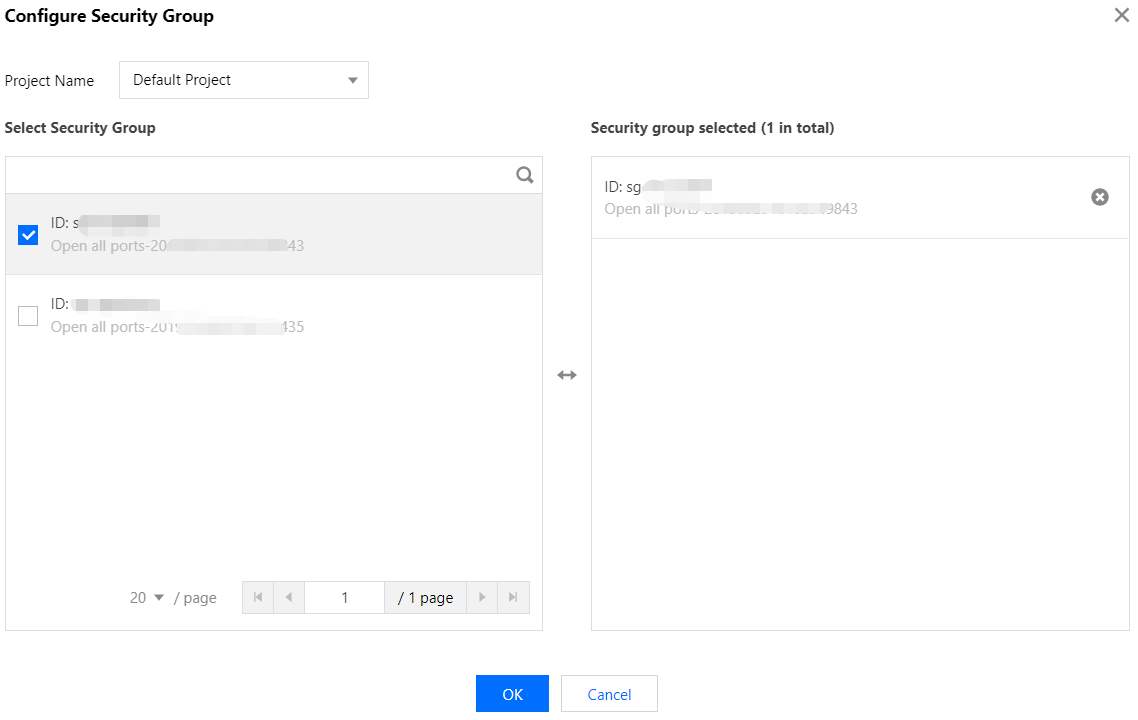
6. In the Configure Security Group pop-up window, select the target security group and click OK.
2. In the MongoDB drop-down list on the left sidebar, select Replica Set Instance or Sharded Cluster Instance. The directions for replica set instances and sharded cluster instances are similar.
3. Above the Instance List on the right, select the region.
4. In the instance list, find the target instance.
5. Click the target instance ID, select the Data Security tab, and view all security groups of the instance.
6. Click Edit. You can click
or
in the Operation column to adjust the filtering priorities of security groups.
2. In the MongoDB drop-down list on the left sidebar, select Replica Set Instance or Sharded Cluster Instance. The directions for replica set instances and sharded cluster instances are similar.
3. Above the Instance List on the right, select the region.
4. In the instance list, find the target instance.
5. Click the target instance ID, select the Data Security tab, and view all security groups of the instance.
6. In the security group list, click the target security group ID or name to enter the Security Group page.
7. Find the security group rule to be modified and click Edit in the Operation column to edit it.
Importing a security group rule
1. On the Security Group page, click the ID/name of a security group.
2. On the Inbound Rule or Outbound Rule tab, click Import Rule.
3. In the pop-up window, select an edited inbound/outbound rule template file and click Import.
Note:
As existing rules will be overwritten after importing, we recommend that you export the existing rules before importing new ones.
If there are no existing rules in the security group, download a template and edit it before importing it.
Cloning a security group
1. On the Security Group page, find the target security group and click More > Clone in the Operation column.
2. In the pop-up window, select the target region and project and click OK.
If the new security group needs to be associated with a CVM instance, do so by managing the CVM instances in the security group.
Deleting a security group
1. On the Security Group page, find the security group to be deleted and click More > Delete in the Operation column.
2. In the pop-up window, click OK.
If the current security group is associated with a CVM instance, it must be disassociated first before being deleted.


 Yes
Yes
 No
No
Was this page helpful?