- Release Notes and Announcements
- User Guide
- Product Introduction
- Purchase Guide
- Getting Started
- Operation Guide
- Access Management
- Instance Management
- Node Management
- Version Upgrade
- Monitoring
- Backup and Rollback
- Data Security
- SSL Authentication
- Database Management
- Multi-AZ Deployment
- Public Network Access
- Disaster Recovery/Read-Only Instances
- Parameter Configuration
- Recycle Bin
- Task Management
- Performance Optimization
- Data Migration Guide
- Best Practice
- Optimizing Indexes to Break Through Read/Write Performance Bottlenecks
- Troubleshooting Mongos Load Imbalance in Sharded Cluster
- Troubleshooting Excessive Slow Queries
- Fixing High CPU Utilization in MongoDB Instance Based on DBbrain
- Troubleshooting Excessive Connections
- Troubleshooting High Request Latency Based on Slow Log
- Troubleshooting High CPU Utilization
- Considerations for Using Shard Clusters
- Sample of Reading and Writing Data in MongoDB Instance
- Export and Import
- Troubleshooting MongoDB Connection Failures
- Performance Fine-Tuning
- Ops and Development Guide
- Troubleshooting
- API Documentation
- History
- Introduction
- API Category
- Making API Requests
- Instance APIs
- RenameInstance
- OfflineIsolatedDBInstance
- ModifyDBInstanceSpec
- IsolateDBInstance
- DescribeSpecInfo
- DescribeDBInstances
- DescribeClientConnections
- CreateDBInstanceHour
- AssignProject
- RenewDBInstances
- DescribeSlowLogs
- DescribeSlowLogPatterns
- InquirePriceRenewDBInstances
- InquirePriceModifyDBInstanceSpec
- InquirePriceCreateDBInstances
- DescribeDBInstanceDeal
- DescribeSecurityGroup
- DescribeInstanceParams
- ModifyDBInstanceSecurityGroup
- ModifyDBInstanceNetworkAddress
- Backup APIs
- Account APIs
- Task APIs
- Other APIs
- Data Types
- Error Codes
- Instance Connection
- FAQs
- Service Agreement
- Glossary
- Contact Us
Overview
All secondary nodes of an instance contribute to the system's high availability. When the primary node fails, each secondary node may be elected as the new primary node to execute data write requests. Therefore, the more the replicas, the higher the availability. In scenarios with a high number of concurrent requests with more reads and less writes, if read/write separation is enabled, you can add secondary nodes to improve the read performance and greatly relieve the read pressure on the primary node.
A TencentDB for MongoDB cluster can have three (one-primary-two-secondary), five (one-primary-four-secondary), or seven (one-primary-six-secondary) nodes in total. You can add secondary nodes appropriately based on the surge in the concurrent requests to your business and remove secondary nodes when the business load drops. This helps you better utilize resources and reduce unnecessary costs in real time.
Billing
The instance will be billed by the new specifications after its specifications are changed. Make sure that your Tencent Cloud account balance is sufficient to cover the updated billing. For more information, see Specification Adjustment Billing.
Notes
After new nodes are added to the cluster, data sync will start without affecting the business.
Be sure to plan for disaster recovery. We recommend you initiate a specification adjustment task during the maintenance period. For more information, see Setting Instance Maintenance Period.
Do not adjust the node quantity and node computing/storage specifications at the same time.
After the node quantity is adjusted, billing will start based on the new specification.
The name, private network address, and port of the instance remain unchanged after node quantity adjustment.
A started specification adjustment task cannot be canceled.
Prerequisites
You have created a TencentDB for MongoDB instance.
If your instance is pay-as-you-go, make sure that your Tencent Cloud account balance is sufficient.
The instance and its associated instances are in Running status and and there are currently no tasks being executed.
Adding a secondary node (replica set)
1. Log in to the TencentDB for MongoDB console.
2. In the MongoDB drop-down list on the left sidebar, select Replica Set Instance.
3. Above the instance list on the right, select the region.
4. In the instance list, find the target instance.
5. Click the Instance ID to enter the Instance Details page and click the Node Management tab.
6. On the Mongod Node tab on the Node Management tab, click Add Secondary Node.
7. In the Adjust Node Quantity pop-up window, read the notes on node quantity adjustment, and proceed to confirm and configure the parameters as detailed below:
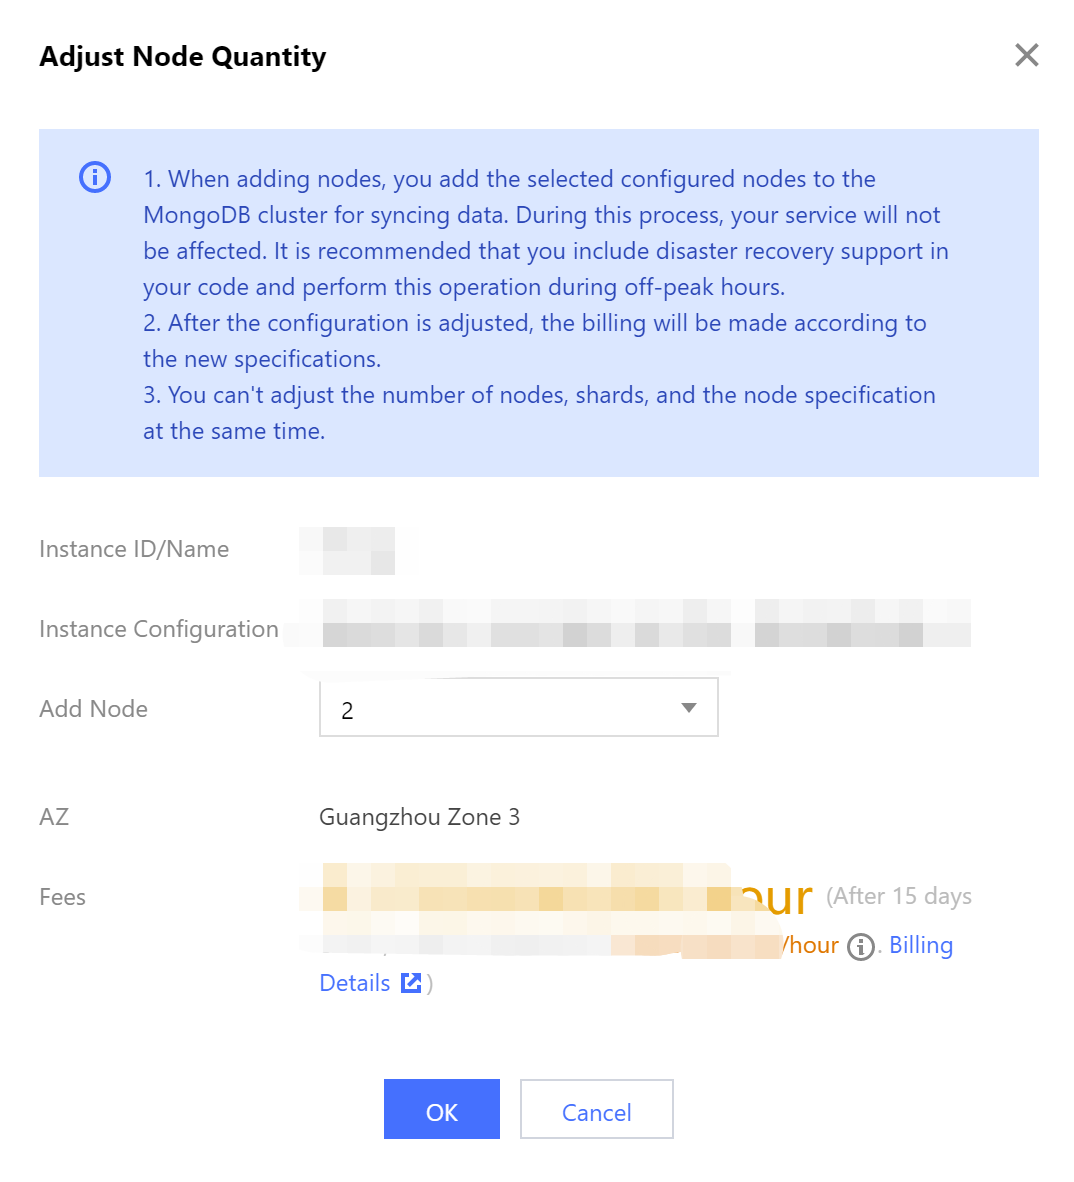
Parameter | Description |
Instance ID/Name | The name of the instance that requires node quantity adjustment. |
Instance Specification | Check the current specification of the instance, including the CPU core quantity, memory, disk capacity, and node quantity. The node quantity includes all primary and secondary nodes. You should determine the number of nodes to be added based on the current specification. |
Add Node | Select the number of secondary nodes to be added from the drop-down list. |
Deployment AZ | This parameter will be displayed if the instance nodes are in the same AZ. It indicates the AZ where all instance nodes are deployed. |
Secondary Node-n | This parameter will be displayed if the instance nodes are in different AZs. It indicates the AZs of different nodes and ranges from 0 to 6. Select the AZs for the new secondary nodes from the drop-down list. |
Fees | Pay-as-you-go: Hourly unit price after instance speciation adjustment. You can click Billing Details to view the billable items and billing formula and confirm the fees.For more information, see Specification Adjustment Billing. |
8. Confirm the fees and click OK.
9. On the left sidebar, select Task Management, and you can view the ongoing task. Wait until Task Progress becomes 100% and Task Status becomes Completed.
Increasing the node quantity per shard (for sharded cluster instance)
1. Log in to the TencentDB for MongoDB console.
2. In the MongoDB drop-down list on the left sidebar, select Sharded Cluster Instance.
3. Above the instance list on the right, select the region.
4. In the instance list, find the target instance.
5. Click the Instance ID to enter the Instance Details page and click the Node Management tab.
6. On the Mongod Node tab on the Node Management tab, click Add Secondary Node.
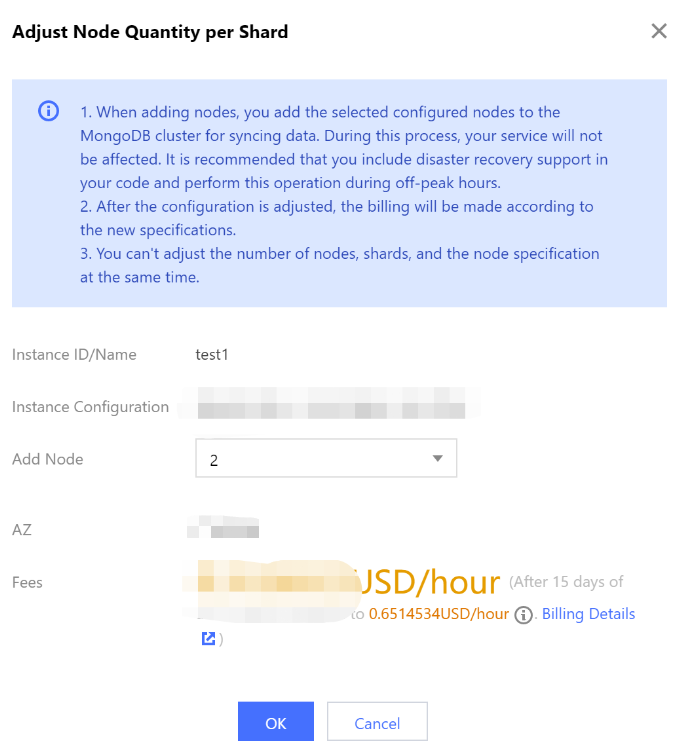
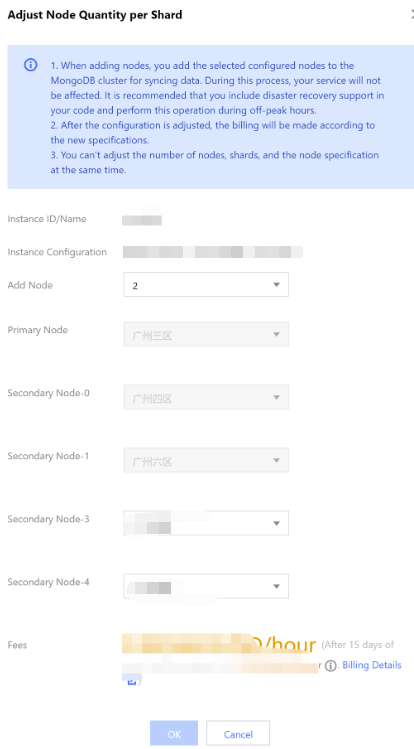
7. In the Adjust Node Quantity per Shard pop-up window, read the notes on node quantity adjustment, and proceed to confirm and configure the parameters as detailed below:
The instance nodes are deployed in the same AZ:
The instance nodes are deployed in different AZs:
Parameter | Description |
Instance ID/Name | Confirm the name of the instance that requires node quantity per shard adjustment. |
Instance Specification | Check the current specification of the instance, including the CPU core quantity, memory, disk capacity, and node quantity. The node quantity includes all primary and secondary nodes. The nodes are evenly distributed to shards; for example, if there are two shards and eight nodes, each shard will have four nodes. You should determine the number of nodes to be added based on the current specification. |
Add Node | Select the number of secondary nodes to be added per shard from the drop-down list. |
Deployment AZ | This parameter will be displayed if the instance nodes are in the same AZ. It indicates the AZ where all instance nodes are deployed. |
Secondary Node-n | This parameter will be displayed if the instance shard nodes are in different AZs. It indicates the AZs of different nodes and ranges from 0 to 6. Select the AZs for the new secondary nodes from the drop-down list. |
Fees | Pay-as-you-go: Hourly unit price after instance speciation adjustment. You can click Billing Details to view the billable items and billing formula and confirm the fees. |
8. Conform the fees and click OK.
9. On the left sidebar, select Task Management, and you can view the ongoing task. Wait until Task Progress becomes 100% and Task Status becomes Completed.
Related APIs
API | Description |
Adjust the specification of a TencentDB instance |

 Yes
Yes
 No
No
Was this page helpful?