TencentDB for MongoDB supports both private and public network access. This document describes how to configure a public network access address in the console for you to access MongoDB database via the public network. By doing so, you can manage the database more flexibly and conveniently.
Implementation Scheme
TencentDB for MongoDB enables public network access through Cloud Load Balancer (CLB). After a CLB instance listening port is configured in the TencentDB for MongoDB console, the CLB instance will forward requests to the real server when its public IP address and port number are accessed over the public networks. The real server then maps the private and public networks and automatically forwards requests from the public network to the private network server of MongoDB. For more information about CLB and the real server, see CLB.
As is shown below, public network users access CLB via IP address 192.168.17.6 and port number 80. The real server of CLB forwards the request to the actual operating environment of MongoDB database where the private network IP address is 10.0.0.1 and the port number is 27017. In this way, public network users can access the MongoDB database via CLB.
Use Limits
Before enabling the public network access of the MongoDB database, you need to understand the relevant restrictions and requirements which involves MongoDB database, CLB, and network to ensure the security and stability of the database. For more information, see the table below.
|
TencentDB for MongoDB | Version | Supports MongoDB version 4.0 and above. |
| Sharded cluster | It only supports binding the default instance access address (CLB address) to CLB. Note: The LB address of a MongoDB sharded cluster forwards client requests to the appropriate Mongos process for processing. For more information, see System Architecture. The CLB listener will listen to the LB IP address and port number of the MongoDB sharded cluster. |
| Replica set | When a node is added or deleted for the MongoDB replica set, you need to modify the public network IP address and specify the listening rules for the new node. |
Network | VPC | Only TencentDB for MongoDB CLB instances under the same VPC can be bound. |
|
| After enabling the public network access, you can’t modify the network for the instance. To modify it, you need to disable the public network access. |
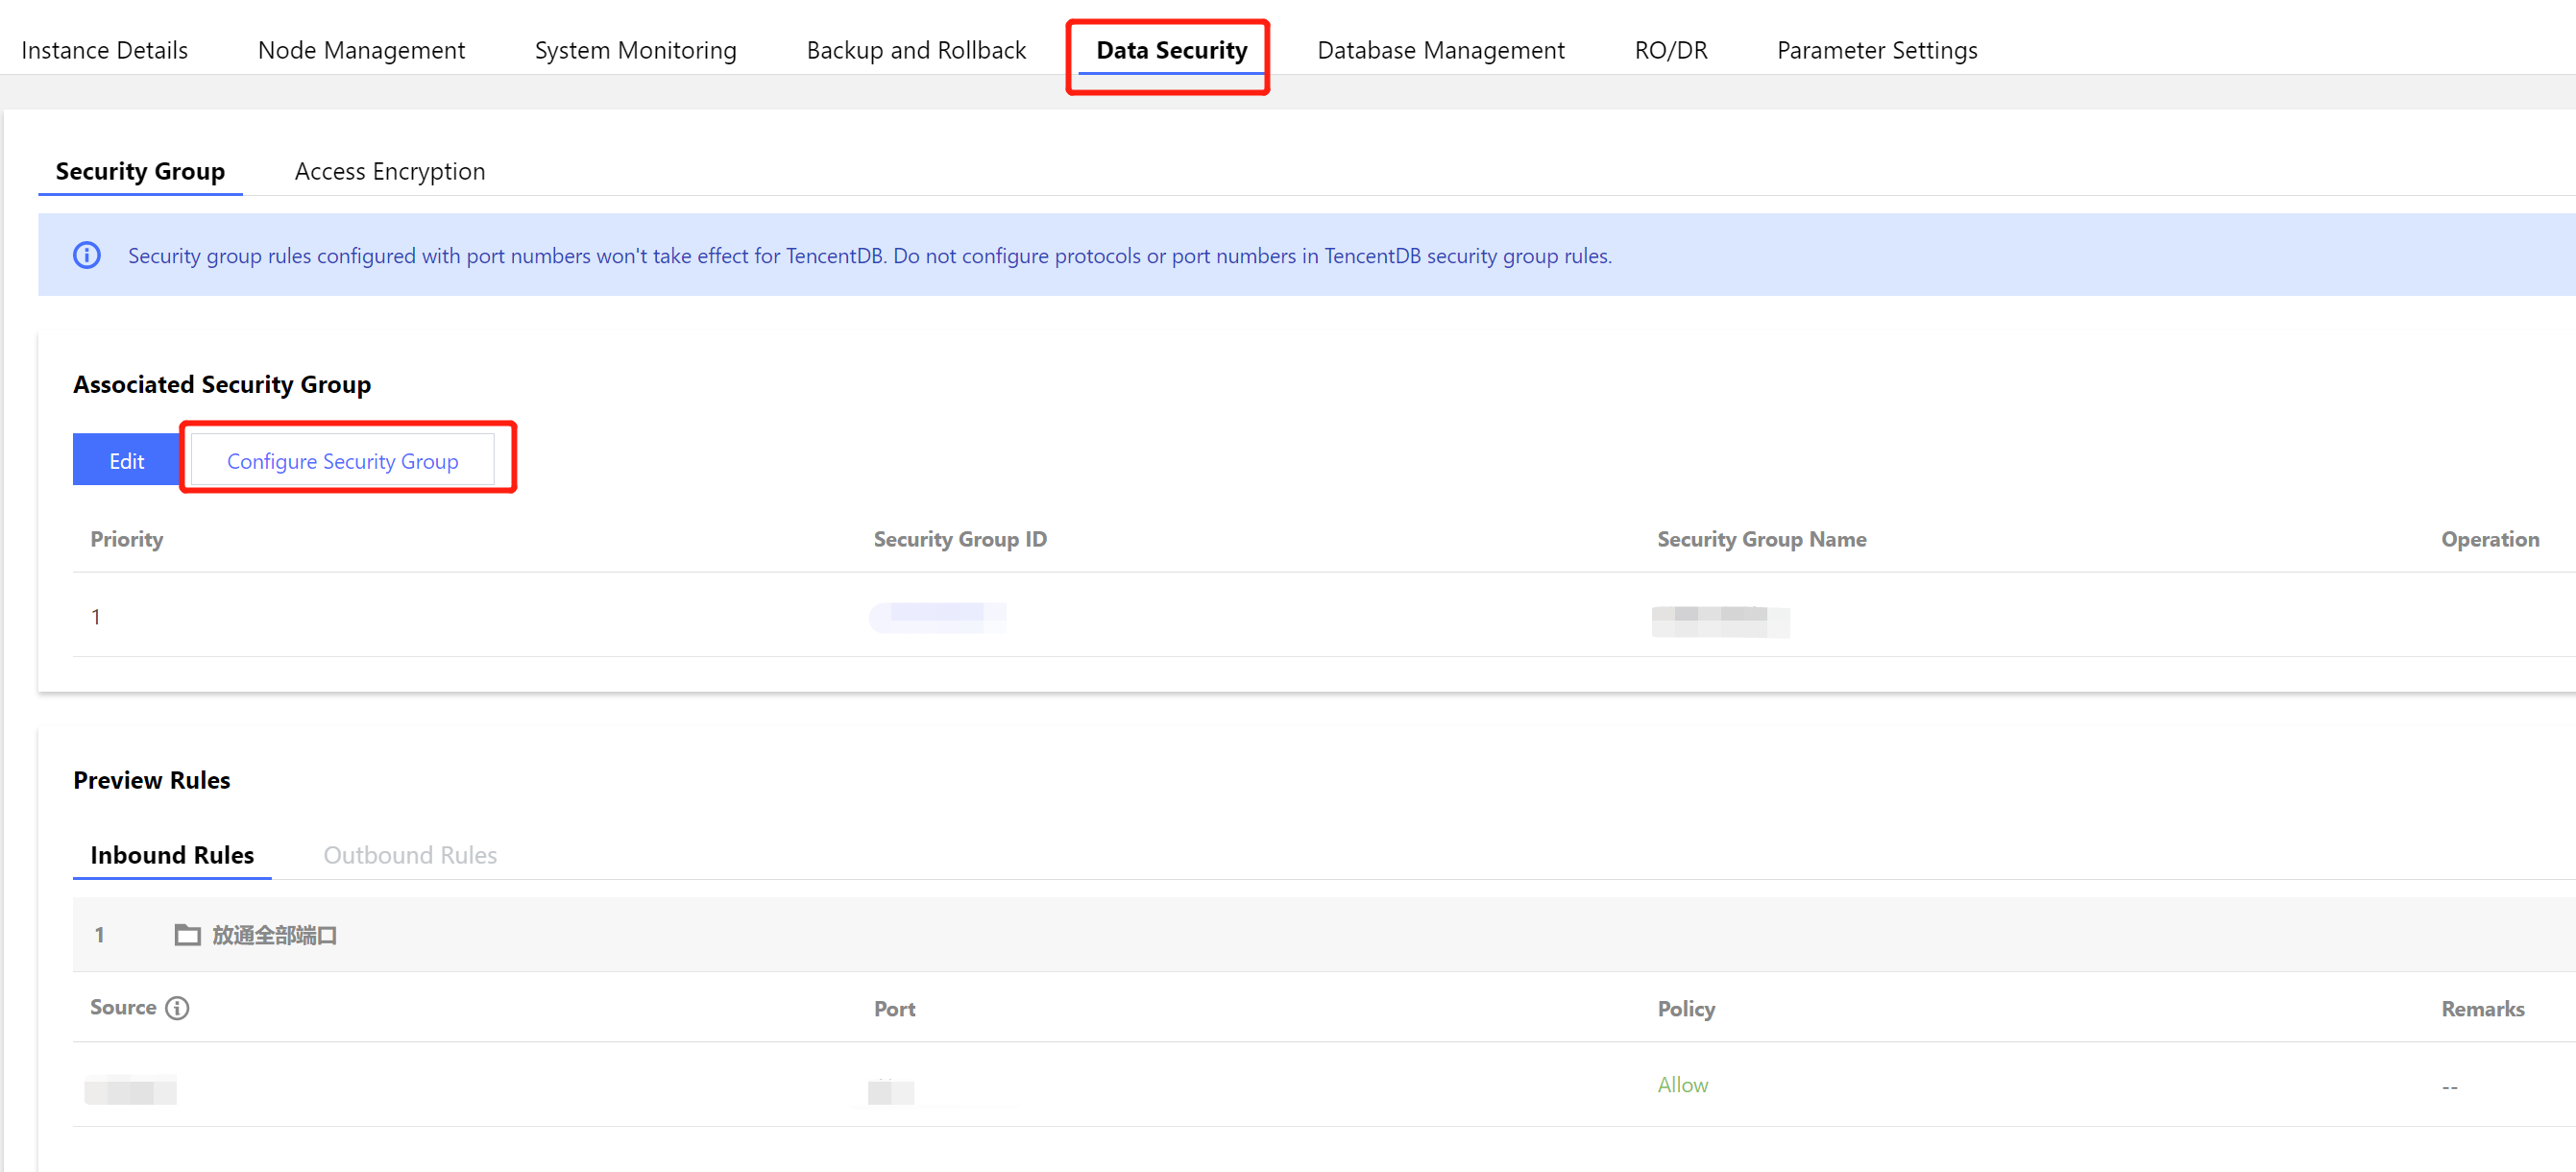
| Security group | You can’t enable the public network access for the MongoDB instance unbound to a security group. We recommend that you configure a security group to restrict the visiting address. For detailed directions, see Configuring Security Group. |
Password-free authentication | Password-free access | You can’t enable public network access for the MongoDB instances with password-free access enabled. |
CLB | Instance type | MongoDB instances can’t be bound to the classic CLB instances. For the differences between CLB (former Application Load Balancer) and classic CLB, see Instance Types Comparison. |
| Instance specifications | CLB instances fall into shared instances and LCU-supported instances. A shared instance can support a maximum of 50,000 concurrent connections per minute, but this may not be enough for some high-spec MongoDB instances. Therefore, we recommend that you choose LCU-supported instances to meet your needs. For differences between these two types of instances, see Instance Specifications Comparison. |
| Account Types | MongoDB instances do not support binding with CLB instances under traditional account types. They only support binding with CLB instances under standard account types. To determine the account type and learn about methods for upgrading account types, see Account Type Description. |
Operation Limits | Disabling Public Network Access | To disable public network access, it is crucial to perform any action through the TencentDB for MongoDB console. Do not attempt to manually delete listeners created by MongoDB within the CLB or remove the entire CLB instance. Failure to follow this instruction may lead to abnormal business connections. |
| Network Changes | Modifying the number of instance nodes may affect the public network functionality. Therefore, when making such changes, you must update the public network configuration through the console to maintain uninterrupted public network connectivity. |
Note
After the public network access is disabled, MongoDB will only clear the bound listener and will not release or repossess the CLB instance. You can purchase or delete a CLB instance in the CLB console.
We recommend that each MongoDB instance be bound to one dedicated CLB instance, after which MongoDB will manage and maintain the listener. To share a CLB instance with other resources, you need to manage your listener ports well and reserve enough listeners. Otherwise, when a CLB is used by multiple services, the management chaos may occur.
Note:
If the public network feature indicates a health check exception in the backend services, please navigate to the corresponding CLB console to ascertain whether there are any health check risks, or whether the health check source IP range has been allowed.
Prerequisites
You have created a TencentDB for MongoDB instance on v4.0 or later, and the instance runs normally.
You have created CLB instances in the same VPC as that of the MongoDB instance. For more information, see Creating CLB Instances. Directions
Step 1. Enable public network access
2. In the MongoDB drop-down list on the left sidebar, select Replica Set Instance or Sharded Cluster Instance. The directions for the two types of instances are similar.
3. Above the Instance List on the right, select the region.
4. In the instance list, find the target instance.
In the search box in the top-right corner, you can search for the target instance by instance ID, instance name, private IP, or tag key.
If you can't find the target instance in the instance list, select Recycle Bin on the left sidebar to check whether it is isolated there due to overdue payments. For more information, see Recycle Bin. 5. In the Instance ID/Name column of the target instance, click the Instance ID to enter the Instance Details page.
6. In the Network Configuration section on the Instance Details page, click Configure CLB Public Network Access next to Public Network Access.
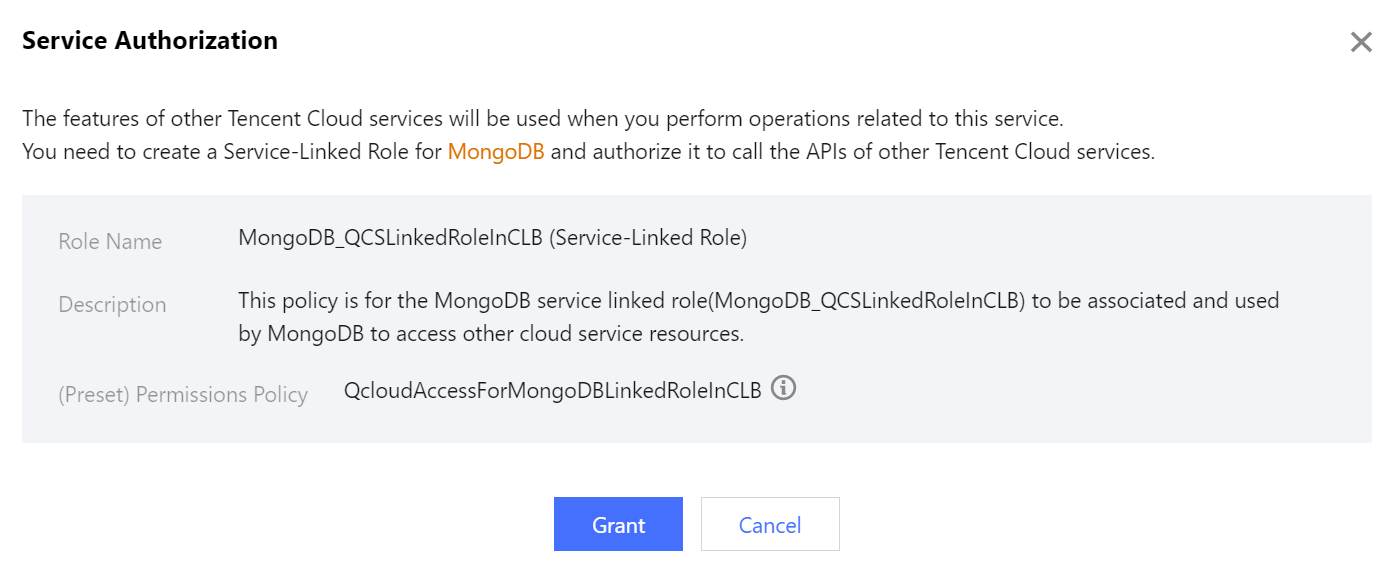
7. In the Service Authorization pop-up window, click Grant.
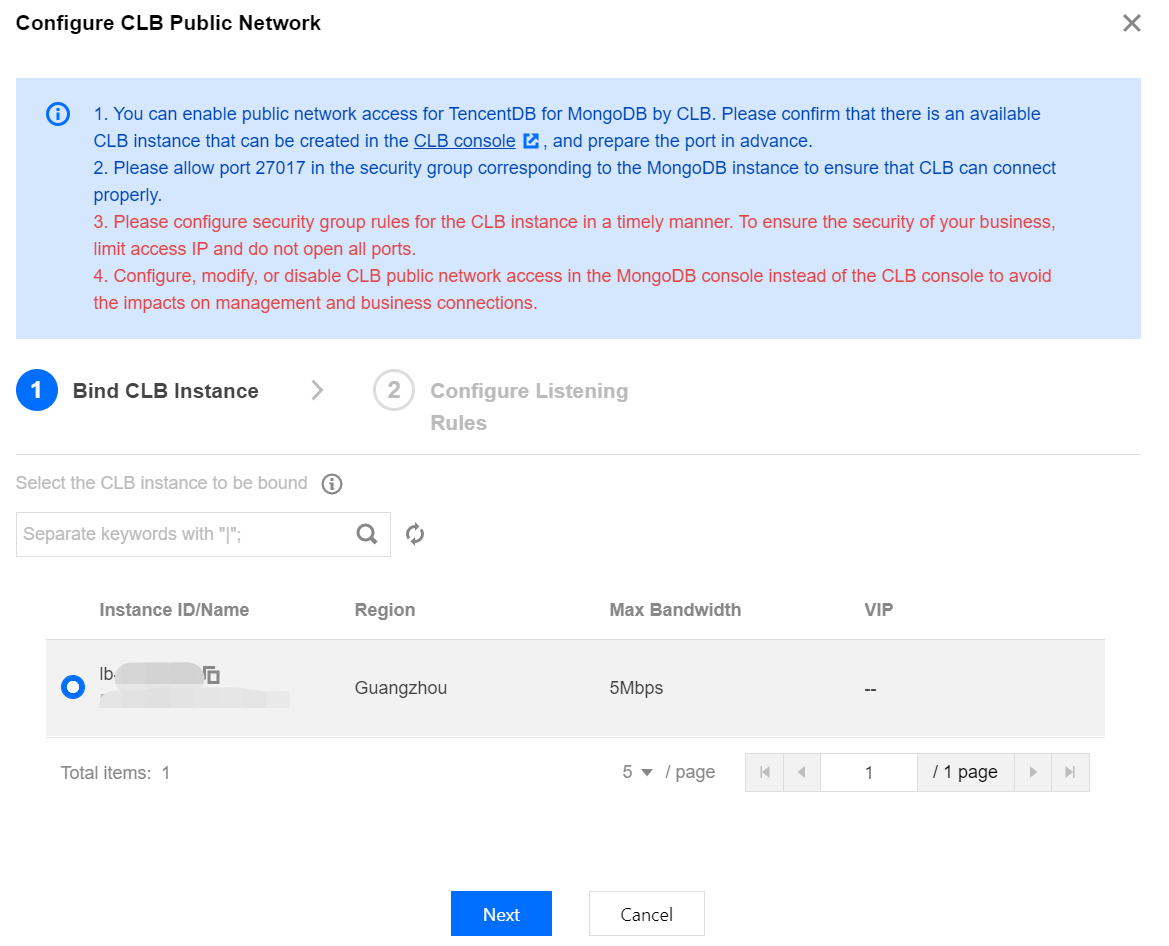
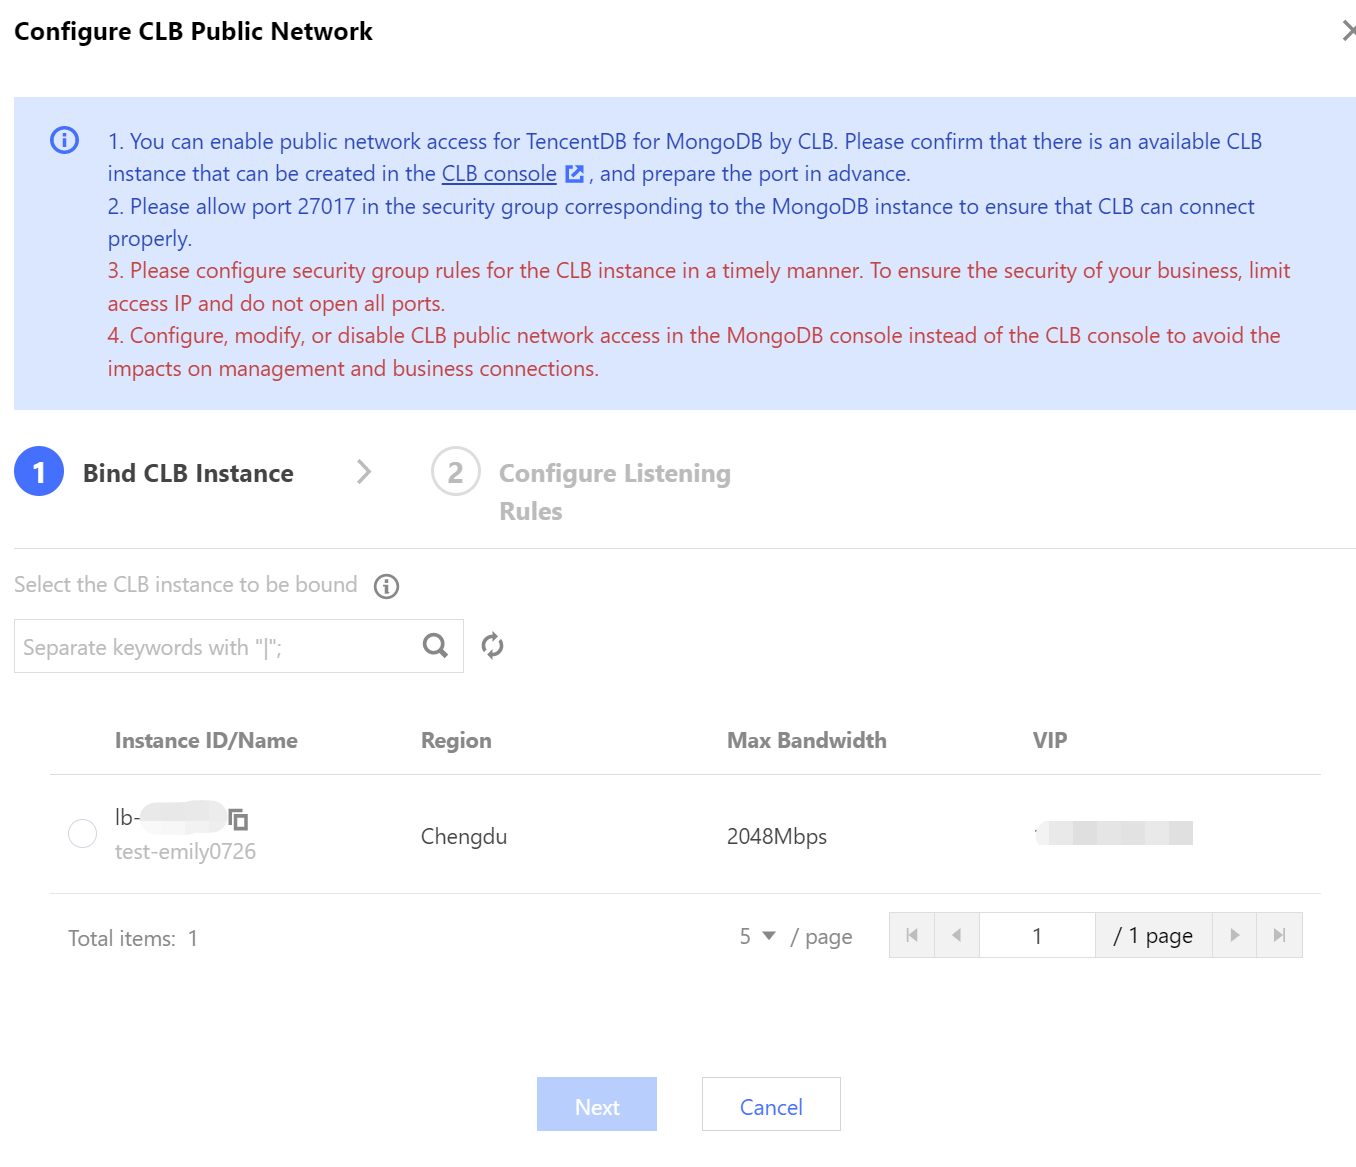
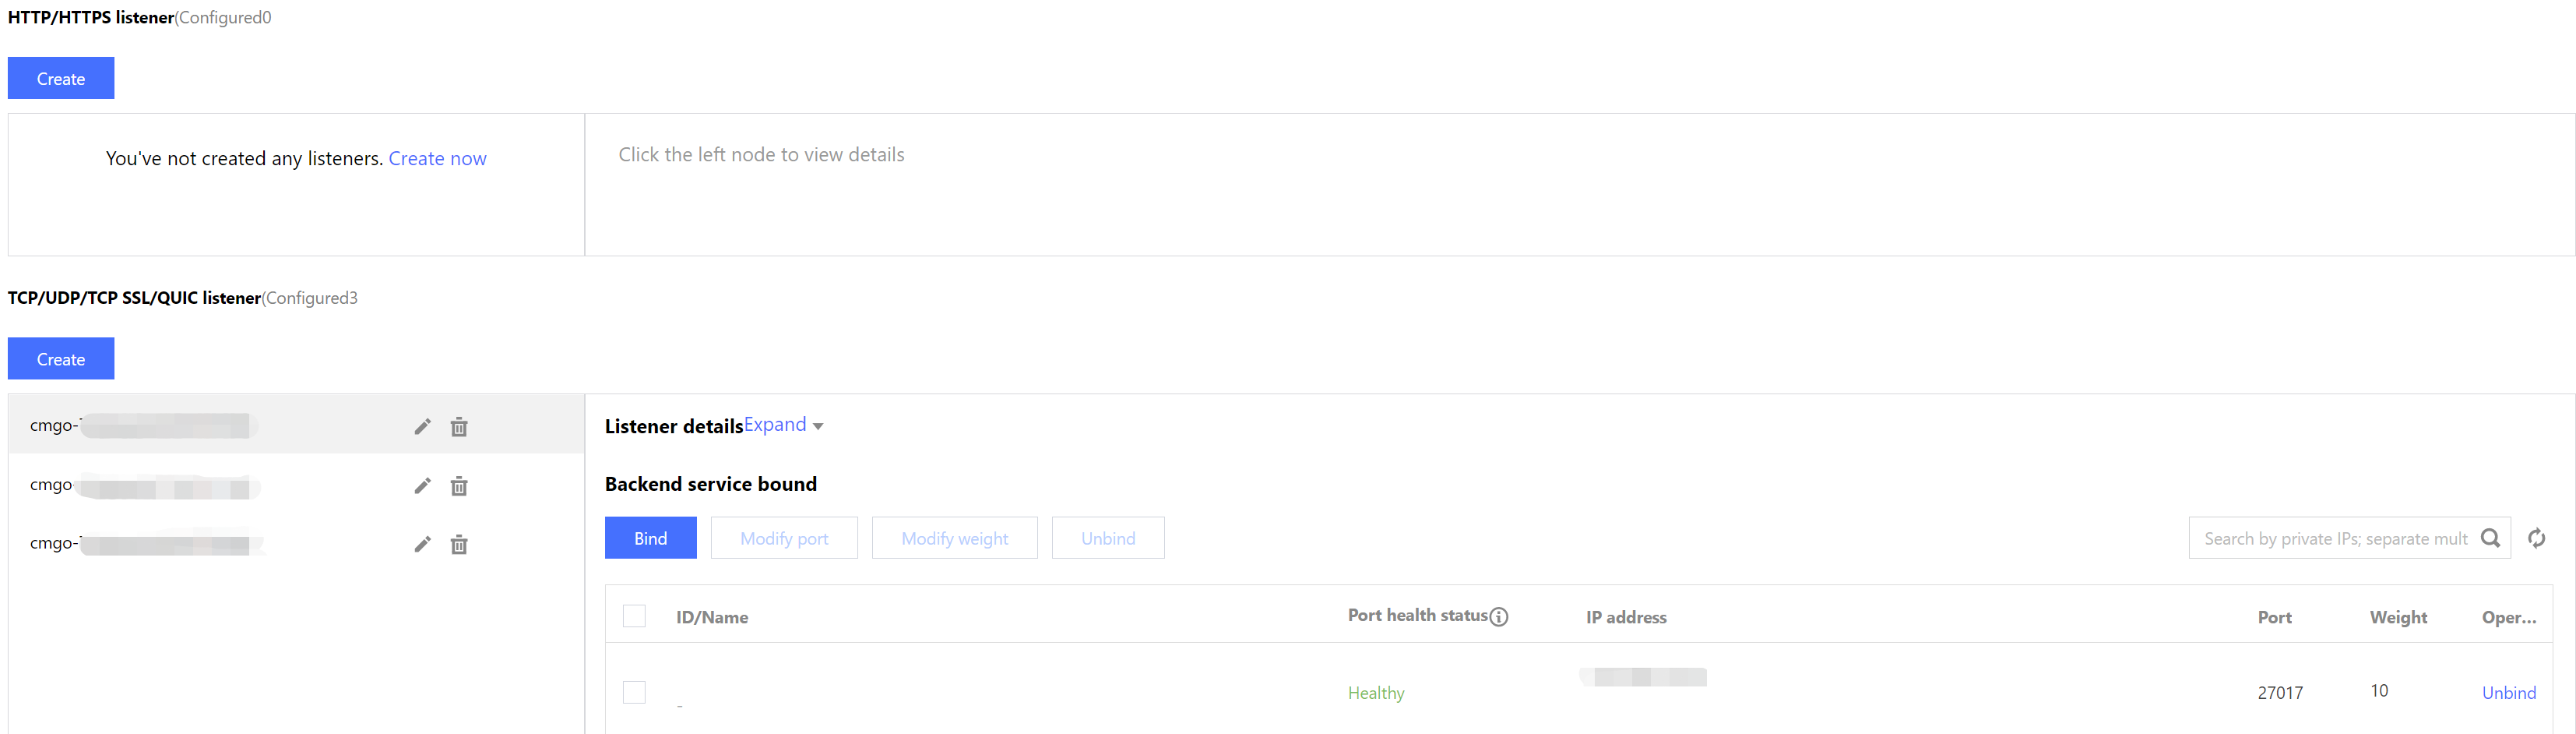
8. In the Configure CLB Public Network Access window, select CLB listening instances and configure listening rules.
a. On the Bind CLB Instance tab, all CLB instances in the same VPC as the current MongoDB instance have been listed. Select the CLB instance to be bound based on the required bandwidth cap specification. VIP refers to the public IP address of the CLB instance.
b. Click Next, on the Configure Listening Rules tab, bind the CLB instance and set the listening rules.
If it is a replica set, configure CLB listening port number for MongoDB primary node and secondary node.
If it is a sharded instance, configure a listening port for the private network address.
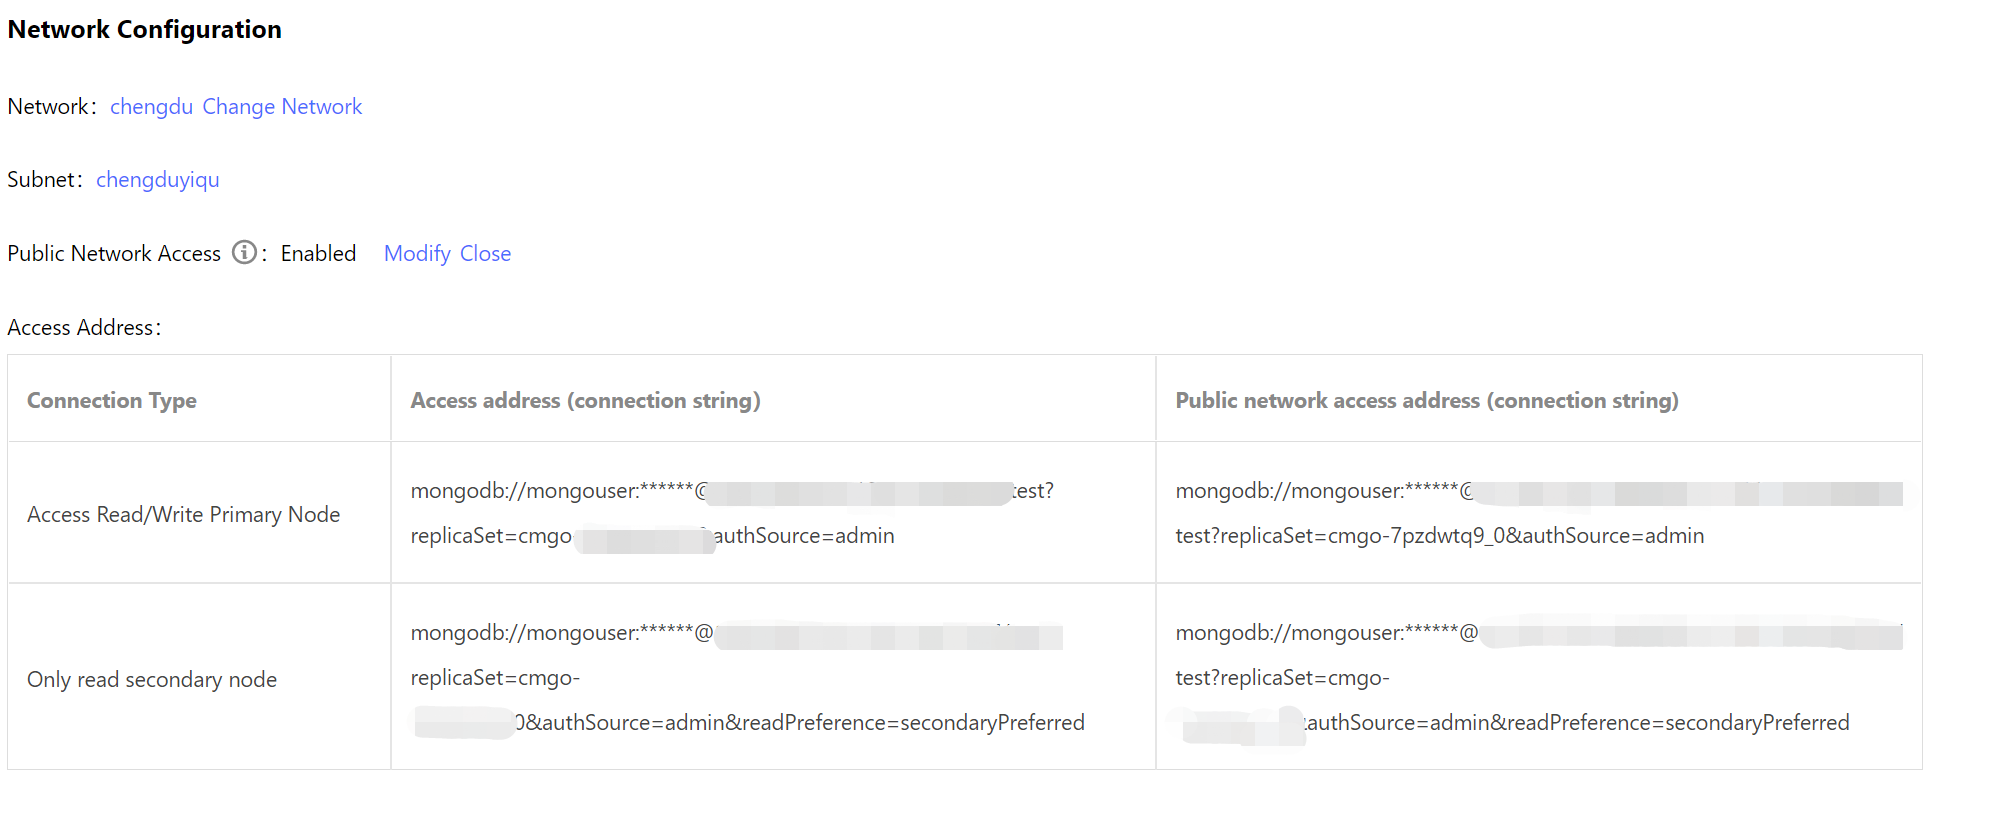
9. Click OK,and wait for the task to complete. In the Network Configuration section on the Instance Details page, you can view the connection string of the public network address.
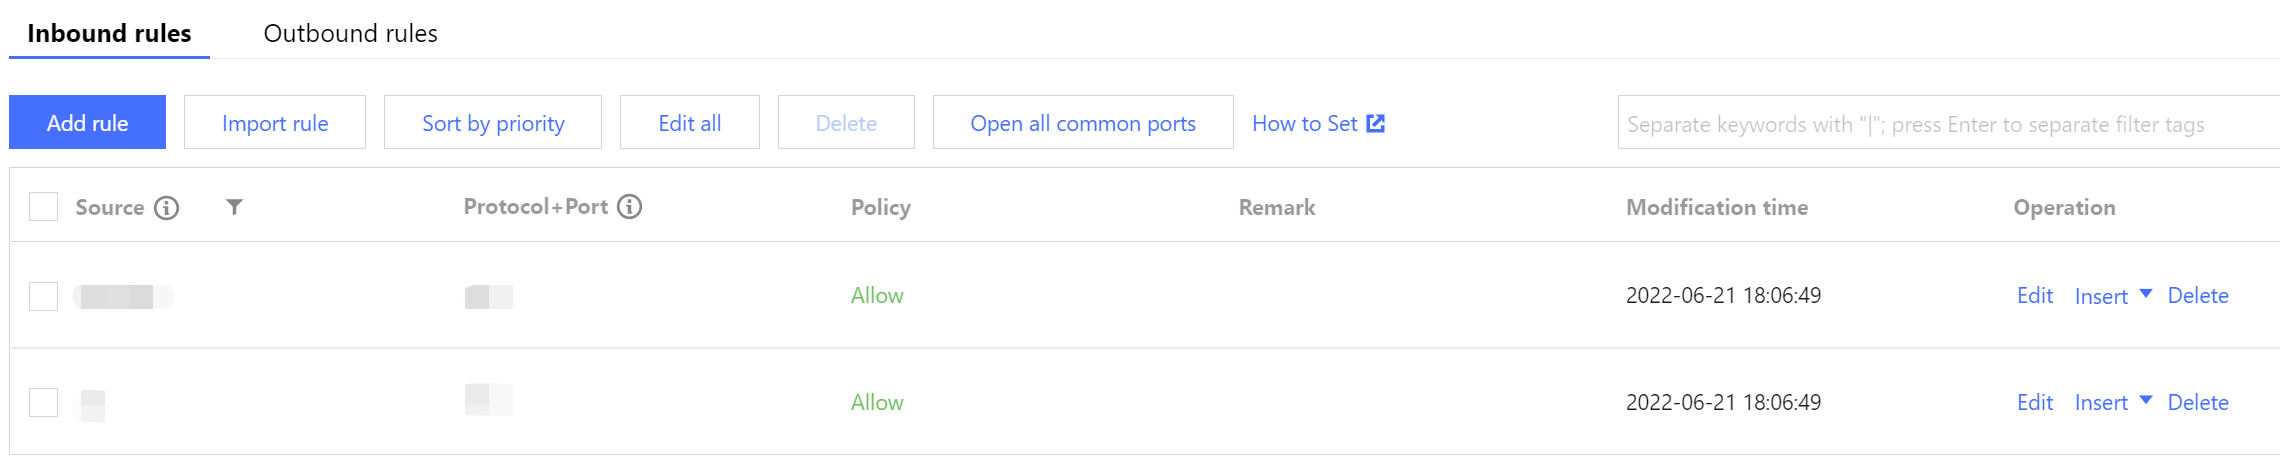
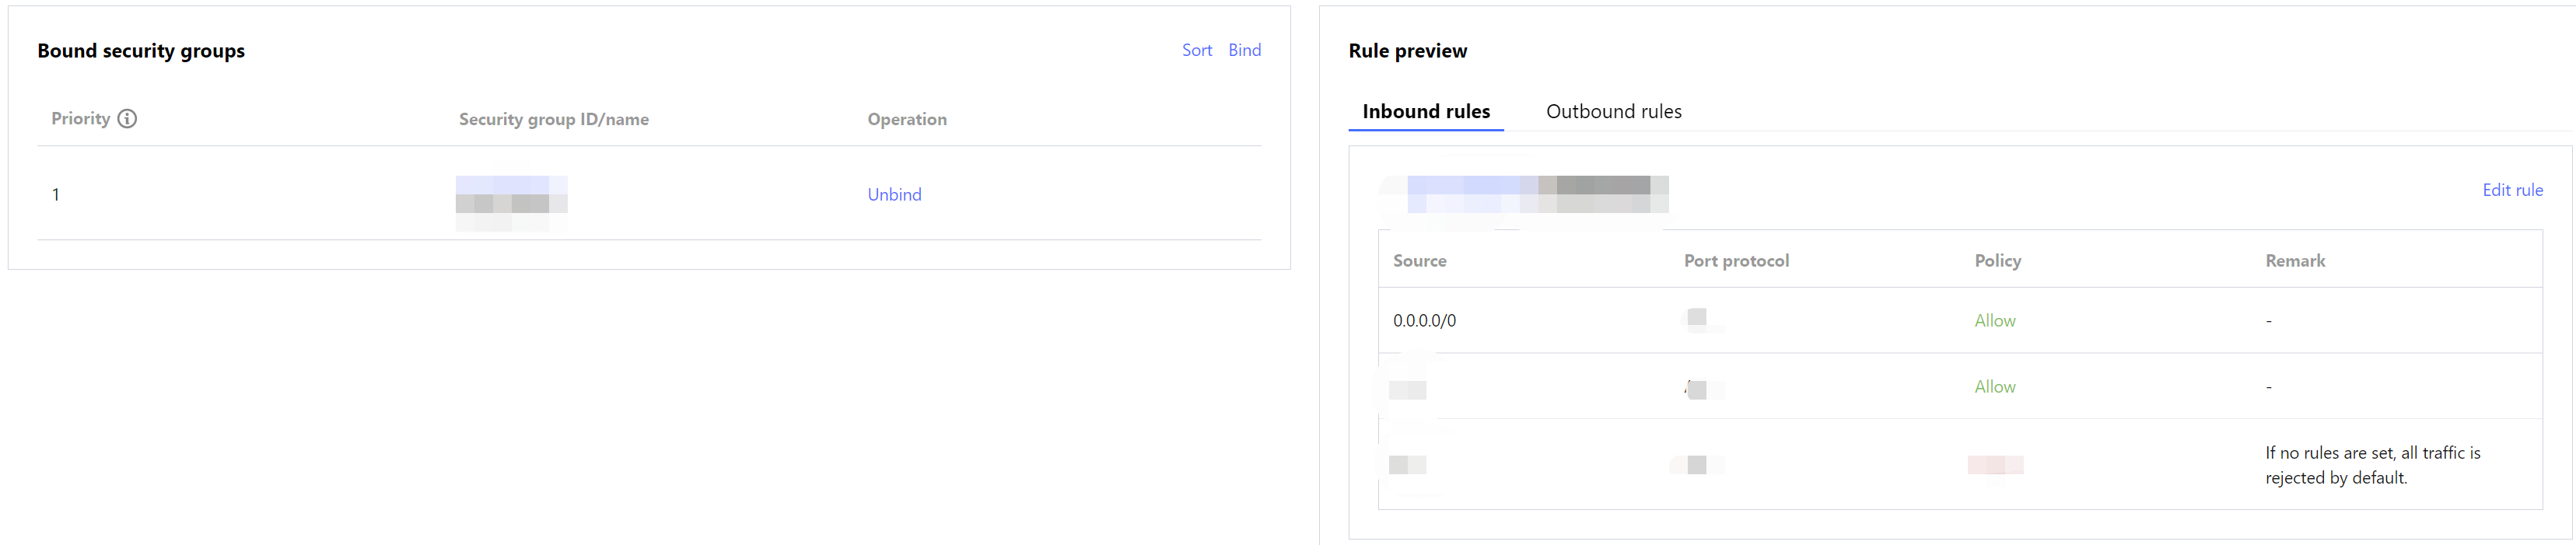
Log in to the CLB console, find the CLB instance bound to MongoDB in the instance list of the instance management page, click Instance ID to enter the Basic Info tab, select Listener Management tab to view the listener. Step 2. Configure a security group
After enabling the public network access, you need to configure security group rules for the CLB and its MongoDB instance timely. By doing so, you can control the access sources to ensure the security of the data access.
2. Log in to the CLB console, find the CLB instance bound to MongoDB in the instance list of the instance management page, click Instance ID to enter the Basic Info tab, and select the Security Group tab. Click Bind in the Bound Security Groups section, select a created security group in the Configure Security Group pop-up window, and click OK. For detailed directions, see Configuring CLB Security Group. 3. Log in to the MongoDB console, find the target instance in the instance list, click the Instance ID, select the Data Security tab, click Configure Security Group to select the desired security group, and click OK. For detailed directions, see Configuring Security Group. Step 3. Connect to a database instance
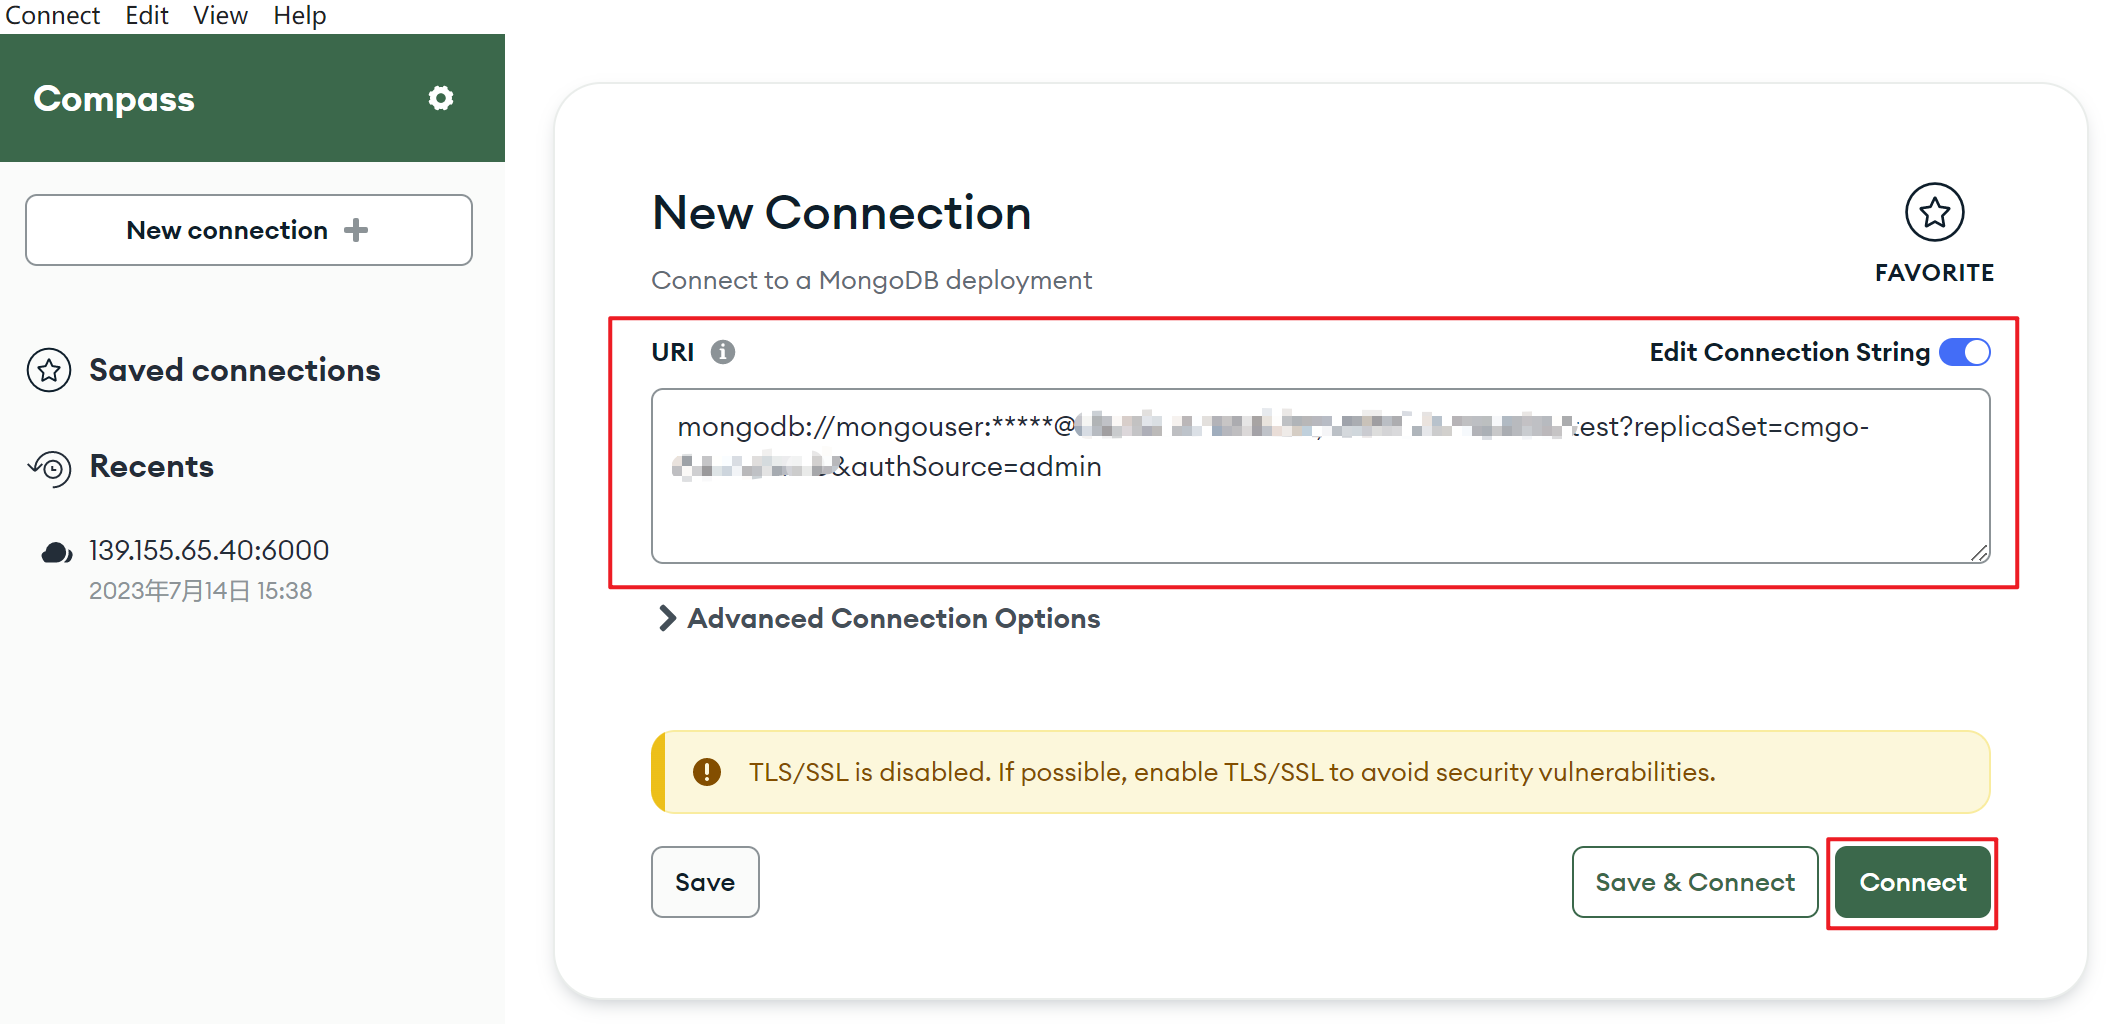
1. Log in to the MongoDB console. In the Network Configuration section on the Instance Details page, In the Access Address section, copy the connection string of Access Read/Write Primary Node or Only read secondary node in the Public network access address (connection string) column in the Access Address. 2. Log in to the MongoDB Compass Download (GUI) client, paste the copied public network address connection string into the URI input box. The password information in the connection string is hidden as *, and you need to manually replace it with the access password of the instance, and click Connect .
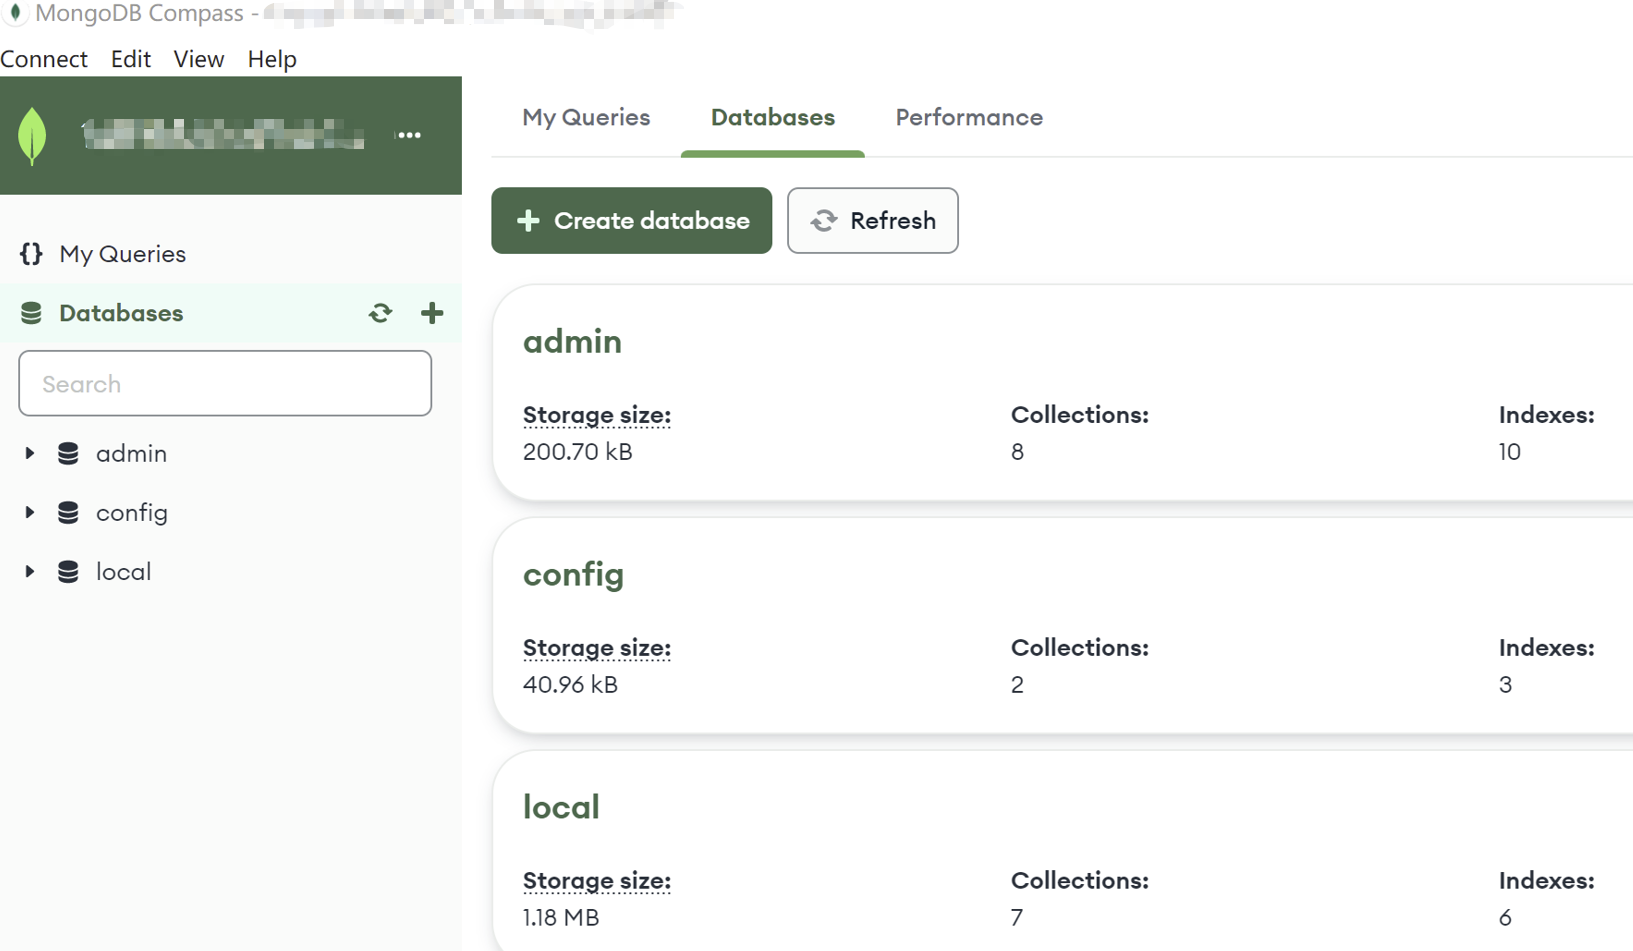
3. You can manage the database after the connection is successful.