This document describes how to upload files directly to a Cloud Object Storage (COS) bucket in uni-app without relying on an SDK, using simple code.
Note:
This document is based on the PostObject and PutObject interfaces of the XML API.
Solution Description
Implementation Process
1. Select a file on the front end, and the front end will send the suffix to the server.
2. The server-side generates a timestamp-based random COS file path based on the suffix, computes the corresponding PostObject policy signature, and returns the URL and signature information to the frontend.
Path security: The random COS file path is determined by the server, which can effectively avoid the problem of existing files being overwritten and security risks.
Multi-platform compatibility: Using the file selection and upload interfaces provided by uni-app, one codebase can be compatible across multiple platforms (Web/Mini Programs/App).
Prerequisites
1. Log in to the COS console and create a bucket to obtain the Bucket (bucket name) and Region (region name). For details, see the Creating a bucket documentation.
2. Log in to the CAM console to obtain your project's SecretId and SecretKey.
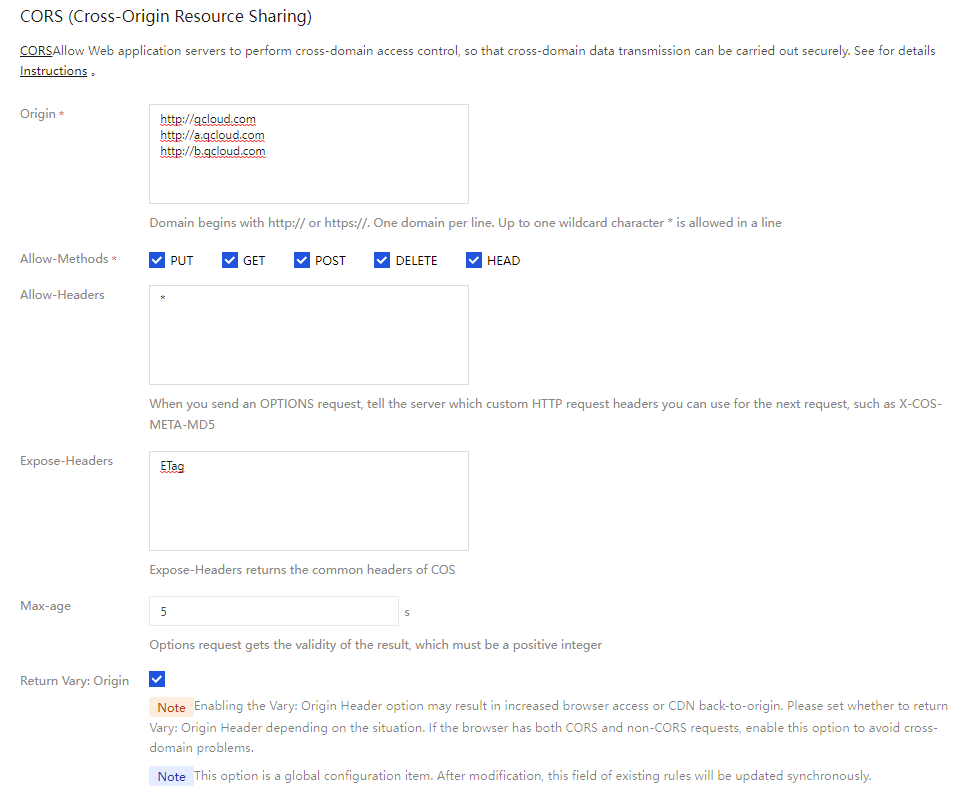
3. Go to the details page of the newly created bucket. On the Security Management > Cross-Origin Access CORS Settings page, click Add Rule. A configuration example is shown in the figure below. For details, see the Setting Cross-Origin Access documentation.
Practical Steps
Note:
Before official deployment, it is recommended that you add a layer of permission verification for the website itself on the server-side.
Frontend Upload
1. Refer to the post-policy example (PostObject server-side interface) or the put-sign example (PutObject server-side interface) to generate a random file path, compute the signature, and return them to the frontend.
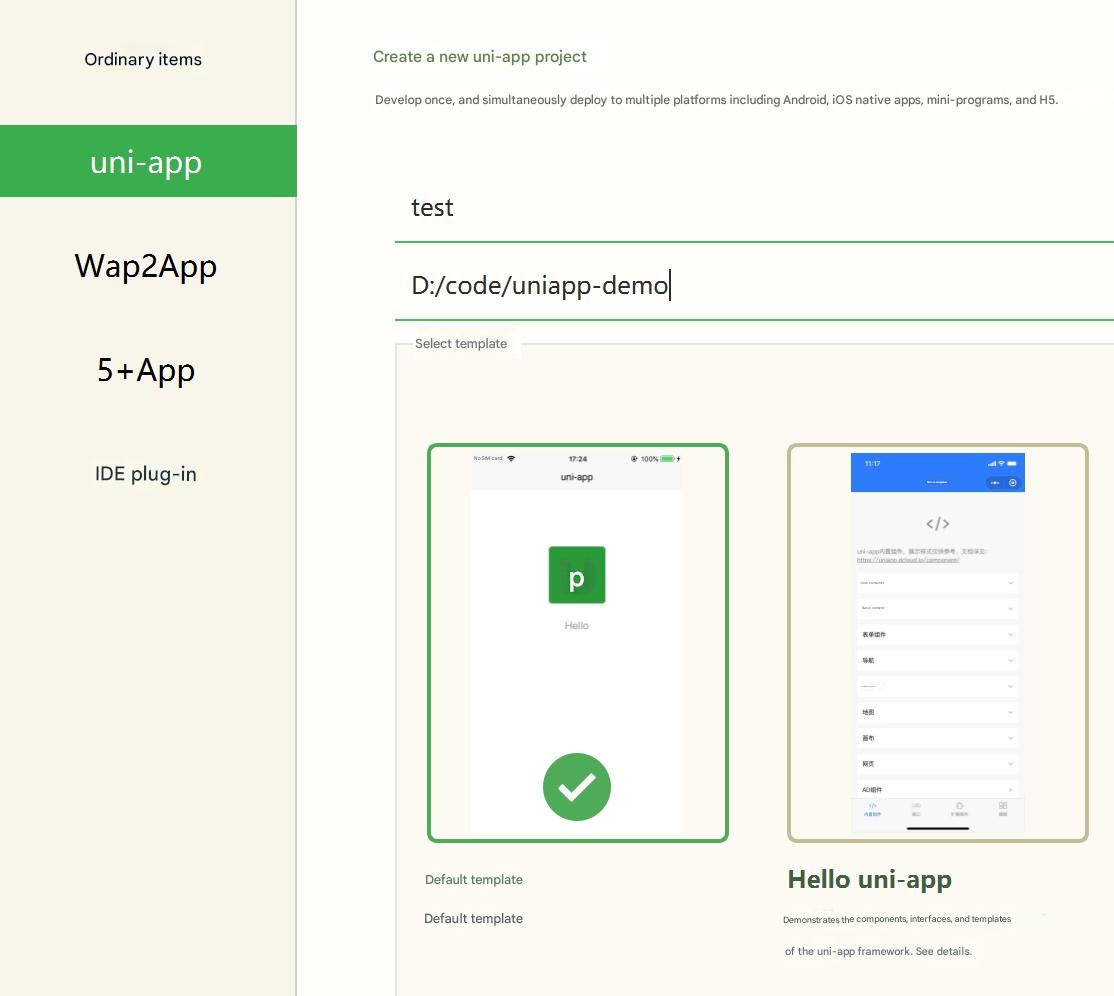
2. Create a uni-app application using the default template in HBuilderX (see the HBuilderX official website for details).
3. Choose File > New > Project. After creation is complete, the application will be a Vue-based project.
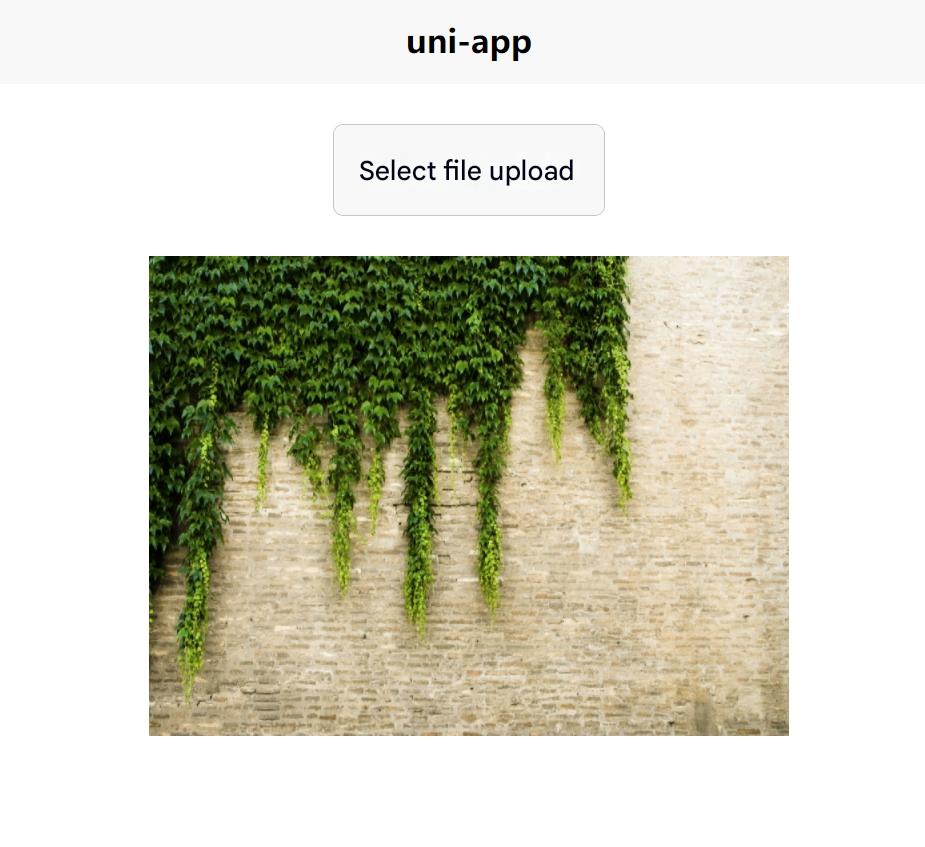
4. Copy the following code to replace the content of the pages/index/index.vue file, and modify the called post-policy interface link to point to your own server address (that is, the server interface in step 1).
// Pass in the file suffix to let the backend generate a random COS object path, and return the upload domain name and policy signature required for the PostObject interface
// Server example reference: https://github.com/tencentyun/cos-demo/tree/main/server/post-policy