iOS(UIKit)
Download
Focus Mode
Font Size
This article will guide you through building a chat interface.
Display Effect
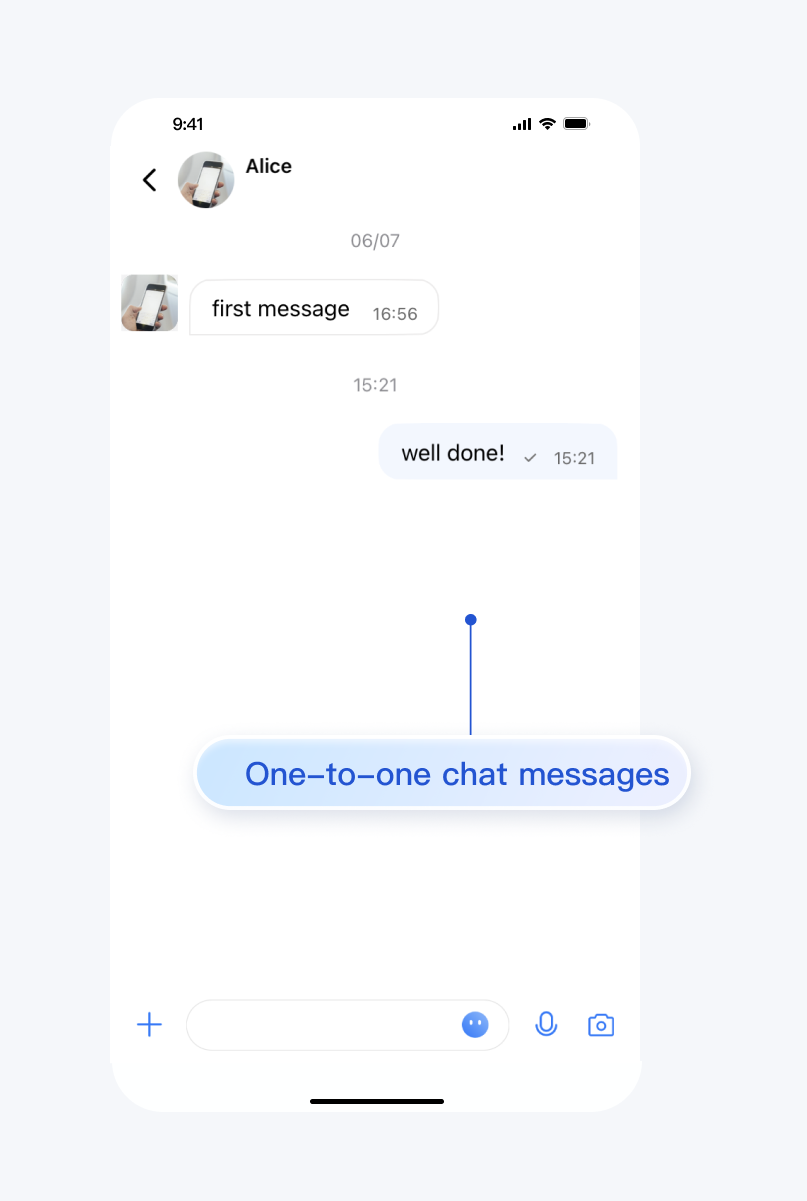
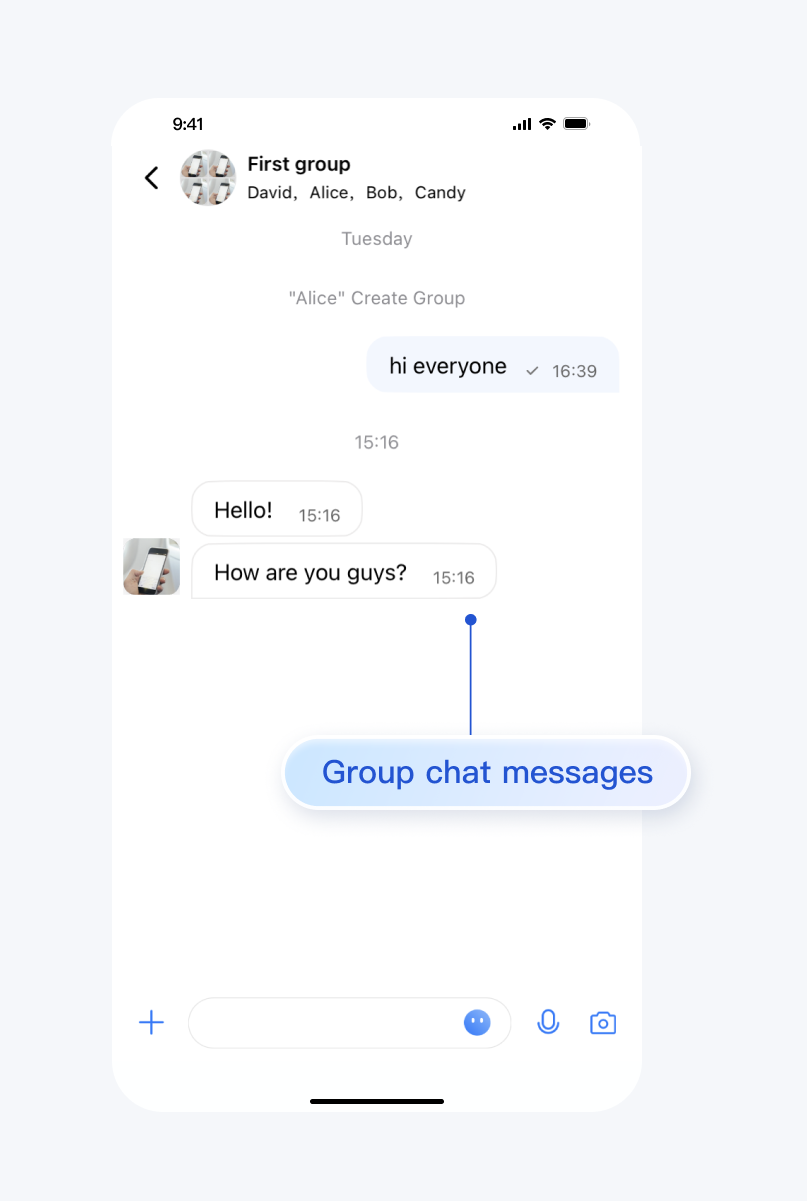
The effect of sending messages in the chat interface is as follows:
One-to-one Chat Interface | Group Chat Interface |
 |  |
Environment Requirements
Xcode 10 or later
iOS 9.0 or later
Preconditions
Before building the interface, please ensure that you have completed the following 4 things:
1. Created an application in the console.
2. Created some user accounts in the console.
3. Integrated
TUIKit or TUIChat.4. Called the
login API in TUILogin to log in to the component.Note:
1. All components use this API to log in. You can log in once every time you start the application.
2. Please make sure that the login is successful, and we recommend that you do the following in the callback of successful login.
If you haven't completed the above 4 steps, please refer to the corresponding steps in Getting Started first, otherwise you may encounter obstacles when implementing the following features.
If you have already completed them, please continue reading below.
Step Instructions
If you wish to jump to the One-to-one Chat Message Interface, you can directly refer to Getting Started, which we won't repeat in this article.
To navigate to the Group Chat Interface, you need to enter a valid groupID. This presupposes that you have an existing groupID of a valid group. There are two convenient ways to obtain it:
1. Go to Console to create a group, the operation path is: Applications > Your App > Chat > Groups > Group Management > Add Group. After successful creation, you can directly see the groupID on the current page.
2. Follow the guide below on Create Group Chat, manually create a group in TUIKit, where the groupID will be displayed on the group details page.
Sample code:
import UIKit// ChatViewController is your own ViewControllerclass ChatViewController: UIViewController {override func viewDidLoad() {super.viewDidLoad()// Create conversation data.let conversationData = TUIChatConversationModel()// Pass userID for 1v1 chat, while groupID for group chat.conversationData.userID = "userID"conversationData.groupID = "groupID"// Create chatVC by groupID or userID.var chatVC: TUIBaseChatViewController_Minimalist?if let groupID = conversationData.groupID, !groupID.isEmpty {chatVC = TUIGroupChatViewController_Minimalist()} else if let userID = conversationData.userID, !userID.isEmpty {chatVC = TUIC2CChatViewController_Minimalist()}chatVC?.conversationData = conversationData// Option 1: push chatVC.navigationController?.pushViewController(chatVC!, animated: true)// Option 2: add chatVC to your own ViewController.// addChild(chatVC!)// view.addSubview(chatVC!.view)}}
#import "TUIBaseChatViewController_Minimalist.h"#import "TUIC2CChatViewController_Minimalist.h"#import "TUIGroupChatViewController_Minimalist.h"// ChatViewController is your own ViewController@implementation ChatViewController- (void)viewDidLoad {// Create conversation data.TUIChatConversationModel *conversationData = [[TUIChatConversationModel alloc] init];// Pass userID for 1v1 chat, while groupID for group chat.conversationData.userID = @"userID";conversationData.groupID = @"groupID";// Create chatVC by groupID or userID.TUIBaseChatViewController_Minimalist *chatVC = nil;if (conversationData.groupID.length > 0) {chatVC = [[TUIGroupChatViewController_Minimalist alloc] init];} else if (conversationData.userID.length > 0) {chatVC = [[TUIC2CChatViewController_Minimalist alloc] init];}[chatVC setConversationData:conversationData];// Option 1: push chatVC.[self.navigationController pushViewController:chatVC animated:YES];// Option 2: add chatVC to your own ViewController.// [self addChildViewController:vc];// [self.view addSubview:vc.view];}@end
import UIKit// ChatViewController is your own ViewControllerclass ChatViewController: UIViewController {override func viewDidLoad() {super.viewDidLoad()// Create conversation data.let conversationData = TUIChatConversationModel()// Pass userID for 1v1 chat, while groupID for group chat.conversationData.userID = "userID"conversationData.groupID = "groupID"// Create chatVC by groupID or userID.var chatVC: TUIBaseChatViewController?if let groupID = conversationData.groupID, !groupID.isEmpty {chatVC = TUIGroupChatViewController()} else if let userID = conversationData.userID, !userID.isEmpty {chatVC = TUIC2CChatViewController()}chatVC?.setConversationData(conversationData)// Option 1: push chatVC.navigationController?.pushViewController(chatVC!, animated: true)// Option 2: add chatVC to your own ViewController.// addChild(chatVC!)// view.addSubview(chatVC!.view)}}
#import "TUIBaseChatViewController.h"#import "TUIC2CChatViewController.h"#import "TUIGroupChatViewController.h"// ChatViewController is your own ViewController@implementation ChatViewController- (void)viewDidLoad {// Create conversation data.TUIChatConversationModel *conversationData = [[TUIChatConversationModel alloc] init];// Pass userID for 1v1 chat, while groupID for group chat.conversationData.userID = @"userID";conversationData.groupID = @"groupID";// Create chatVC by groupID or userID.TUIBaseChatViewController *chatVC = nil;if (conversationData.groupID.length > 0) {chatVC = [[TUIGroupChatViewController alloc] init];} else if (conversationData.userID.length > 0) {chatVC = [[TUIC2CChatViewController alloc] init];}[chatVC setConversationData:conversationData];// Option 1: push chatVC.[self.navigationController pushViewController:chatVC animated:YES];// Option 2: add chatVC to your own ViewController.// [self addChildViewController:chatVC];// [self.view addSubview:chatVC.view];}@endMinimalist
More practices
Contact Us
If you have any questions about this article, feel free to join the Telegram Technical Group, where you will receive reliable technical support.
Help and Support
Was this page helpful?
You can also Contact sales or Submit a Ticket for help.
Help us improve! Rate your documentation experience in 5 mins.
Feedback