tencent cloud

Chat

News and Announcements
Release Notes
Announcements
Product Introduction
Overview
Basic Concepts
Scenarios
Features
Account System
User Profile and Relationship Chain
Message Management
Group Related
Official Account
Audio/Video Call
Use Limits
Purchase Guide
Billing Overview
Pricing
Purchase Instructions
Renewal Guide
Service Suspension Explanation
Refund Policy
Development Guidelines
Demo Zone
Activate Service
Free Demos
Quick Run
Download
SDK and Demo Source Code
Update Log
Chat Interaction (UI Included)
TUIKit Introduction
Getting Started
Full-feature Integration
Single-function Integration
Build with AI
Build Basic Interfaces
More Features
Customizing Appearance
Internationalization
Push Service
Overview
Noun explanation
Activate the Service
Quick Start
Manufacturer Channel
Statistics
Troubleshooting Tool
Client APIs
REST API
Push Callback
Advanced Features
Release Notes
Error Codes
FAQS
Desk
Overview
Quick Start
Integration Guide
Admin Operation Manual
Agent Manual
More Practices
Live Streaming Setup Guide
AI Chatbot
Super Large Entertainment and Collaboration Community
Discord Implementation Guide
How to Integrate Chat into Games
WhatsApp Channel-style Official Account Integration Solution
Send Red Packet
Firewall Restrictions
No UI Integration
Quick Start
SDK Integration
Initialization
Login and Logout
Message
Conversation
Group
Community Topic
User Profile and Relationship Chain
Offline Push
Cloud Search
Local Search
Official Channel Management
Client APIs
JavaScript
Android
iOS & macOS
Swift
Flutter
Electron
Unity
React Native
C APIs
C++
Server APIs
Secure authentication with UserSig
RESTful APIs
Webhooks
Console Guide
New Console Introduction
Creating and Upgrading an Application
Basic Configuration
Feature Configuration
Account Management
Group Management
Official Channel Management
Webhook Configuration
Usage
Viewing Guide for Resource Packages
Real-Time Monitor
Auxiliary Development Tools
Access Management
Advanced Features
FAQs
uni-app FAQs
Purchase
SDK
Account Authentication
User Profile and Relationship Chain
Message
Group
Audio-Video Group
Nickname and Profile Photo
Security Compliance Certification
Service Level Agreement
Security Compliance Certification
Chat Policies
Privacy Policy
Data Privacy and Security Agreement
Migration
Migration Solutions
Migration Solutions Lite
Error Codes
Contact Us

Android

PDF
Focus Mode
Font Size
Last updated: 2025-09-30 15:34:18
This article will guide you through the process of building a conversation list interface.

Demo

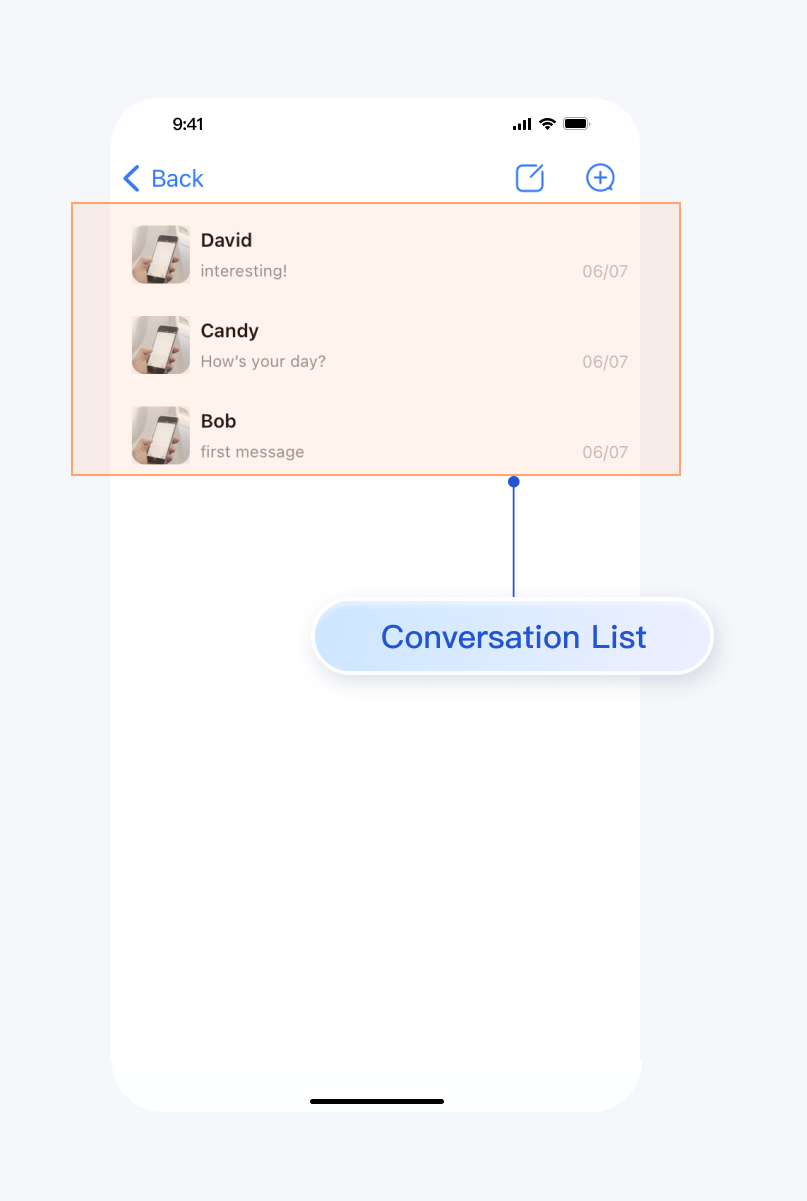
The loading effect of the conversation list is shown below:


Development Environment Requirements

Android Studio-Giraffe
Gradle-7.2
Android Gradle Plugin Version-7.0.0
kotlin-gradle-plugin-1.5.31

Preconditions

Before building the interface, please ensure that you have completed the following 4 things:
1. Created an application in the console.
2. Created some user accounts in the console.
3. Integrated with TUIKit or TUIConversation.
4. Called the login API in TUILogin to log in to the component.
Note:
1. All components use this API to log in. You can log in once every time you start the application.
2. Please make sure that the login is successful, and we recommend that you do the following in the successful login callback.
If you haven't completed the above 4 steps, please refer to the corresponding steps in Getting Started first, otherwise you may encounter obstacles when implementing the following features.
If you have already completed them, please continue reading below.

Step Instructions

To build a conversation list, you just need to add the Fragment corresponding to the conversation list to your Activity. Once added, the Fragment will automatically load recent conversations. If the chat interface is also integrated, when a user clicks on a line in the conversation list, it will automatically navigate to the corresponding chat interface.
MainActivity layout file:
<?xml version="1.0" encoding="utf-8"?> <FrameLayout xmlns:android="http://schemas.android.com/apk/res/android" android:layout_width="match_parent" android:layout_height="match_parent"> <FrameLayout android:id="@+id/conversation_view" android:layout_width="match_parent" android:layout_height="match_parent"/> </FrameLayout>
MainActivity Java file:
Minimalist version
Classic version
public class MainActivity extends AppCompatActivity { @Override protected void onCreate(@Nullable Bundle savedInstanceState) { super.onCreate(savedInstanceState); setContentView(R.layout.main_activity); TUIConversationMinimalistFragment fragment = new TUIConversationMinimalistFragment(); getSupportFragmentManager() .beginTransaction() .add(R.id.conversation_view, fragment) .commitAllowingStateLoss(); } }
public class MainActivity extends AppCompatActivity { @Override protected void onCreate(@Nullable Bundle savedInstanceState) { super.onCreate(savedInstanceState); setContentView(R.layout.main_activity); TUIConversationFragment fragment = new TUIConversationFragment(); getSupportFragmentManager() .beginTransaction() .add(R.id.conversation_view, fragment) .commitAllowingStateLoss(); } }
Note:
If you haven't sent messages to any person or group before, no conversation will be generated. In this case, loading the TUIConversationMinimalistFragment will show an empty list. For a better experience, it's recommended to send messages to some accounts first to trigger the creation of conversations. If you want to know how to send messages in the chat interface, please refer to the document: Build Chat Interface.

More practices

You can locally run the TUIKitDemo source code to explore more interface implementations.

Contact Us

If you have any questions about this article, feel free to join the Telegram Tech Support Group, where you will receive reliable technical support.


Help and Support

Was this page helpful?

Help us improve! Rate your documentation experience in 5 mins.

Feedback