TencentDB for SQL Server supports data migration from SQL Server databases self-built on CVMs. This document guides you on configuring the migration task to help you migrate your self-built SQL Server database on a CVM to TencentDB for SQL Server.
Note:
Before migration, ensure that the SQL Server version of the target instance is not lower than that of the source instance.
It supports uploading a single .bak file or a .tar archive for recovery.
The database to be migrated must not have a duplicate name with a TencentDB for SQL Server database.
The data migration feature for older versions has been decommissioned. This document is for reference only by existing users. To use the new data migration feature, see Data Migration Solution Overview.
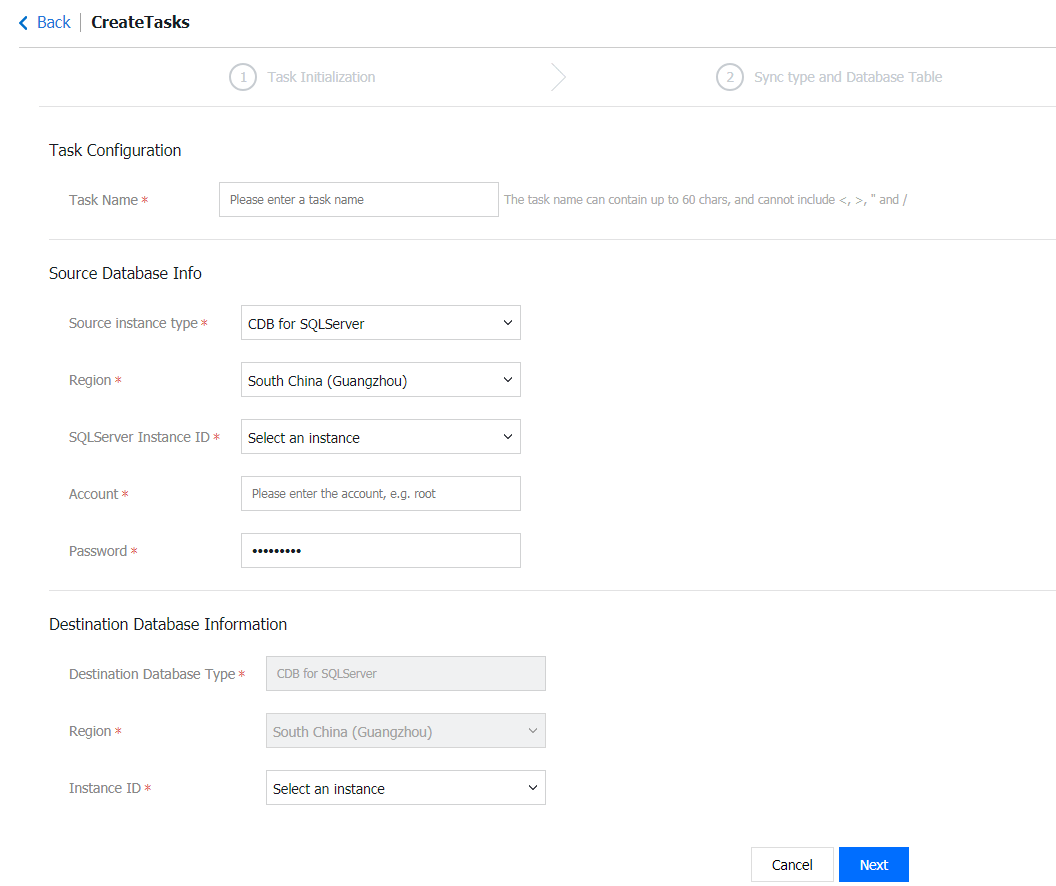
2. Click Create Task, fill in the task name, source database information, and target database information, and select CVM-based self-created SQL Server database for the source instance type.
3. After clicking Next, you must first configure the source SQL Server instance before proceeding to configure the migration task.
Note:
If the error message "Source instance information verification failed!" appears, check the following items to troubleshoot.
Check whether the sa account exists on the source SQL Server instance.
Check whether the password for the sa account on the source SQL Server instance is correct.
Check whether the connectivity of the source SQL Server instance's IP address and PORT is normal.
Step 2: Configuring the Source SQL Server Instance
1. The sa account is enabled on the source SQL Server instance.
2. In Connections, select Allow remote connections to this server and set a reasonable remote query timeout value.
3. In Security, select SQL Server and Windows Authentication mode.
4. Enable the TCP/IP network protocol.
5. Start the built-in account and select localsystem.
6. The Windows Firewall allows communication on SQL Server ports, as well as on port 445 (for the basic network) or port 49001 (for the VPC).
7. (Optional) When you select VPC for CVM Network, you must configure the freeSSHd tool.
8. Download and install freeSSHd, use the default installation, and agree to start the freeSSHd service.
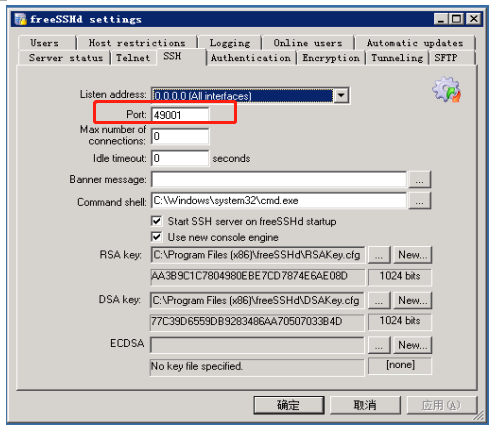
9. Double-click the freeSSHd desktop icon, right-click the freeSSHd icon in the taskbar to open the Settings page, and then configure it.
10. Select the SSH option and configure the port to 49001 (the default port here is 22 and needs to be changed to 49001).
11. Select the Server status option and start the SSH server.
12. Select the Authentication option and then select Allowed to enable password authentication.
13. Select the Users option, add a user named tencent_vpc_migrate (this username cannot be changed) with the password tencent_vpc_migrate (this password cannot be changed), and configure as shown in the following figure:
14. Use D:\\dbbackup\\ (this path cannot be changed) as the backup folder for SQL Server migration, select the SFTP option, and configure this path in "SFTP home path".
Step 3: Configuring the Migration Task
Select the migration type and configure the database (select the databases and tables to be migrated), click Save and Verify, and if the verification fails, complete the fixes as instructed by the error messages.
Step 4: Starting the Migration Task
After the task is created, return to the task list. At this point, the task status is Initializing. Select and click Start to initiate the synchronization task.
Step 5: Completing the Migration Task
After data synchronization is complete (that is, the progress bar reaches 100%), you must manually click Complete to end the synchronization process. If you selected Incremental Sync when configuring the migration task, you need to manually click Complete when the progress bar is at 99%. Then, check the Status to see whether the migration succeeded.
When the task status changes to Task successful, it indicates that the data migration has succeeded.
When the task status changes to Task failed, it indicates that the data migration has failed. Please check the failure information, and then re-migrate after making corrections based on that information.
This API (StartMigrationCheck) is used to start a pre-migration verification task, applicable to the migration method where the migration source type is TencentDB for SQL Server.
This API (QueryMigrationCheckProcess) is used to query the progress of a migration check task, applicable to the migration method where the migration source type is TencentDB for SQL Server.