- Updates and Announcements
- User Tutorial
- Product Introduction
- Purchase Guide
- Getting Started
- Configuration Guide
- Permission Management
- Use Cases
- Best Practice
- API Documentation
- FAQ
- Troubleshooting Methods
- CDN Service Level Agreement
- Glossary
- Updates and Announcements
- User Tutorial
- Product Introduction
- Purchase Guide
- Getting Started
- Configuration Guide
- Permission Management
- Use Cases
- Best Practice
- API Documentation
- FAQ
- Troubleshooting Methods
- CDN Service Level Agreement
- Glossary
This document describes how to accelerate access to resources in COS through CDN in the COS console.
Prerequisites
- You have signed up for a Tencent Cloud account and verified your identity.
- You have activated the CDN service. For more information, see Configuring CDN from Scratch.
Operation Guide
Creating a bucket
For more information on how to create a bucket, see Creating Buckets.
Configuring acceleration
- After a bucket is created, click the name of the bucket in the bucket list to go to the configuration management page. You can also click Configure in the "Operation" column of the bucket to go to the configuration management page. Then, click Domain Management on the left sidebar.
- Enable the Default CDN Acceleration Domain.
Generated by the system, the default CDN acceleration domain is the domain name passing through CDN cache nodes. You can choose to enable or disable it.
(1) Click Edit to manually enable Default CDN Acceleration Domain.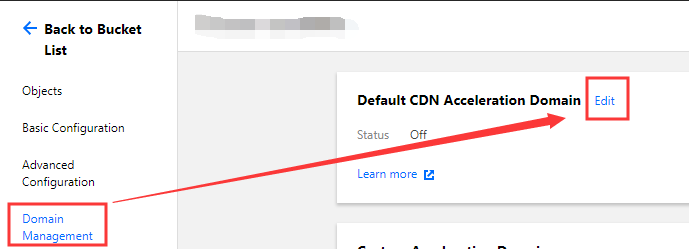
(2) Set the default CDN acceleration: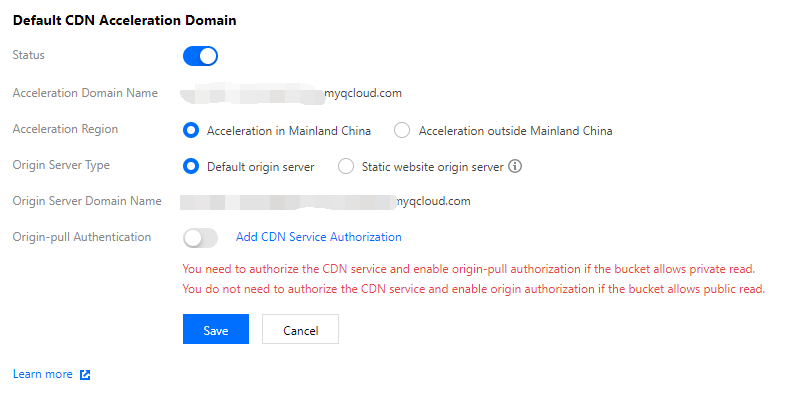
Origin Server Type: It is set to default origin server. If you have enabled static website for the origin server bucket and want to accelerate content delivery for the static website, select static website origin server.
Origin-pull Authentication: For public-read buckets, origin-pull authentication does not need to be enabled. For private-read buckets, CDN service authorization must be added and origin-pull authentication must be enabled manually. For more information, see Enabling Default CDN Acceleration Domain Names.
CDN Authorization: Click Add CDN Service Authorization and select I agree to this authorization and understand that the CDN service can access this bucket.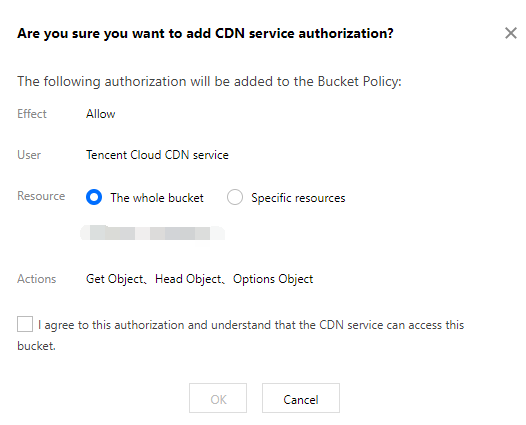
(3) After completing the configuration, click Save. CDN acceleration is enabled.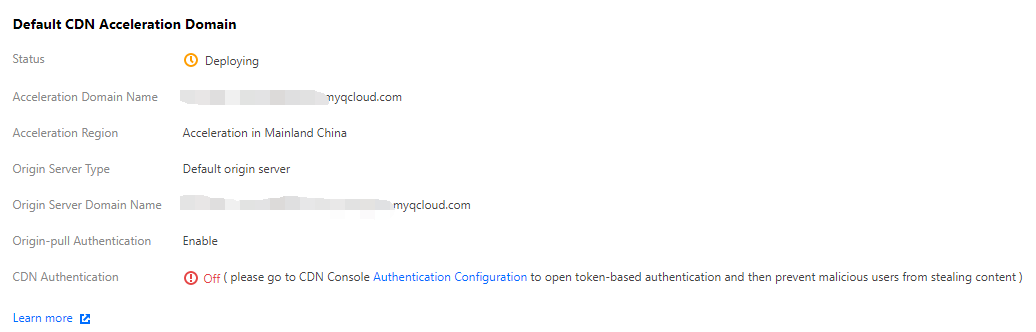
Note:
- If both origin-pull authentication and CDN service authorization are enabled for private-read buckets, a signature is not required to access the origin server through CDN, and cached resources in CDN are distributed over the public network. In this case, data security may be affected. To ensure data security, we recommend that you enable CDN authentication.
- On May 9, 2022, COS discontinued support for default CDN acceleration domains for buckets that never used them. This change does not affect buckets that are using or once used default CDN acceleration domains. However, we recommend that you switch to custom CDN acceleration domains. For more information on how to enable custom CDN acceleration domains, see Enabling Custom CDN Acceleration Domains.
- Enable Custom CDN Acceleration Domain.
You can bind a custom domain name that already has an ICP filing to the bucket and enable CDN acceleration.Note:A maximum of 10 custom domain names can be added in the COS console.
(1) Click Add Domain in the Custom Acceleration Domain section.

(2) Add a custom domain name that has an ICP filing.
Domain: Enter the custom domain name to be bound, for example,www.example.com. Ensure that the domain name has an ICP filing and a corresponding CNAME record has been configured at the DNS service provider. For more information, see CNAME Configuration.
Origin-pull Authentication: For private-read buckets, manually enable origin-pull authentication to protect the origin server.
After completing the configuration, click Save. The custom domain name is added.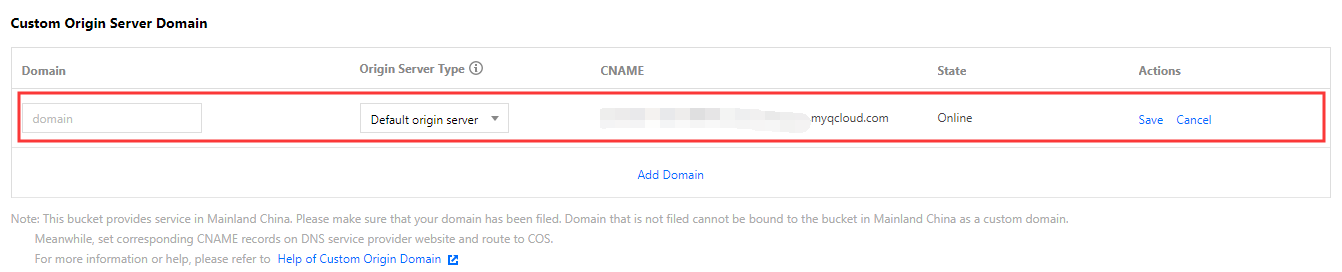
!- If both origin-pull authentication and CDN service authorization are enabled for private-read buckets, a signature is not required to access the origin server through CDN, and cached resources in CDN are distributed over the public network. In this case, data security may be affected. To ensure data security, we recommend that you enable CDN authentication.
- On May 9, 2022, COS discontinued support for default CDN acceleration domains for buckets that never used them. This change does not affect buckets that are using or once used default CDN acceleration domains. However, we recommend that you switch to custom CDN acceleration domains. For more information on how to enable custom CDN acceleration domains, see Enabling Custom CDN Acceleration Domains.
(3) After the configuration is saved, the CDN authentication switch is displayed in the CDN Authentication column. You can manually enable CDN authentication for the custom domain name.
CDN Authentication: Timestamp authentication can be enabled to prevent data theft by malicious users. You can enable the feature after adding the domain name.
For more information on how to configure CDN acceleration in the COS console, see Domain Name Management Overview.
Recommended Configuration
- After completing all the settings, go to the CDN Console and prefetch the static resource files in COS to CDN nodes in advance, which will reduce the strain on the origin server and accelerate response and downloading. For more details, see Prefetch Cache.
- Configure cross-origin access headers. For more details on cross-origin permissions of resources, see HTTP Response Header.
- If the resource has been modified on your origin server, you are recommended to purge cache before prefetch again. For more details, see Purge Cache.

 Yes
Yes
 No
No
Was this page helpful?