This document describes how to quickly create an event-triggered function in the console.
Compared with event-triggered functions, the HTTP-triggered functions provided by SCF focus more on optimizing web services. Click here to understand and quickly create an HTTP-triggered function.
Step 1. Sign up for a Tencent Cloud account
If you already have a Tencent Cloud account, ignore this step.
Step 2: Topping Up Online
New SCF users are entitled to a certain monthly free tier of resource usage and invocations within three months of activation. SCF can be billed in a prepaid (subscription package) or postpaid (pay-as-you-go) manner. If you need to use other postpaid Tencent Cloud resources, top up your account first as instructed in Payment Methods before making purchases.
Step 3. Authorizing TKE
Log in to the Tencent Cloud console, select Products > Serverless Cloud Function to enter the SCF console, and follow the prompts to authorize SCF. (If you have already authorized SCF, skip this step.)
Step 4. Create a function
1. Click Function Service on the left sidebar to enter the Function Service page.
2. Select Guangzhou at the top of the page and click Create as shown below:
3. On the Create function page, select Create from scratch as shown below:
4. Configure the basic information of the function as shown below:
Function type: Select Event-triggered function.
Function name: The function name is automatically populated by default and can be modified as needed.
Region: The region is automatically populated by default and can be modified as needed.
Runtime environment: Python 3.7 is automatically populated by default and can be modified as needed.
Time zone: SCF uses the UTC time by default, which you can modify by configuring the TZ environment variable. After you select a time zone, the TZ environment variable corresponding to the time zone will be added automatically.
5. Keep the default options for Function codes, Log configuration, and Advanced configuration.
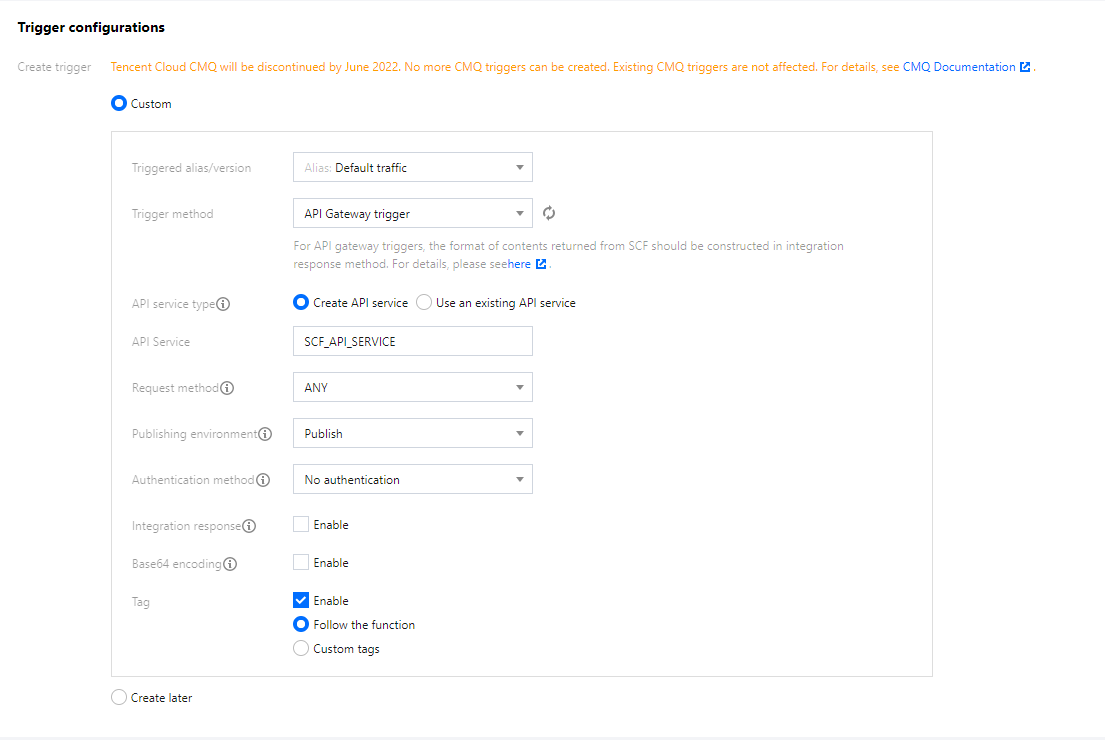
6. Select Create trigger > Custom to create a trigger as shown below:
Trigger method: Select API Gateway trigger.
Integration Response: Deselect Enable integration response.
Keep the default options for other parameter.
7. Click Complete. You can view the created function on the Functions page.
Step 5. Test in the cloud
Function deployment test
Trigger configuration test
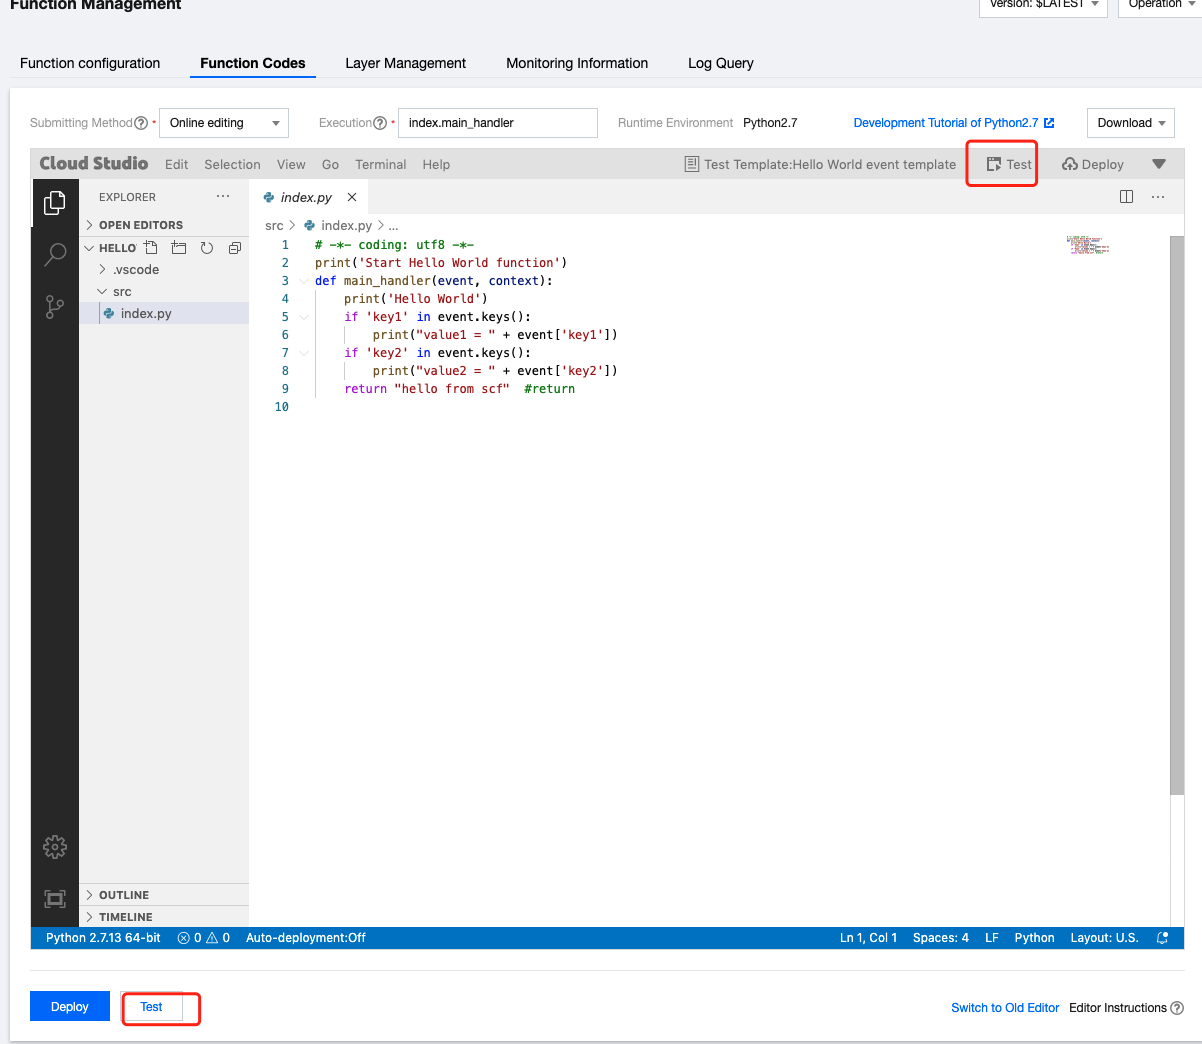
On the Function Management page, select Function code and click Test to run the code with the test result returned as shown below:
Note:
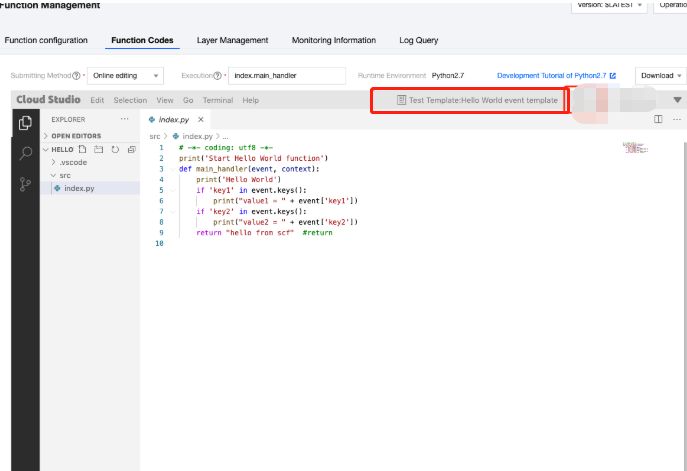
If you need to replace the test template or its content, you can directly edit the function content or select Current test template, replace it, and then click Save as shown below:
Different test templates simulate different trigger message sources, and the messages passed between different triggers and SCF are data structures agreed upon in advance. For more information, see Trigger Overview.
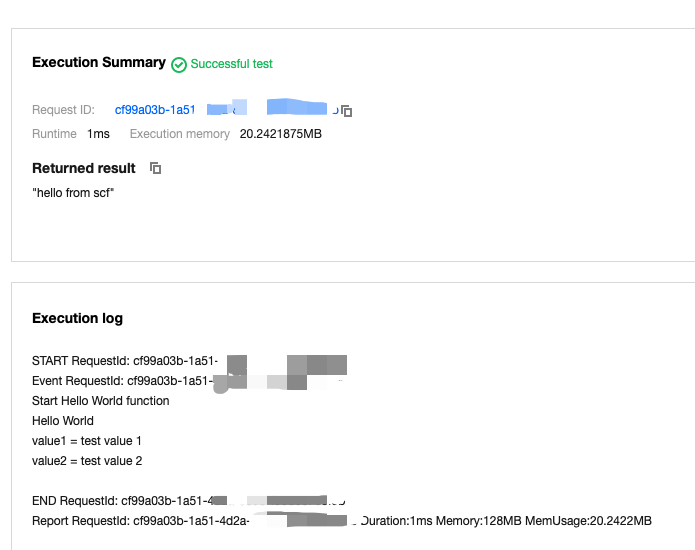
The following information will appear:
During this test, SCF will get the data structures of the "Hello World event template" in the event parameter of the main_handler.
{
"key1":"test value 1",
"key2":"test value 2"
}
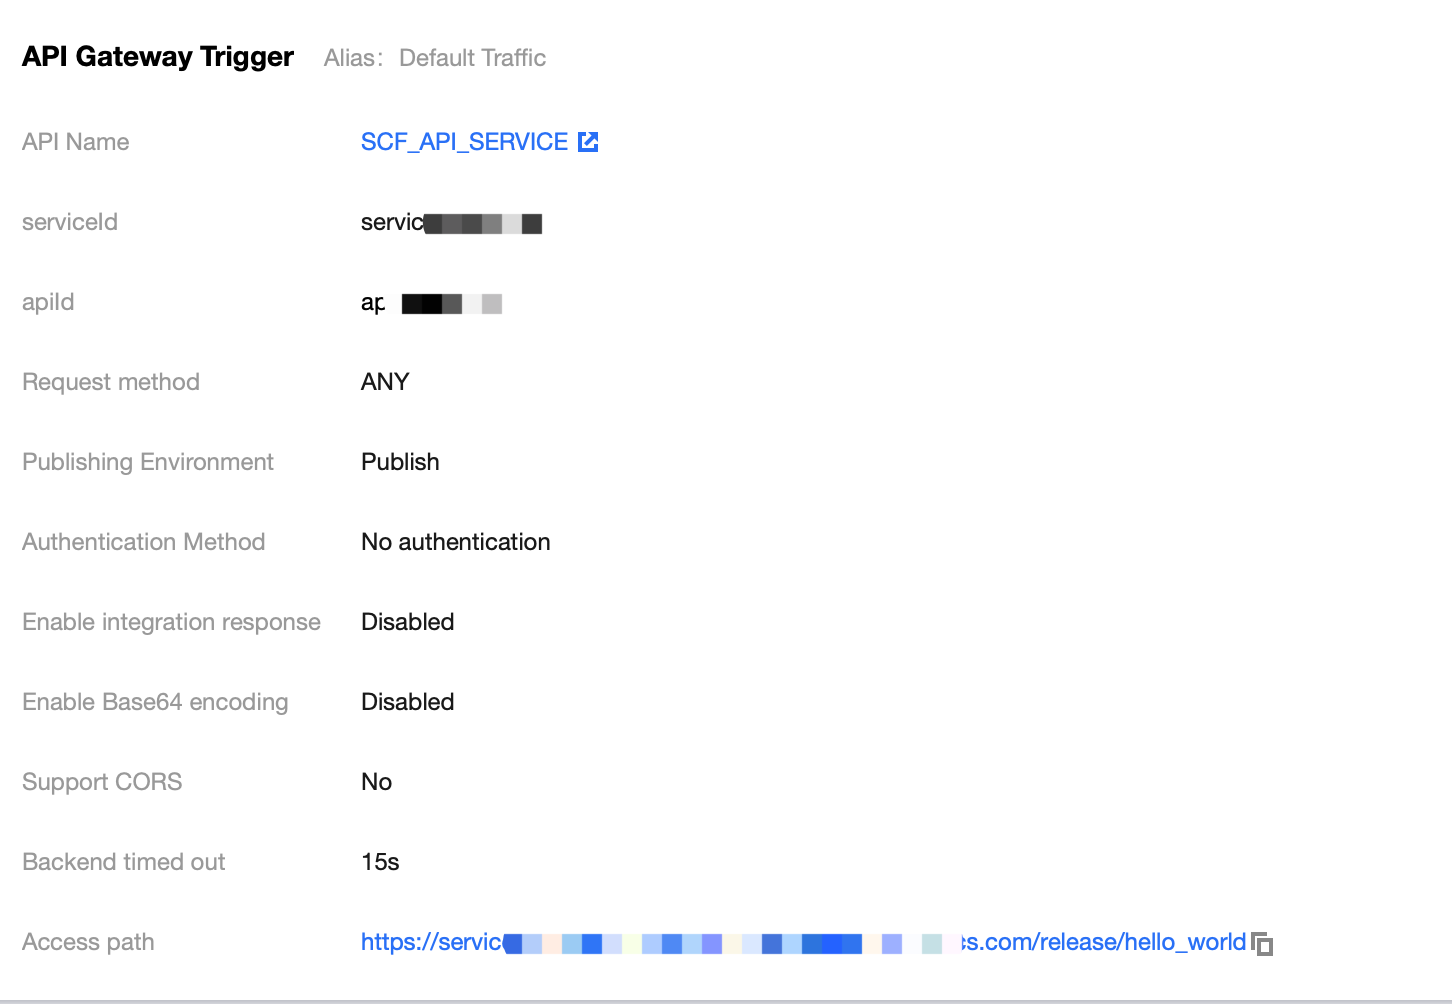
On the Trigger Management page, view the trigger details.
1. After a trigger is successfully created, an access path will be generated on the Trigger management page of the function as shown below:
2. Open the access path in a browser. If "Hello World" is displayed, the function is successfully deployed.
Step 6. View logs and monitoring data
View logs
View monitoring data
Configure alarms
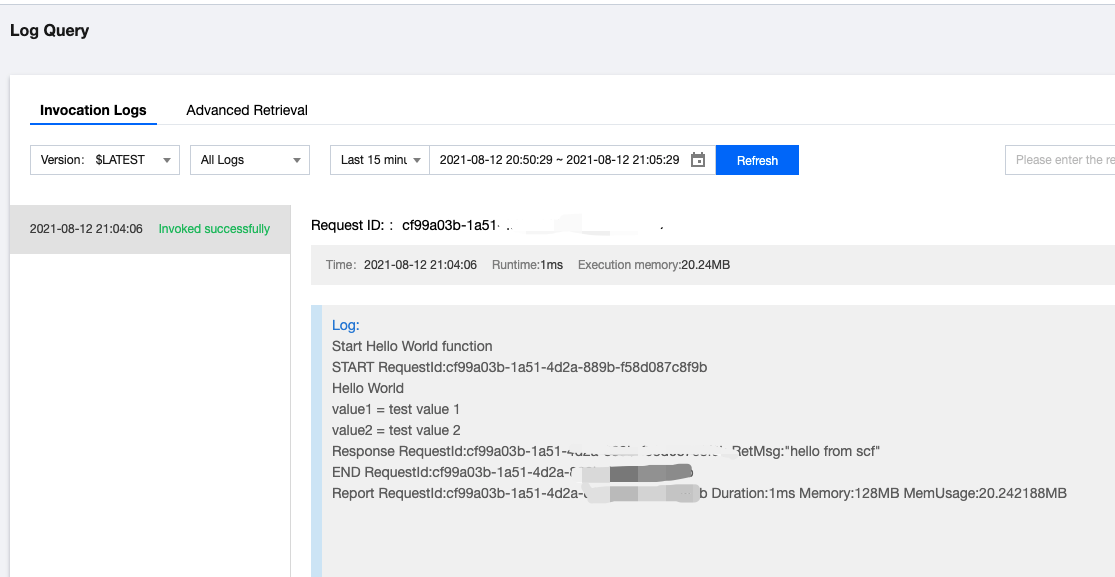
On the details page of a created function, select Log Query on the left to view the detailed logs of the function as shown below:
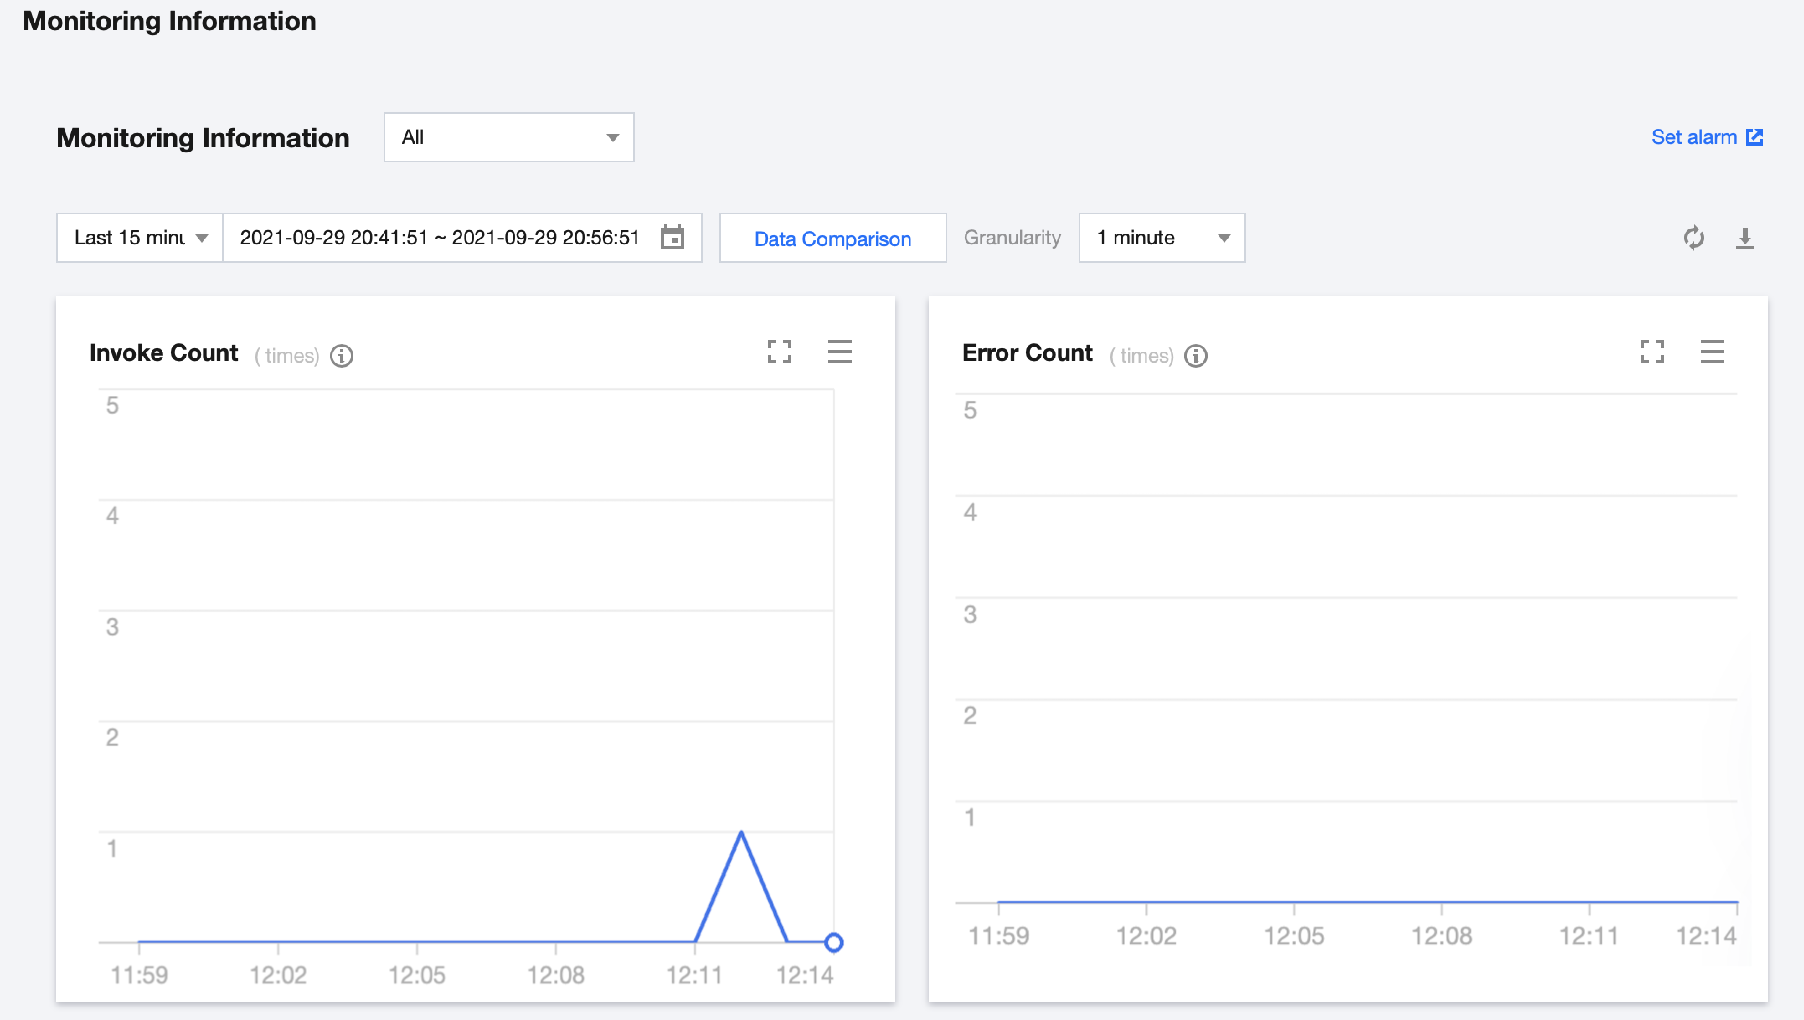
On the Function Management page, select Monitoring information of the created function to view metrics such as function invocations and execution duration as shown below:
Note:
The minimal granularity of monitoring statistics collection is 1 minute. You need to wait for 1 minute before you can view the current monitoring record.
On the details page of a created function, click click here to configure an alarm policy for the function to monitor its running status as shown below:
For more information on how to configure an alarm, see Configuring Alarms.
Step 7. Delete the function
After the function starts running, it consumes resources. In order to avoid unnecessary fees, this step shows you how to clear all resources.
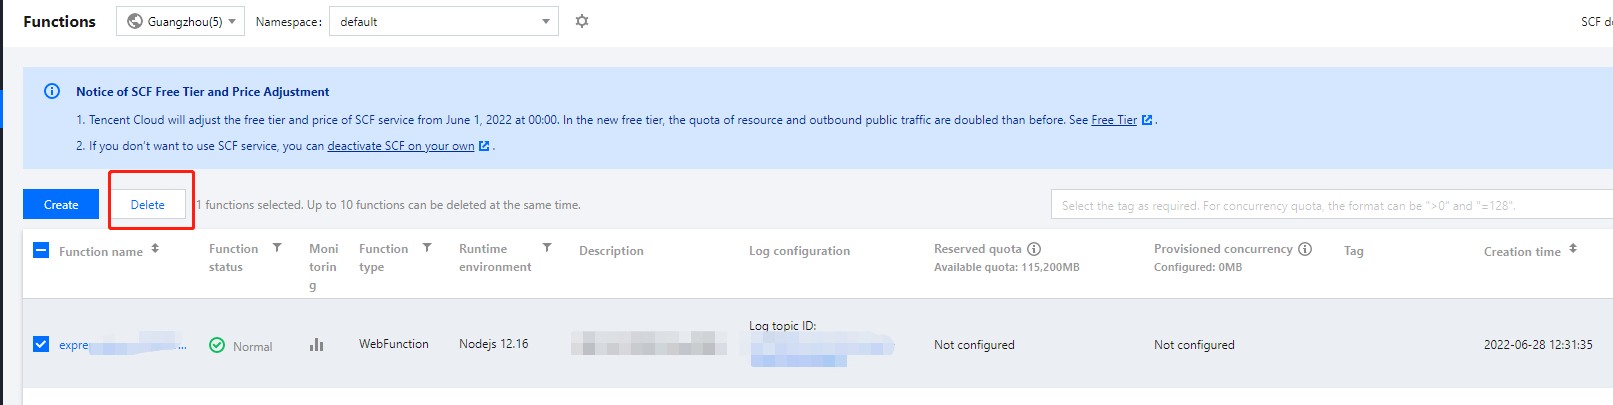
1. Select Functions on the left sidebar, select the function to be deleted, and click Delete as shown below:
2. Confirm the information in the Delete Function pop-up window and click OK.