Live recording is a solution that records and saves live streams to VOD after remuxing (without modifying audio/video data, timestamp etc.). The recording files can be further processed and distributed. For details, see Live Recording.
Strengths
Based on the capabilities of CSS, the live recording feature can quickly record and store live streaming content to VOD for secondary production and distribution.
Relying on Tencent Cloud's leading AI technologies in audio and video and globally deployed cache nodes, VOD provides top-notch audio/video services including stream publishing, transcoding, distribution, and playback, delivering ultra-low latency and ultra-high image quality while being capable of handling large numbers of concurrent requests.
With the live recording feature, you can easily spread videos of your live events in various scenarios and to different applications.
The feature is useful in cases such as corporate live streaming, live shopping, and online classes. It allows you to distribute your content through different channels.
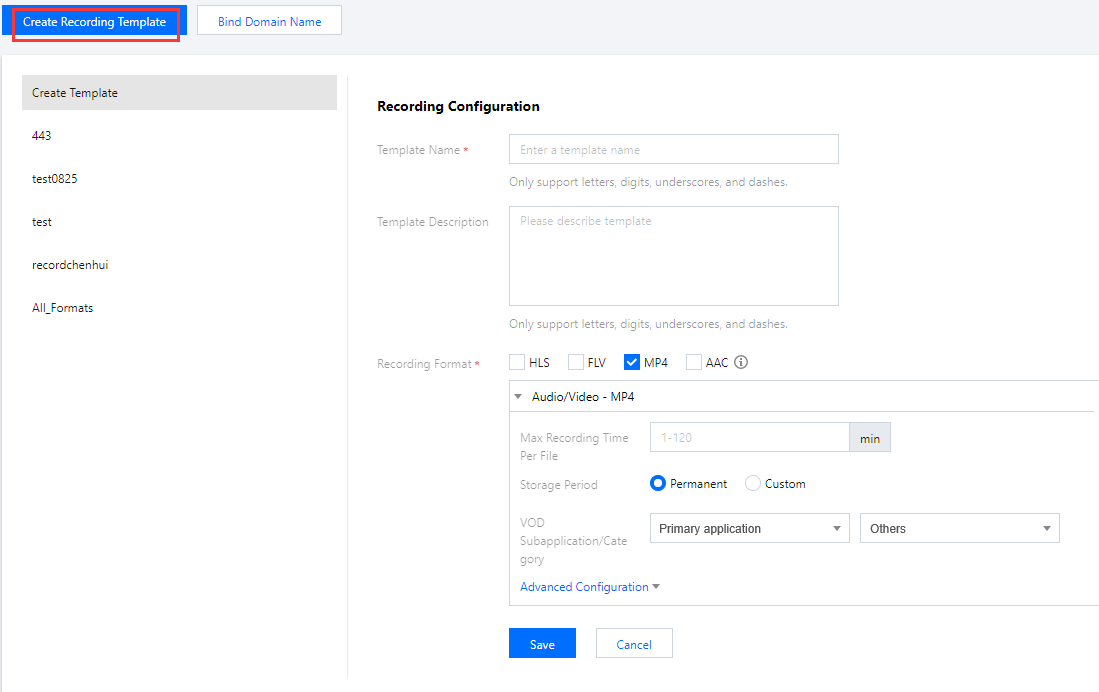
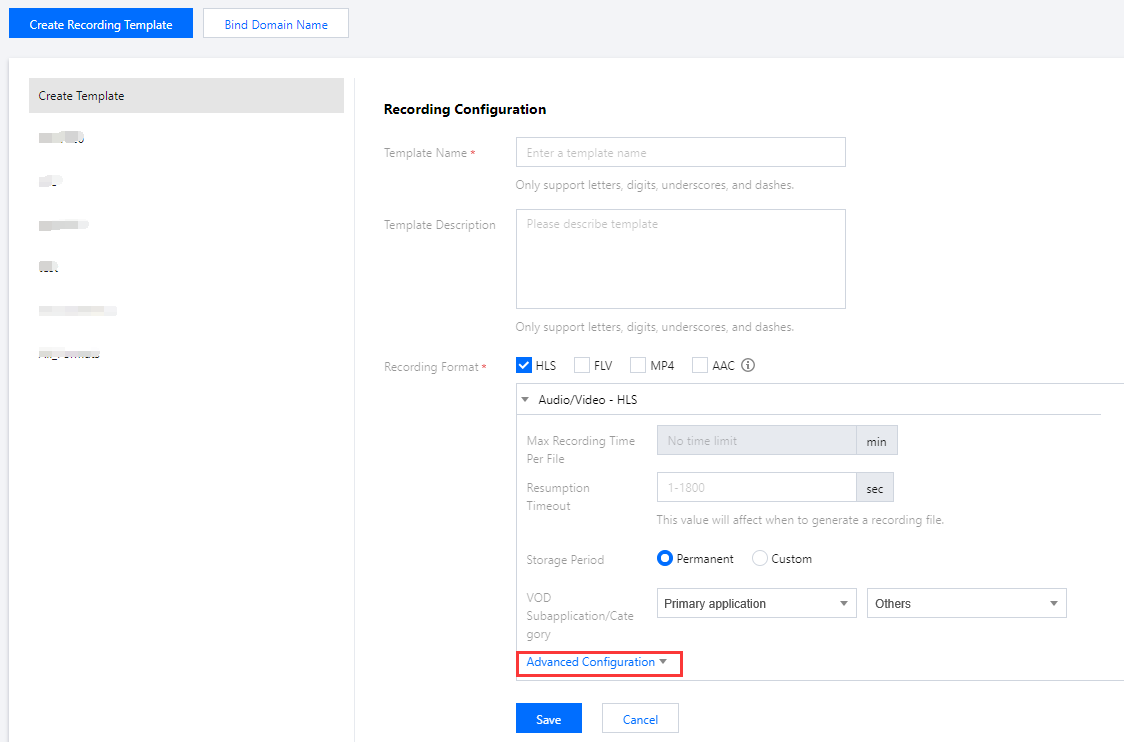
To use the live recording feature, you need to create a recording template first. The configuration of live recording is saved in the recording template. You can create recording templates with different configurations to record files into different formats or different durations.
1.2 Click Create Recording Template and select at least one recording format. For detailed directions, see Creating a Recording Template.
1.3 Click Save.
Creating a template using an API:
You can also call the CreateLiveRecordTemplate API to create a recording template. The template ID will be returned after the template is created successfully.
Step 2. Select a recording scheme
CSS offers the following recording schemes for different scenarios:
Scheme 1. Global recording for a domain name
You can bind your live recording template to a push domain in the CSS console or by calling an API, and streams pushed through the domain will be recorded automatically.
Use cases: Showroom streaming, live shopping, online classroom, and video surveillance.
Steps:
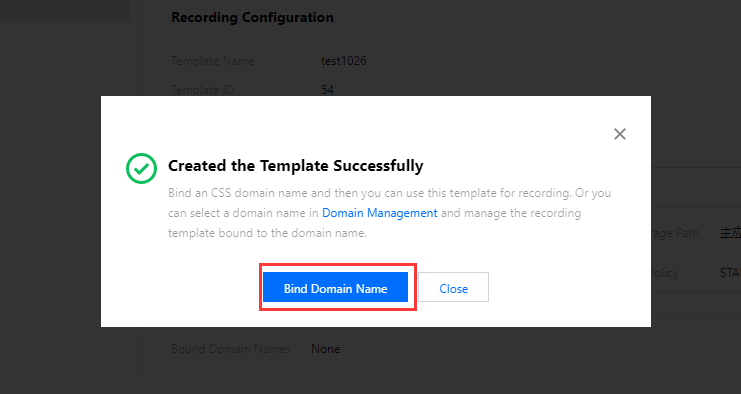
1.1 After creating a recording template, you will be prompted to bind a domain name. Click Bind Domain Name and select a push domain.
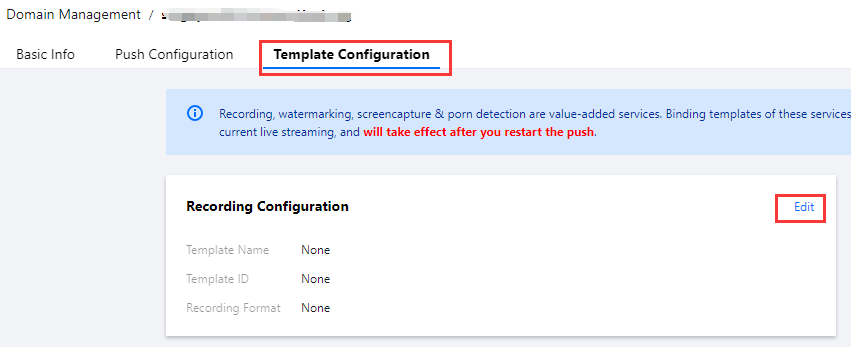
1.2 You can also bind a push domain on the Domain Management. Click your push domain. On the domain details page, select Template Configuration. In the Recording Configuration area, click Edit to bind the push domain. For more information, see Binding a Recording Template.
1.3 Alternatively, you can call CreateLiveRecordRule, passing in the template ID and push domain to bind them.
Scheme 2. Recording a specified stream
You can record a specific live stream by binding your live recording template to the specified live stream through an API.
Use cases: Live events, live exhibitions, sports live streaming, and co-streaming.
Steps: To bind a recording template to a specific live stream, call CreateLiveRecordRule, passing in the recording template ID, the target push domain, push path, and StreamName (these three parameters must match).
Scheme 3. Recording a specified time period
You can call an API to specify the time to start and end recording.
Use cases: News live streaming and live events.
Steps: Call CreateRecordTask to create a recording task, specifying the recording template ID, the target push domain, push path, and StreamName (these three parameters must match), as well as the start and end time.
Example:
1. In the simplest case, you only need to specify StreamName, DomainName, AppName, and EndTime to record live streams.
The following sample code creates a video recording task from 8 AM to 10 AM on August 10, 2020. The recording files are in FLV format and are saved permanently. Each segment is 30 minutes long.
Sample request:
2. You can also specify the recording format, recording type, and storage parameters.
The following sample code creates a video recording task from 8 AM to 10 AM on August 10, 2020. The recording files are in MP4 format and are saved permanently. Each segment is one hour long.
Scheme 4. Real-time recording (mixed-stream recording is supported)
You can record any segment of a stream in real time through API calls.
Use cases: Scenarios where only segments need to be recorded, such as sporting events or game live streaming (you can also record streams globally and clip out the segments you need afterward).
Steps: Call CreateRecordTask to create a recording task, specifying the recording template ID, the target push domain, push path, and StreamName (these three parameters must match), as well as the end time. The task will start immediately after creation.
If only audio is published, you can record it in AAC format.
Use cases: Audio live streaming and audio co-streaming.
Steps: When creating the recording template, select AAC as the format, and bind the push domain.
Note:
A binding rule will take effect in about 5-10 minutes after creation. Any change of the binding rule will not affect live streams that are being pushed and will apply only to new streams.
Step 3. Publish a stream
After binding the recording template with your push domain as instructed in Step 2, generate a push address using the push domain, and push you stream via the address.
After the live stream ends, the recording file will be stored to VOD.
Note:
If you have selected a subapplication when creating the recording template, the recording file will be stored in the specified subapplication.
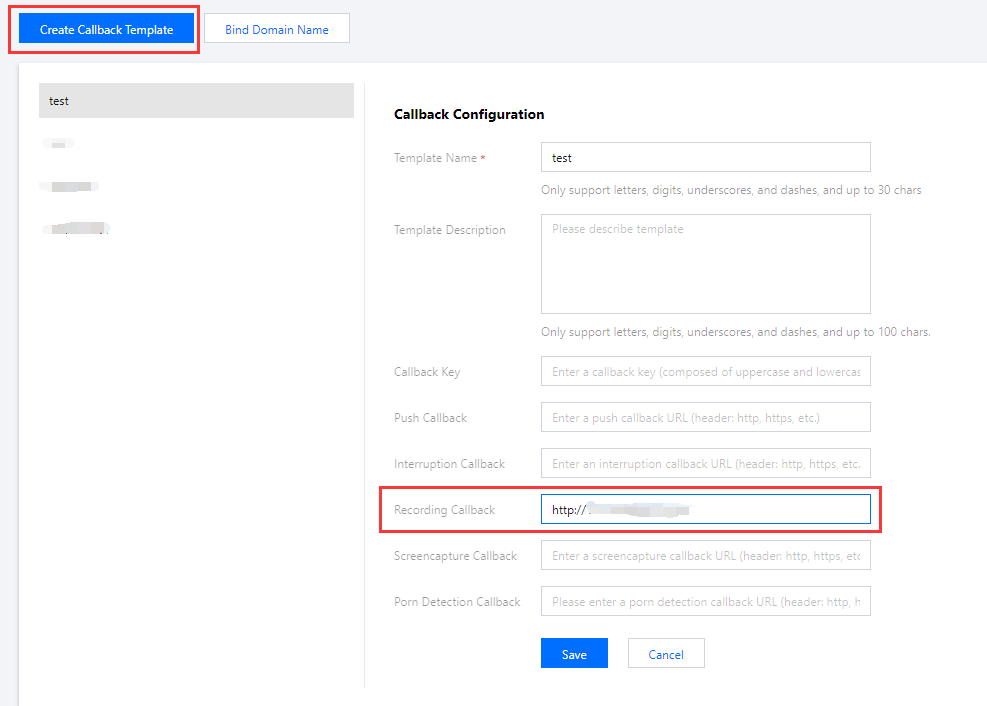
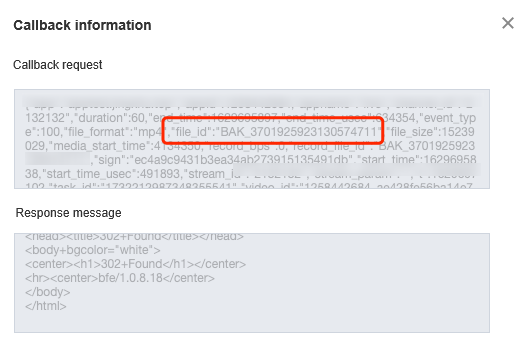
If you want to receive the URL of the recording file via a callback, you need to create a callback template (enter the callback URL and bind the push domain) before publishing your stream. For details, see Recording Event Notification.
Step 4. Get the recording file
You can query and get a recording file using the following methods:
Recording callback: If you have configured a callback template (you need to provide a callback URL) before publishing a live stream, when a recording file is generated, a callback will be sent to your callback server. To learn more, see Recording Event Notification.
VOD API: You can also call the SearchMedia API to query files.
Step 5. Process the recording file
Scheme 1. Live recording + automatic transcoding + video playback acceleration
Use cases: The recording file of a live stream can be immediately transcoded and accelerated automatically for viewers to play back on demand. This scheme is suitable for most live streaming scenarios where no video processing is required.
Steps:
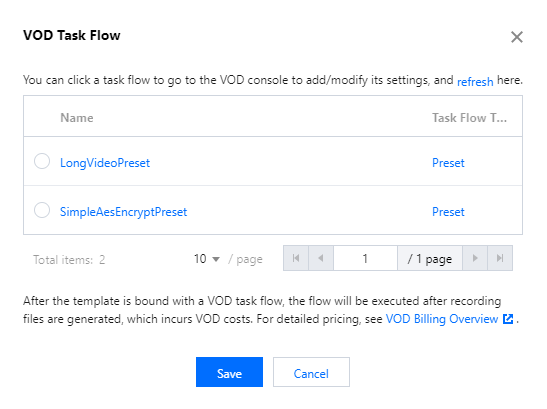
1.1 When creating a recording template before stream publishing, click Advanced Configuration to configure a task flow.
1.2 Bind the template to a video processing task flow you created in the VOD console.
1.3 Publish the live stream. For details, see Live Push.
1.4 After recording is finished, get the file ID from the callback.
1.5 Get the URL of the recording file for playback.
Scheme 2. Live recording + manual transcoding + video playback acceleration
Use cases: If you want to record live streams to VOD without transcoding the recording files right away, do not add a task flow when creating the recording template. When you want to transcode the videos later, you can do it manually. You can also use the on-cloud clipping feature to clip the recording files.
Steps:
1.1 Publish the live stream. For details, see Live Push.
1.2 The stream will be automatically recorded to VOD.
1.3 Get the file ID.
1.4 Configure a transcoding template or task flow manually to transcode the recording file. For details, see Template Settings.
1.5 You can further edit the videos if necessary.
1.6 After transcoding and processing, get the URL of the output file for playback.
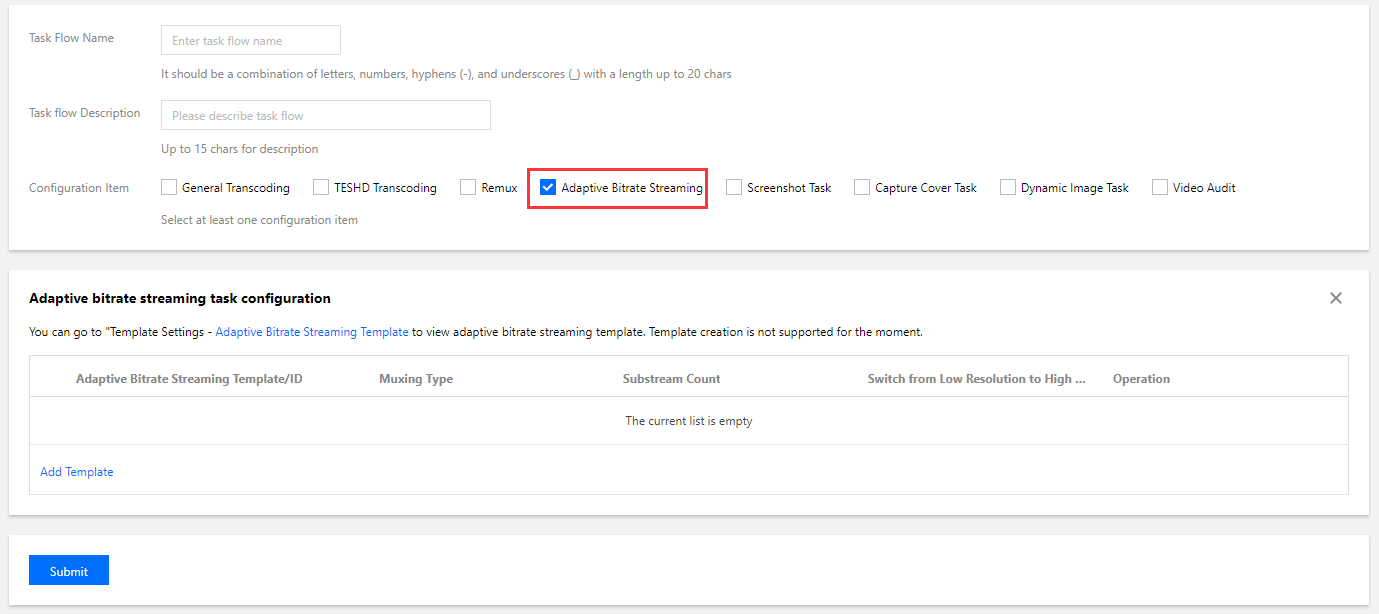
Scheme 3. Live recording + adaptive bitrate streaming + video delivery acceleration + player
Use cases: If you have high security requirements that cannot be met by HLS encryption, you can use adaptive bitrate streaming together with our Player SDK. This scheme is suitable for online education and corporate training.
Steps:
1.1 Publish the live stream. For details, see Live Push.
1.2 The stream will be automatically recorded to VOD.
1.3 Get the file ID.
1.4 Configure a task flow to generate adaptive bitrate streams. For details, see Task Flow Settings.
1.5 Configure the player: Select the adaptive bitrate stream generated for playback.