Tencent Cloud implements custom management of your resource bills from the perspective of statistical analysis by leveraging its tag tool and cost allocation capabilities. This well meets your need for multidimensional management and analysis of bills and costs. If you want to allocate your costs from the perspective of an EMR cluster or a user of certain nodes in the cluster, you can use Cost Allocation Tags.
Cost allocation by cluster: This feature allows you to view cluster bills by business department. When different departments use different EMR clusters, it is necessary to allocate costs by department. Cluster tags can be set for different departments for cost allocation and associated with other resources in the EMR cluster, such as EMR nodes, cloud disks, and metadata.
Cost allocation by node: This feature allows you to view node bills by business department. When multiple departments share the same EMR cluster, it is necessary to allocate costs by task node used by different departments. Node tags can be set for different departments for cost allocation and associated with other resources on the EMR node, such as CVM, system disks, and data disks.
Preparations
You have set Tag to a cost allocation tag as described in Cost Allocation Tags. After the cost allocation tag takes effect, it will be displayed in bills within 24 hours, subject to the data caching mechanism.
Directions
Cost allocation by cluster
1. Configure a cost allocation tag.
Configure a cost allocation tag for a new cluster:
Create a cluster: Log in to the EMR console and select Create cluster on the Cluster list page as shown below:
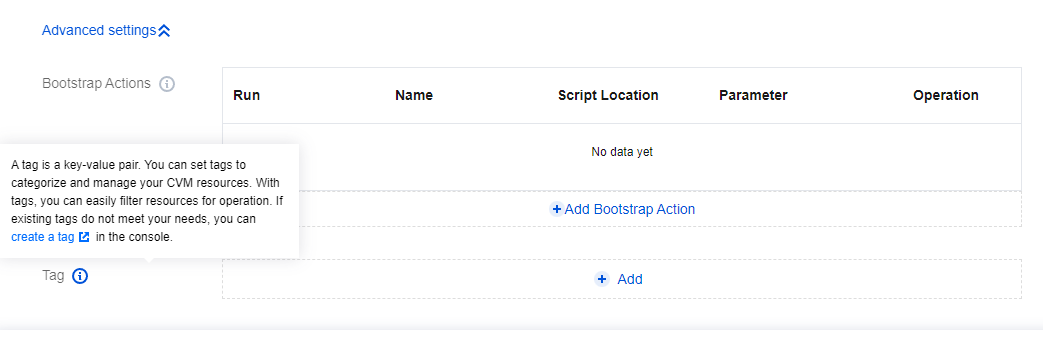
Select a cost allocation tag: In Basic configuration > Advanced settings, select the configured cost allocation tag as shown below:
Configure a cost allocation tag for an existing cluster:
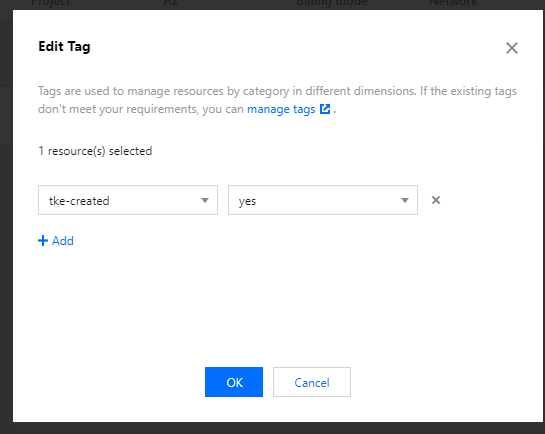
Add a cost allocation tag for a cluster: Log in to the EMR console, select the target cluster on the Cluster list page, and click More > Edit tag at the top as shown below:
In the Edit tag pop-up window, add, modify, or delete tags as needed.
Note:
You can batch edit tags for up to 20 clusters at a time.
2. View the cluster's cost allocation tag.
Set the Tag field in the list: Click the set icon in the Cluster list.
Select the Tag field as shown below:
View the cluster's cost allocation tag as shown below:
3. View the node's cost allocation tag.
A cost allocation tag assigned to a cluster will be automatically inherited by CDB (such as TencentDB for MySQL), CBS (system disks and data disks), and CVM in the cluster.
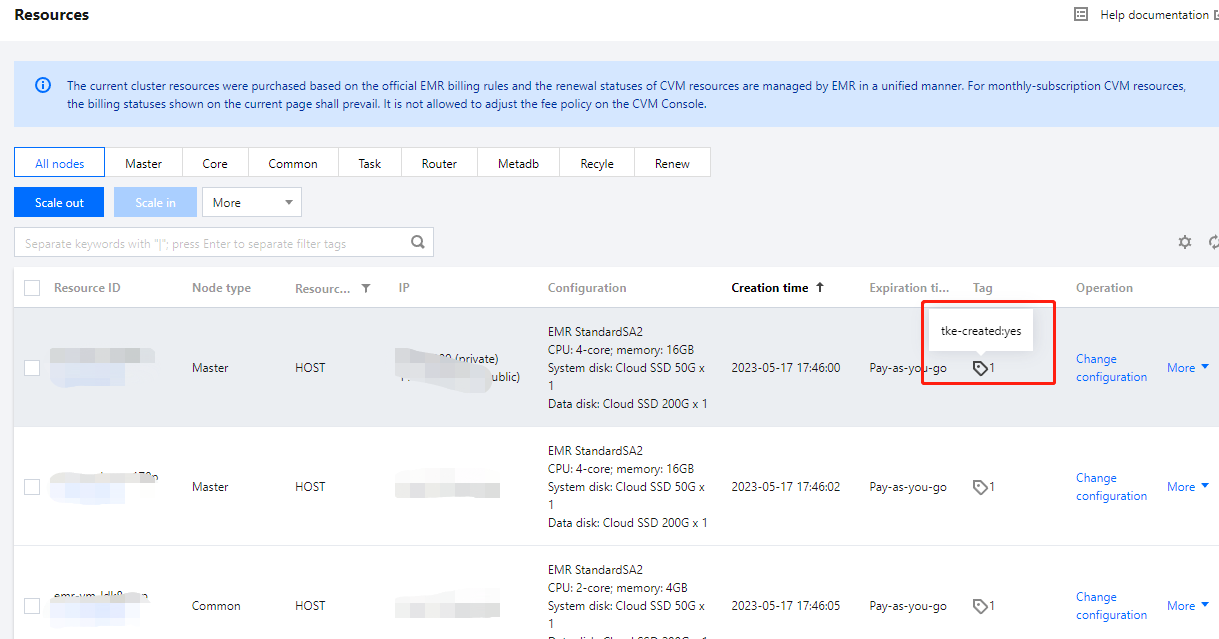
Configure a cost allocation tag for a node: In the cluster list, click the ID/Name of the target cluster to enter the cluster details page. Then, select Cluster resources > Resources, and click the Set icon.
Select the Tag field.
View the node's cost allocation tag.
4. Configure a cost allocation tag for an added node.
After a cluster is created, new MetaDB instances or manually /automatically added nodes will not automatically inherit the cluster's cost allocation tag; instead, they need to be manually associated with the tag.
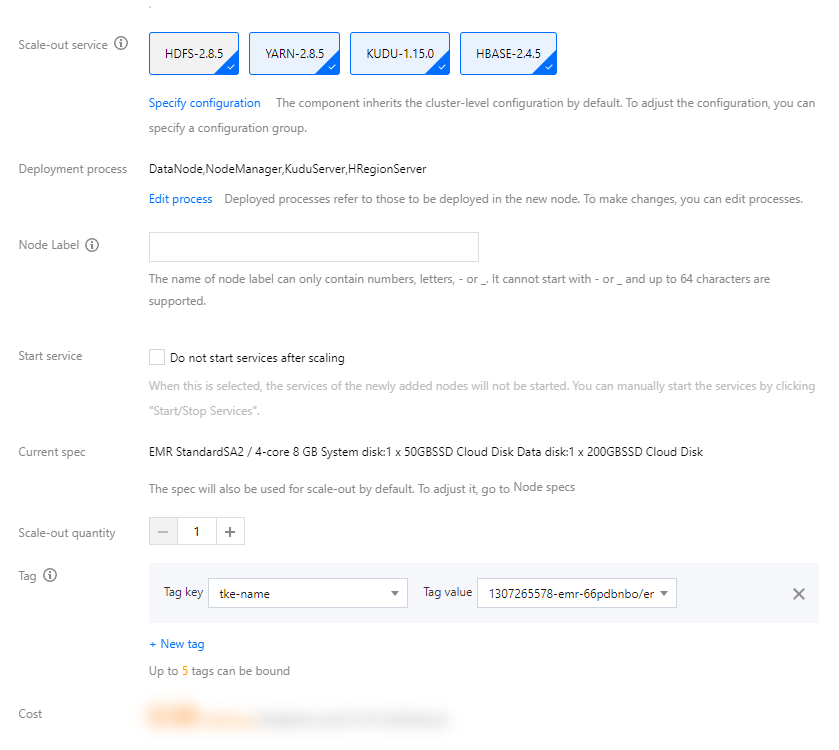
Configure a cost allocation tag for an added node: Click the ID/Name of the target cluster to enter the cluster details page, select Cluster Resources > Resources, click Scale out to associate an added node with a cost allocation tag (cluster-level).
Configure a cost allocation tag for a MetaDB instance: Click the ID/Name of the target cluster to enter the cluster details page, select Cluster services > Add component, select Hive (for example), and select a cost allocation tag (cluster-level tag) to associate the new MetaDB instance with the cluster's cost allocation tag.
Note:
Cluster fees = fees incurred by existing resources + fees incurred by new resources; therefore, new resources must be associated with the cluster's cost allocation tag in order to be included in the calculation of cluster fees.
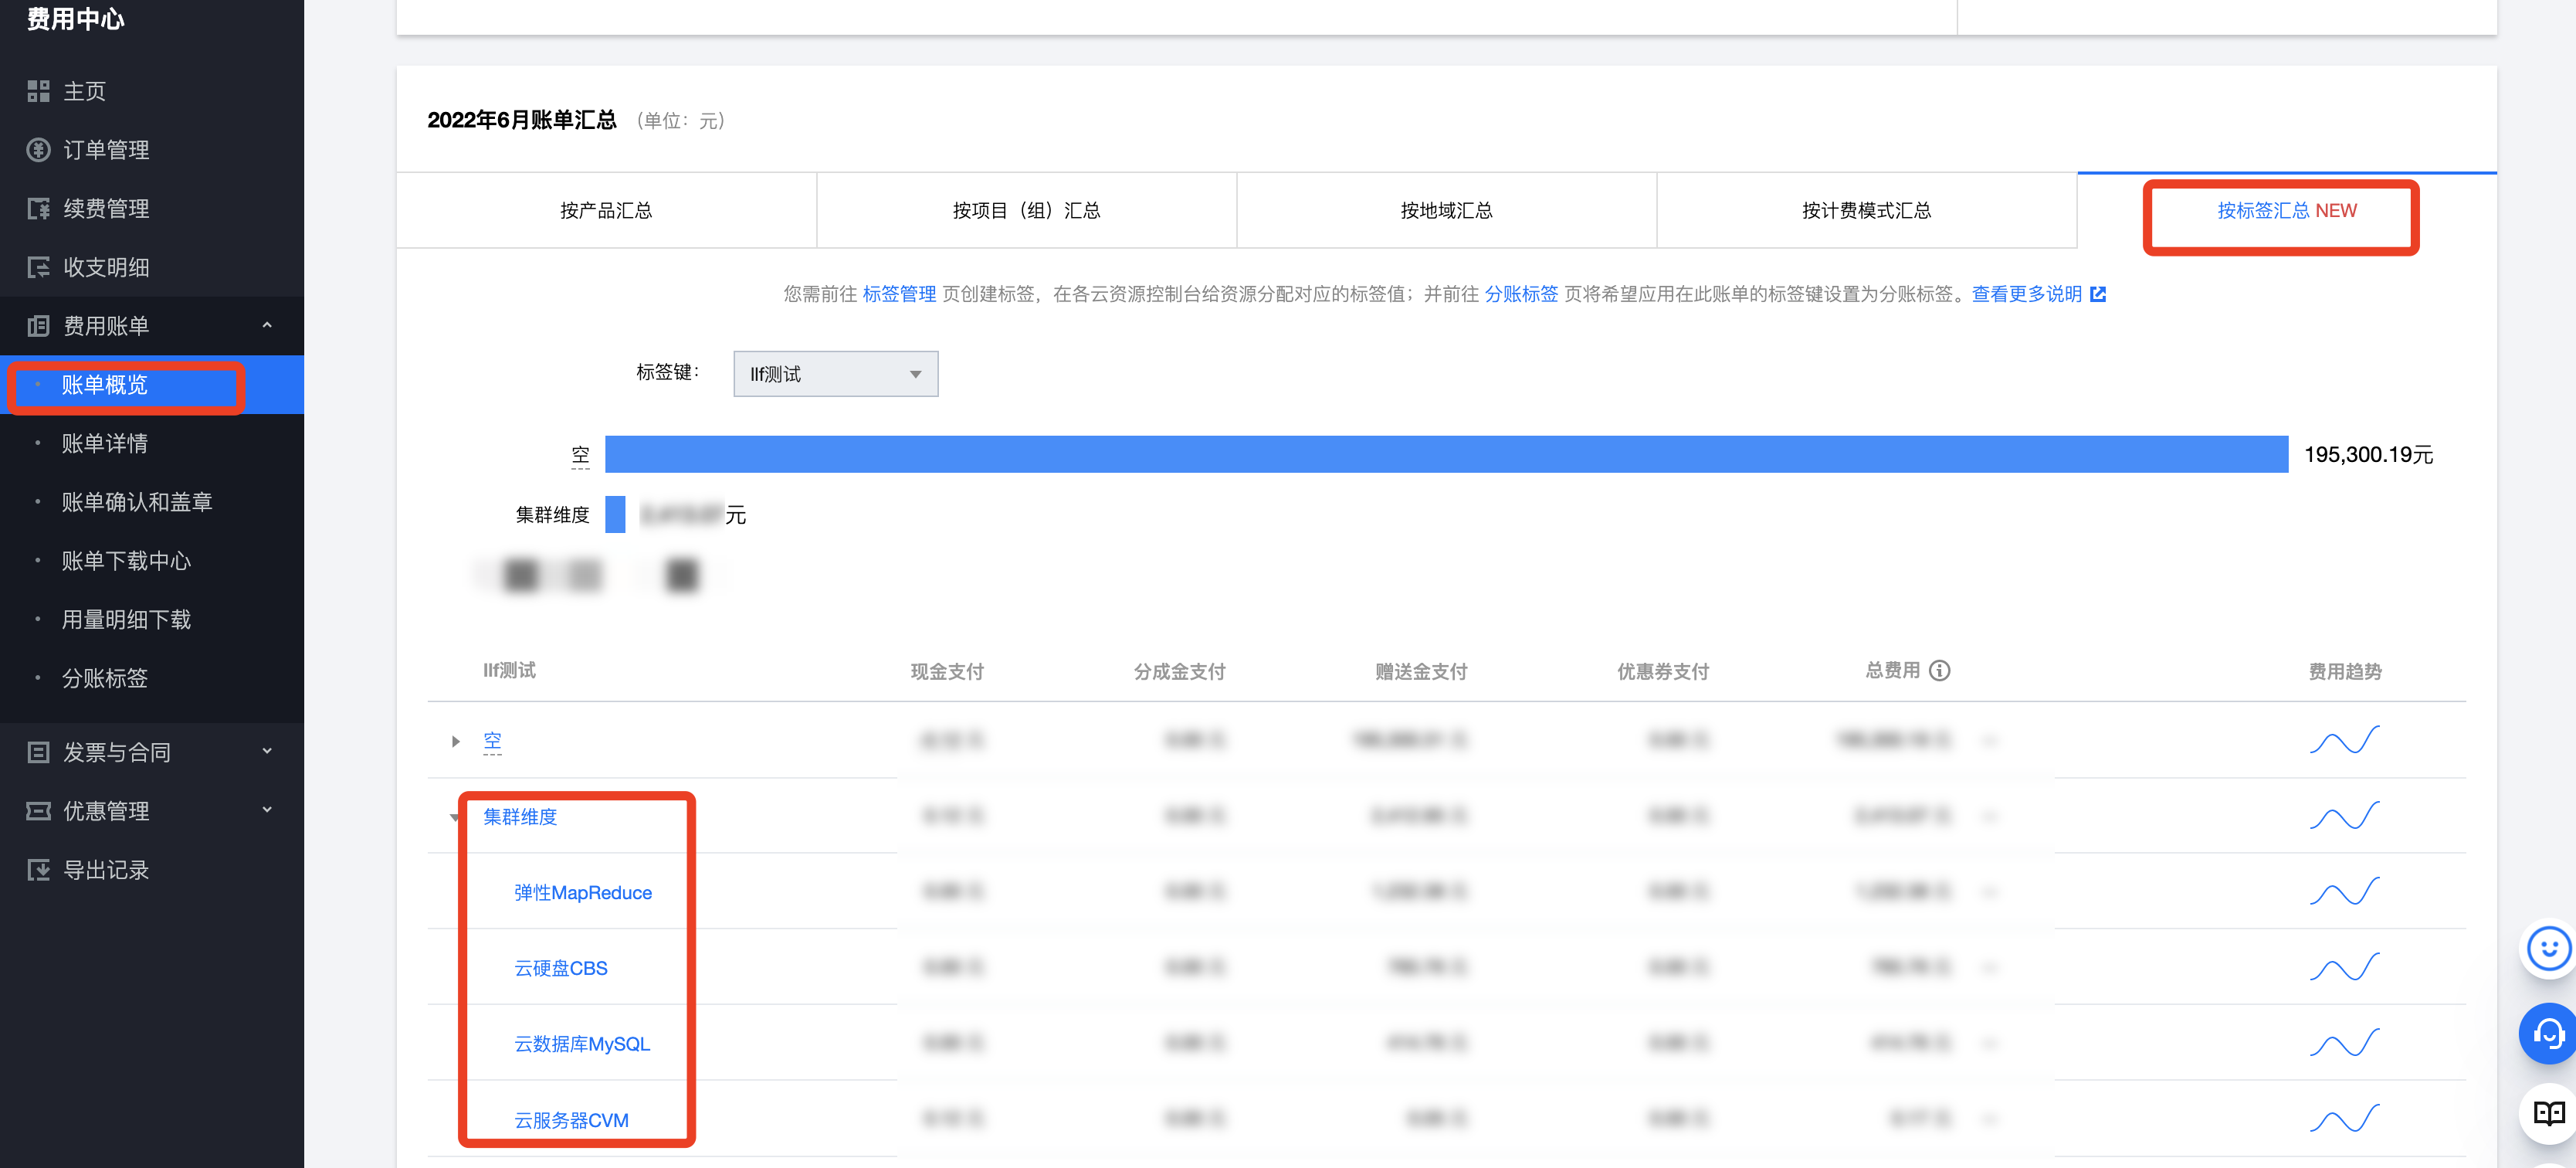
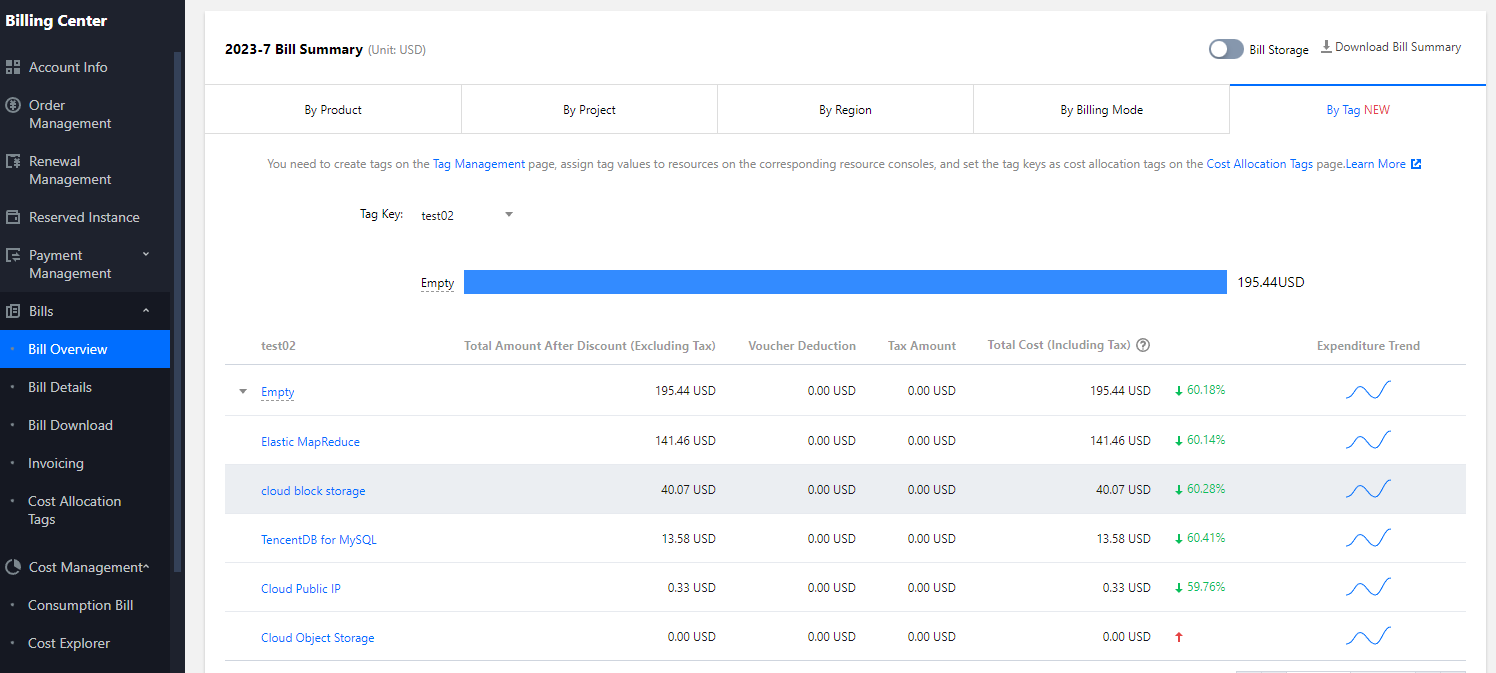
5. View the cluster's bills.
On the Bill Overview page in the Billing Center, select the bill for the target month and select By Tag and Cluster level to view the cluster fees.
Note:
As you have selected the Hive metadata storage location for association with MetaDB when creating the cluster, the fees here consist of the fees of nodes, CBS, and TencentDB for MySQL.
As a new pay-as-you-go cluster is billed by hour, its billing data will start to be displayed after one hour.
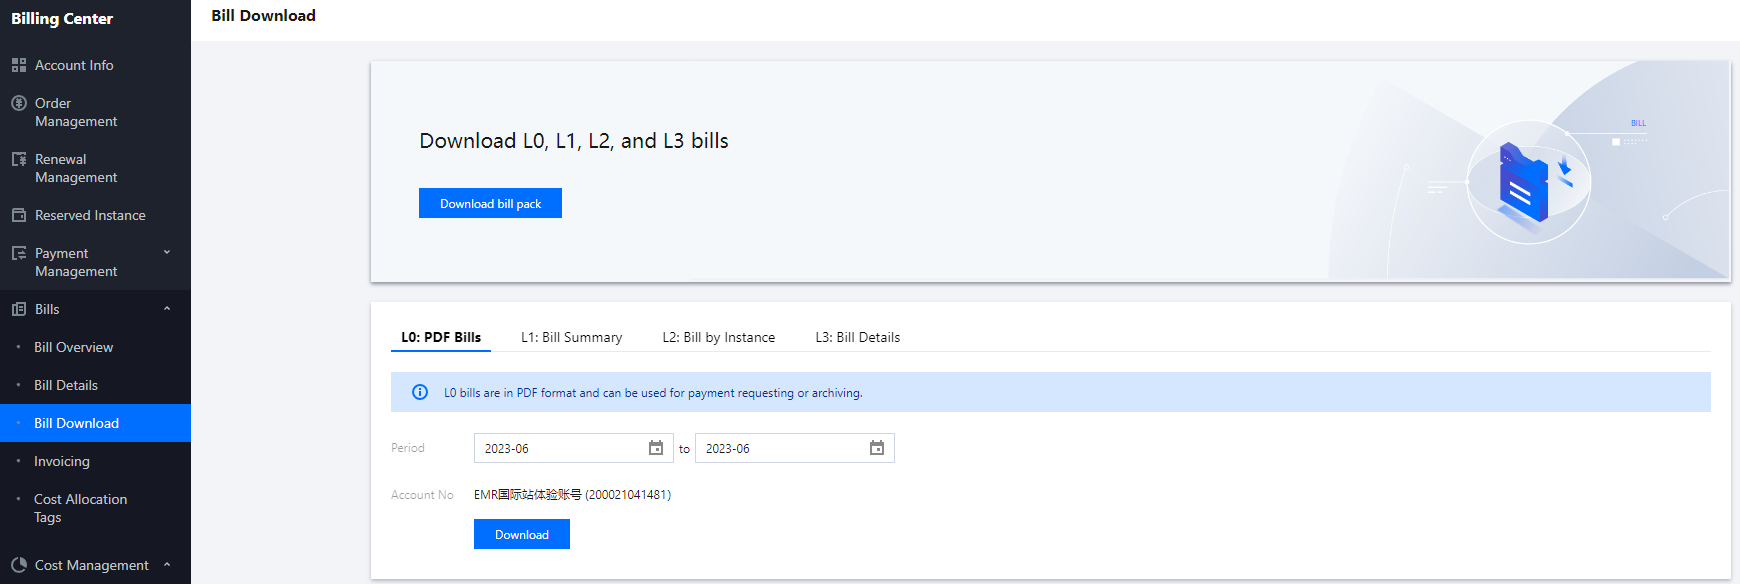
6. Download bills.
In the Billing Center, select Bills > Download Center to select bills for different months by bill type (L0, L1, L2, or L3).
Note:
L0: Electronic bill in PDF format, which can be easily used for requesting payments or archiving bills.
L1: Multidimensional consolidated bill, which provides billing data by product, project, region, or tag for you to view bills easily.
L2: Resource bill, which provides billing data by resource ID (instance).
L3: Detailed bill, which provides billing data at the finest granularity. For example, if a product is billed by hour, a new billing data entry will be displayed per hour per component. For all bills except L3 bills, the billing data for the previous month can be queried in the current month, while the billing data for the current month can be queried only after the first day of the next month.
Cost allocation by node
1. Configure a cost allocation tag for a node
Click the ID/Name of the target cluster to enter the cluster details page. Then, select Cluster resources > Resources, select the target node, and click More > Edit tag.
You can add, modify, or delete a cost allocation tag for a node as shown below:
2. Set the Tag field of a node
Click the ID/Name of the target cluster to enter the cluster details page. Then, select Cluster resources > Resources, and click the Set icon.
Select the Tag field as shown below:
3. View the node's cost allocation tag as shown below:
4. View the node's bill.
On the Bill Overview page in the Billing Center, select the bill for the target month and select By Tag and the cost allocation tag of the added node to view the node fees.
5. Download bills.
The steps are the same as those for downloading cluster bills.


 Yes
Yes
 No
No
Was this page helpful?