Android
Download
フォーカスモード
フォントサイズ
この文章では、TUICallKit コンポーネントを素早く導入する方法を紹介します。以下では、10 分以内に次の幾つかの重要なステップを完了し、最終的に完全な UI インターフェイスを含むビデオ通話機能を入手します。
1v1 ビデオ通話 | グループ通話 |
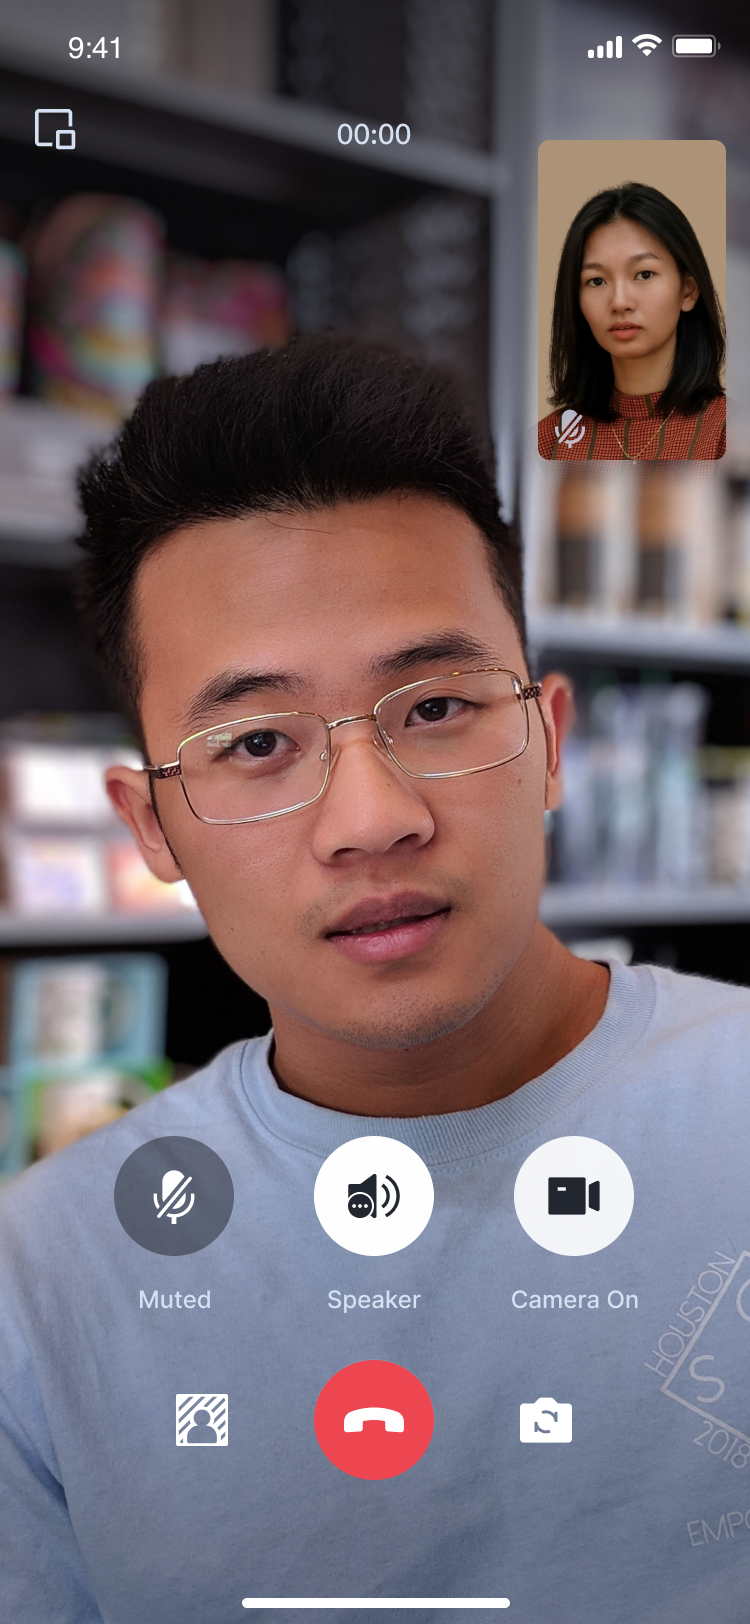 | 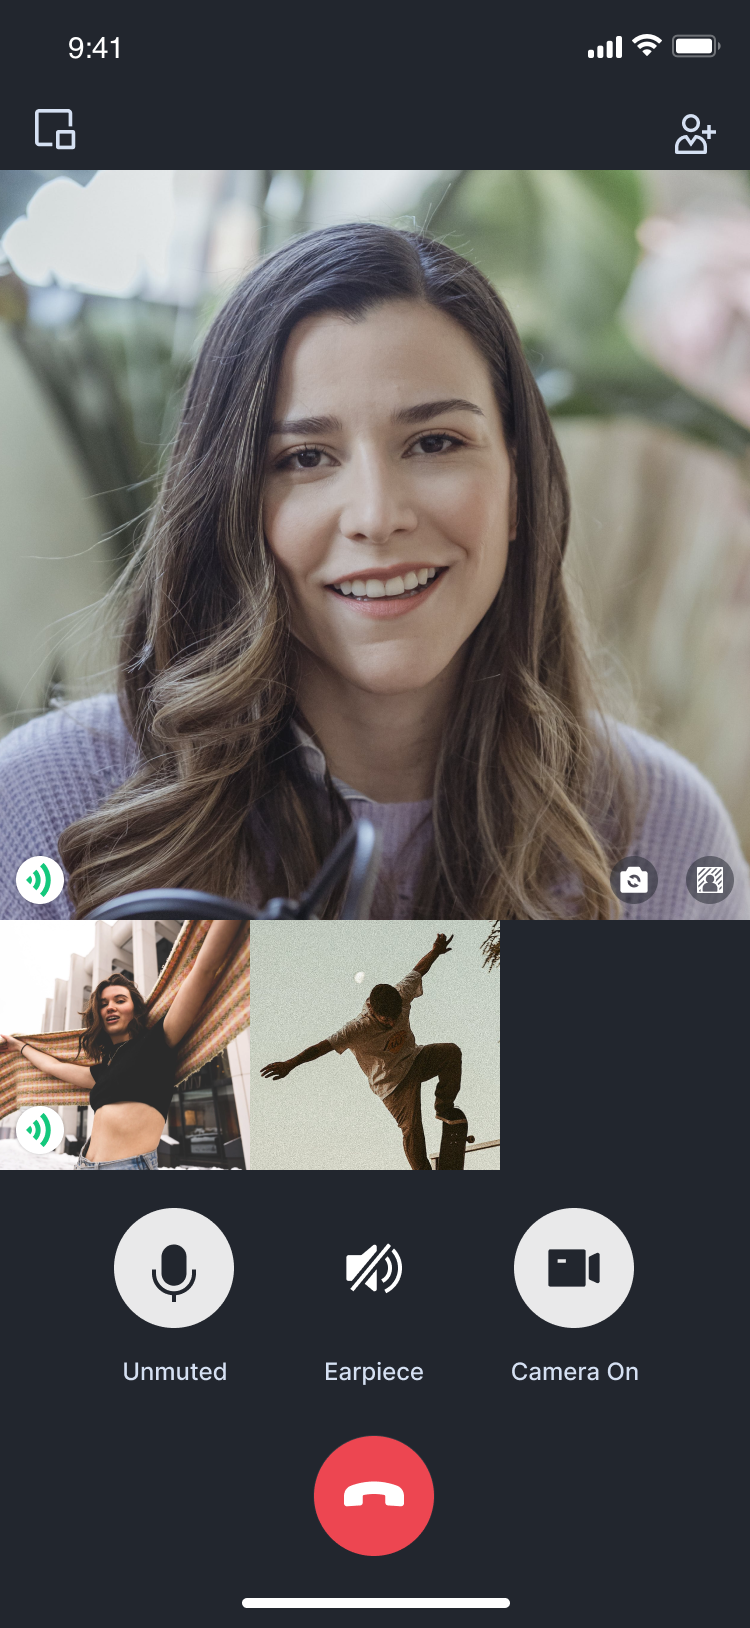 |
環境の準備
Android 5.0(SDK API Level 21)以上のバージョン。
Gradle 4.2.1 以上のバージョン。
Android 5.0 以上のモバイルデバイス。
ステップ 1:サービスのアクティブ化
Tencent Cloud が提供するオーディオ・ビデオサービスを使用する前に、コンソールでアプリケーションのオーディオ・ビデオサービスを有効にする必要があります。具体的な手順は サービス(TUICallKit)のアクティブ化を参照してください。サービスをアクティブ化したら、その後の手順で使用される
SDKAppID とSDKSecretKeyを記録します。ステップ 2:コンポーネントのダウンロードと導入
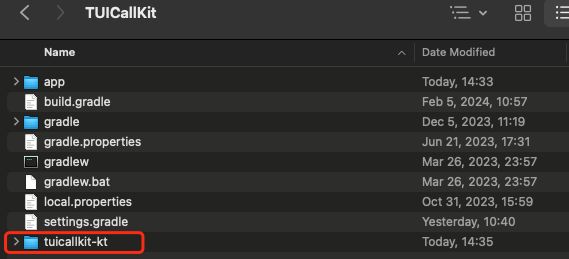
Github でコードをクローン/ダウンロードし、下図に示すように、Android ディレクトリの tuicallkit-kt サブディレクトリを現在のプロジェクトの app の同じレベルのディレクトリにコピーします。
ステップ 3:プロジェクト設定
1. プロジェクトのルートディレクトリにある
settings.gradle.kts(或settings.gradle)ファイルを見つけて、そこに以下のコードを追加し、tuicallkit-ktコンポーネントをプロジェクトに導入します。include(":tuicallkit-kt")
include ':tuicallkit-kt'
2. app ディレクトリで
build.gradle.kts(或build.gradle) ファイルを見つけ、dependencies に以下のコードを追加し、新しく追加されたコンポーネントへの現在のアプリケーションの依存を宣言します。dependencies {api(project(":tuicallkit-kt"))}
dependencies {api project(':tuicallkit-kt')}
説明
TUICallKit プロジェク内部トは、デフォルトで
TRTC SDK、IM SDK、tuicallengine およびパブリックコーパス tuicoreに依存しており、開発者が個々に設定する必要はありません。バージョンアップが必要な場合は、tuicallkit-kt/build.gradleファイル内のバージョン番号を変更するだけです。3. SDK 内部で Java のリフレクション特性を使用しているため、SDK 内のいくつかのクラスを難読化されていないリストに追加する必要があります。そのため、app ディレクトリの
proguard-rules.pro ファイルの最後に以下のコードを追加する必要があります。追加した後に、右上の「Sync Now」をクリックしてコードを同期します。-keep class com.tencent.** { *; }
4. app ディレクトリで
AndroidManifest.xml ファイルを見つけ、application ノードに tools:replace="android:allowBackup" を追加し、コンポーネント内の設定を上書きし、自分の設定を使用します。// app/src/main/AndroidManifest.xml<application android:name=".DemoApplication" android:allowBackup="false" android:icon="@drawable/app_ic_launcher" android:label="@string/app_name" android:largeHeap="true" android:theme="@style/AppTheme" tools:replace="android:allowBackup">
5. コンパイルして実行することをお勧めします。問題が発生した場合は、当社のGithub demo プロジェクトを実行してみることをお勧めします。比較することで、潜在的な違いを特定し、発生した問題を解決することができます。導入や使用中に問題が発生した場合は、お気軽にフィードバックしください。
ステップ 4:TUI コンポーネントのログイン
以下のコードをプロジェクトに追加します。このコードの機能は、TUICore 内の関連するインターフェイスを呼び出して TUI コンポーネントのログインを完了することです。このステップは非常に重要です。ログインに成功した後にのみ、TUICallKit が提供する機能を使用できるようになります。
import com.tencent.qcloud.tuicore.TUILogin import com.tencent.qcloud.tuicore.interfaces.TUICallbackimport com.tencent.qcloud.tuikit.tuicallkit.debug.GenerateTestUserSigclass MainActivity : ComponentActivity() { override fun onCreate(savedInstanceState: Bundle?) { super.onCreate(savedInstanceState)// beginval userID = "denny" // お客様の UserId に置き換えてくださいval sdkAppID = 0 // 最初のステップでコンソールから取得した SDKAppID に置き換えてくださいval secretKey = "****" // 最初のステップでコンソールから取得した SecretKey に置き換えてくださいval userSig = GenerateTestUserSig.genTestUserSig(userId, sdkAppId, secretKey)TUILogin.login(this, sdkAppId, userId, userSig, object : TUICallback() {override fun onSuccess() {}override fun onError(errorCode: Int, errorMessage: String) {}})// end } }
import com.tencent.qcloud.tuicore.TUILogin; import com.tencent.qcloud.tuicore.interfaces.TUICallback;import com.tencent.qcloud.tuikit.tuicallkit.debug.GenerateTestUserSig;public class MainActivity extends AppCompatActivity { @Override public void onCreate(Bundle savedInstanceState) { super.onCreate(savedInstanceState);//beginString userID = "denny"; // お客様の UserId に置き換えてくださいint sdkAppID = 0; // 最初のステップでコンソールから取得した SDKAppID に置き換えてくださいString secretKey = "****"; // 最初のステップでコンソールから取得した SecretKey に置き換えてくださいString userSig = GenerateTestUserSig.genTestUserSig(userId, sdkAppId, secretKey);TUILogin.login(this, sdkAppId, userId, userSig, new TUICallback() {@Overridepublic void onSuccess() {}@Overridepublic void onError(int errorCode, String errorMessage) {}});//end } }
パラメータ | タイプ | 説明 |
userID | String | お客様はビジネスに応じてユーザー ID をカスタマイズすることができ、大文字と小文字(a-z A-Z)、数字(0-9)、アンダースコアとハイフンのみを使用することができます。 |
sdkAppID | int | |
secretKey | String | Tencent RTC コンソールで作成したオーディオ・ビデオアプリケーションの SDKSecretKey。 |
userSig | String | ユーザーのログインを認証し、ユーザーが本人かどうかを確認し、悪意のある攻撃者がクラウドサービスの使用権を盗むことを阻止するためのセキュリティ保護署名。 |
説明:
開発環境:ローカル開発のデバッグ段階である場合は、ローカルの
GenerateTestUserSig.genTestSig関数を使って userSig を生成することができます。この方法における SDKSecretKey は簡単に逆コンパイル・逆クラッキングされやすいです。一旦キーが漏洩すると、攻撃者はお客様の Tencent Cloud のトラフィックを盗むことができるようになります。本番環境:プロジェクトがオンラインでリリースされる場合、 サーバー側で UserSig を生成する 方法を使用してください。
ステップ 5:最初の電話をかけます
上記のログインメソッドの呼び出しが成功を返した後に、TUICallKit の call メソッドを呼び出し、着呼側の userID と 通話タイプを指定してオーディオ・ビデオ通話を開始すると、着呼側は着信招待を受信できます。
import com.tencent.qcloud.tuikit.tuicallengine.TUICallDefine import com.tencent.qcloud.tuikit.tuicallkit.TUICallKit// 1 対 1 の音声通話を開始します(着呼側の userID が mike であると仮定する)TUICallKit.createInstance(context).call("mike", TUICallDefine.MediaType.Audio)
import com.tencent.qcloud.tuikit.tuicallengine.TUICallDefine; import com.tencent.qcloud.tuikit.tuicallkit.TUICallKit;// 1 対 1 の音声通話を開始(着呼側の userID が mike であると仮定する)TUICallKit.createInstance(context).call("mike", TUICallDefine.MediaType.Audio);
発呼側が音声通話を開始 | 着呼側が音声通話のリクエストを受信 |
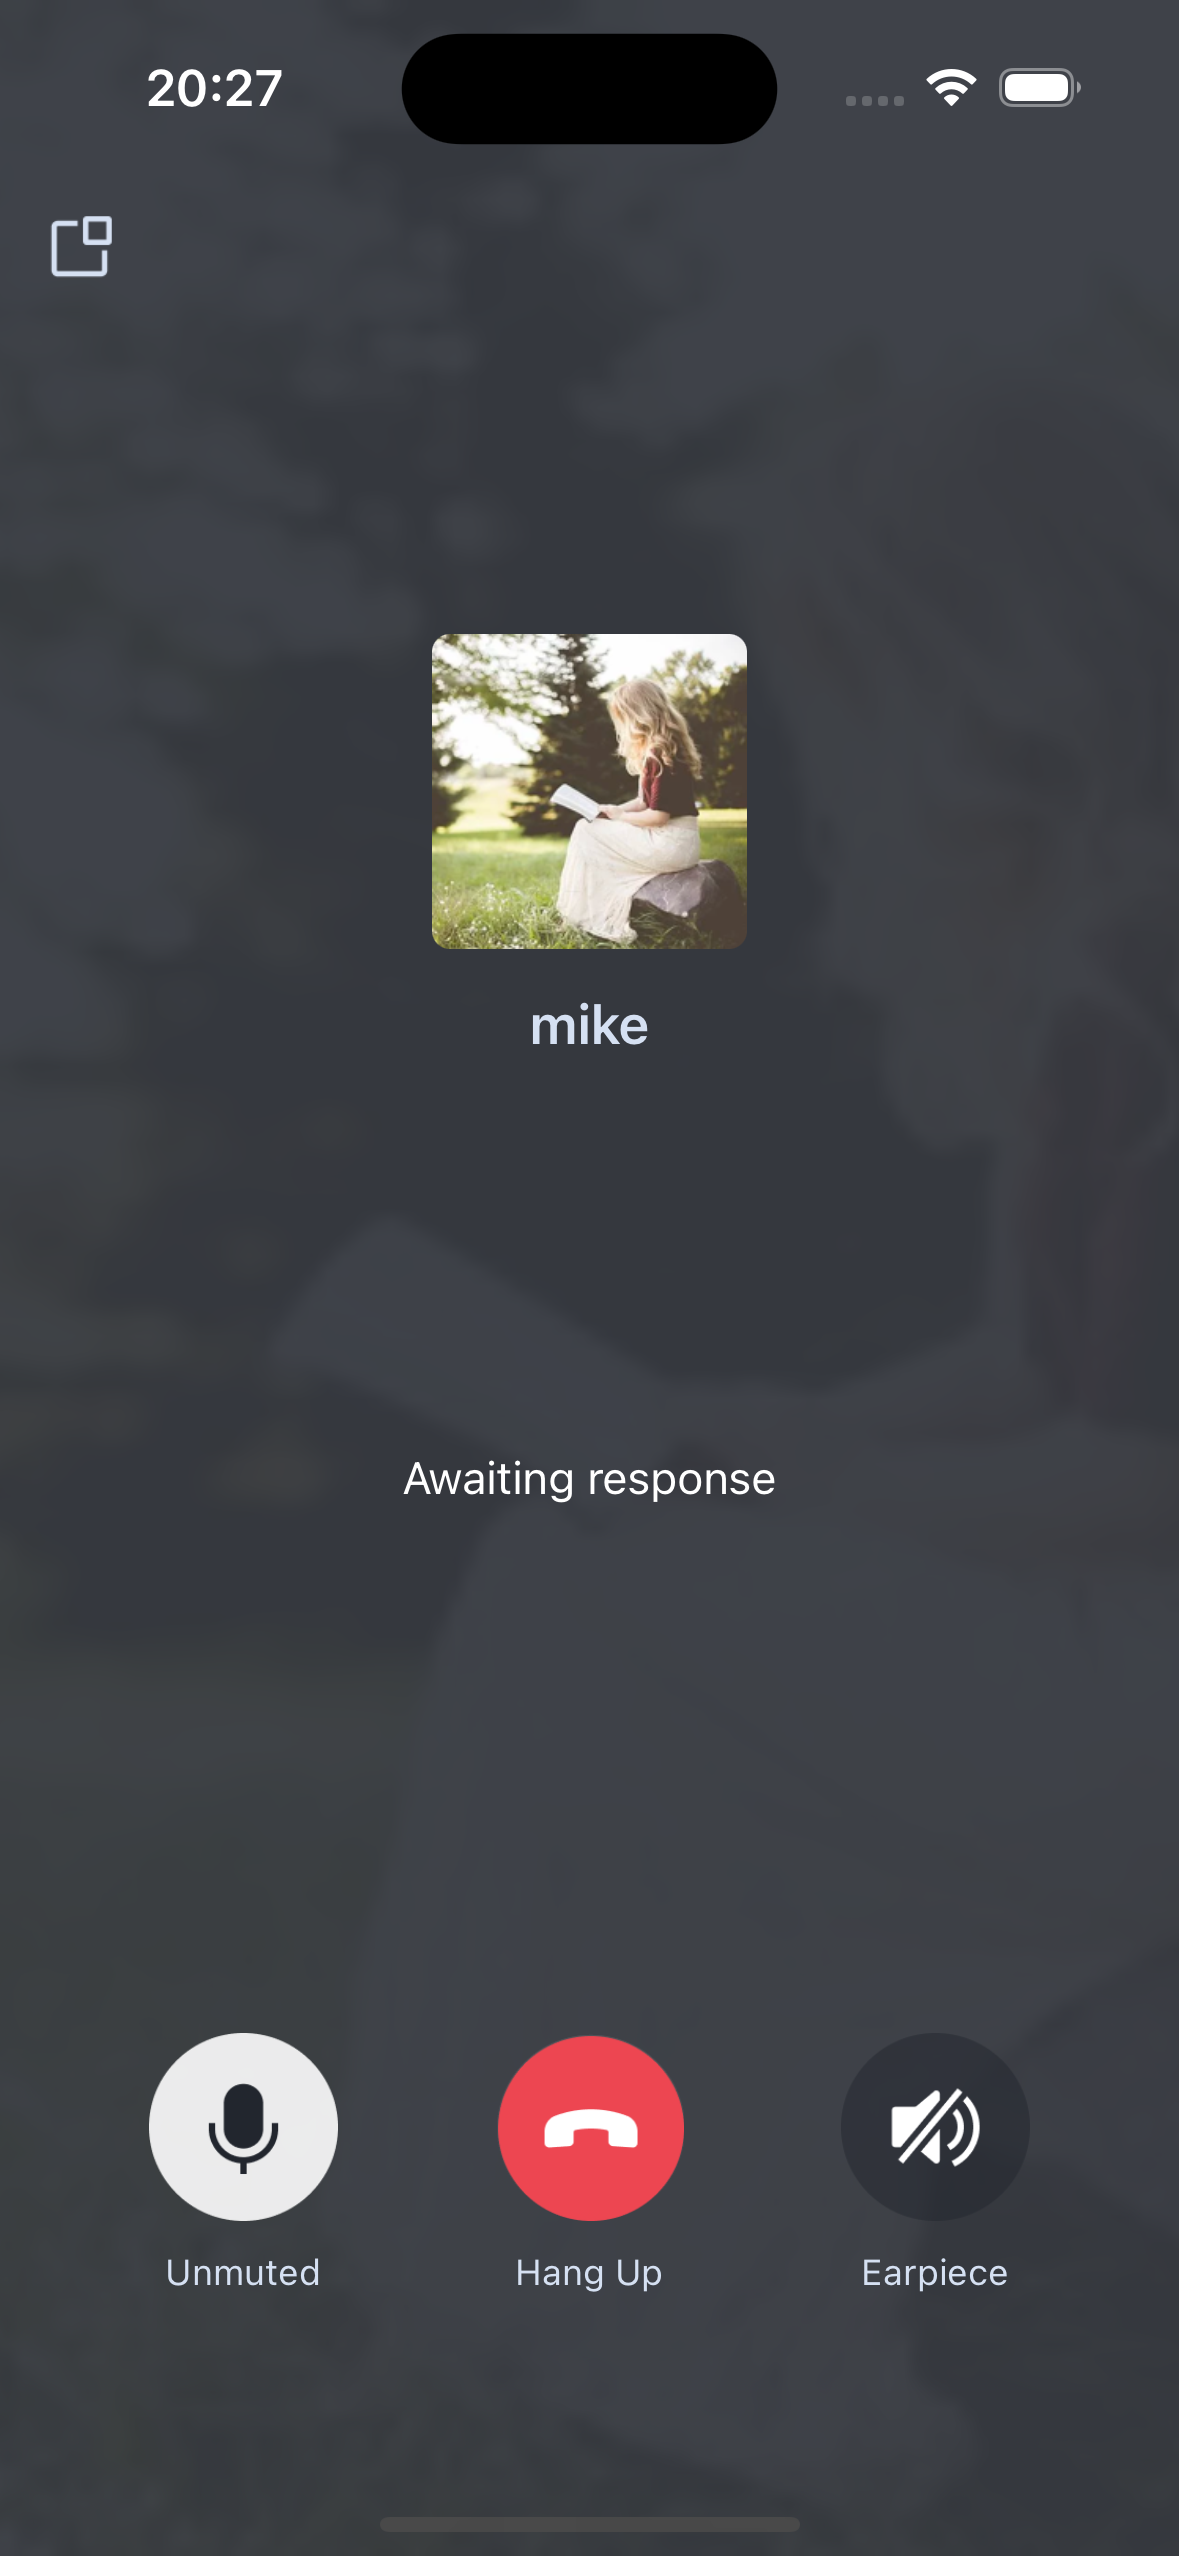 | 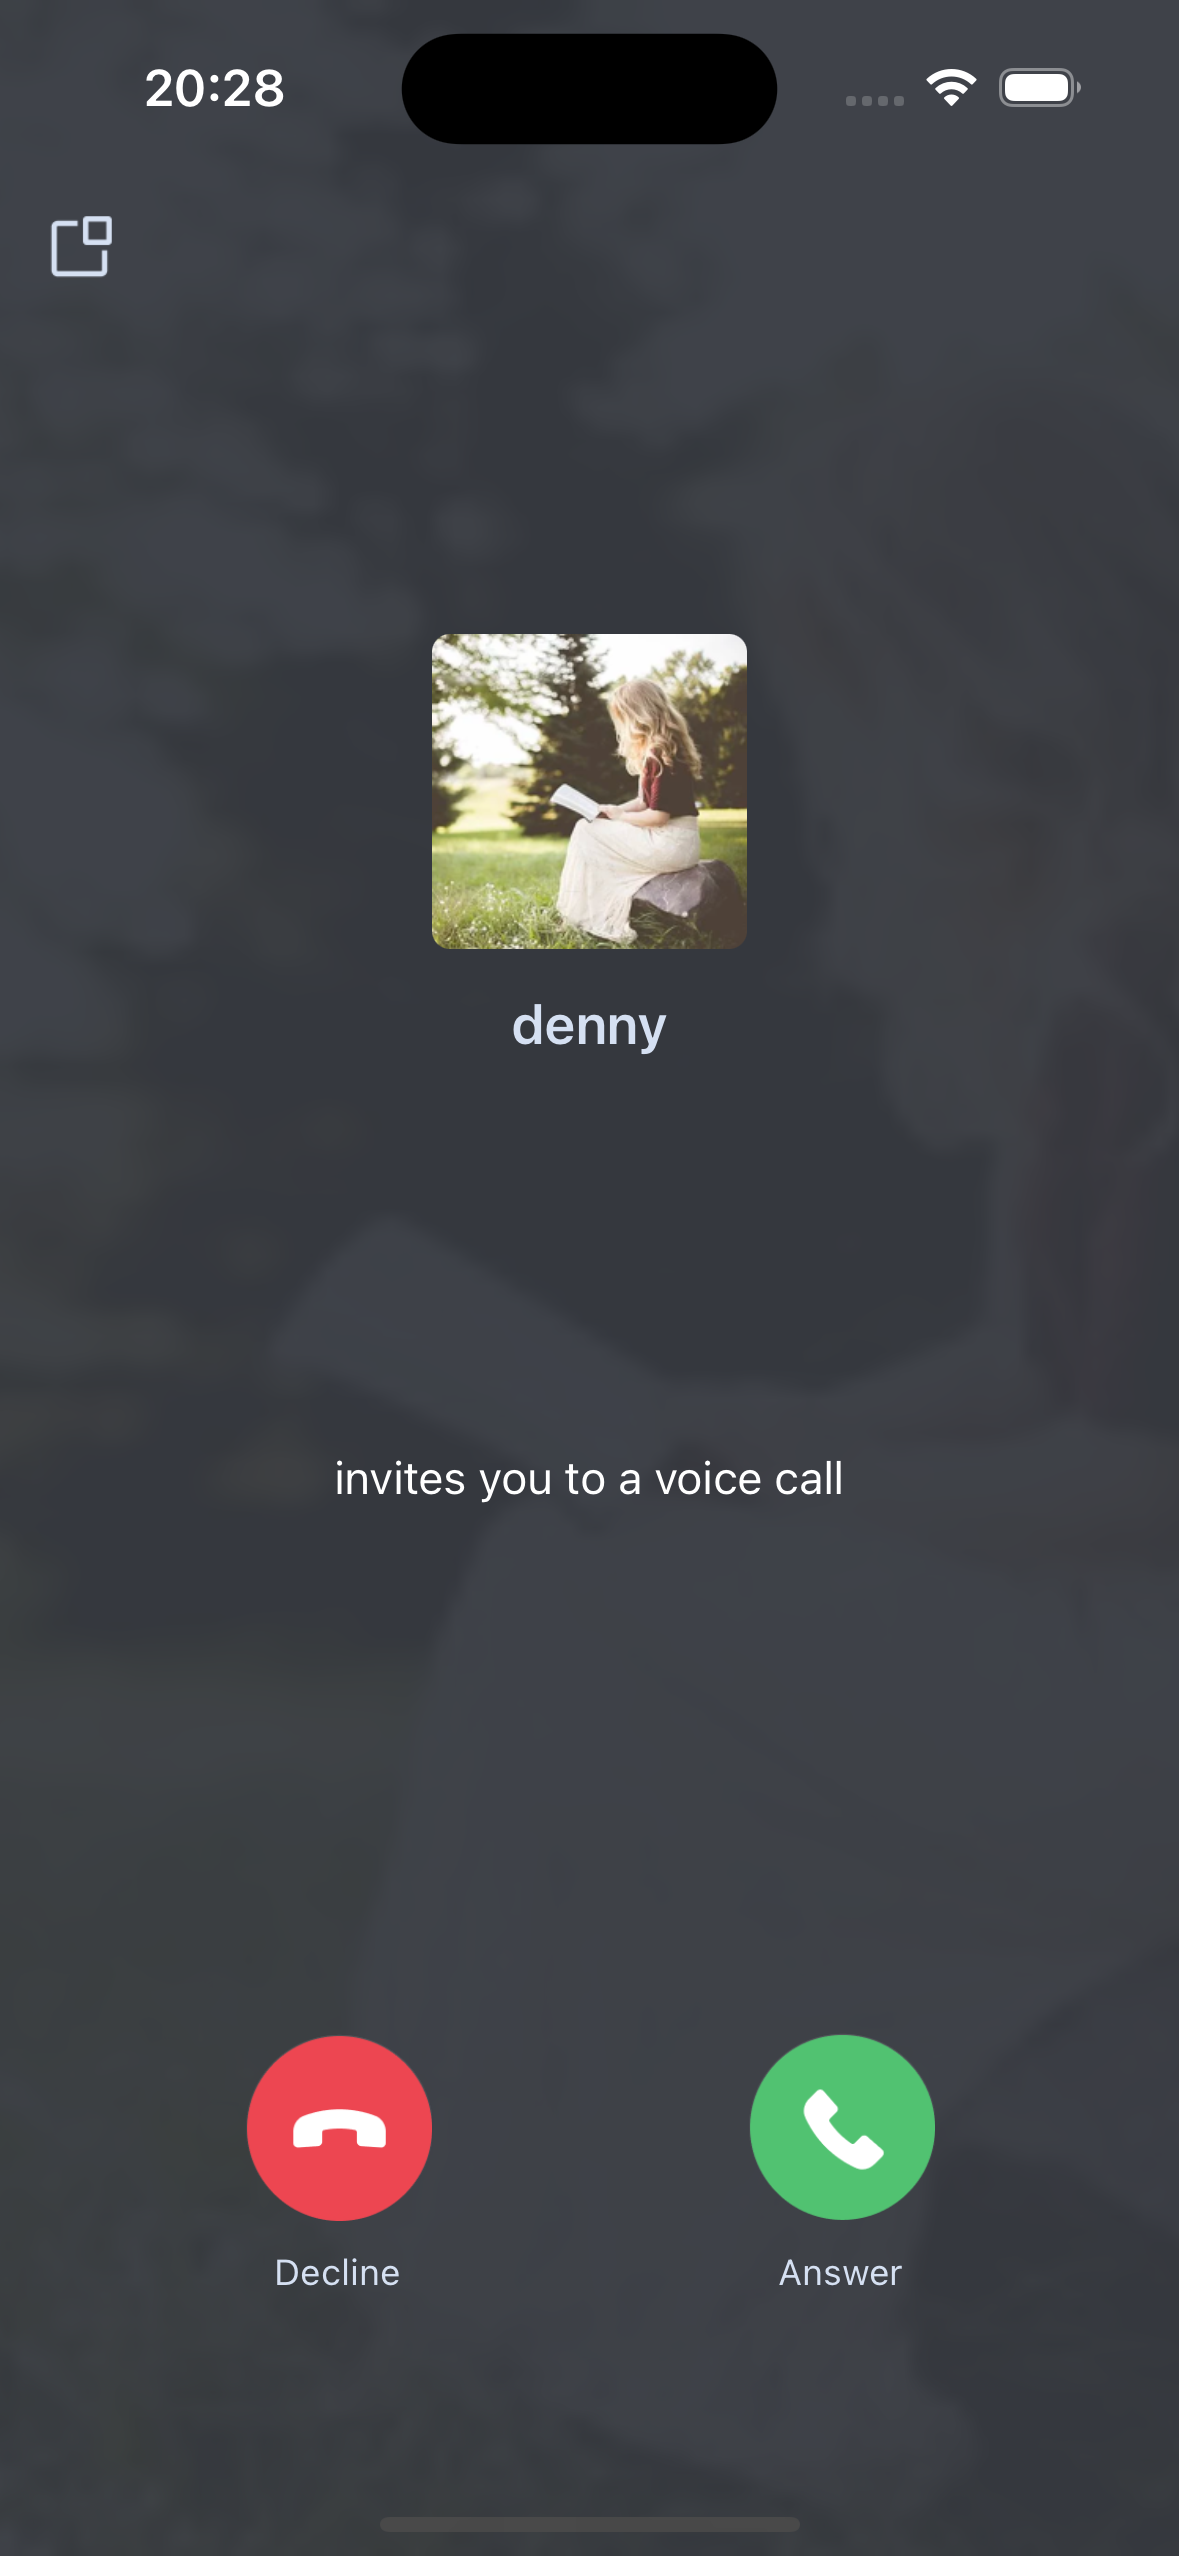 |
その他の特性
グループ通話
カスタム着信音
よくある質問
コミュニケーションとフィードバック
何かご要望やフィードバックがございましたら、info_rtc@tencent.com までお問い合わせください。
フィードバック