오프라인 푸시 기능을 사용하면 애플리케이션이 ‘백그라운드에서 실행’되거나 ‘오프라인 상태’에도 오디오/비디오 통화를 수신할 수 있습니다. TUICallKit은 TUIOfflinePush 컴포넌트를 통합하여 오프라인 푸시 기능을 구현합니다. 이 문서는 음성/영상 통화 프로젝트에 TUIOfflinePush 컴포넌트를 통합하는 방법을 설명합니다.
준비 사항
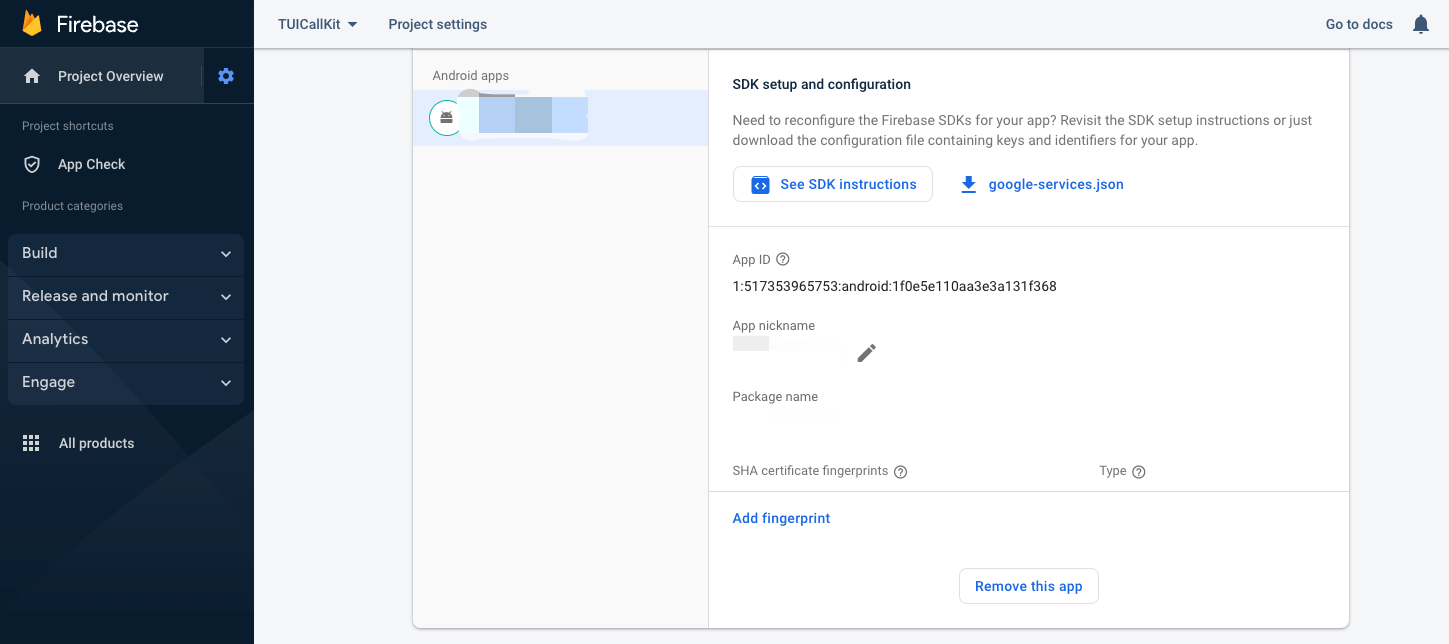
1. 벤더의 푸시 플랫폼에 애플리케이션을 등록합니다. 오프라인 푸시 기능은 벤더의 자체 채널에 의존합니다. APPID 및 APPKEY와 같은 매개변수를 가져오려면 벤더의 푸시 플랫폼에 애플리케이션을 등록해야 합니다.
주의사항:
다음 두 파일은 이후 단계에서 사용됩니다.
Huawei Push에 등록할 때 agconnect-services.json 파일을 다운로드하여 저장합니다.
Google FCM에 등록할 때 google-services.json 파일을 다운로드하여 저장합니다.
Google FCM
2. IM 콘솔에서 구성
메시지 연동을 위해 각 벤더 채널에 등록할 때 동일한 패키지 이름을 입력해야 합니다. 생성된 ID APPID, APPKEY를 기록해 두십시오. 이는 이후 단계에서 사용됩니다.
1단계: 컴포넌트 다운로드 및 가져오기
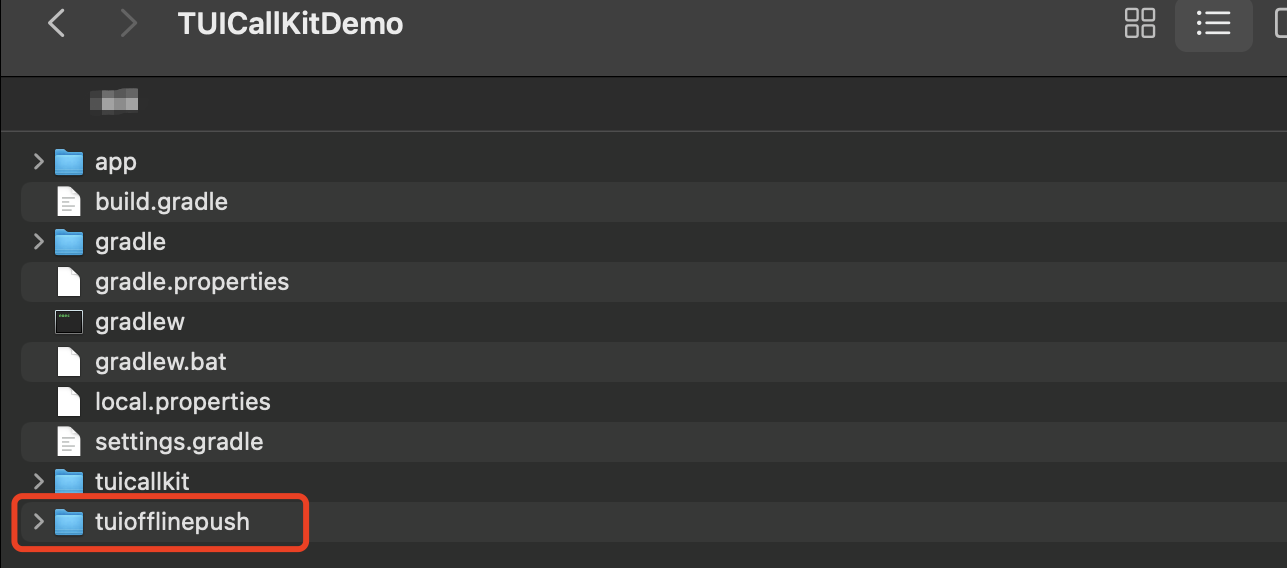
1. Github로 이동하여 코드를 복제/다운로드한 다음 아래와 같이 Android 디렉터리의 tuiofflinepush 서브 디렉터리를 프로젝트의 app과 동일한 디렉터리에 복사합니다.
2. 프로젝트 루트 디렉터리에서 setting.gradle 파일을 찾아 다음 코드를 추가합니다.
include ':tuiofflinepush'
3. app 디렉터리에서 'build.gradle' 파일을 찾아 다음 코드를 추가하여 방금 추가한 tuiofflinepush 컴포넌트에 대한 현재 app의 종속성을 선언합니다.
api project(':tuiofflinepush')
2단계: 프로젝트 구성
1. app 디렉터리에서 build.gradle 파일을 찾아 필요에 따라 애플리케이션 패키지의 이름을 바꿉니다.
applicationId 'com.****.trtc'
2. app 디렉터리에서 build.gradle 파일을 찾아 ViVo 액세스 매개변수 VIVO_APPKEY, VIVO_APPID 및 HONOR_APPID를 설정하여 컴파일 또는 실행 오류를 방지합니다.
manifestPlaceholders =[
"VIVO_APPKEY":"PLACEHOLDER",
"VIVO_APPID":"PLACEHOLDER",
"HONOR_APPID":"PLACEHOLDER"
]
3. Huawei 및 Google 푸시 플랫폼용 파일 구성: app 디렉터리에 준비 과정에서 Google FCM에 등록할 때 저장한 google-services.json 파일을 교체합니다. app 디렉터리에 준비 과정에서 Huawei Push에 등록할 때 저장한 agconnect-services.json 파일을 추가합니다.
4. PrivateConstants 파일에 준비 과정에서 기록된 ID, APPID, APPKEY를 입력하고 매개변수 설정이 올바른지 확인합니다. 다음 매개변수를 입력합니다.
publicclassPrivateConstants{
/****** Xiaomi 오프라인 푸시 매개변수 start ******/
// Tencent Cloud 콘솔에서 타사 푸시 인증서를 업로드한 후 생성된 인증서 ID
벤더 콘솔에서 푸시 서비스를 테스트합니다. 알림을 성공적으로 푸시할 수 있으면 벤더 채널이 정상입니다. 그런 다음 TUIOfflinePush 콘솔에서 벤더 매개변수가 올바르게 구성되었는지 확인하고, 그렇지 않은 경우 필요에 따라 매개변수를 입력합니다(테스트한 대로, 콘솔에서 vivo x9용 메시지 유형을 구성해야 합니다).
일부 휴대폰은 '중요하지 않은 알림' 폴더로 알림을 보냅니다. 이 경우 상태 표시줄을 아래로 드래그하여 알림이 '중요하지 않은 알림' 폴더에 있는지 확인하십시오.
다음 로그를 필터링하여 TUIOfflinePush가 성공적으로 등록되었는지 확인합니다.
TUIOfflinePush
2. 알림을 받았을 때 잠금 화면이 켜지지 않는 이유는 무엇입니까?
벤더 및 플랫폼에 의해 부과된 제한으로 인해 Android 휴대폰은 화면이 잠겨 있을 때 다른 권한이 필요합니다. 다음과 같이 문제를 해결하십시오.
시스템 잠금 화면 알림 권한이 활성화되어 있는지 확인하십시오. 일부 벤더에서는 통합 제한을 적용했습니다. 예를 들어 오프라인 알림을 수신할 때 Xiaomi 휴대폰의 화면이 켜지지 않으면 설정 > 잠금 화면을 선택하고 알림을 위해 잠금 화면 깨우기를 켭니다.
애플리케이션의 잠금 화면 알림 권한이 활성화되어 있는지 확인합니다. 예를 들어 Xiaomi 휴대폰에서 잠금 화면 알림 허용을 토글해야 합니다.
설명:
이 문제에 대한 호환성 처리가 필요한 경우 지원을 위해 당사(QQ 그룹 592465424)에 문의하십시오.
3. 오프라인 푸시 알림을 클릭하면 통화 UI를 가져올 수 없는 이유는 무엇인가요?
다음 로그를 필터링하여 통화 요청이 감지되었는지 확인합니다.
onReceiveNewInvitation
4. 애플리케이션이 백그라운드에서 실행 중일 때 호출 UI를 포그라운드로 가져올 수 없는 이유는 무엇입니까?
애플리케이션을 백그라운드에서 포그라운드로 자동으로 끌어오기 위해서는 App에서 ‘백그라운드 자동 시작’ 또는 ‘플로팅 창’ 권한이 활성화되어 있는지 확인해야 합니다.
다른 벤더 또는 동일한 벤더의 다른 Android 버전이라도 다른 권한 및 권한 이름을 제공합니다. 예를 들어, Xiaomi 6에 대한 백그라운드 팝업 창 권한만 활성화하면 되고 백그라운드 팝업 창 및 플로팅 창 표시 권한을 모두 활성화해야 합니다.
설명:
테스트 중에 모든 권한을 수동으로 활성화하면 여전히 호출 UI를 자동으로 포그라운드로 가져올 수 없으며 호환성 처리가 필요합니다.