uniapp(Android&iOS)
ダウンロード
フォーカスモード
フォントサイズ
본 문서는 TUICallKit 컴포넌트의 빠른 통합 과정을 안내합니다. 10분 이내에 몇몇 주요 단계를 완료하고, 최종적으로 완벽한 UI 인터페이스를 갖춘 비디오 통화 기능을 얻게 됩니다.

TUICallKit Demo 경험
TUICallKit 플러그인 주소: TUICallKit 플러그인 링크.
직접 1개 새 프로젝트를 실행하시려면, 직접 uni-app Demo 빠른 실행을 읽으십시오.
개발 환경 요구
HbuilderX 버전 요구: HbuilderX 버전 ≥ 3.94.
플러그인 디버깅 설명: 네이티브 플러그인은 당분간 시뮬레이션 디버깅을 지원하지 않습니다.
iOS 기기 요구: iOS 시스템 ≥ 9.0, 오디오/비디오 통화를 지원하는 실제 기기입니다.
Android 기기 요구: Android 시스템 ≥ 5.0(SDK API Level 21), 오디오/비디오 통화를 지원하는 실제 기기이고, USB 디버깅 허용합니다.
단계 1: 서비스 활성화
Tencent Cloud에서 제공하는 오디오/비디오 서비스를 이용하기 전에 콘솔로 이동하여 애플리케이션의 오디오/비디오 서비스를 활성화해야 합니다. 구체적 단계는 서비스 활성화를 참고하시기 바랍니다.
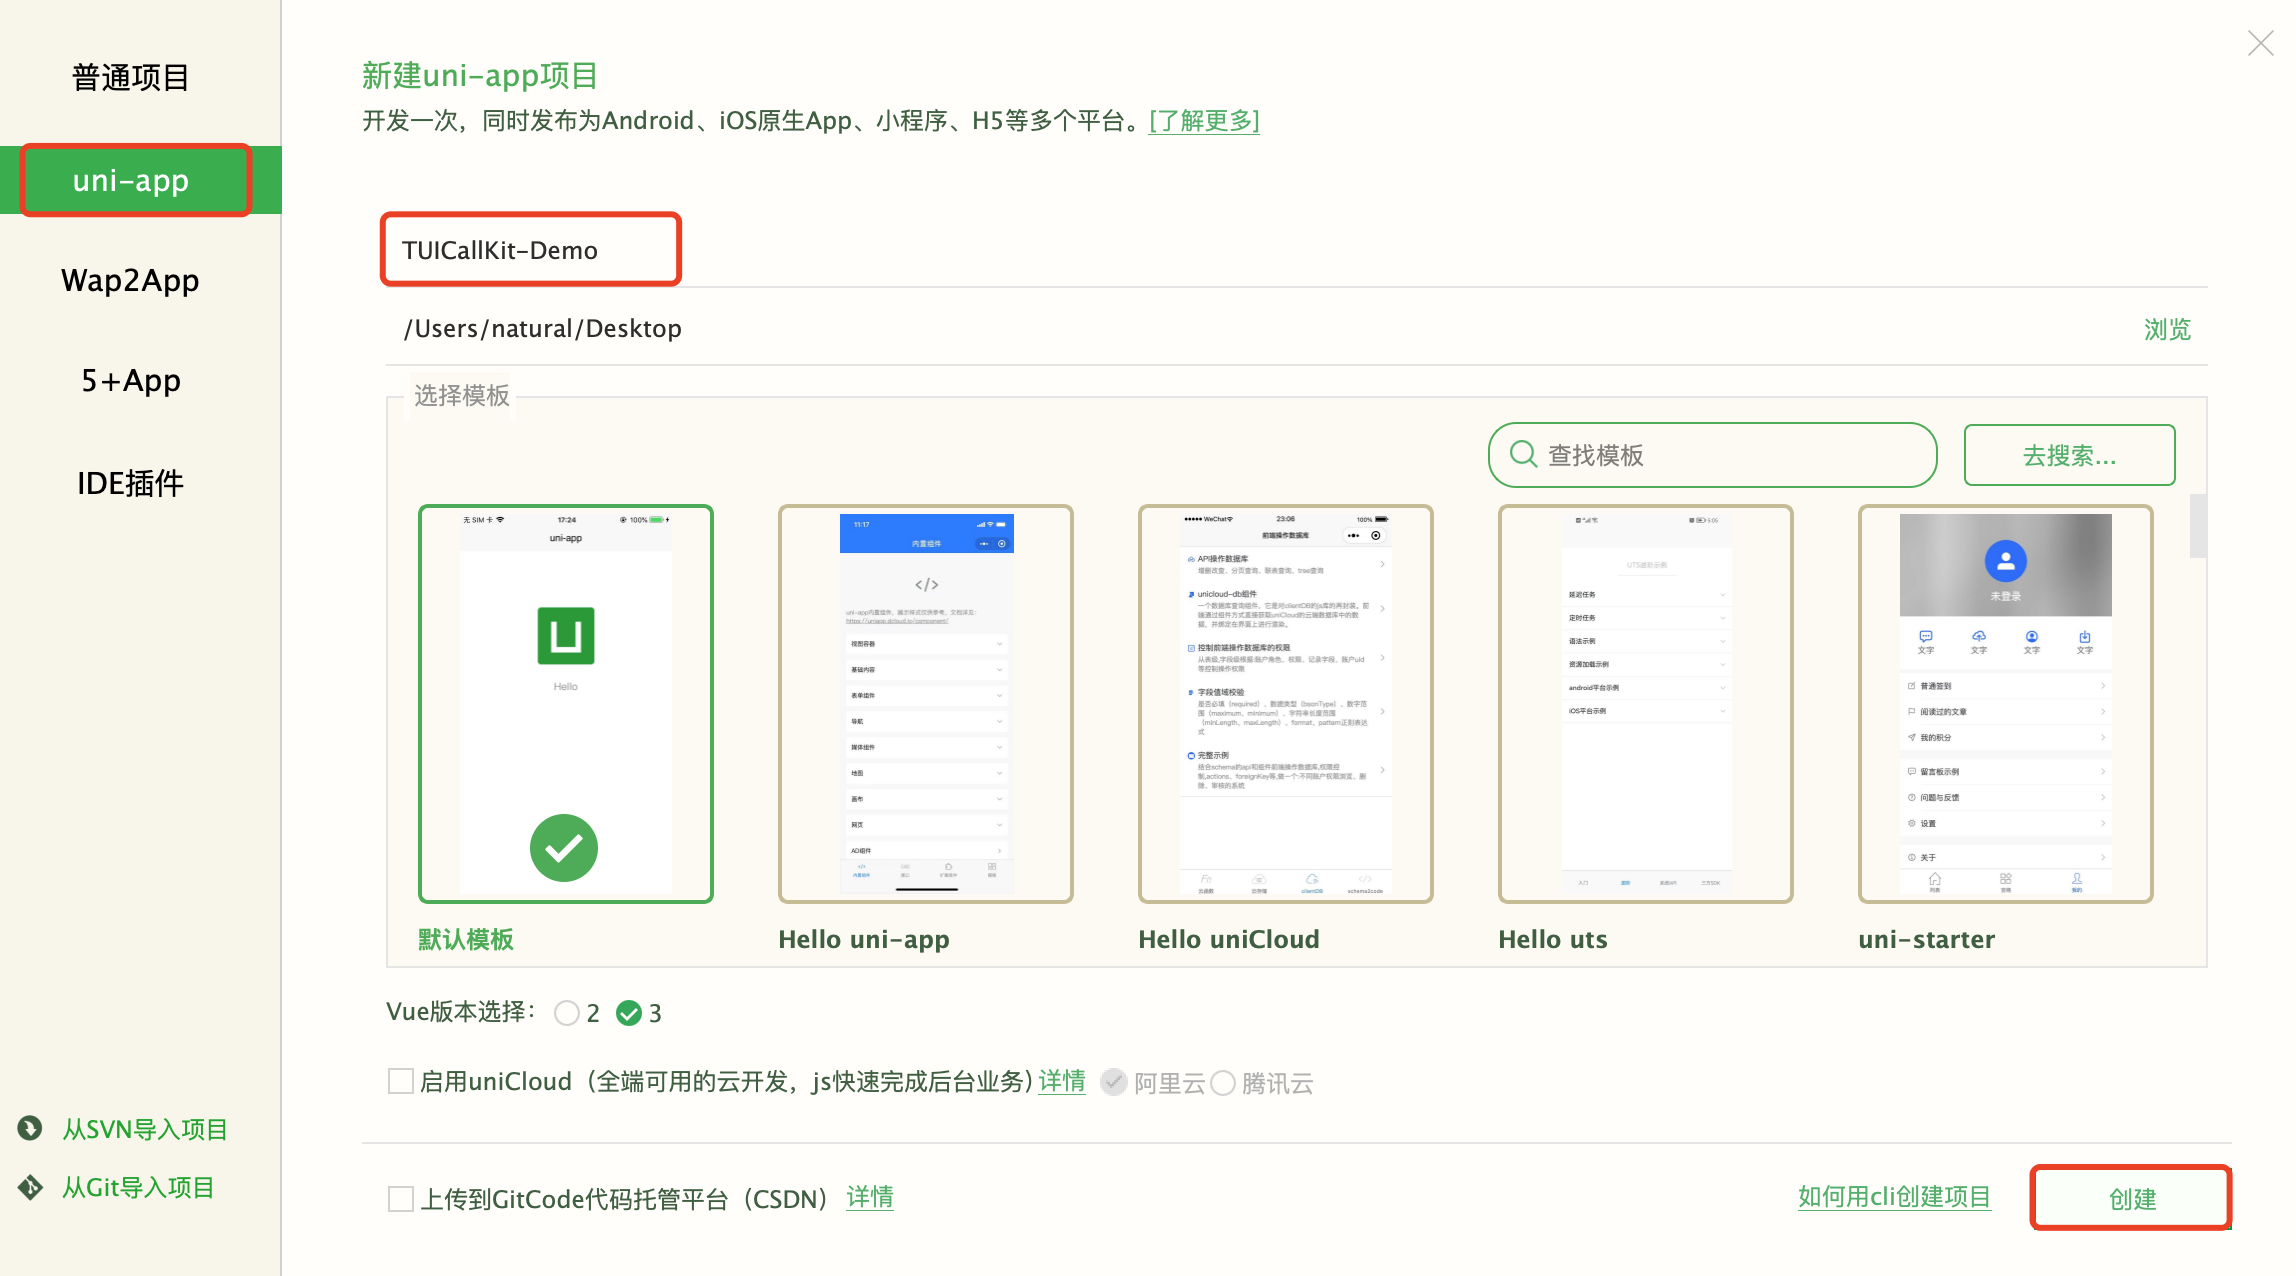
단계 2: uni-app 프로젝트 만들기
Hbuilderx 개발 툴을 열고, 새 uni-app 프로젝트: 프로젝트 이름 (TUICallKit-Demo)을 클릭합니다.
단계 3: TUICallKit 플러그인 다운로드 및 가져오기
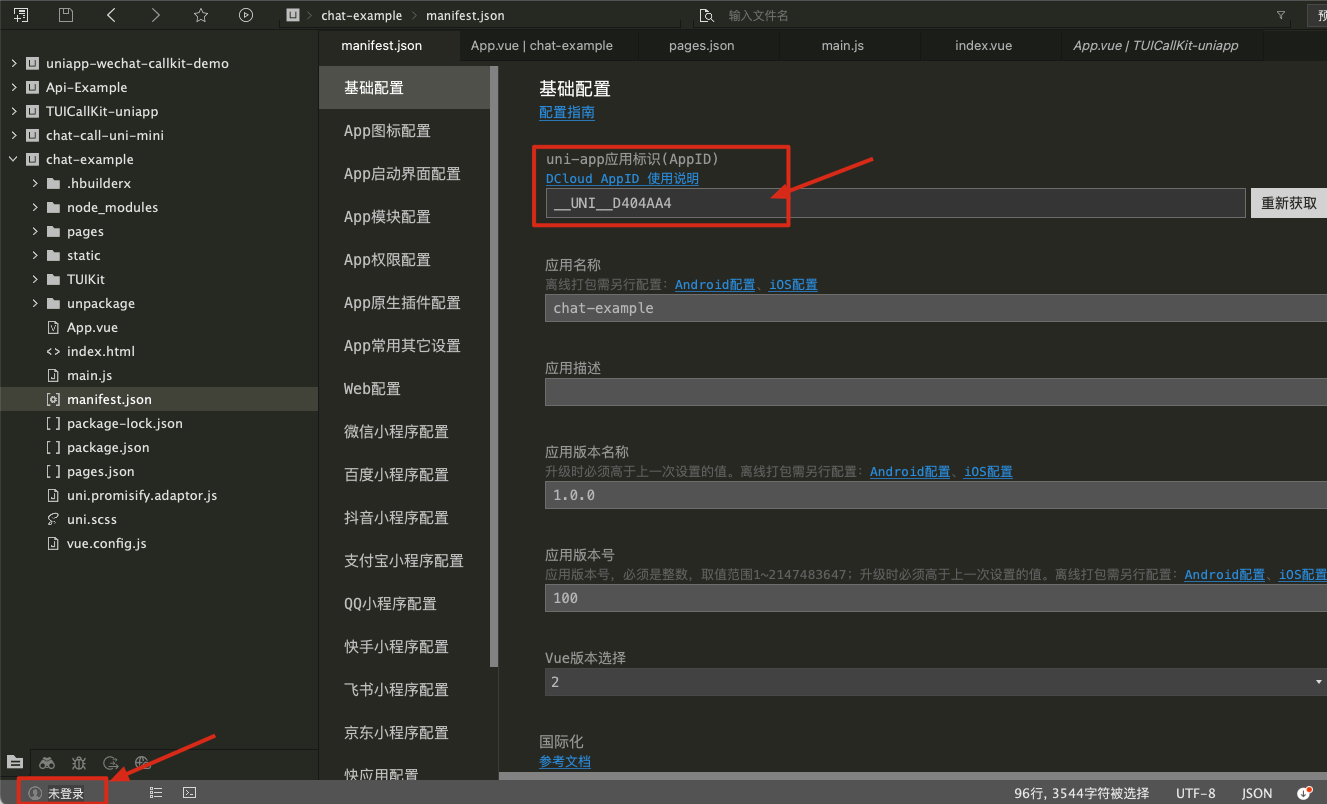
1. 프로젝트를 만들고, uni-app 앱아이디(AppID)를 생성합니다.
HbuilderX를 열고, 왼쪽 하단을 클릭하여 uni-app 계정(계정이 없으면 우선 등록해야 함)에 로그인합니다. 로그인에 완료한 후, 프로젝트의 manifest.json 파일을 클릭하여 uni-app 앱아이디(AppID)를 생성합니다.
2. TencentCloud-TUICallKit 플러그인에 접근하여, 플러그인 상세 페이지에서 플러그인(무료)을 구매하며, 플러그인을 구매할 때 대응하는 AppID를 선택하여 정확한 패키지명을 연동합니다.
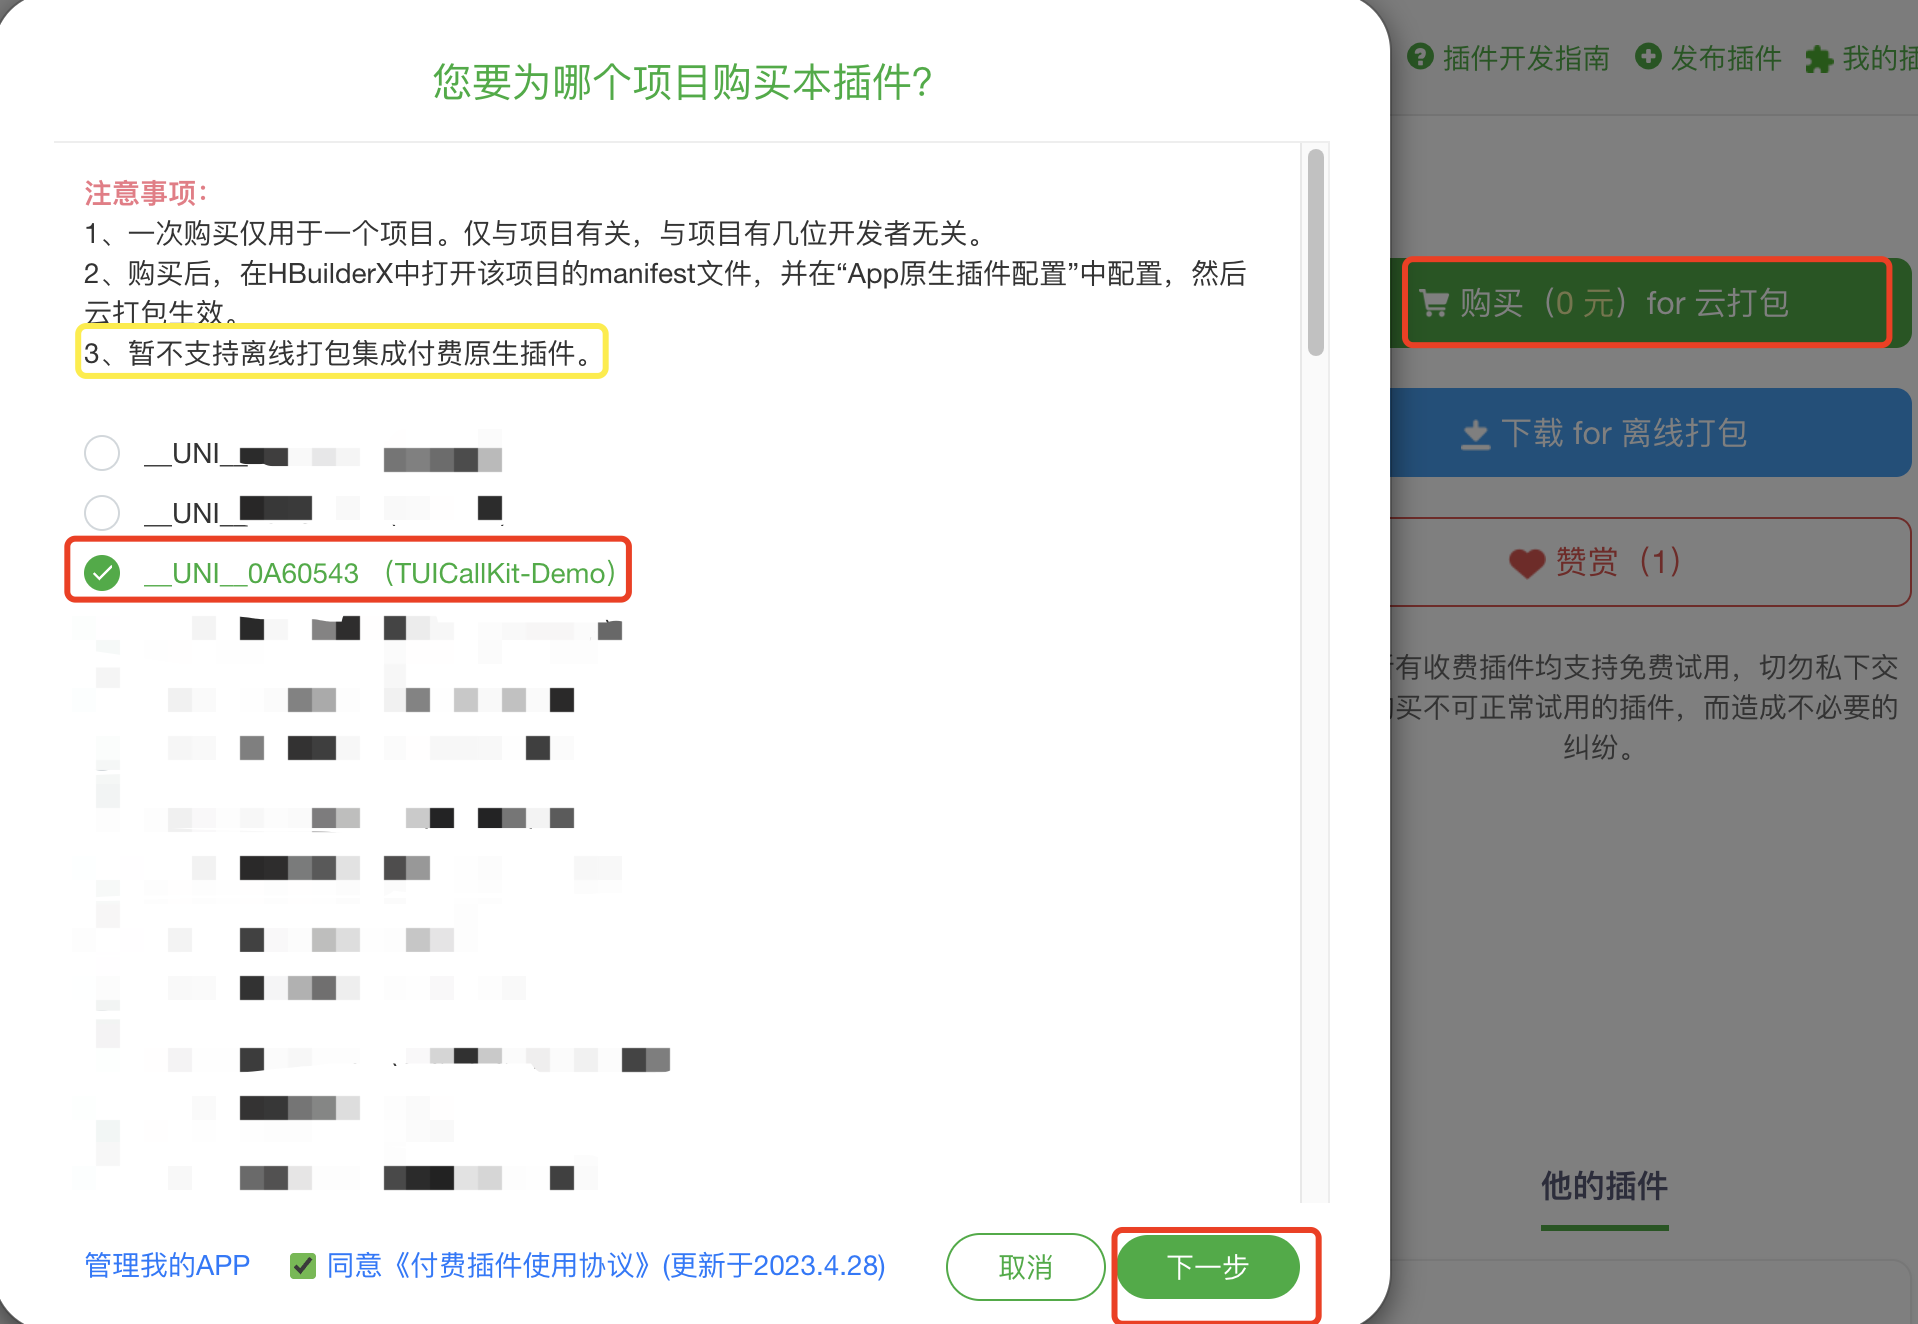
3. 을
TUICallKit-Demo 프로젝트에 플러그인을 가져옵니다.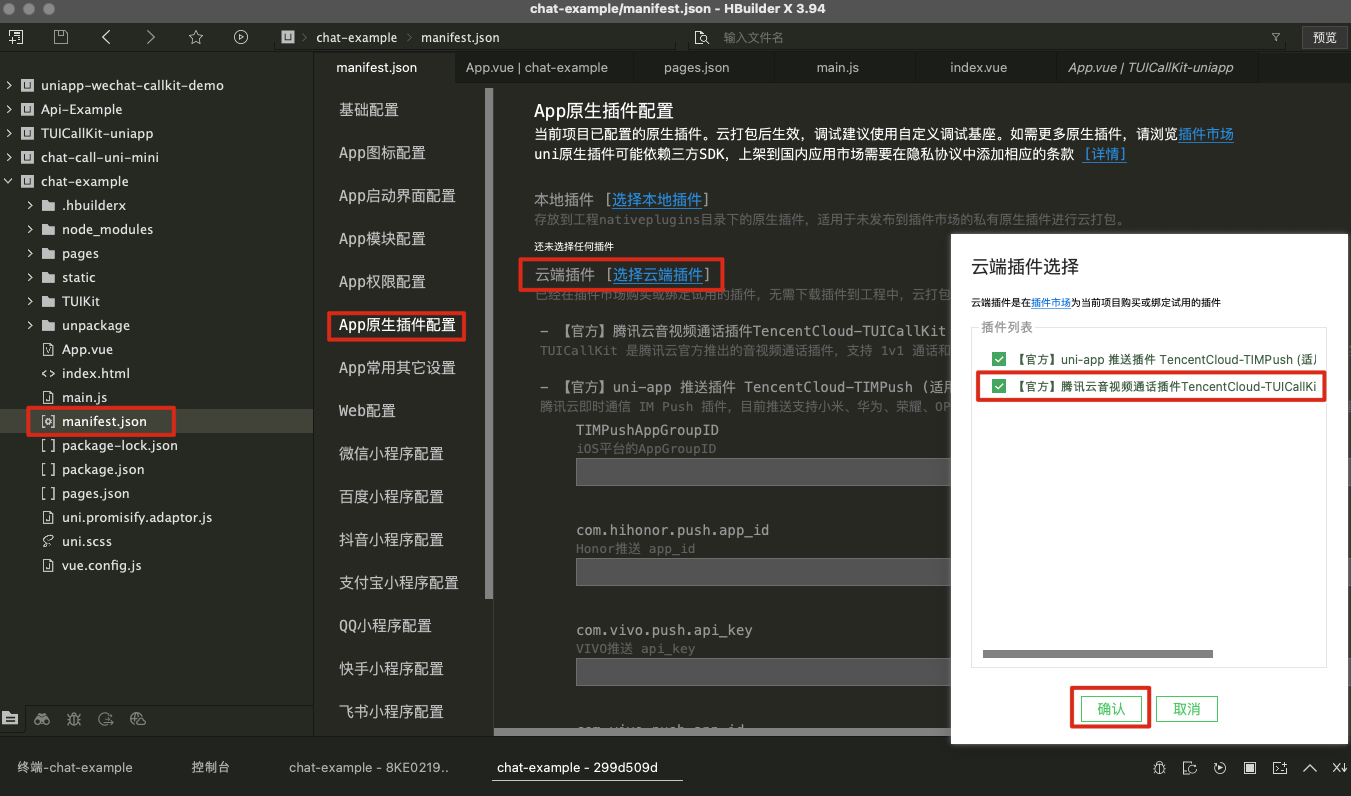
단계 4: TUICallKit 플러그인
1. 을 사용하여
TUICallKit-Demo/pages/index/index.vue 에 다음 코드를 가져옵니다.<template><view class="container"><input type="text" v-model="inputID" :placeholder=" isLogin ? 'please enter a caller userID' : 'please enter your login userID' " /><text v-show="isLogin"> your userID: {{ userID }} </text><button v-show="!isLogin" @click="handleLogin"> Login </button><button v-show="isLogin" @click="handleCall"> start call </button></view></template><script>const TUICallKit = uni.requireNativePlugin('TencentCloud-TUICallKit'); //【1】import TUICallKit pluginuni.$TUICallKit = TUICallKit;import { genTestUserSig } from '../../debug/GenerateTestUserSig.js'export default {data() {return {inputID: '',isLogin: false,userID: '',}},methods: {handleLogin() {this.userID = this.inputID;const { userSig, sdkAppID: SDKAppID } = genTestUserSig(this.userID);const loginParams = { SDKAppID, userID: this.userID, userSig }; // apply SDKAppID、userSig//【2】Loginuni.$TUICallKit.login( loginParams, res => {if (res.code === 0) {this.isLogin = true;this.inputID = '';console.log('\\[TUICallKit\\] login success.');} else {console.error('\\[TUICallKit\\] login failed, failed message = ', res.msg, params);}});},handleCall() {try {const callParams = {userID: this.inputID,callMediaType: 2, // 1 -- audio call, 2 -- video callcallParams: { roomID: 234, strRoomID: '2323423', timeout:30 },};//【3】start 1v1 video calluni.$TUICallKit.call( callParams, res => {console.log('\\[TUICallKit] call params: ', JSON.stringify(res));});this.inputID = '';} catch (error) {console.log('\\[TUICallKit] call error: ', error);}}}}</script><style>.container {margin: 30px;}.container input {height: 50px;border: 1px solid;}.container button {margin-top: 30px;}</style>
2. SDKAppID, SDKSecretKey, userSig 매개변수를 기입합니다.
UserSig가 시효성이 있기 때문에, 테스트 환경에서, 이 방법을 사용할 것을 추천합니다.
1. 클릭하여 debug 폴더 다운로드하여, debug 디렉토리를 프로젝트에 복사합니다. 아래 그림과 같이:
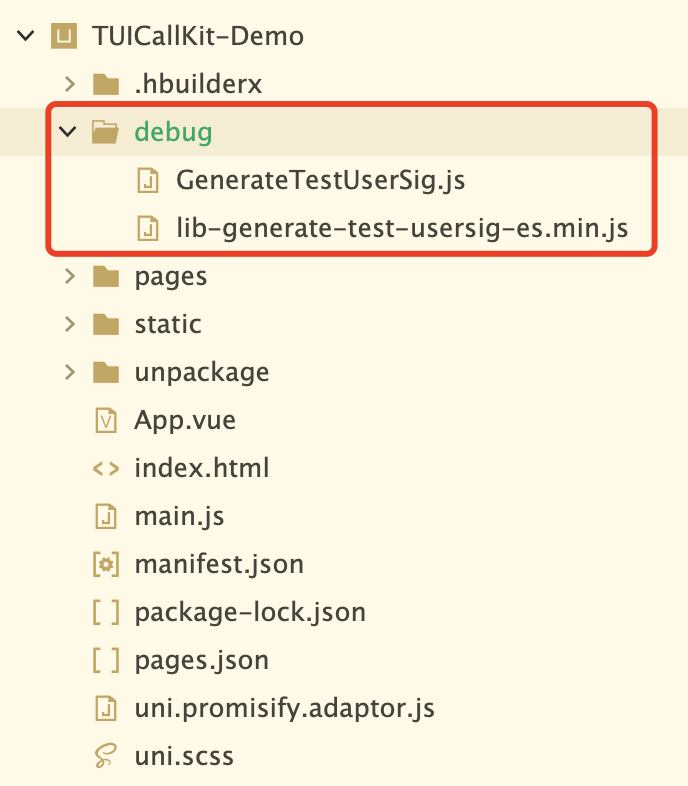
2. 기입
TUICallKit-Demo/debug/GenerateTestUserSig.js 파일의 SDKAppID, SDKSecretKey (서비스 활성화 참고)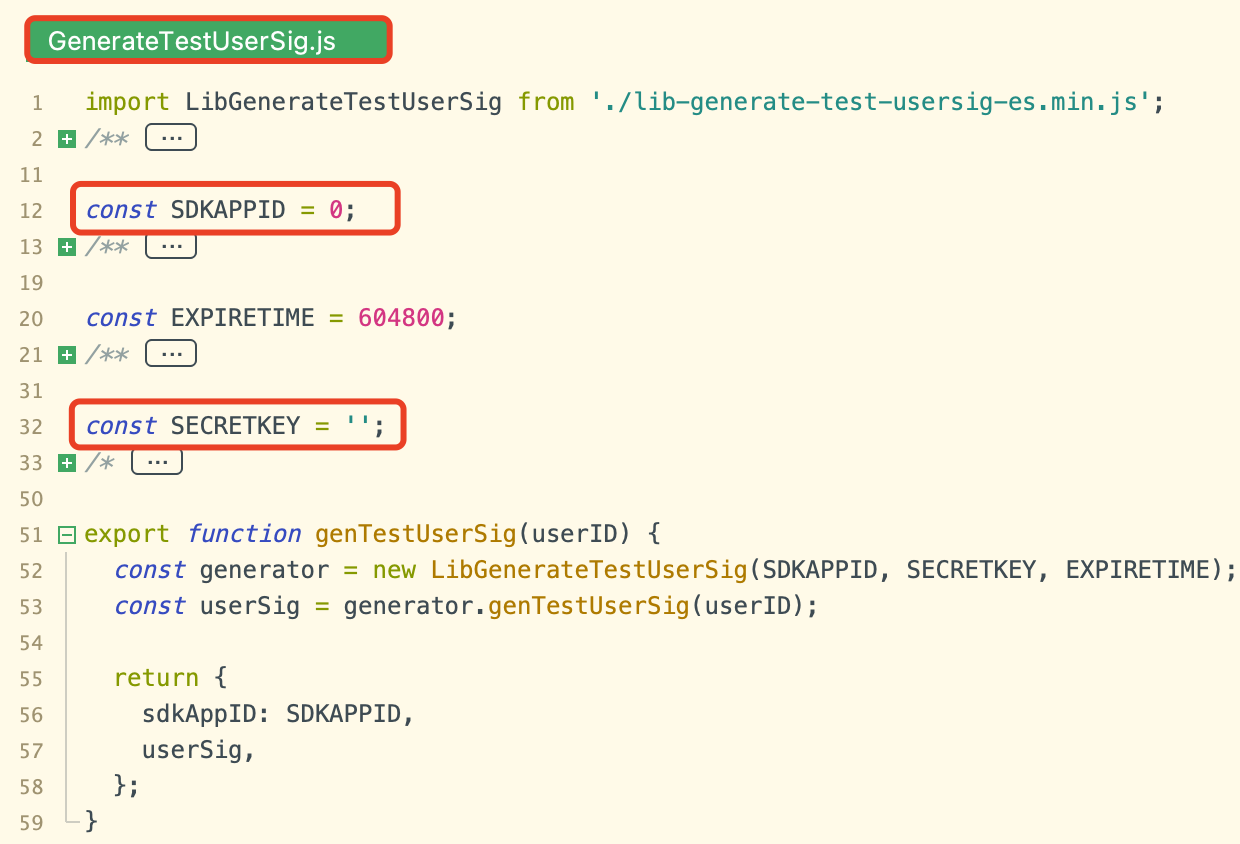
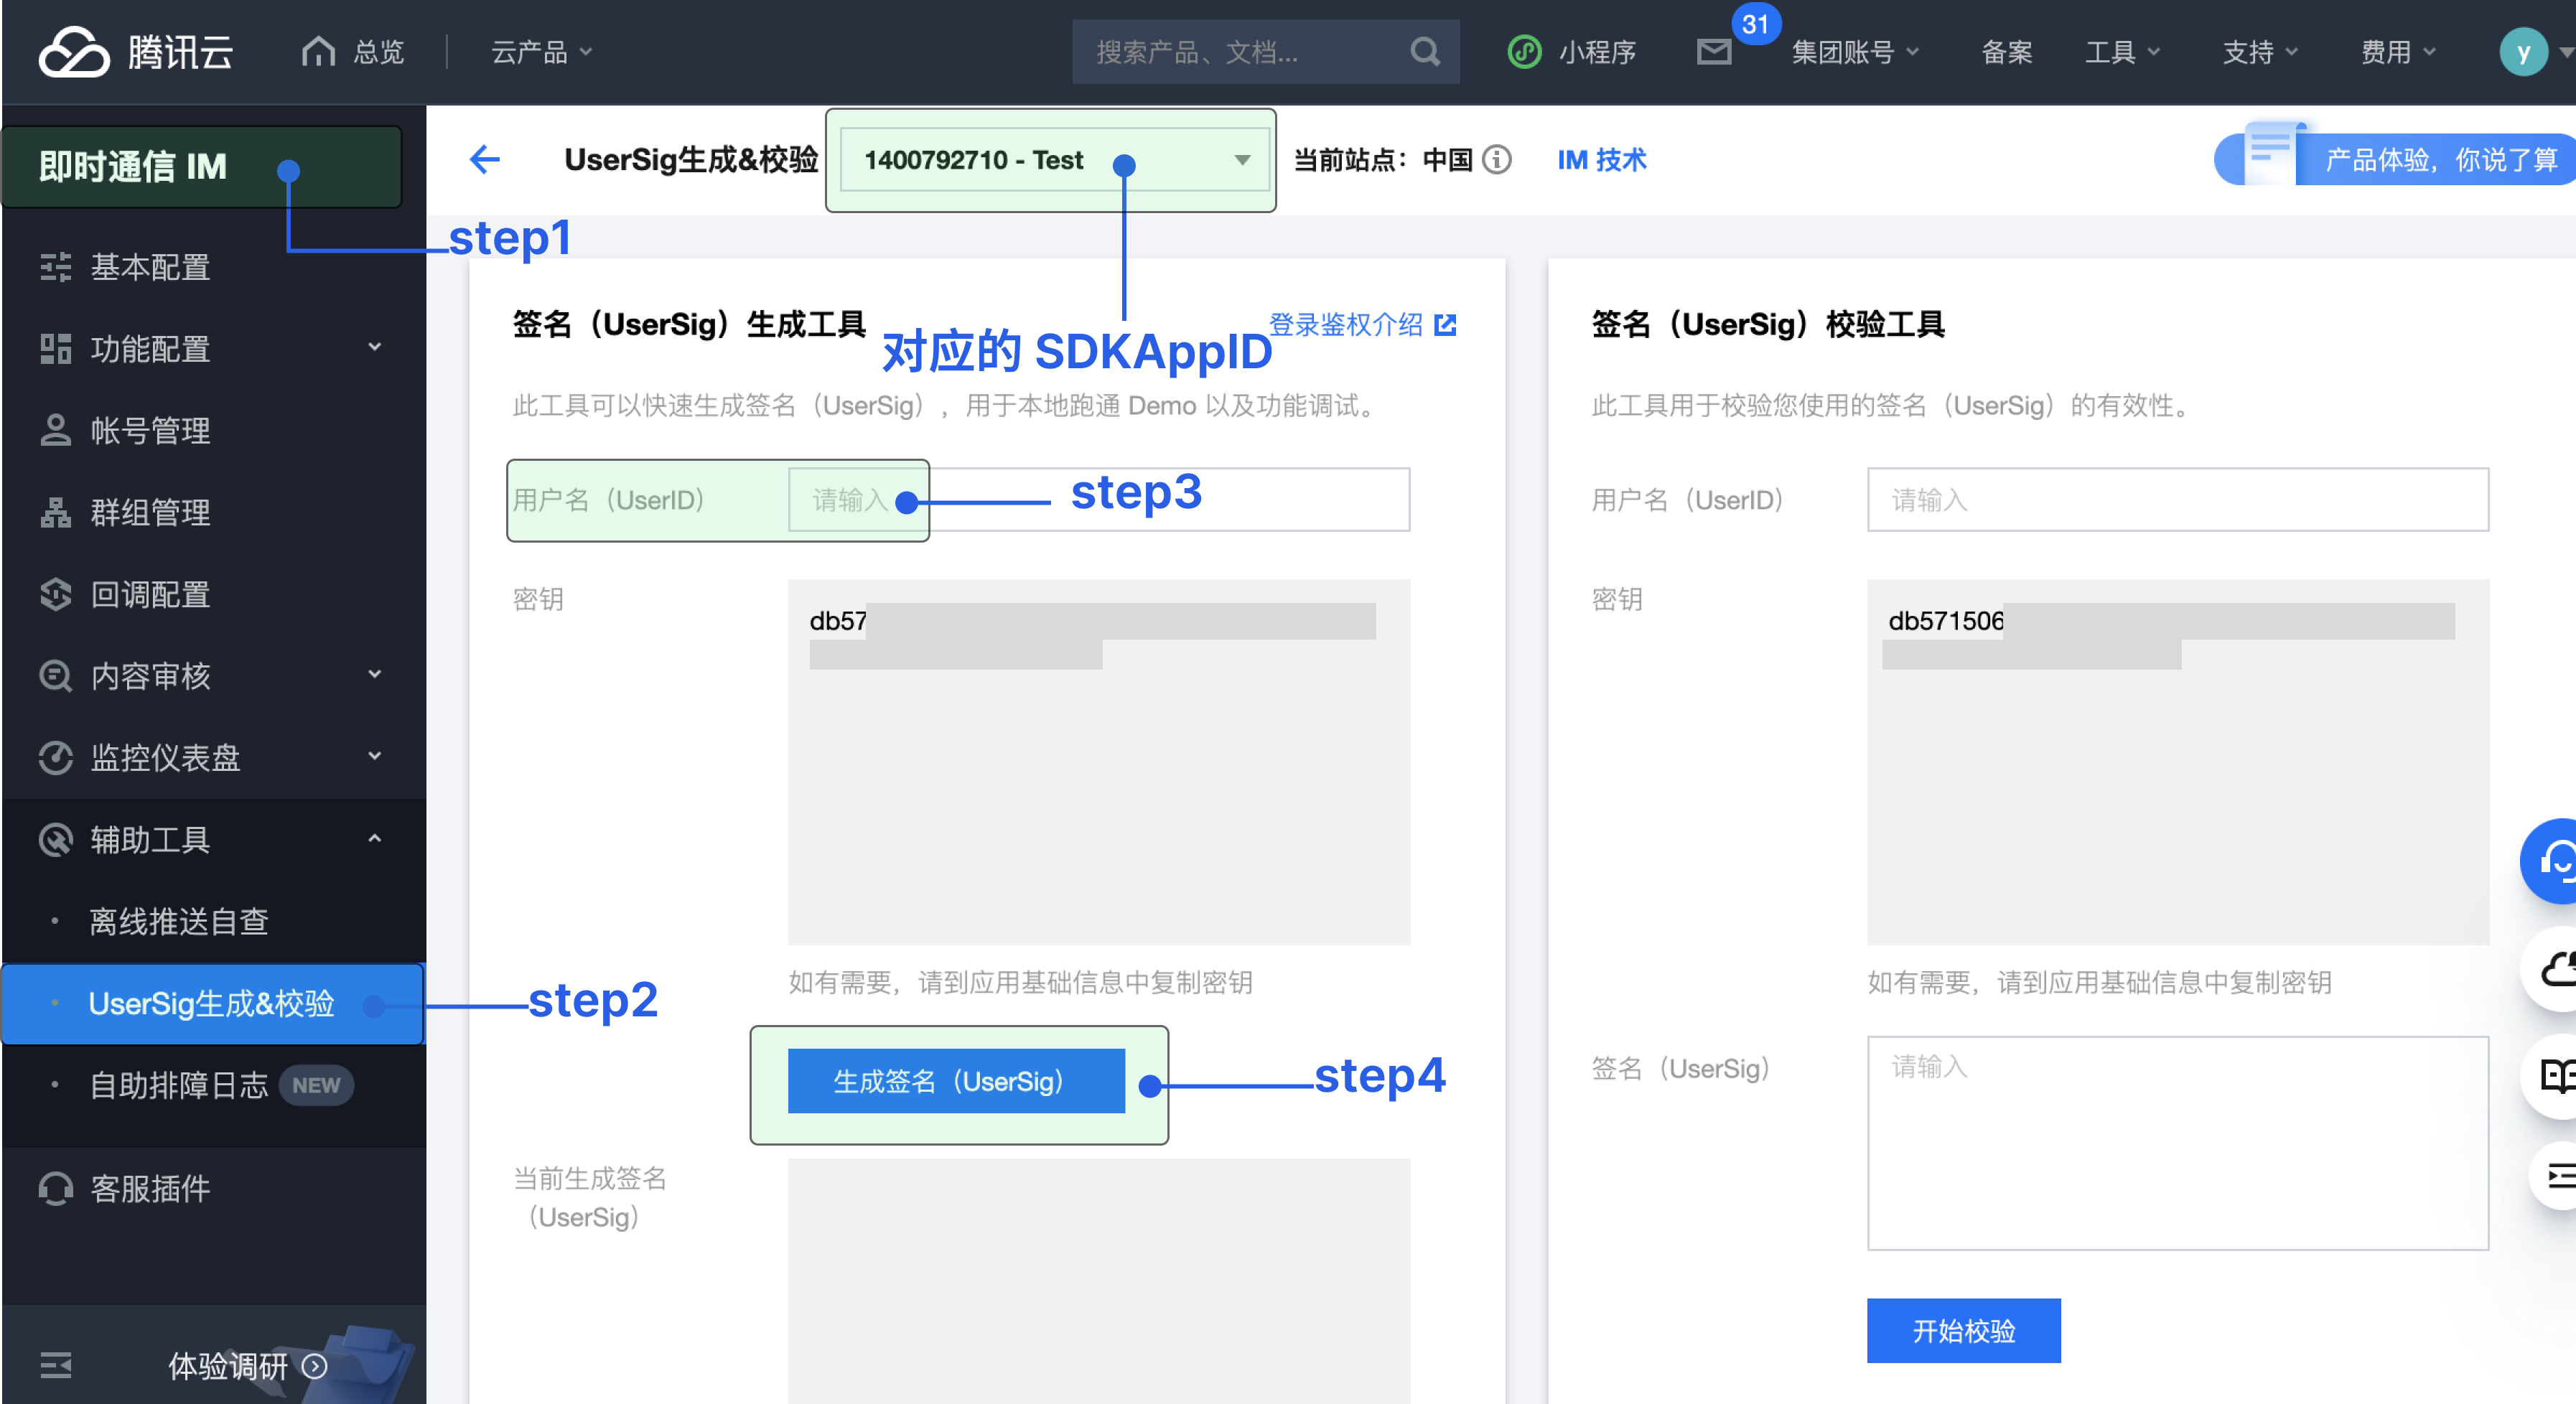
만약 콘솔 생성을 사용하신다면,
TUICallKit-Demo/pages/index/index.vue 파일에, 여기의 SDKAppID、userSig 값을 할당해야 합니다.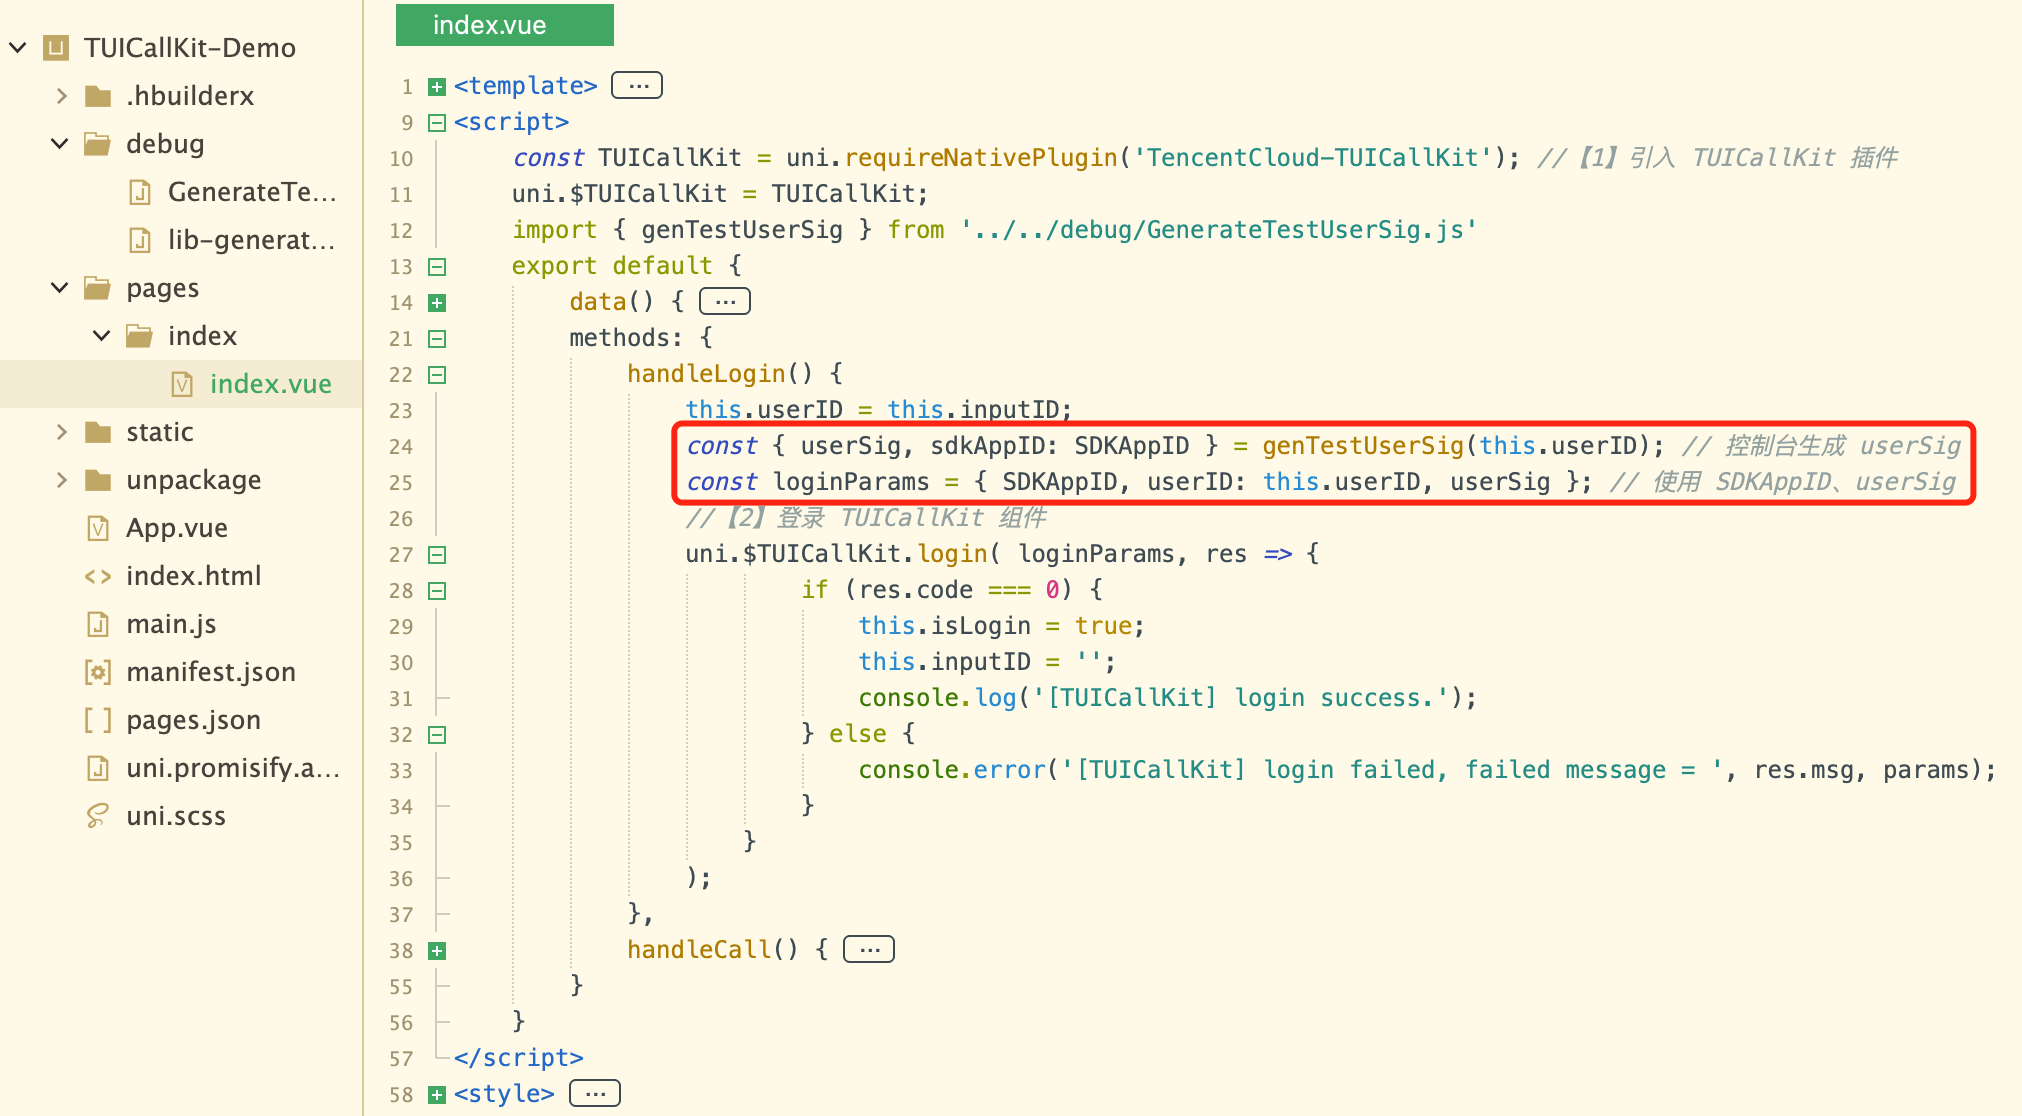
단계 5: 첫 번째 통화를 하기
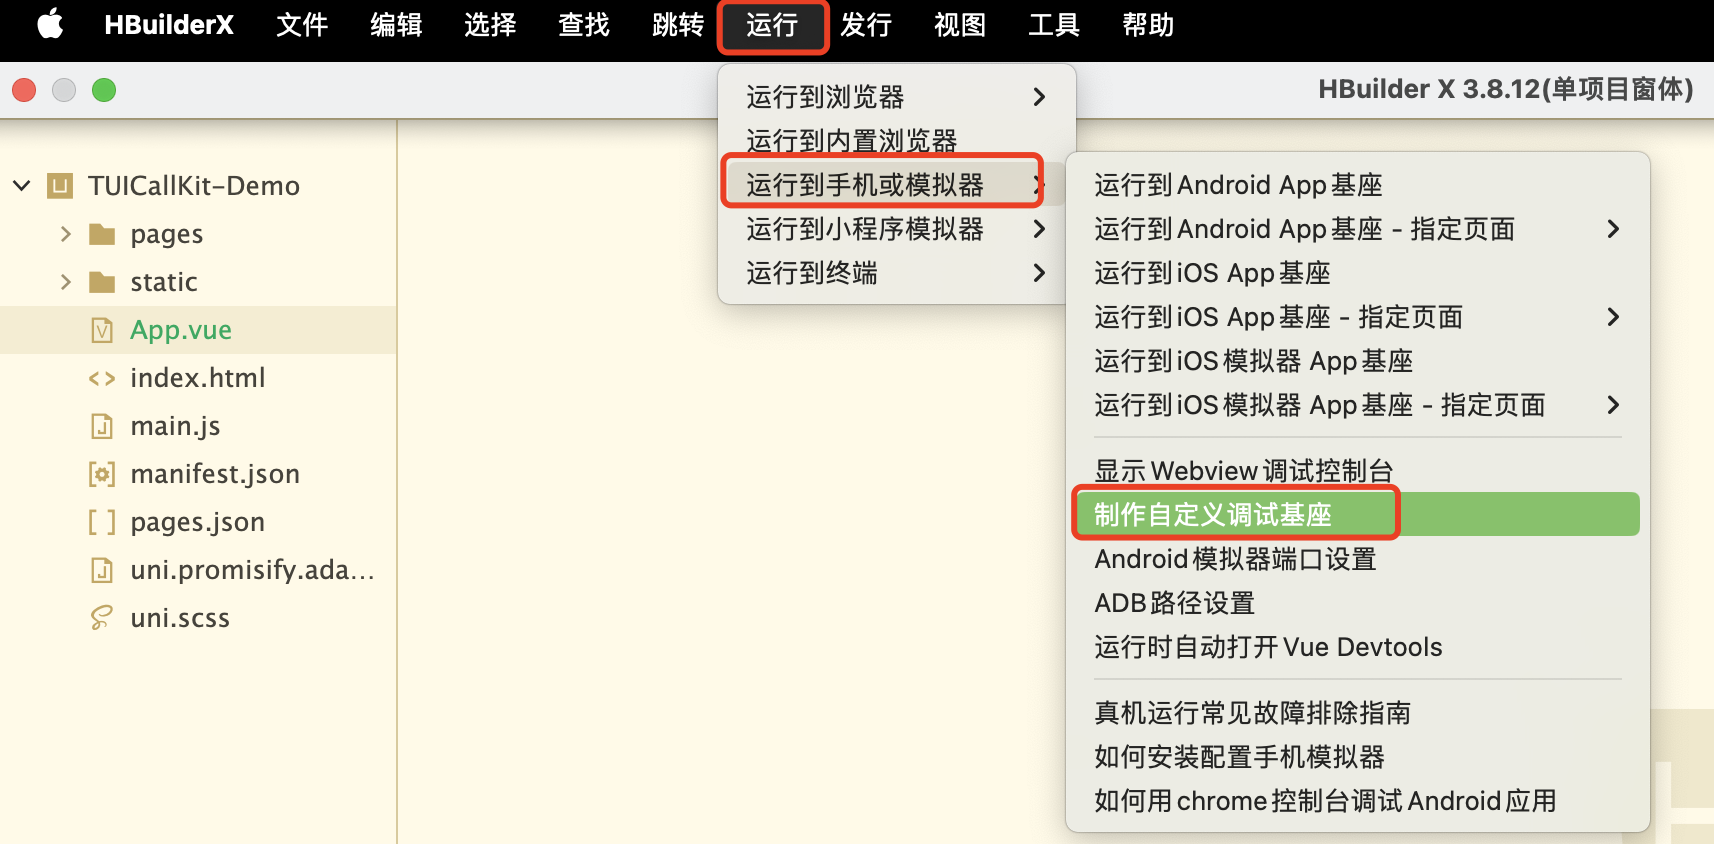
1. 사용자 정의 디버깅 베이스를 제작하려면, 기존 패키징 방식을 선택하여 패키징하시기 바랍니다.
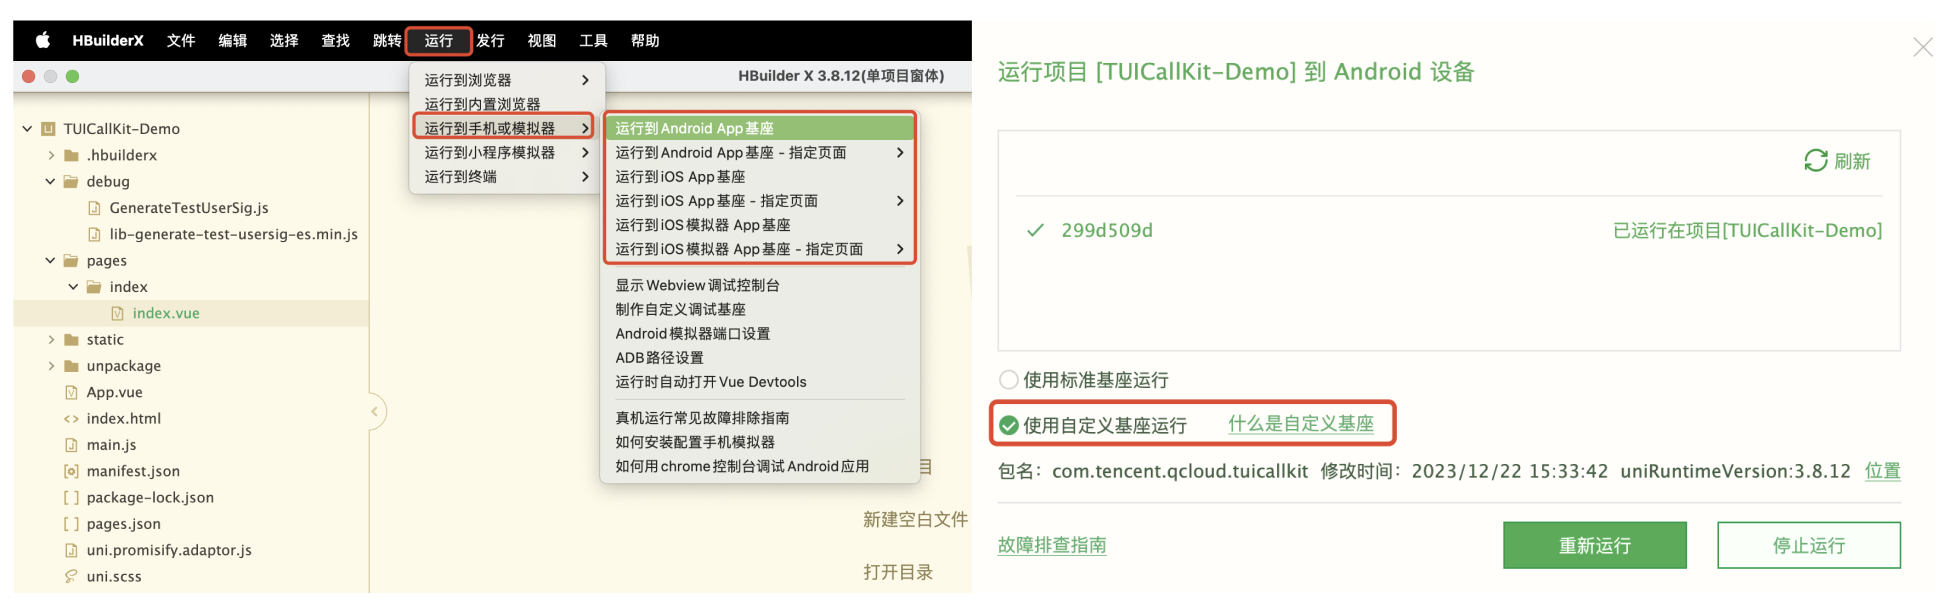
2. 사용자 정의 디버깅 베이스에 성공한 후, 사용자 정의 베이스를 사용하여 프로젝트를 실행합니다.
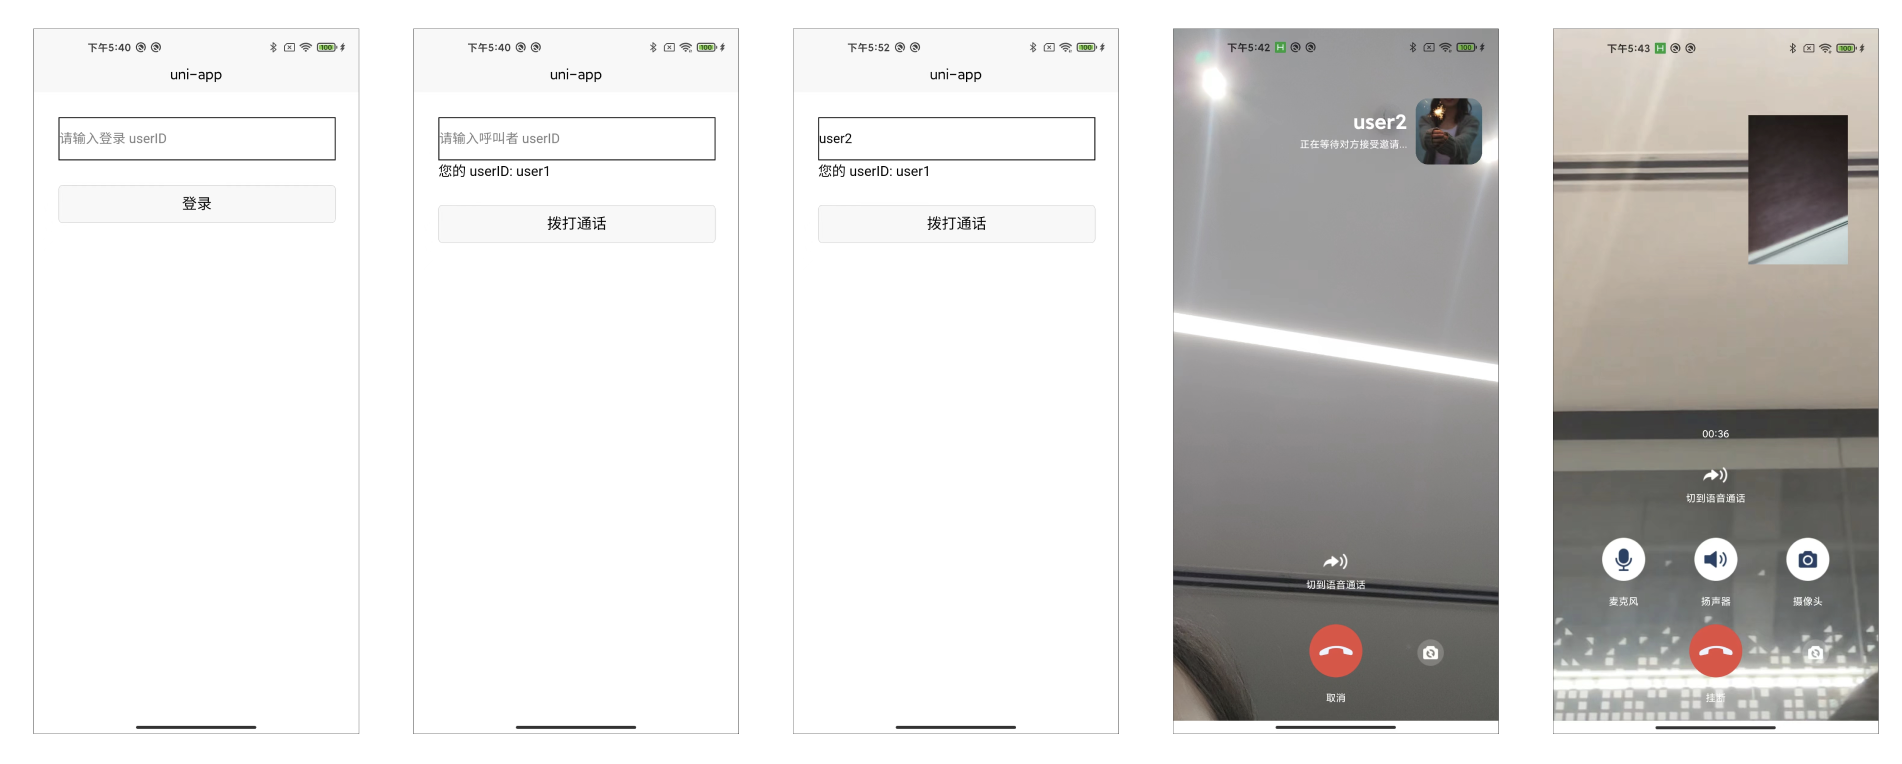
3. 1v1 비디오 통화의 구체적 효과는 그림에 표시된 바와 같습니다.
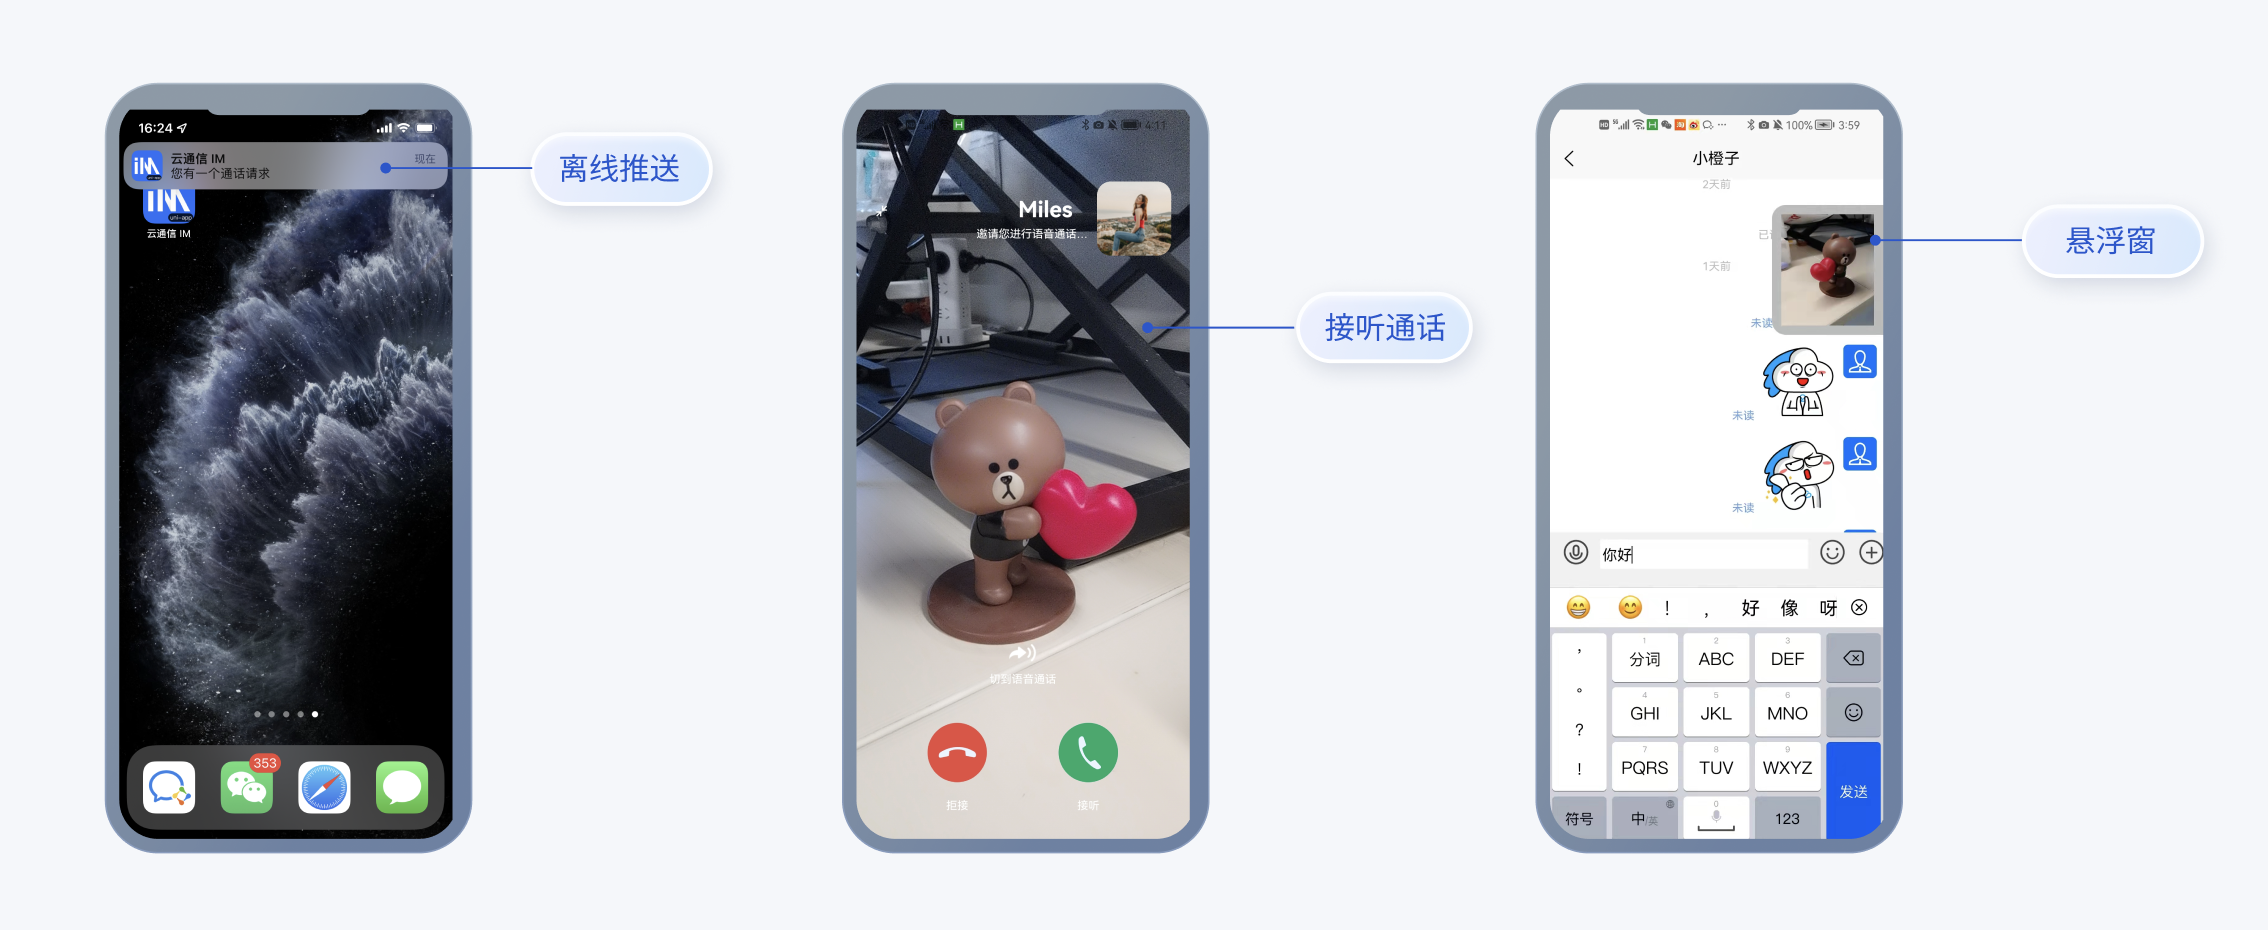
더 많은 특성
그룹 통화
플로팅 창
자주 받는 질문들
관련 사례 - 온라인 고객 서비스 시나리오
온라인 고객 서비스 시나리오에 대한 소스 코드를 제공하고 있으며, 온라인 고객 서비스 시나리오 다운로드하여 경험을 통합할 것을 권장합니다. 이 시나리오는 예시 고객 서비스 그룹 + 예시 친구의 기초 템플릿을 제공하며, 구현 기능은 다음의 내용들을 포함합니다.
텍스트 메시지, 이미지 메시지, 오디오 메시지, 비디오 메시지 등 일반적인 메시지 발송을 지원합니다.
2인 오디오, 비디오 통화 기능을 지원합니다.
그룹 채팅 대화방 생성, 그룹 멤버 관리 등을 지원합니다.
기술 상담
요구사항 또는 피드백이 있는 경우 info_rtc@tencent.com으로 연락하시기 바랍니다.
フィードバック