Voice over IP (VoIP) Push is a notification mechanism powered by Apple to respond to VoIP calls. Combined with PushKit.framework and CallKit.framework provided by Apple, it can implement the system-level call effect. Currently, the VoIP Push service provided by IM only supports offline push notifications.
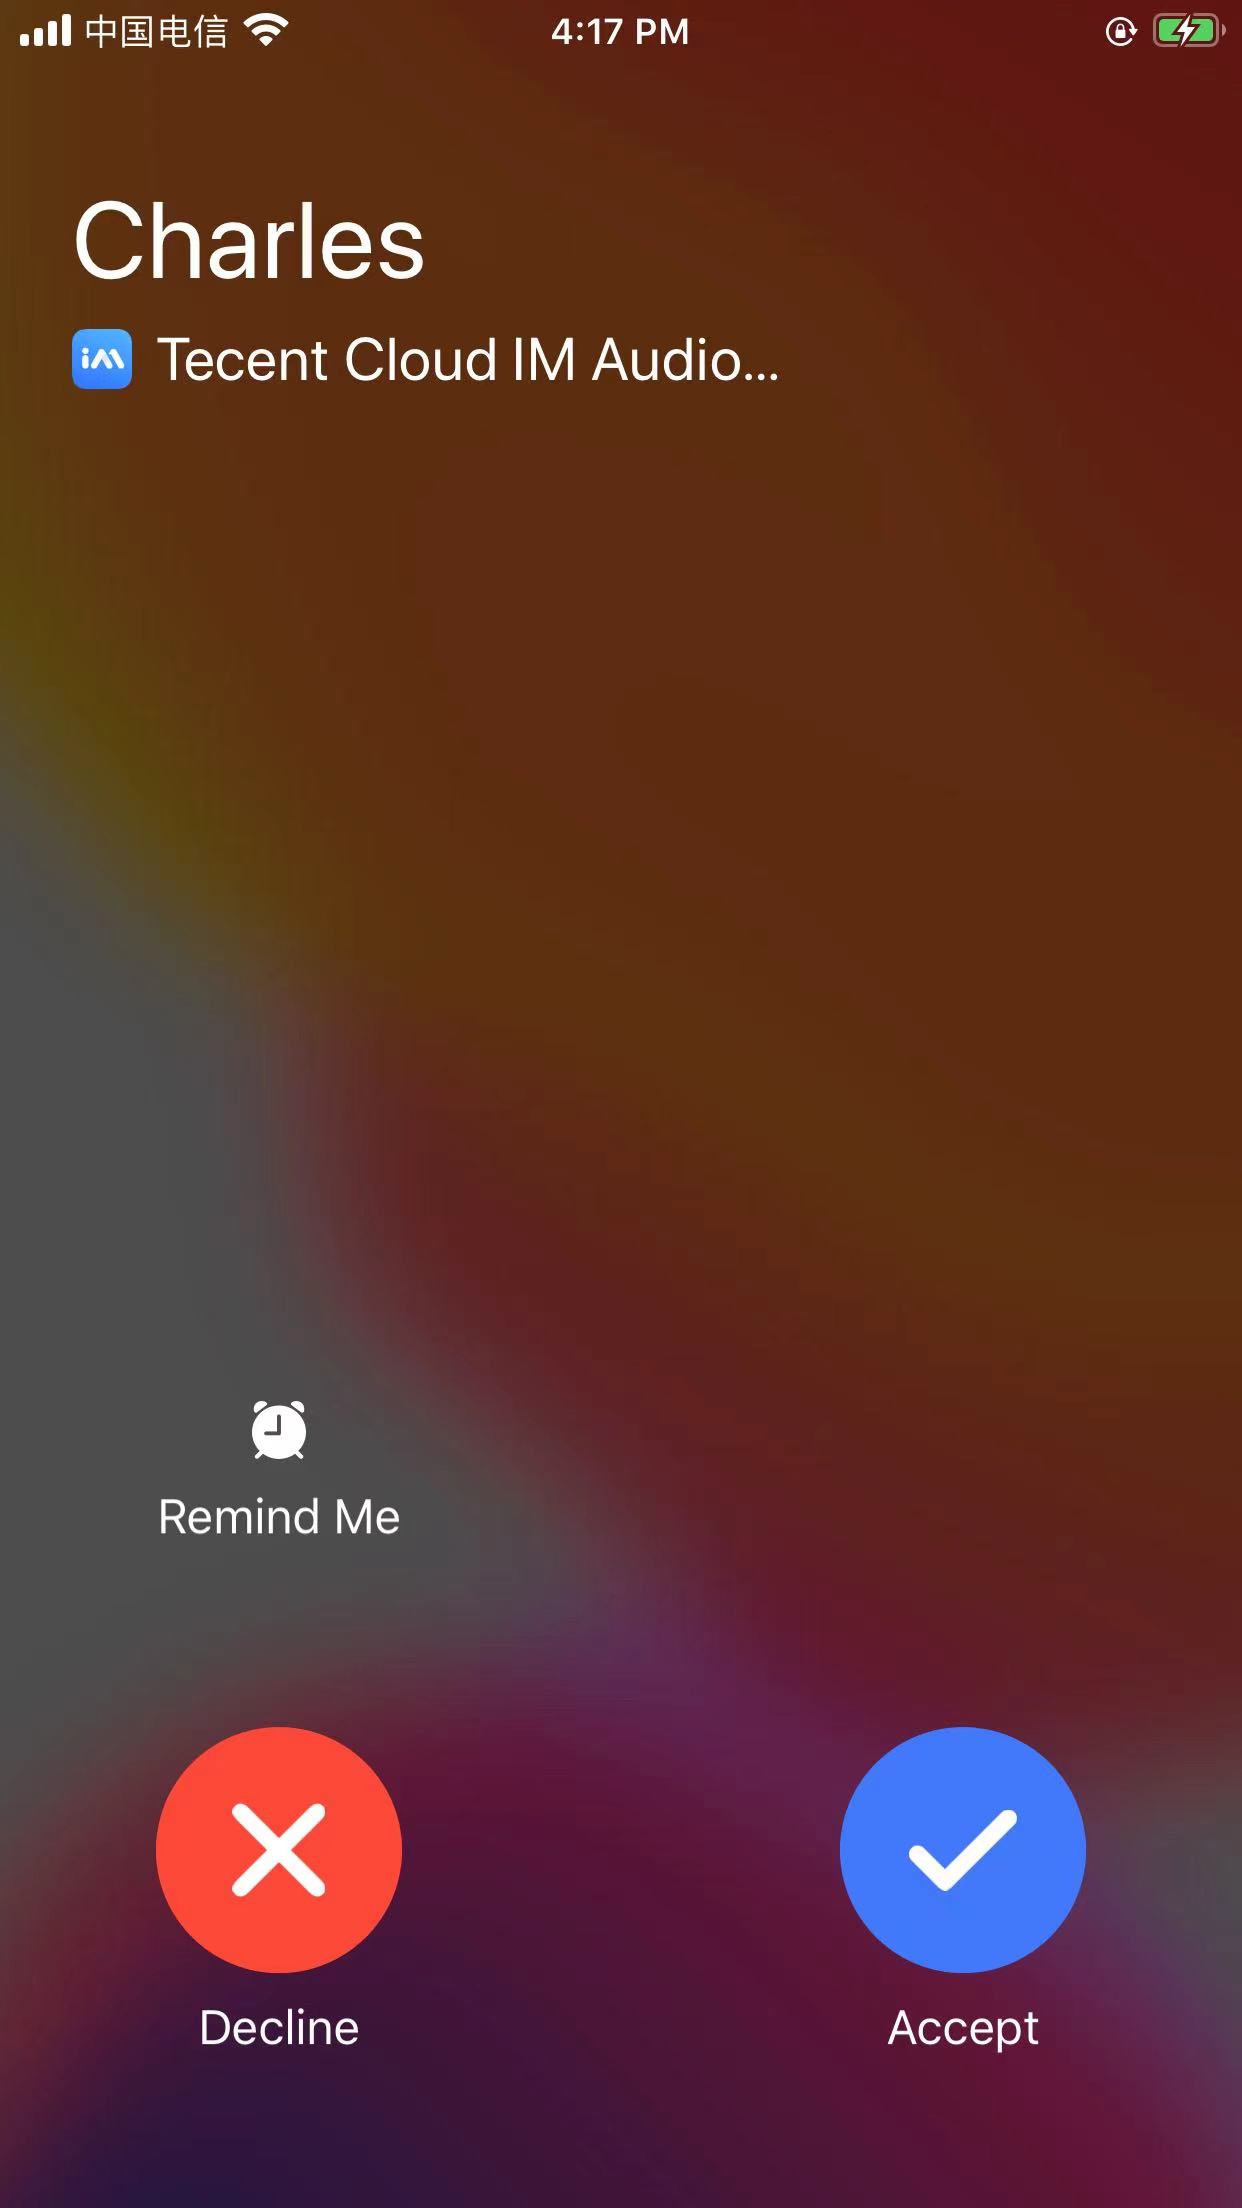
VoIP calls
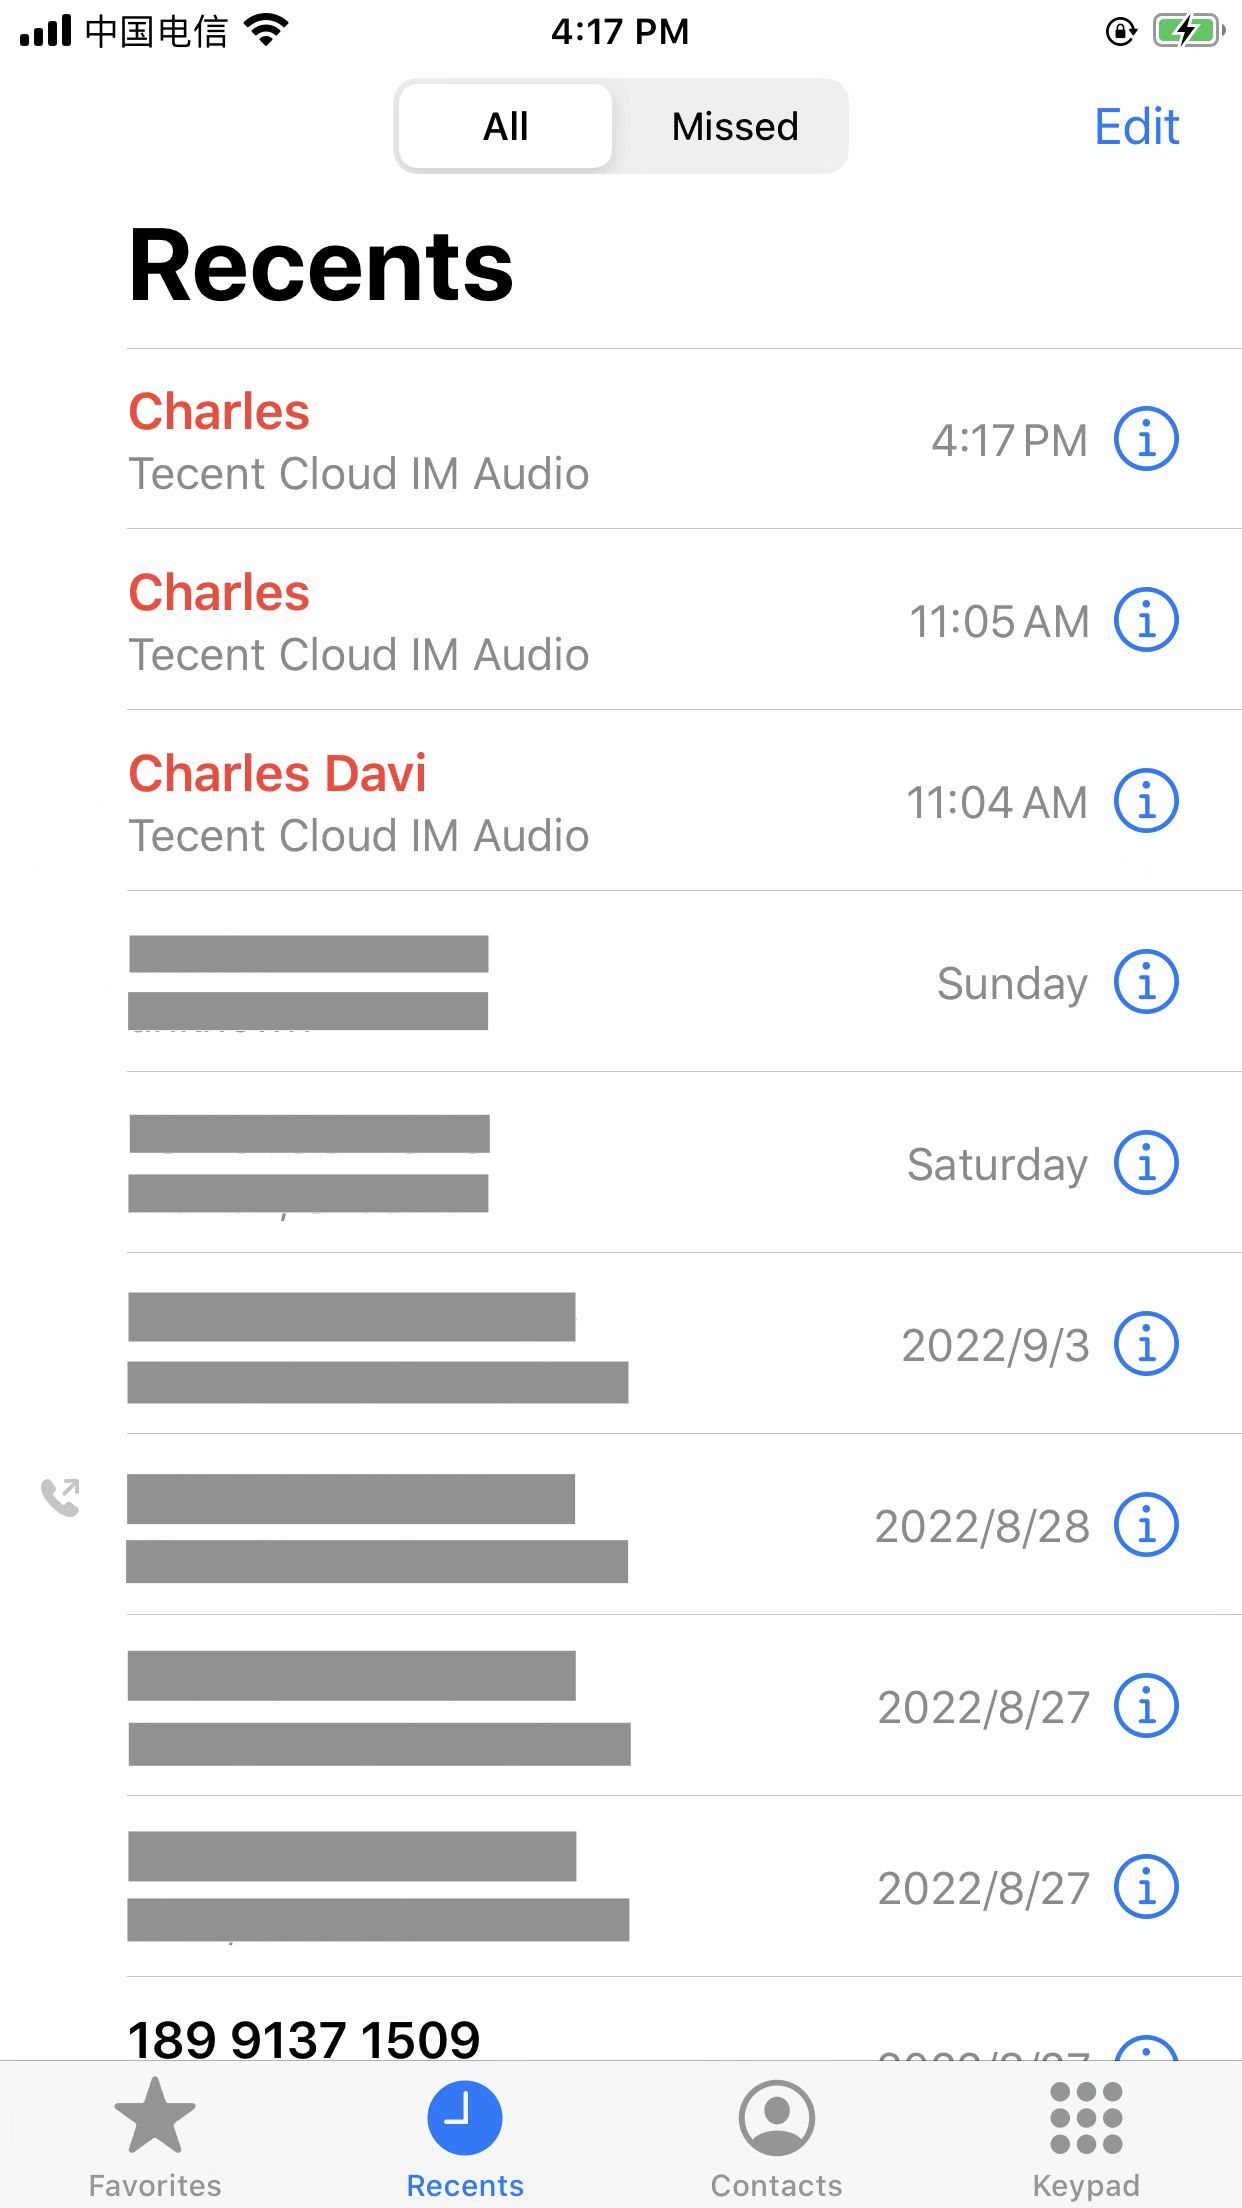
Recent calls
Note
As required by Apple, for iOS 13.0 and later, VoIP Push must be used together with CallKit.framework; otherwise, a crash will occur after app running.
VoIP Push cannot directly use the push certificate for APNs. You need to separately Generate a VoIP Push certificate on Apple Developer.
VoIP Push cannot directly use the push token for APNs. You need to separately Get the VoIP token from the client code and Report the token.
Setting up VoIP Push
Follow the steps below to receive VoIP push notifications:
1. Generate a VoIP Push certificate;
2. Upload the certificate to the IM console;
3. Get the VoIP token from Apple after each successful login of the app.
4. Call the setVOIP API to report the token to the backend of IM.
Step 1. Generate a VoIP Push certificate
Before generating a VoIP Push certificate, log in to Apple Developer to activate the remote push service for your app as instructed here.
After the Push Notifications capability is enabled for your app (AppID), generate a VoIP Push certificate and set it up as instructed below:
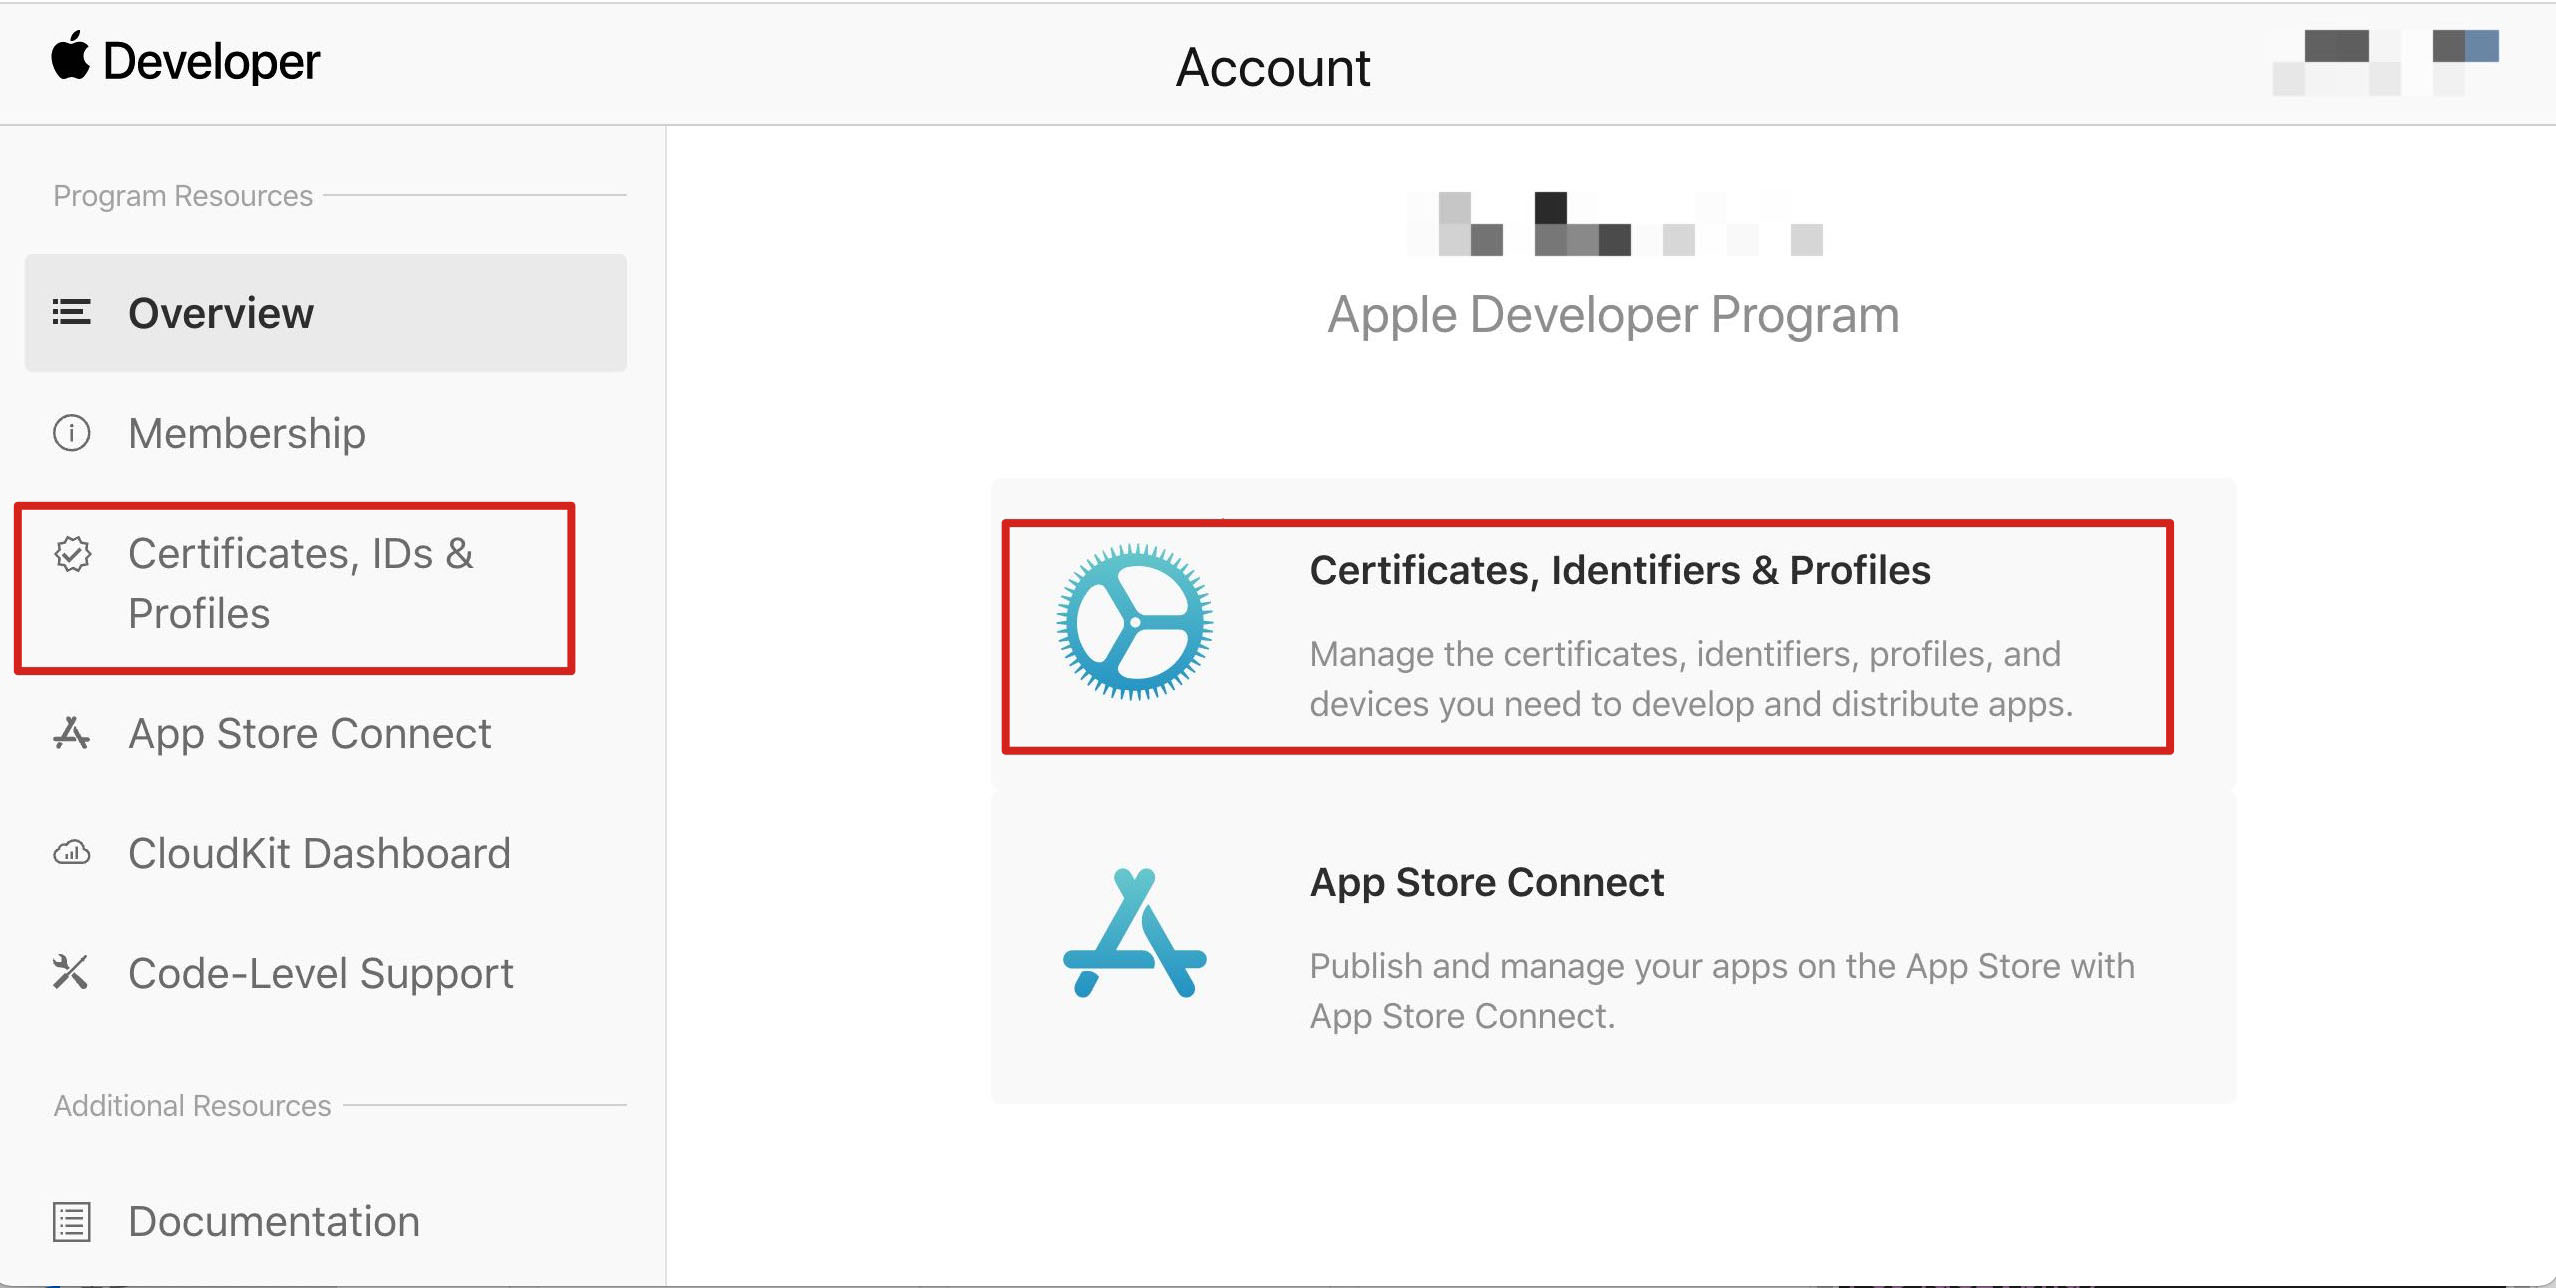
1. Log in to Apple Developer and click Certificates, Identifiers & Profiles in the right pane or Certificates, IDs & Profiles in the left sidebar to enter the Certificates, IDs & Profiles page;
2. Click + on the right of Certificates;
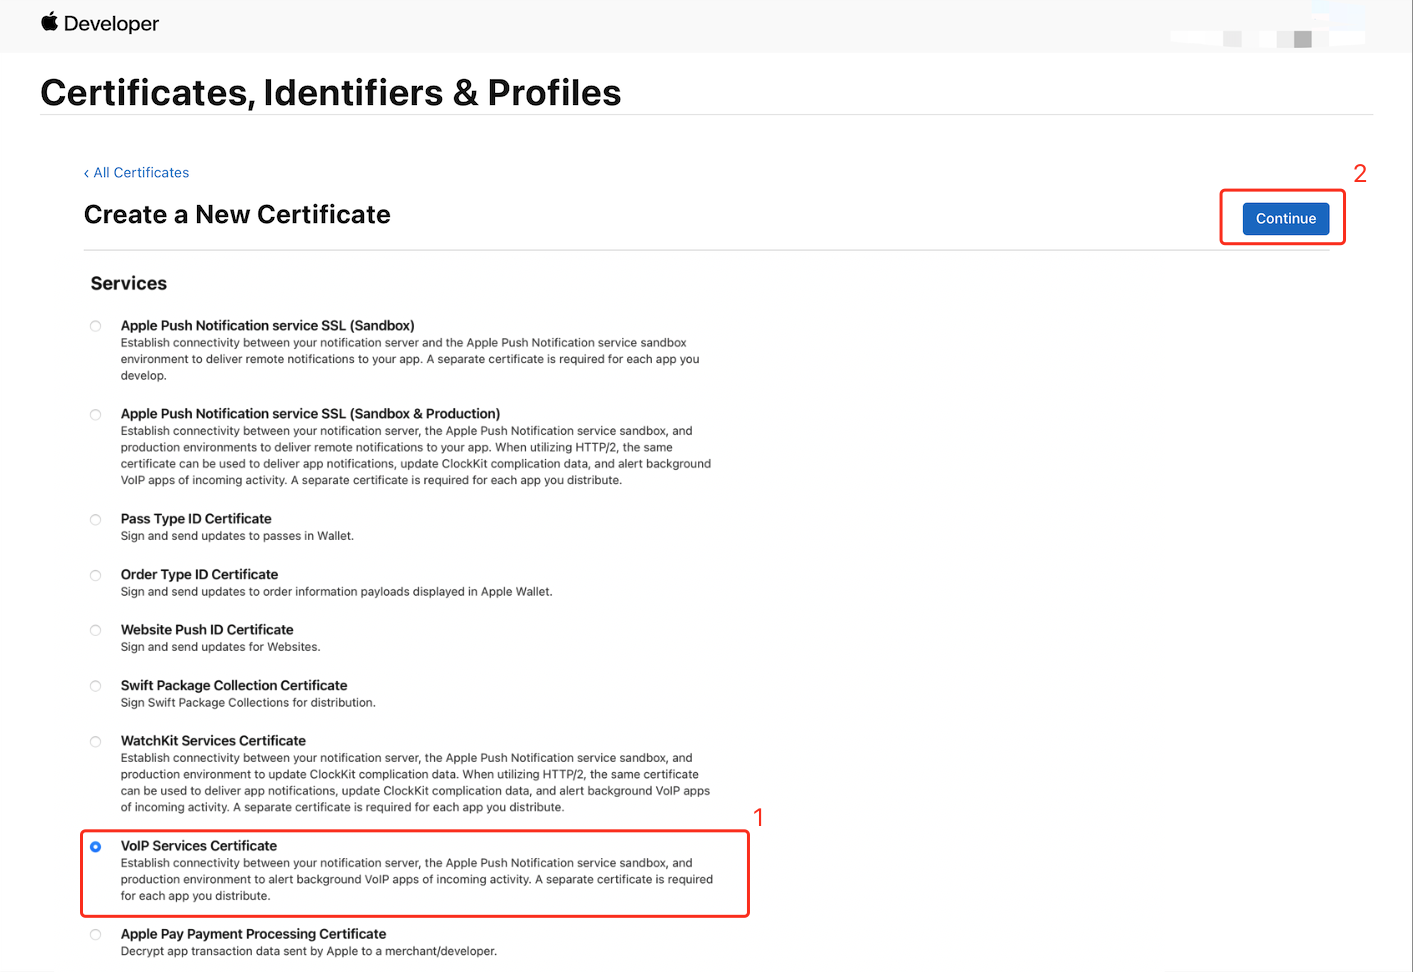
3. Select VoIP Services Certificate in the Create a New Certificate pane and click Continue;
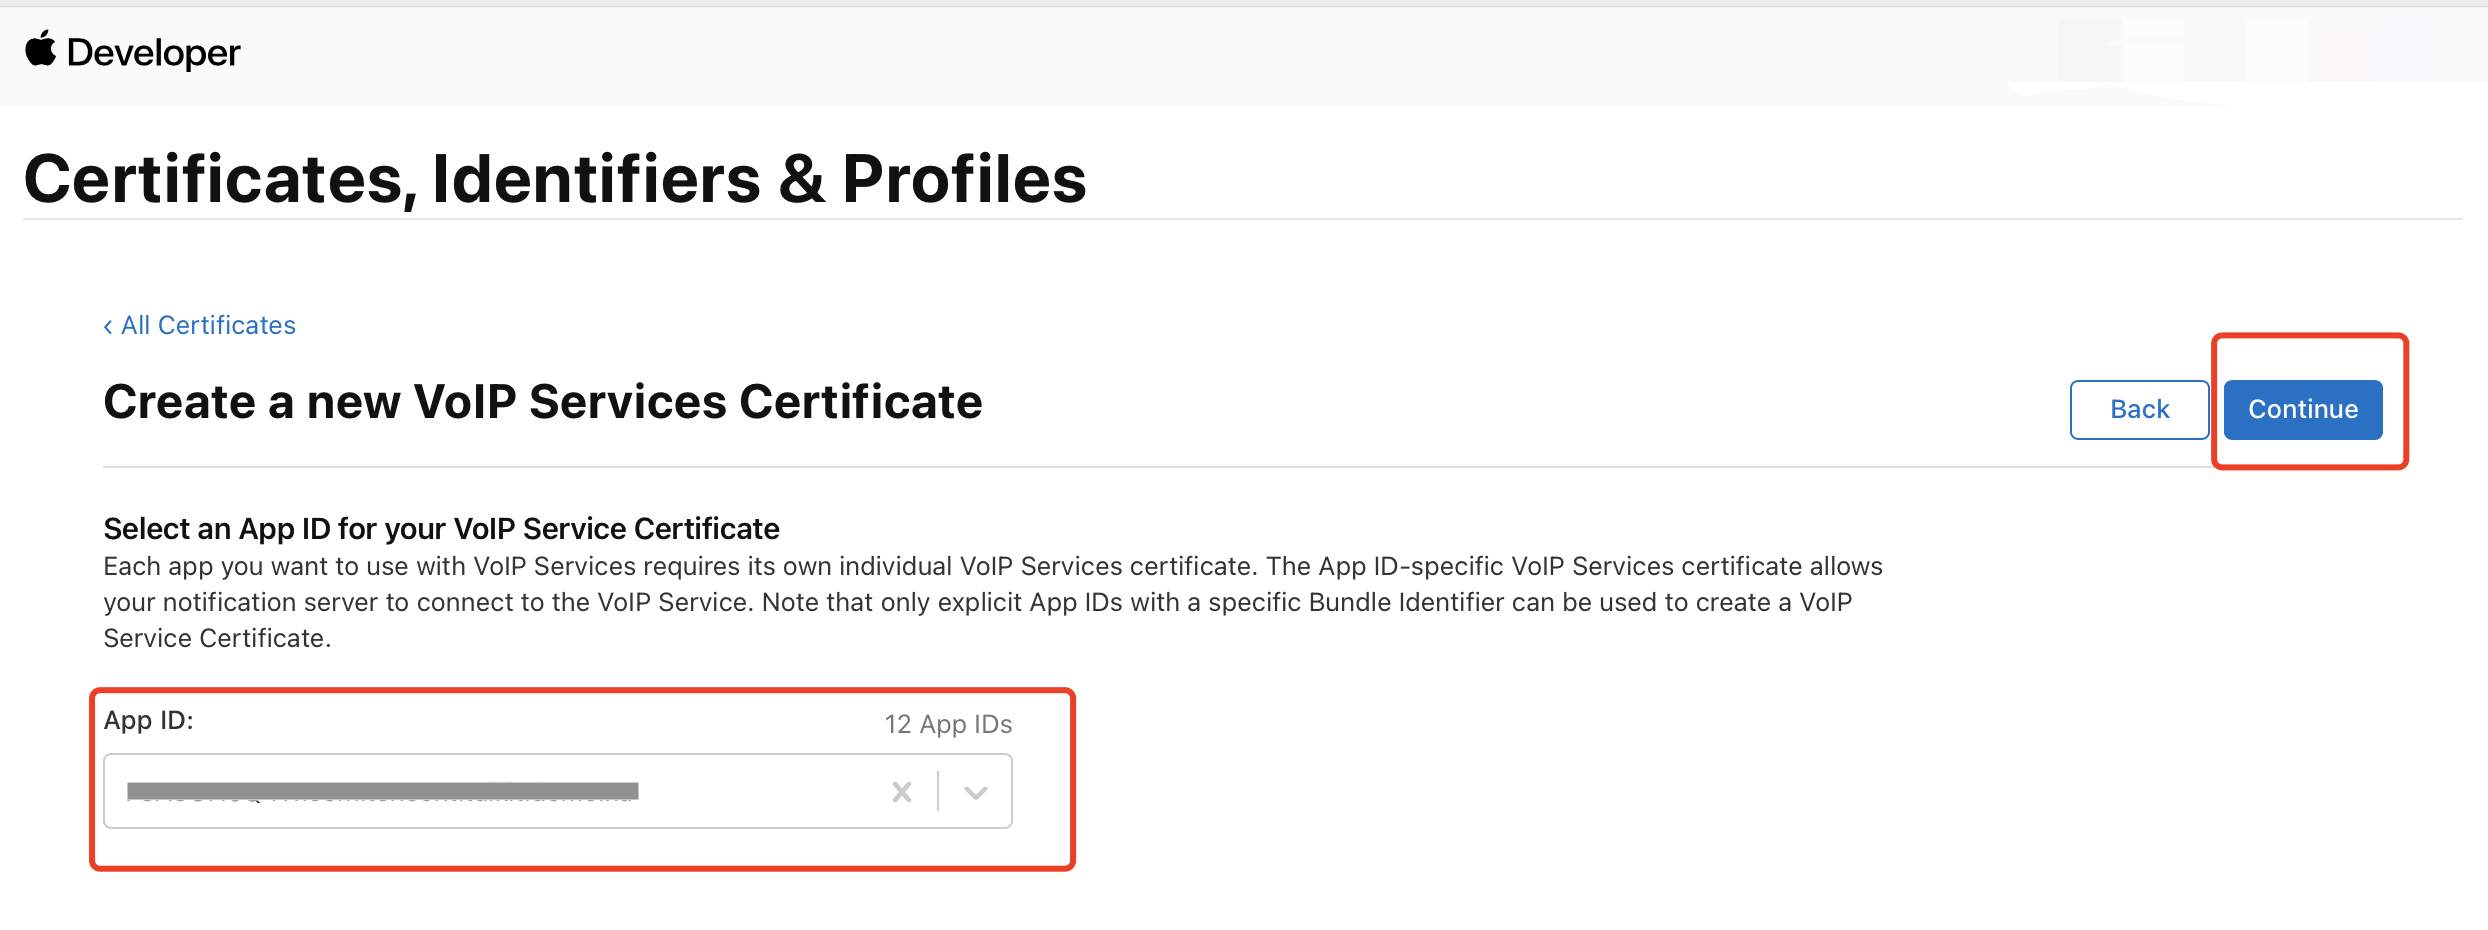
4. Select the BundleID of your app in the Select an App ID for your VoIP Service Certificate pane, and click Continue;
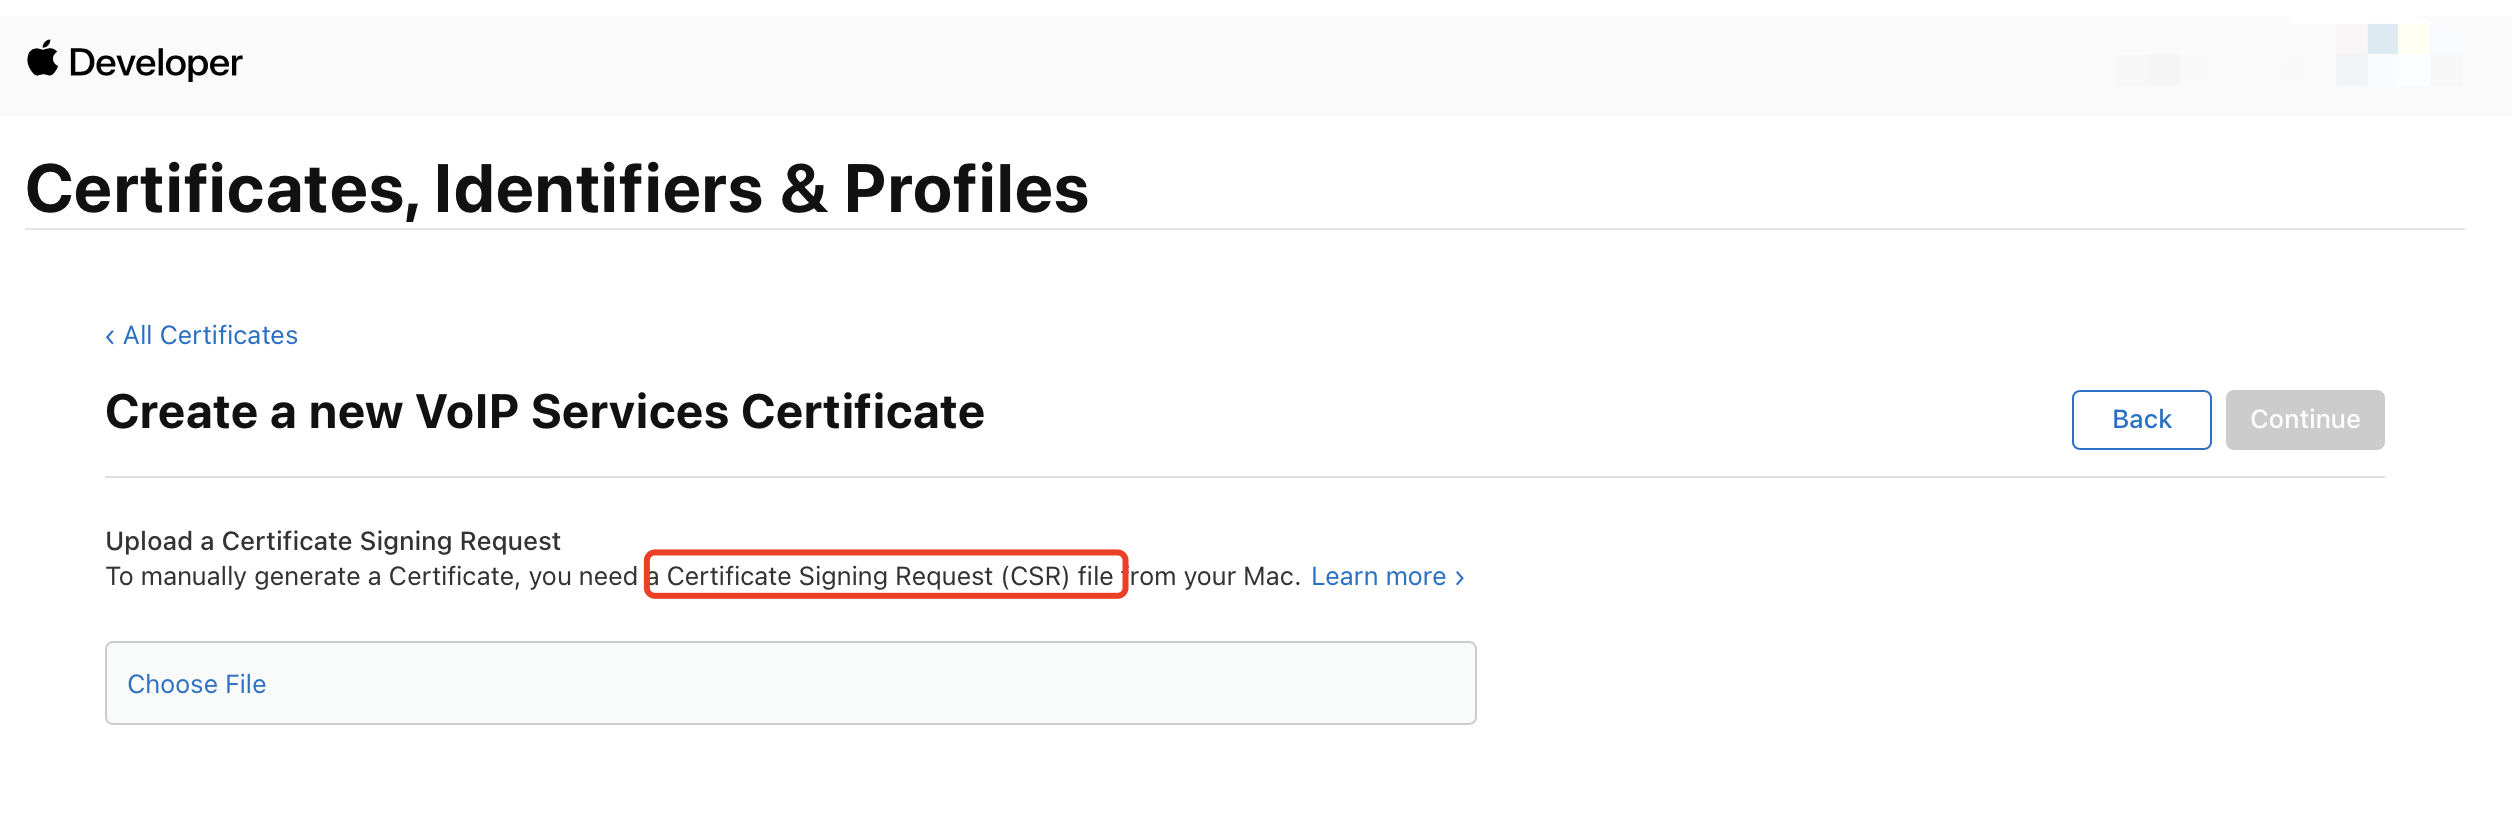
5. The system will prompt you that a Certificate Signing Request (CSR) is required;
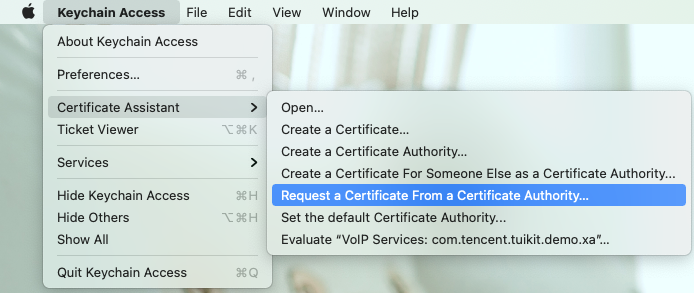
6. Create a CSR file: Launch Keychain Access on Mac, and select Keychain Access > Certificate Assistant > Request a Certificate from a Certificate Authority;
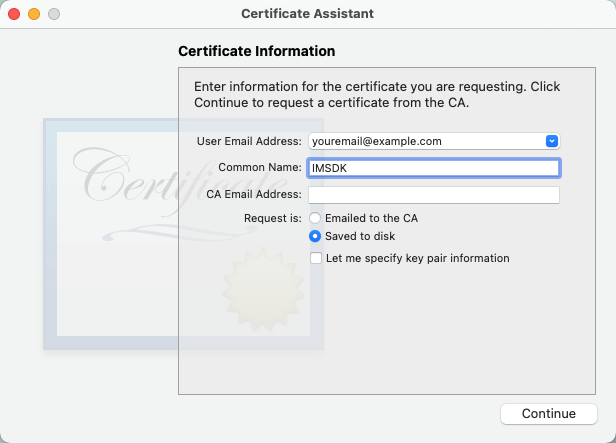
7. In the User Email Address and Common Name fields, enter your email address and your name or company name; Select Saved to disk and click Continue. Then the system will generate a *.certSigningRequest file.
8. Go back to the Apple Developer page shown in step 5 and click Choose File to upload the *.certSigningRequest file.
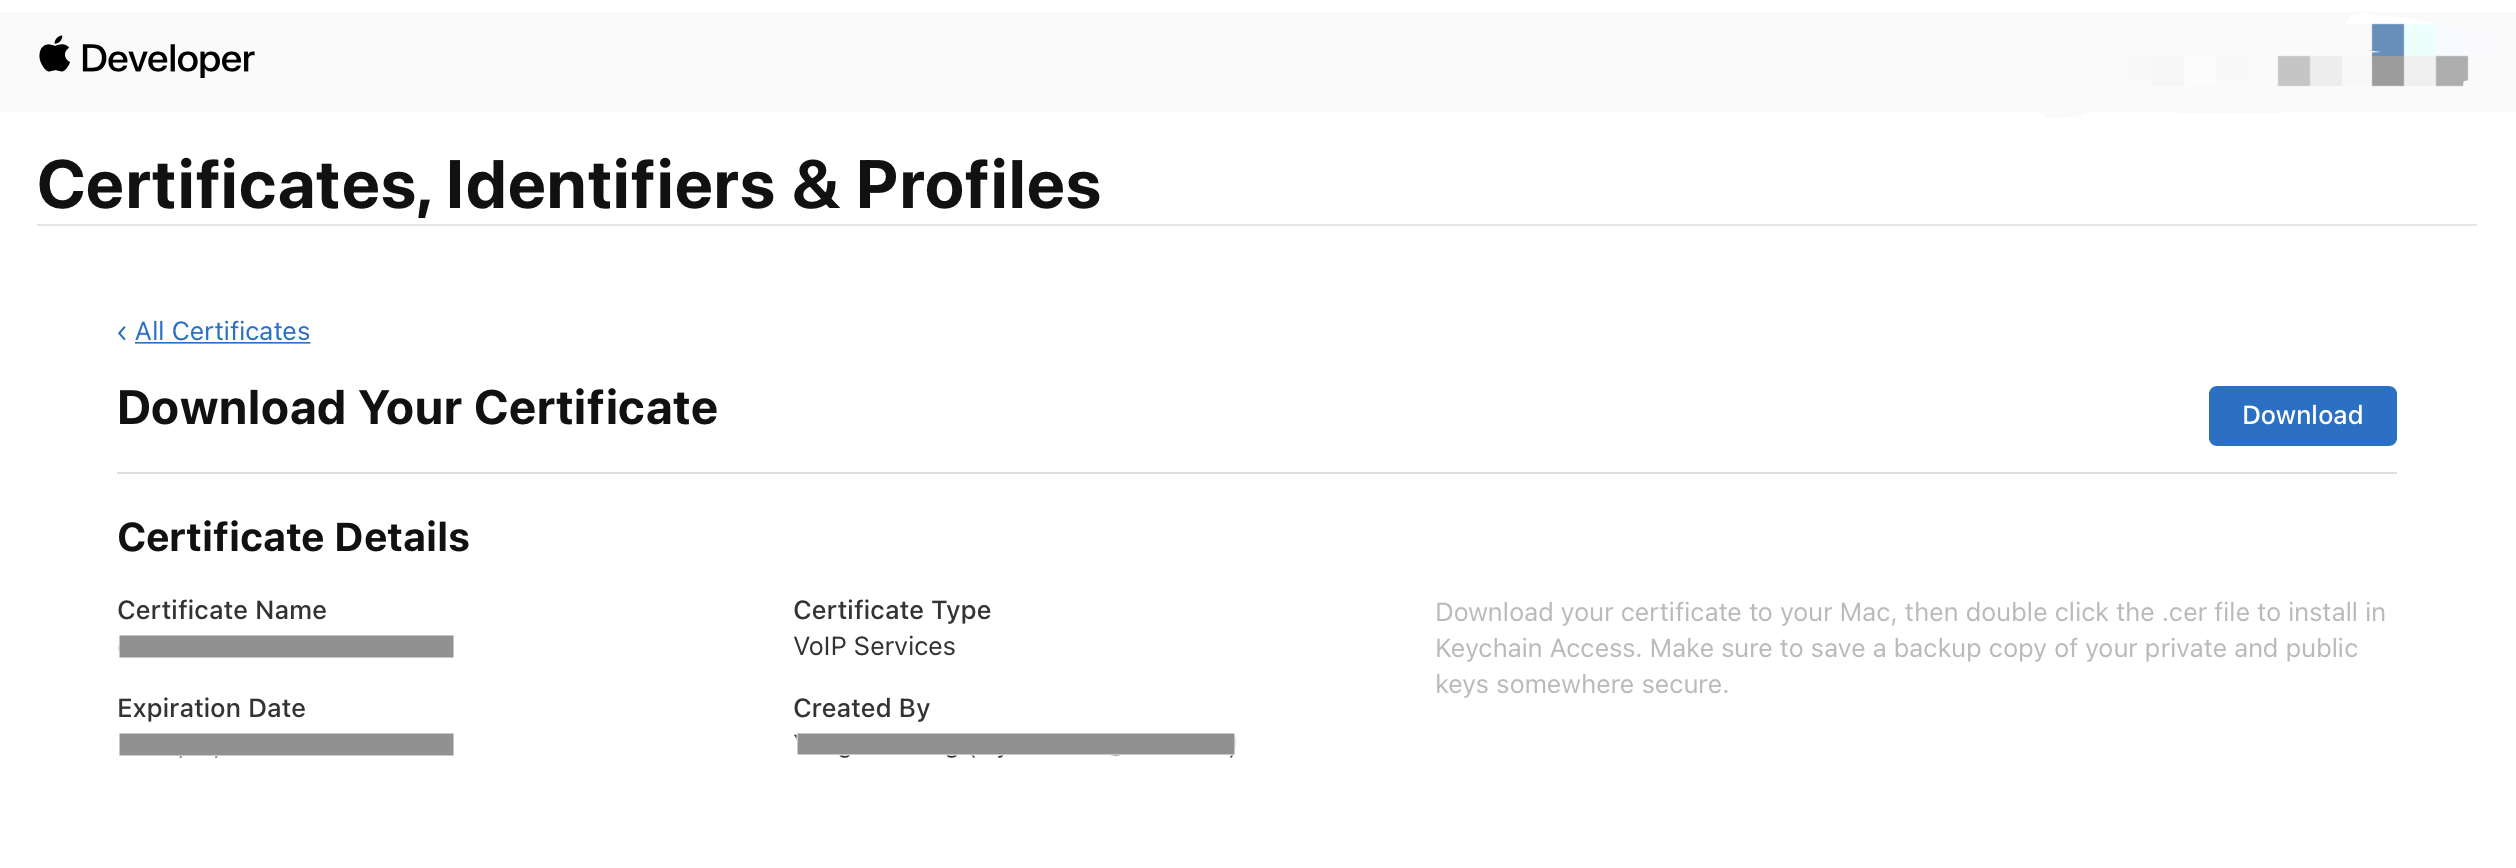
9. Click Continue to generate the certificate, and click Download to save the certificate locally.
10. Double click the voip_services.cer file downloaded. The system will import it to Keychain Access.
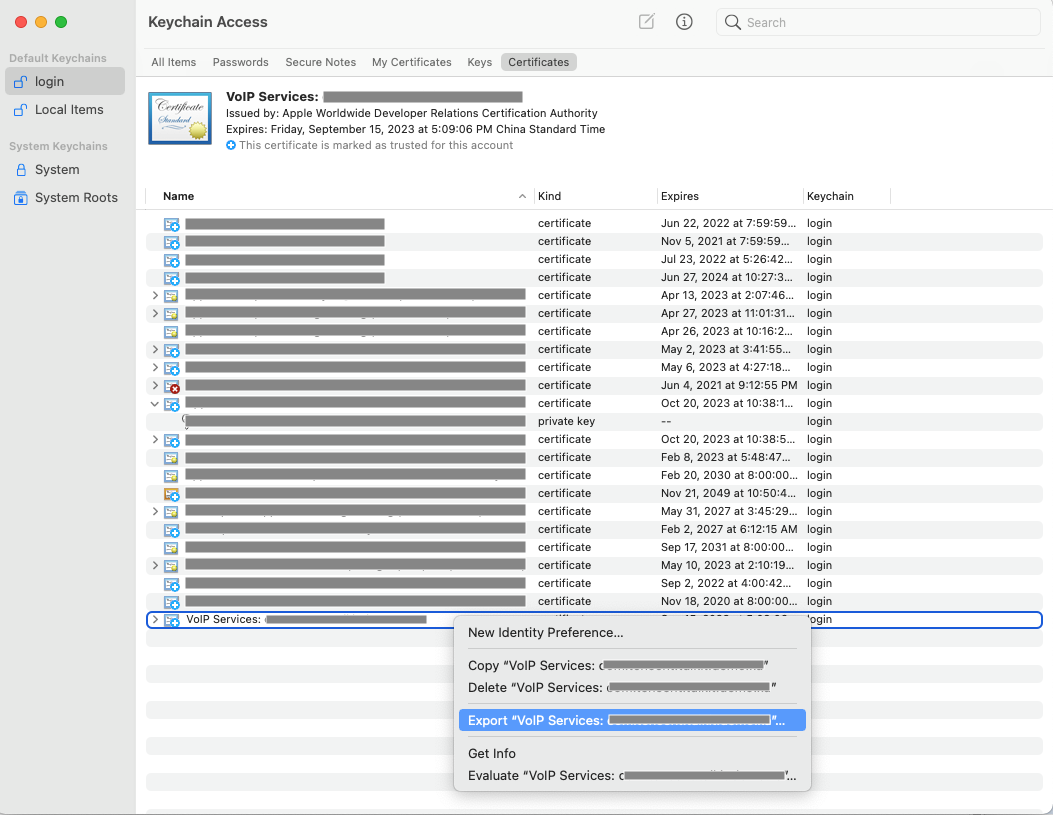
11. Launch Keychain Access, select Login > My Certificates, and right click to export the .p12 file generated for the created VoIP Services.
Note
Set the password when saving the .p12 file.
Step 2. Upload the certificate to the IM console
Log in to the IM console, select your IM app and upload the certificate as instructed below:
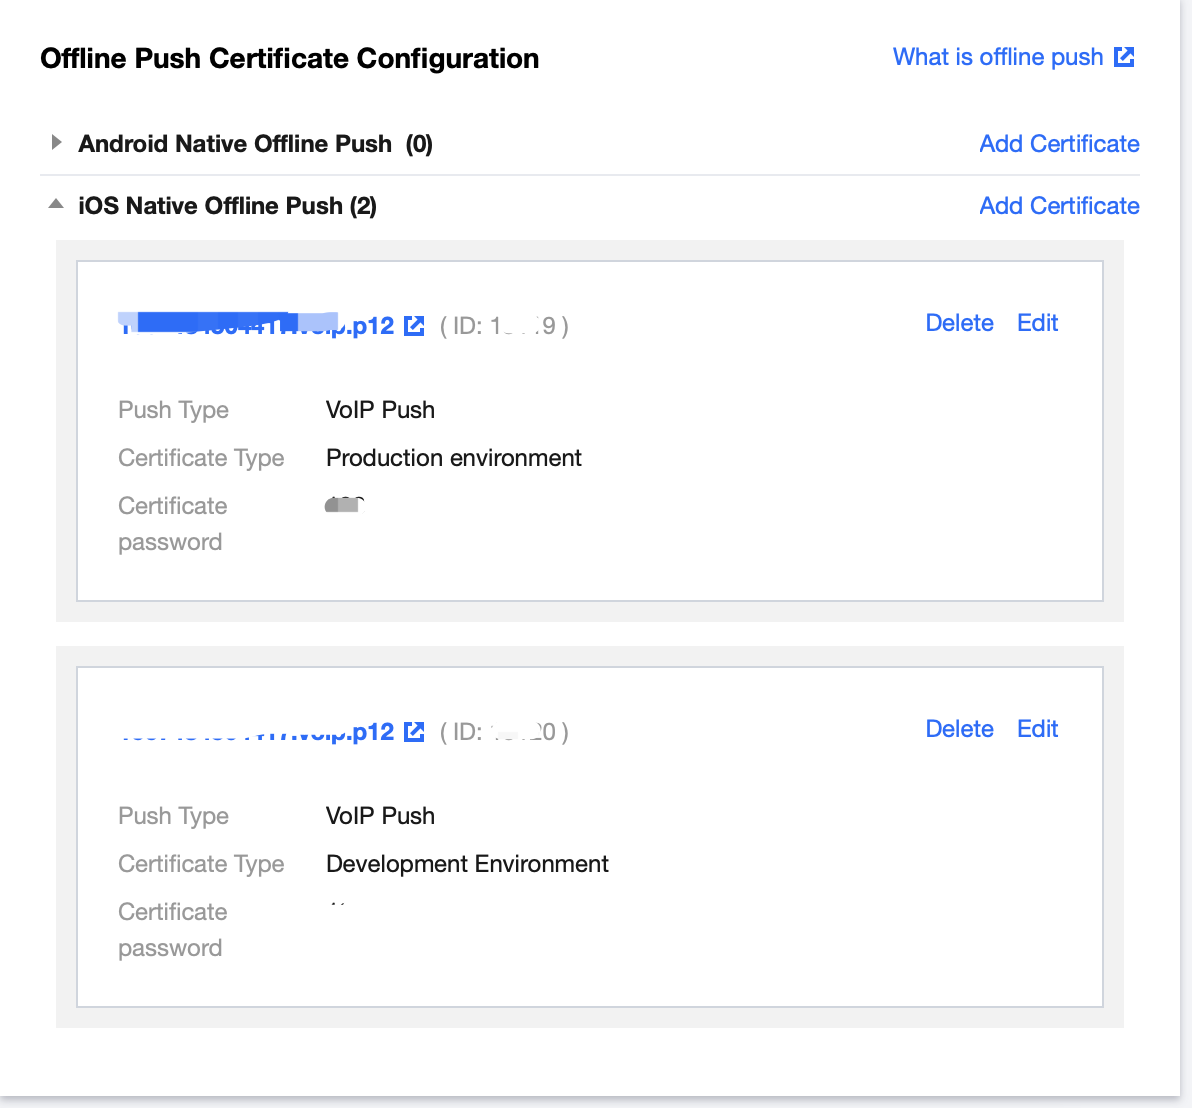
1. Select your IM app, and click Add Certificate in the Offline Push Certificate Configuration pane;
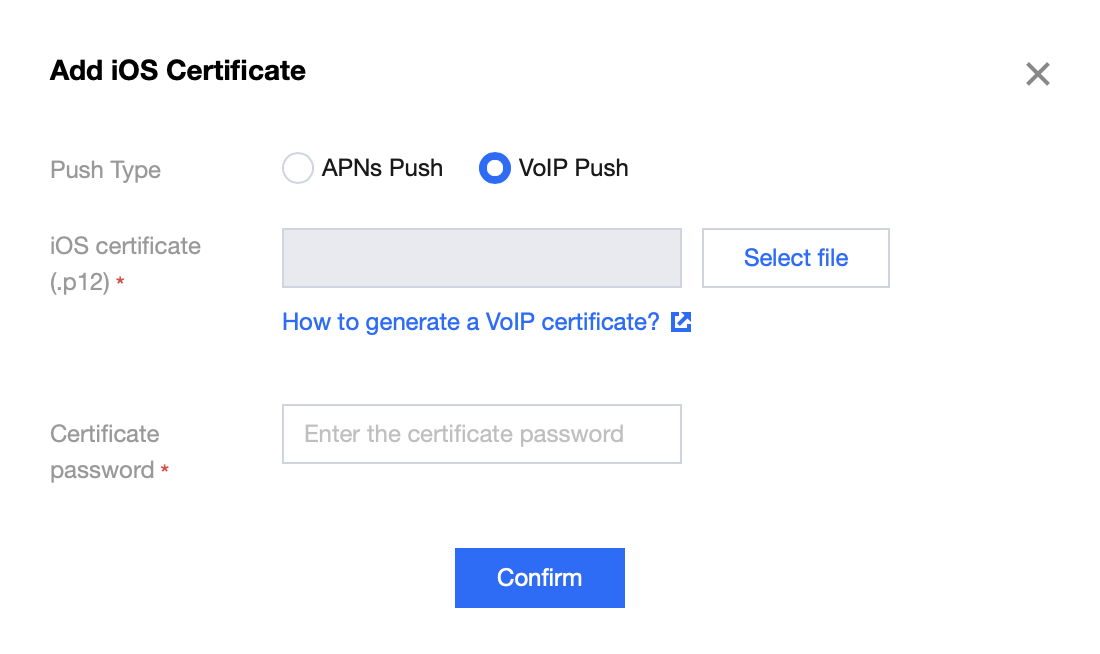
2. In the Add iOS Certificate window, upload the VoIP certificate for production or development environment;
Note
The VoIP Push certificate is not distinguished for the production environment and development environment. The certificate IDs required for the production environment and development environment will be automatically generated after you upload the certificate.
We recommend naming the uploaded certificate in English (special characters such as brackets are not allowed).
You need to set a password for the uploaded certificate. Without a password, push notifications cannot be received.
For an app published on App Store, the environment of the certificate must be the production environment. Otherwise, push notifications cannot be received.
The uploaded .p12 certificate must be your own authentic and valid certificate.
3. Record the certificate IDs for environments after upload.
Note
The certificate ID for the development environment and that for the production environment must be strictly distinguished, and entered in Step 4. Report the token accordingly.
Step 3. Get the token from Apple
Add the following code in your app to get the VoIP Push token from Apple:
Note
For the purpose of compliance, we recommend getting the VoIP Push token from Apple after the user agrees to the privacy policy.
After login to the IM SDK, call the setVOIP API to upload the VoIP Push token stated in Step 3 to the Tencent Cloud backend as shown below (example code). For more details, see TUIOfflinePush.
-(void)reportVOIPToken:(NSData *)token
{
// Note: `config.certificateID` is the certificate ID generated after the certificate is uploaded to the IM console, and it is different for the development environment and for the production environment.
You can mark the message push type as VoIP Push by setting the iOSPushType field of the V2TIMOfflinePushInfo object to V2TIM_IOS_OFFLINE_PUSH_TYPE_VOIP when calling the sendMessage API to send the message.
pushInfo.iOSPushType = V2TIM_IOS_OFFLINE_PUSH_TYPE_VOIP;// Marked as VoIP Push
[V2TIMManager.sharedInstance sendMessage:message
receiver:# your userID #
groupID:# your groupID #
priority:V2TIM_PRIORITY_DEFAULT
onlineUserOnly:NO
offlinePushInfo:pushInfo
progress:nil
succ:nil
fail:nil
}];
FAQs
What should I do if no VoIP Push token is obtained or the token request failure is prompted?
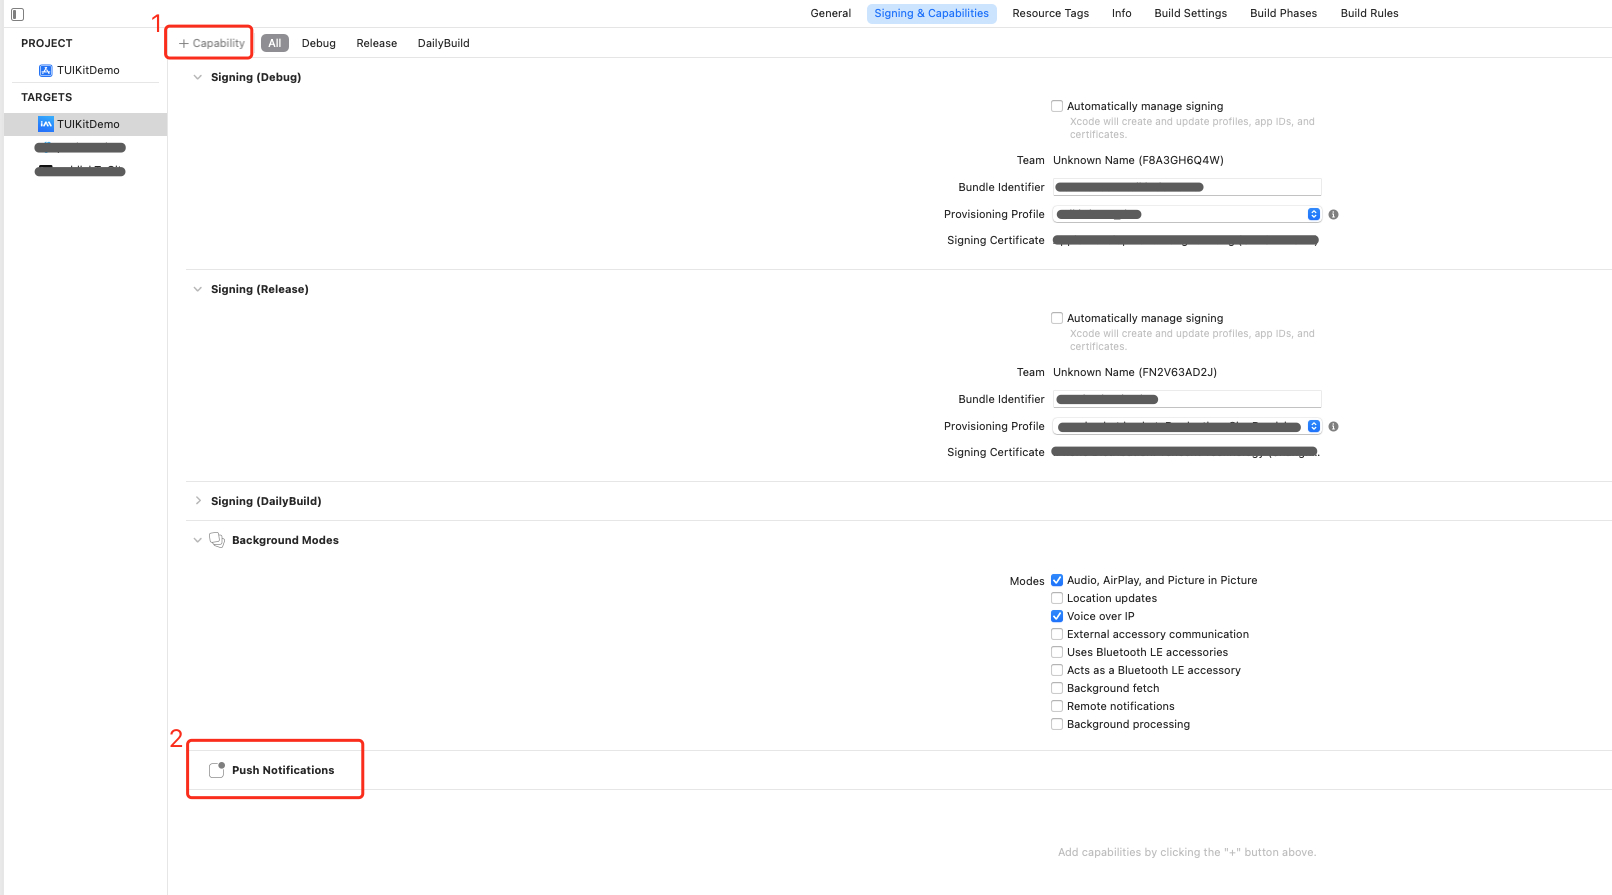
Check whether the Push Notifications capability is added to Capability of your project.
Why cannot VoIP push notifications be received even though the certificate is uploaded and the token reported successfully?
1. First, check whether the certificate type and certificate ID match the running environment of the app. If not, push notifications cannot be received.
2. Check the status of your account: Press the Home key to switch the app to the backend, or log in and kill the process. Currently, VoIP Push supports offline push notifications only.
3. Check whether the Voice over IP option is checked in Background Modes of Capability of your project.


 Yes
Yes
 No
No
Was this page helpful?