AI Chatbot, powered by Tencent Cloud's cutting-edge artificial intelligence technology, accomplishes intelligent Q&A for FAQs, small talk, data operation dashboards, among other functions. With Tencent Cloud Chat, you can swiftly develop chatbots interacting cross-platform and terminals. Moreover, by incorporating Desk, a smart customer service combining human intelligence and machine capabilities can be further realized.
You may refer to the following steps for creating, configuring, testing bot workflows and unleashing them onto your chat applications.
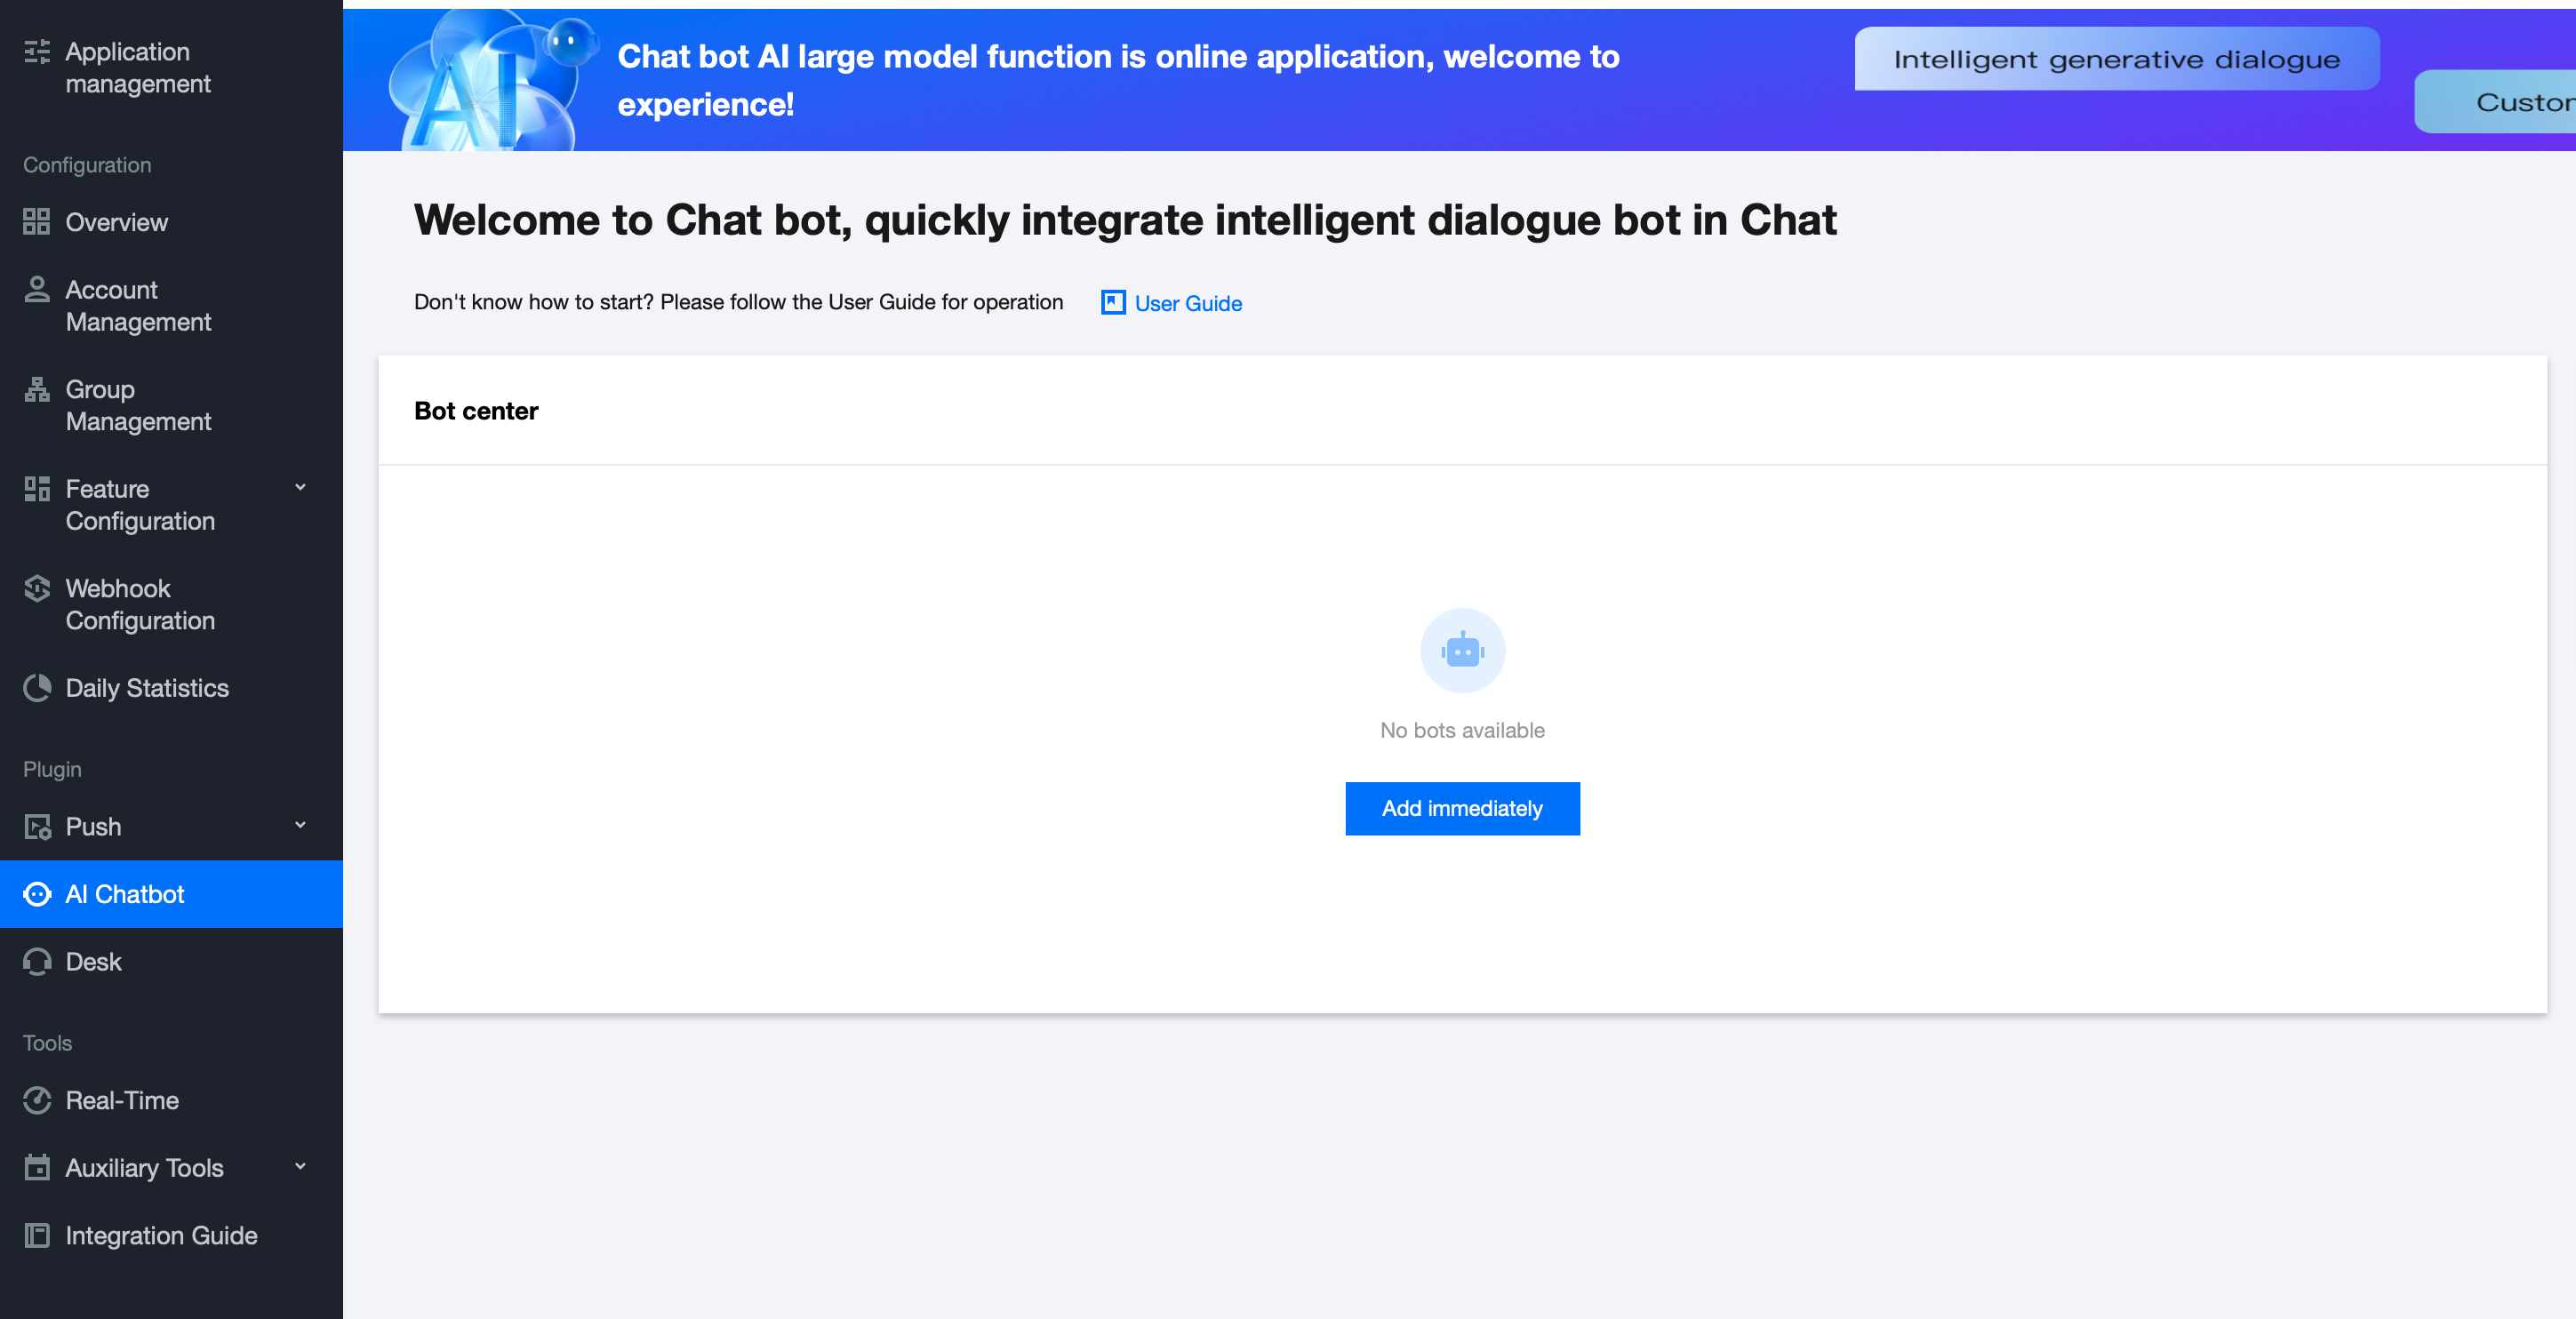
1. Sign into the Chat Console, select the target application, and choose AI Chatbot from the left navigation bar.
2. After activating the bot feature, click on the Bot Center area's Add immediately button.
3. In the Add Bot popup, fill in the bot's name and choose or upload a bot avatar.
4. Click confirm to complete the creation of the bot.
Step 2: Choose the Chatbot Version
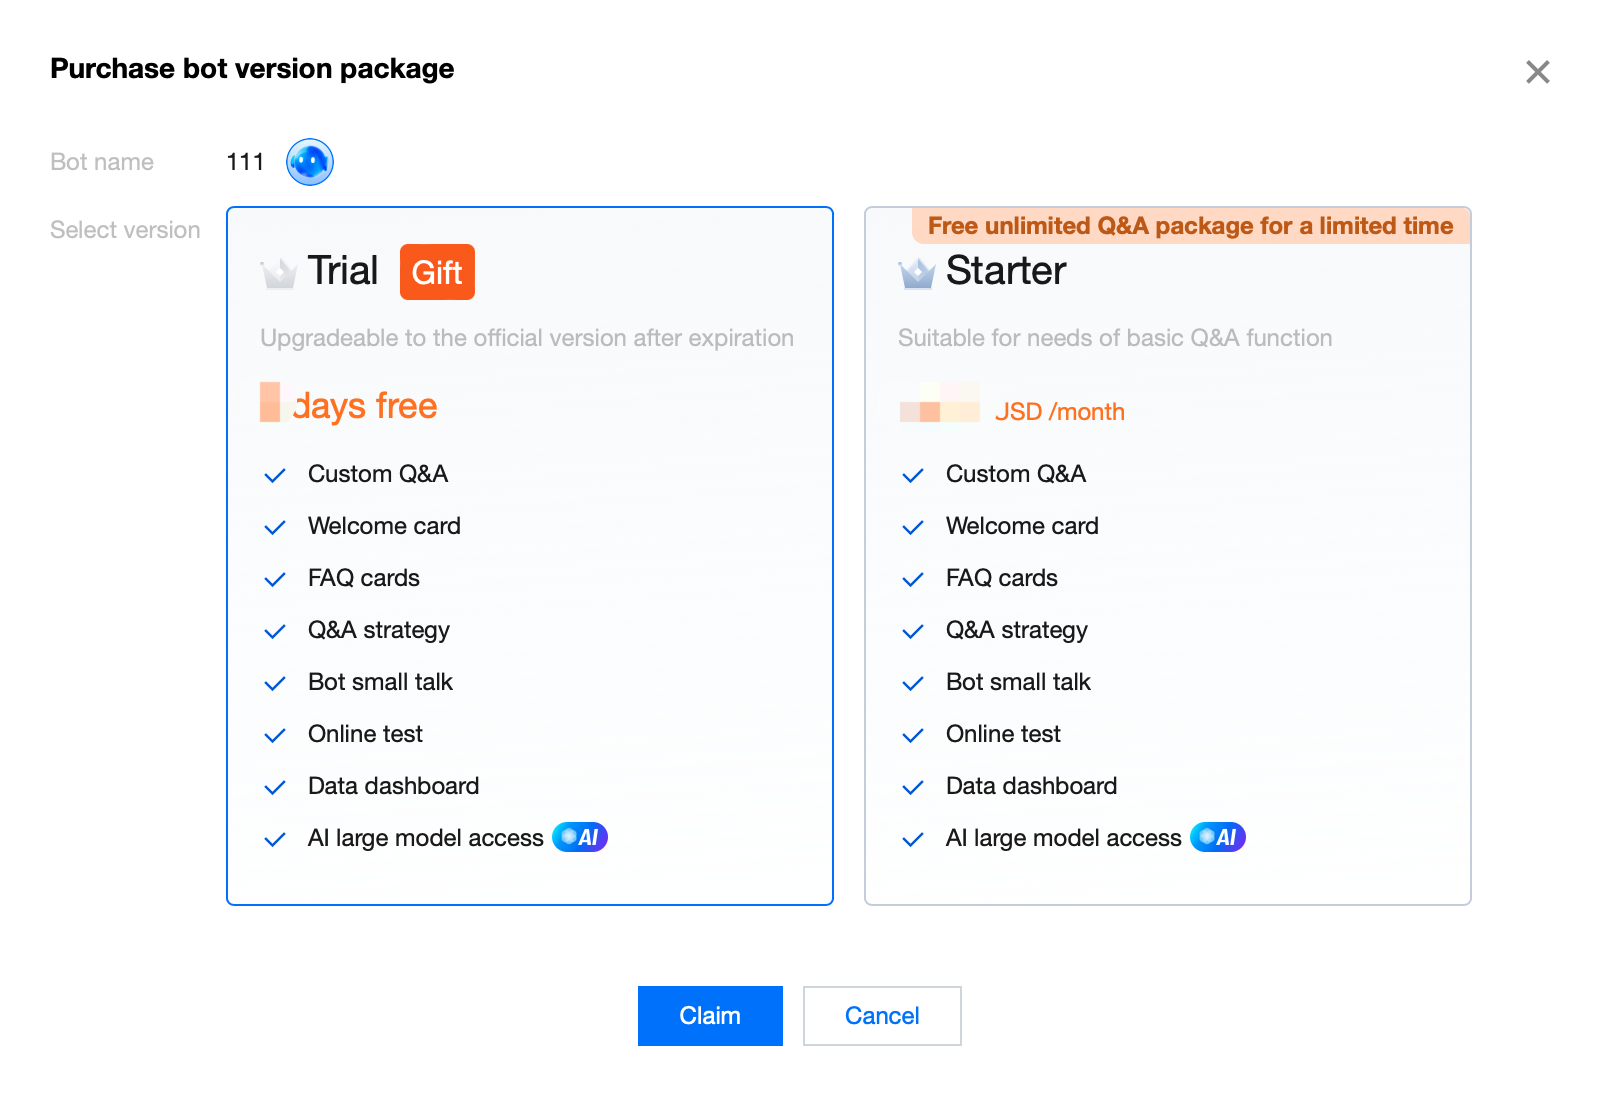
You can choose the bot version in the following way to unlock the chatbot's features.
Try out a Chatbot
Click on the Claim/ Purchase in the Chatbot Card Zone, choose the trial version in the pop-up window and click Claim to complete your selection of the intelligent bot version.
Note:
Each sdkappid can claim one trial version of the chatbot, valid for 7 days, which can be upgraded to the official version after expiry.
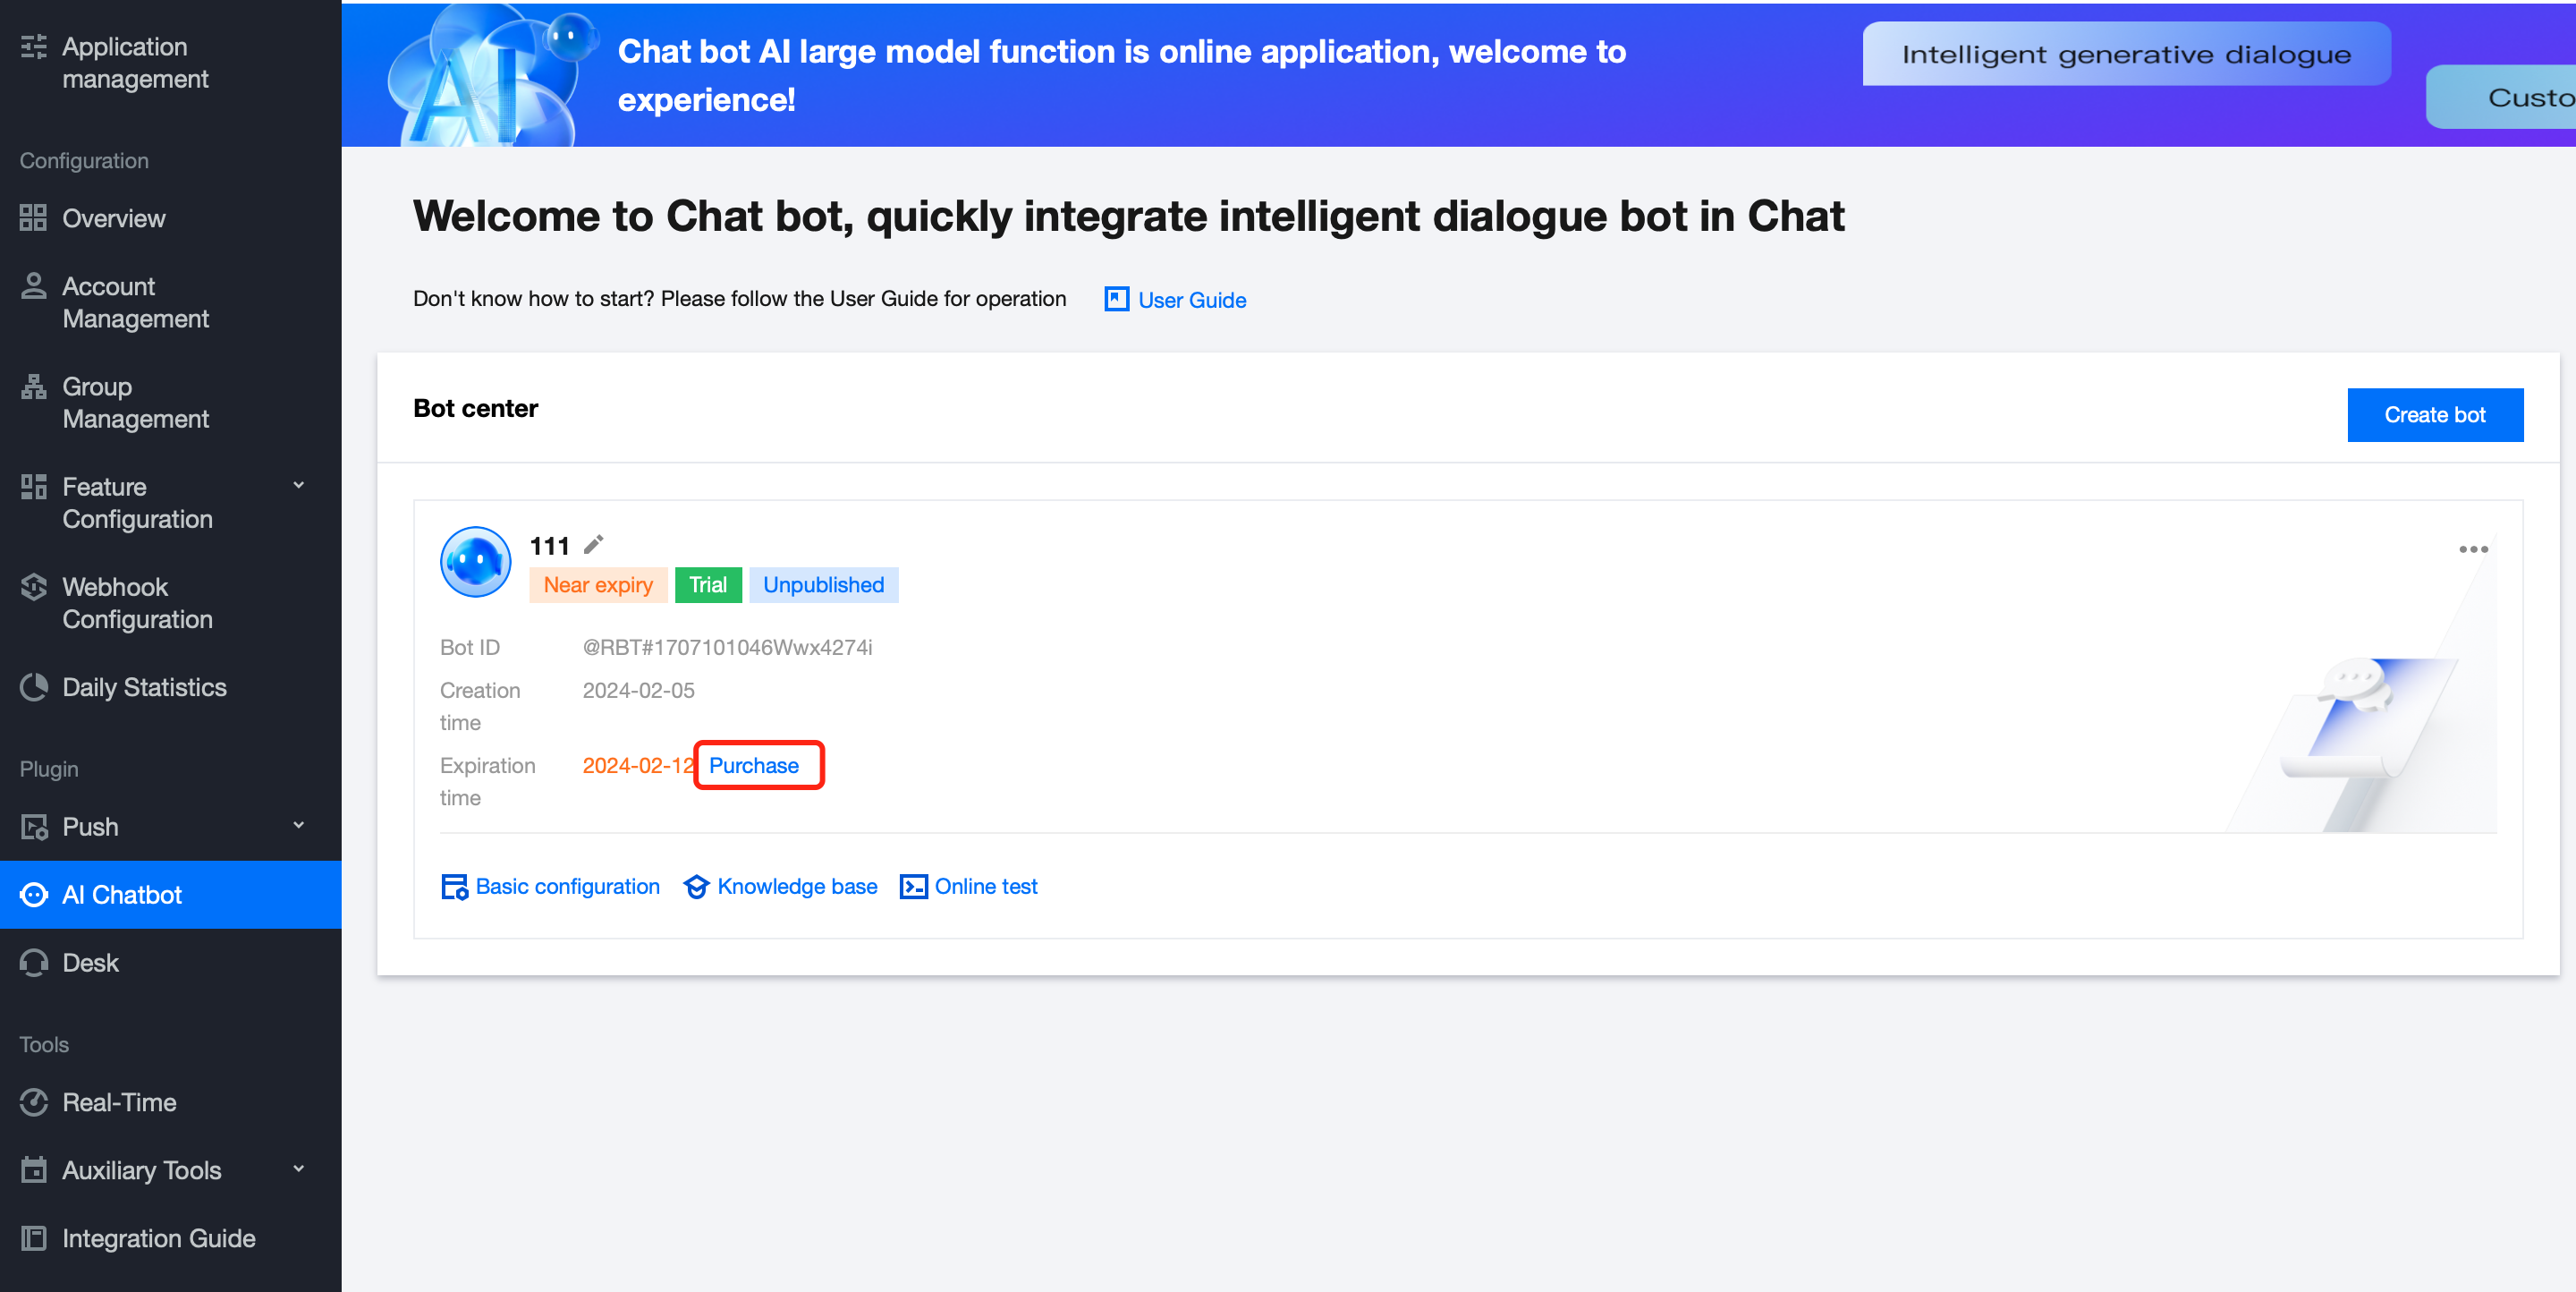
Procure the Bot
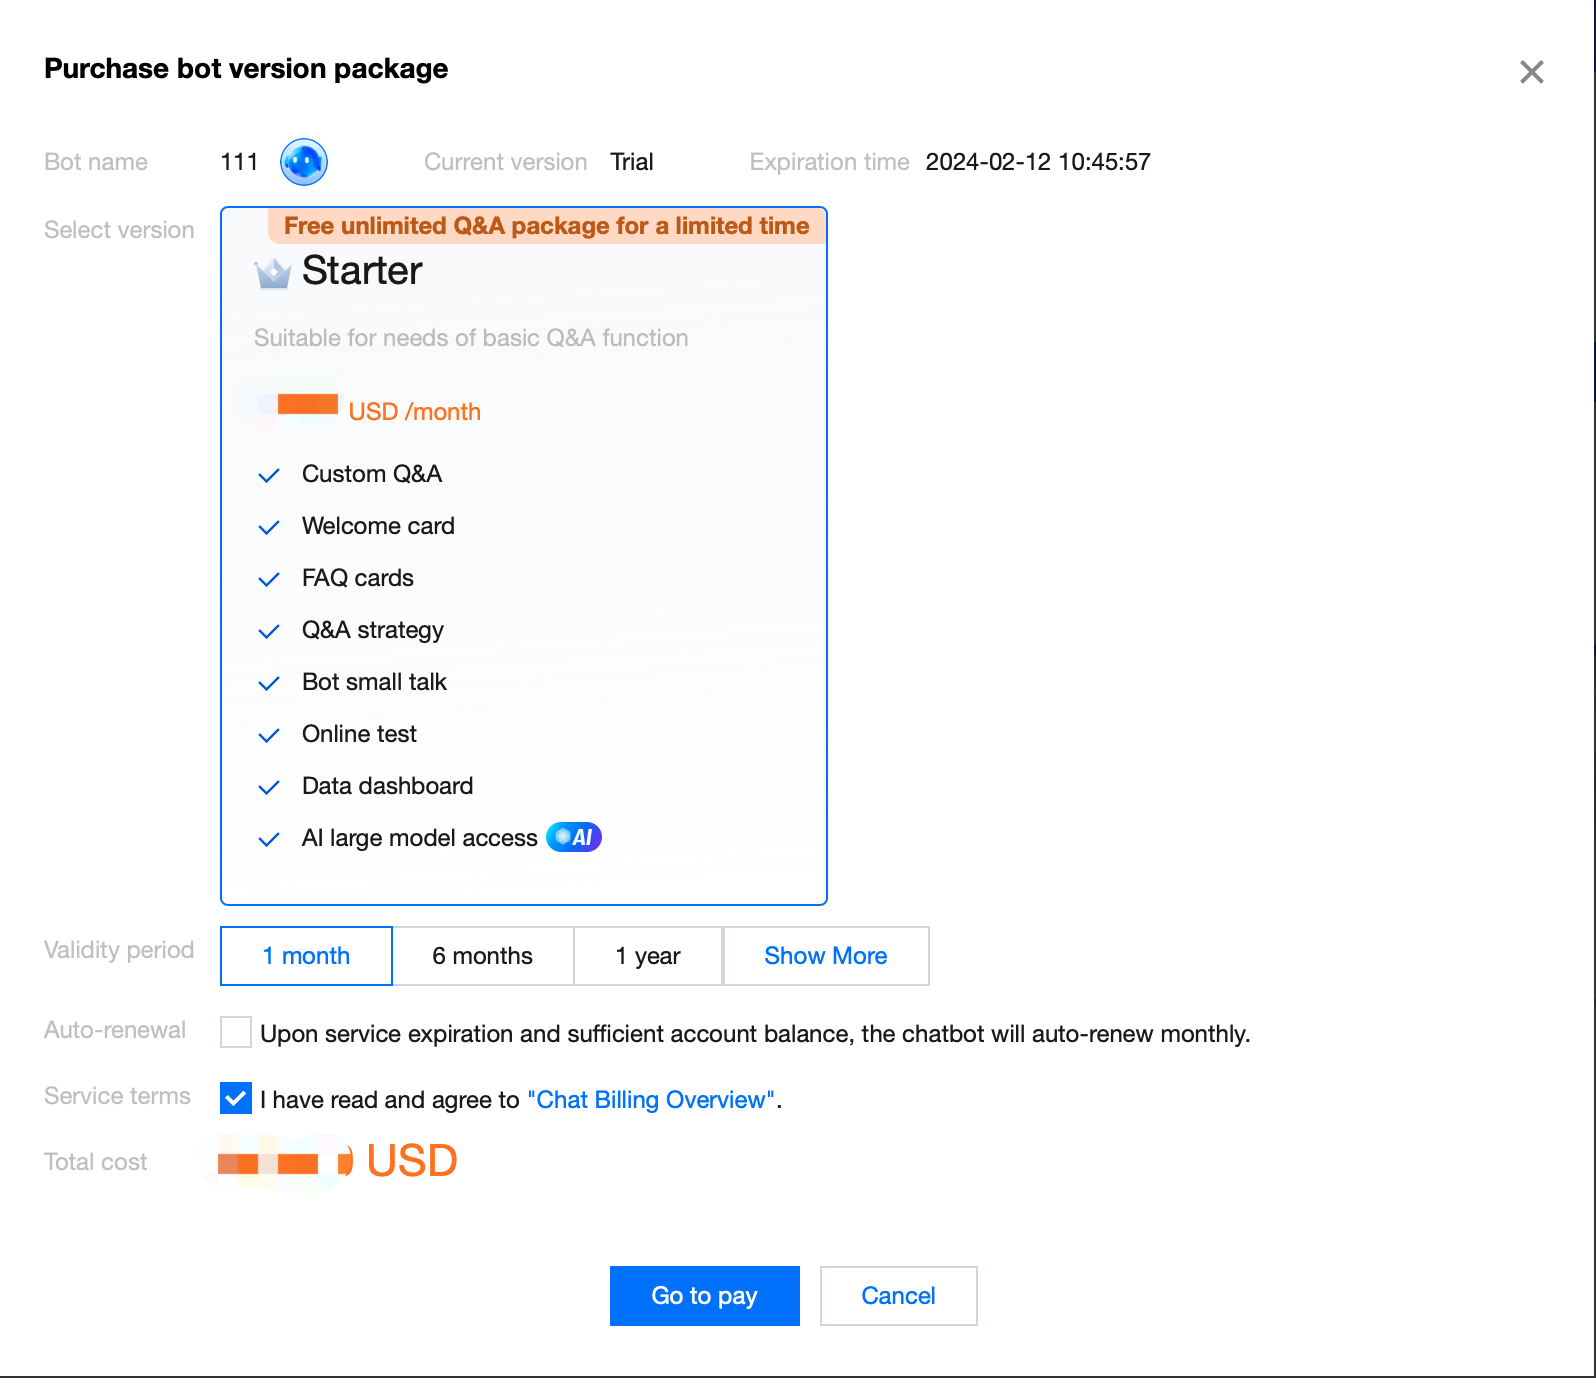
1. click on the purchase button in the bot card zone.
2. In the invoked pop-up, select the bot version and purchase duration, tick to agree to the agreement terms, then click on Proceed to Payment.
3. Finalize your payment on the payment page.
Note:
Beta Benefits: Robot Message Deduction Package Temporarily Free(Unlimited Robot Messages for a Limited Time). The date for the planned termination of this promotion is set tentatively for the 31st of March, 2024, with the official end date yet to be determined. We will release news related to this in a timely manner, and notify you in advance through various methods such as email, SMS, and internal messages. Kindly stay tuned.
Step 3: Basic Configuration
Click on the Basic Configuration area of the robot card. Here, you can preview or edit basic robot information, greetings, reply message effects, and Q&A strategies. For specific operations, please refer to Basic Configuration.
If you need to use a large model engine, you can link third-party large model engines on the Q&A Strategy card under the Basic Configuration. For specific operations, please refer to Configuration of Large Model Engines.
Step 3: Configuring the Knowledge Base
In the Knowledge Base, you can configure some commonly asked questions, and the bot will respond based on your configured common questions. For detailed operations, please see Knowledge Base Configuration.
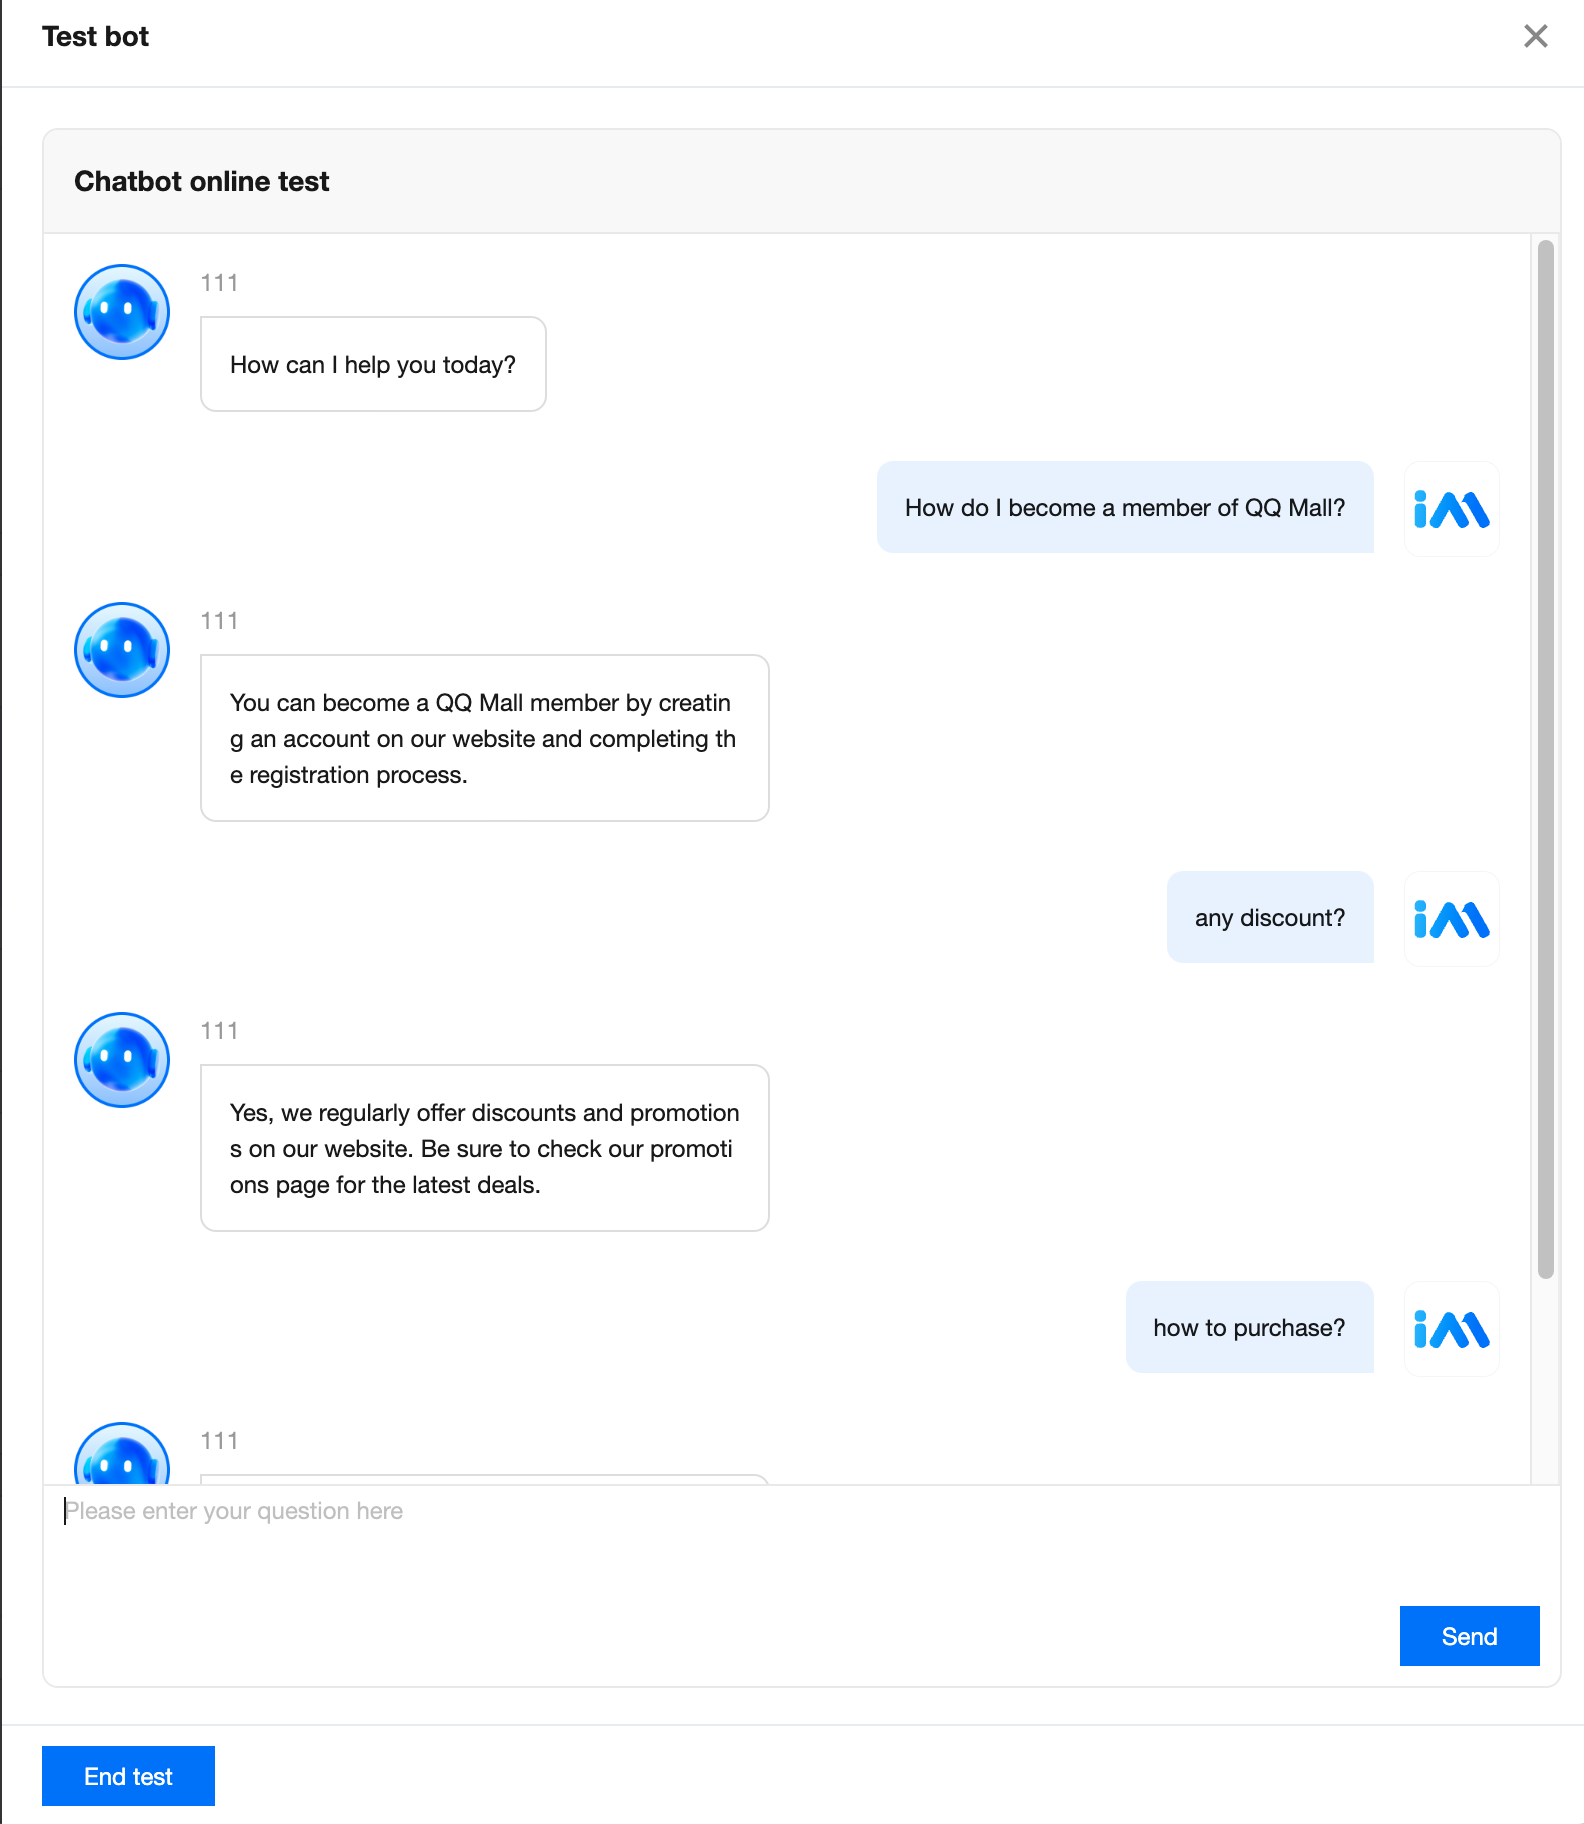
Step 4: Online Testing
Click on the Online test button at the bottom right of the page to summon the online testing pop-up.
You can test the bot's performance in the prompted online testing pop-up.
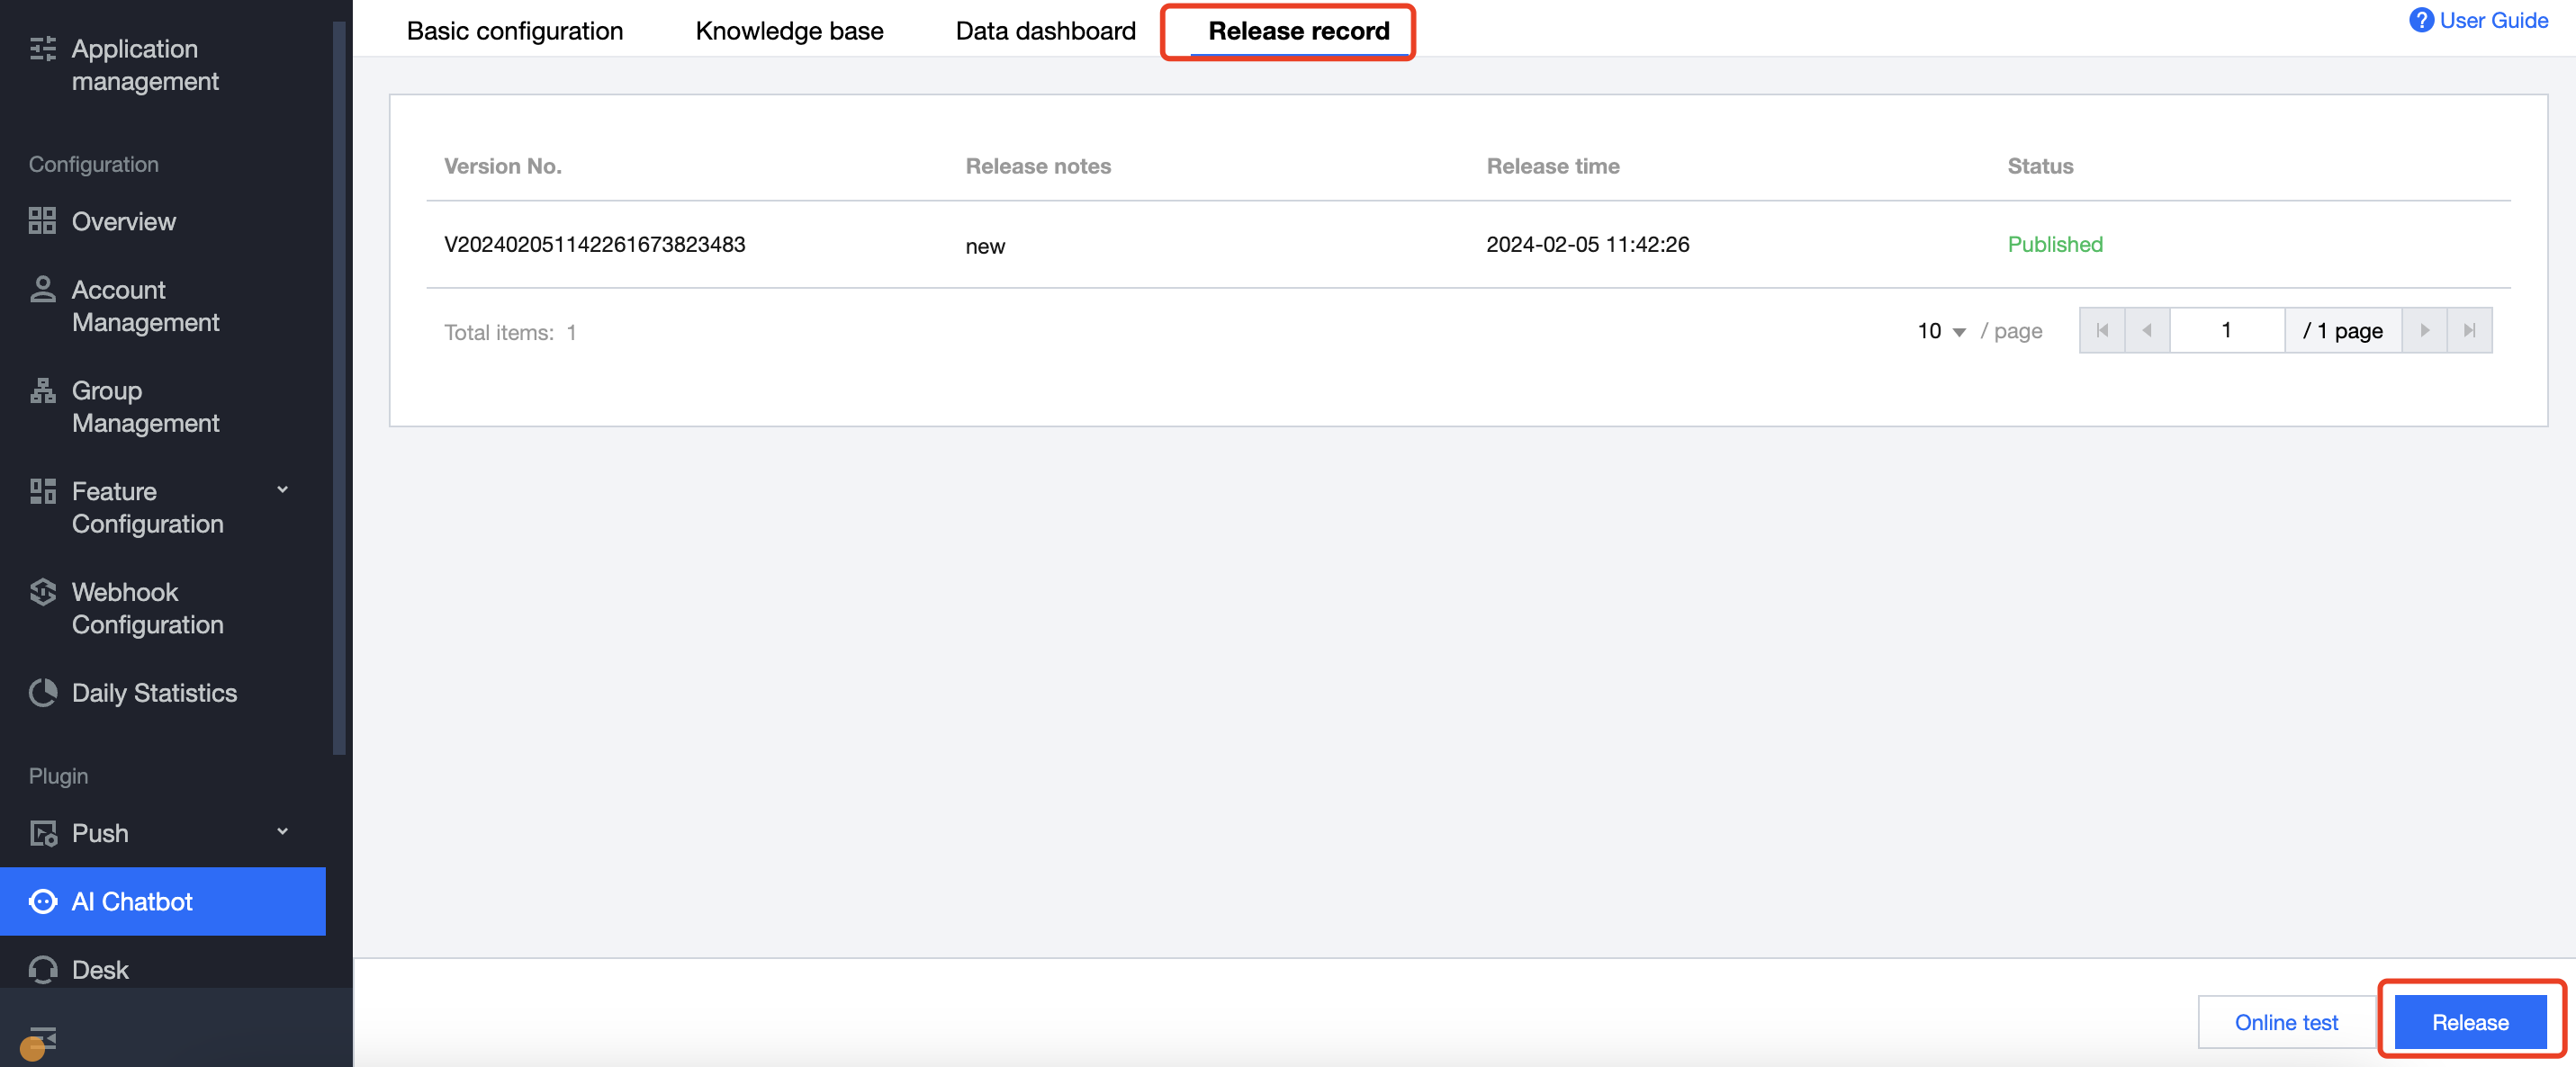
Step 5: Release the Bot
Click on the Release button at the bottom right of the page. You can publish the updated basic configuration and Q&A database to the live network. After publication, you can select Release record at the top of the page to peruse the historical publication status.


 Yes
Yes
 No
No
Was this page helpful?