Open Broadcaster Software (OBS) is a third-party open-source tool for live streaming. It’s easy to use and free of charge, and it supports OS X, Windows, and Linux. OBS can be used in a wide range of scenarios to meet most live streaming needs without requiring additional plugins. You can download its latest version at the OBS website.
You have activated CSS and added a playback domain with an ICP filing number in the console (for push, you can use the default domain we provide or add your own).
Getting a Push URL
1. Log in to the CSS console, click Address Generator in the left sidebar.
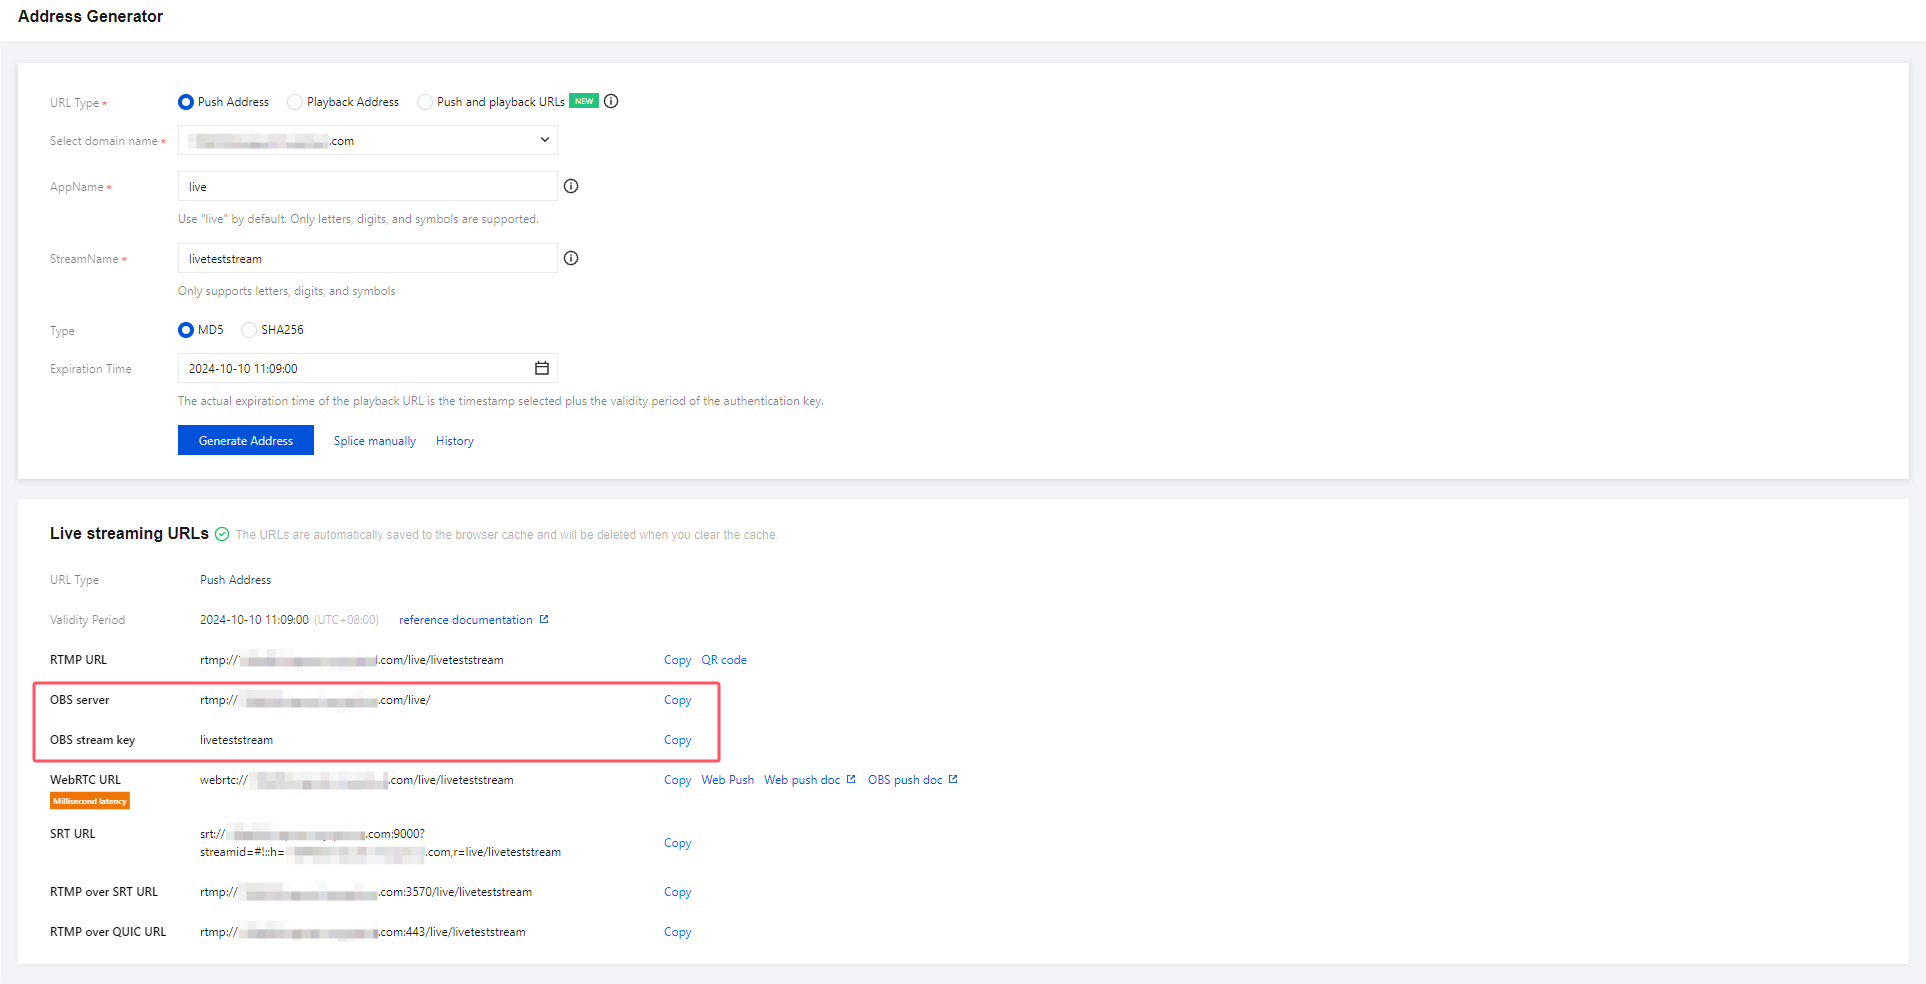
2. Enter the Address Generator page and perform the following configurations:
2.1 Select the URL type: Push Address.
2.2 Select the domain name you have added in Domain Management.
2.3 Enter an application name (AppName), which is used to distinguish applications under the same domain. The default value is live.
2.4 Enter a custom stream name (StreamName), such as liveteststream.
2.5 You need to select an encryption type according to your security needs and performance considerations. You can select either MD5 or SHA256 as your encryption type, and the default is MD5.
2.6 Select the expiration time of the address, such as 2024-10-10 11:09:00.
3. Click Generate Address to get an OBS push URL.
Configuring OBS for Push
Step 1. Configure the push URL
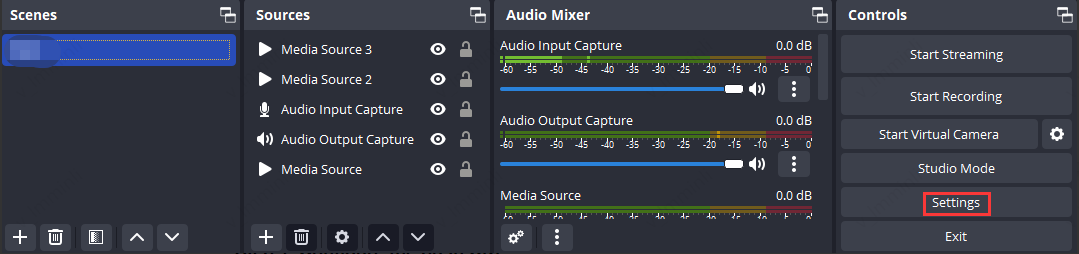
1. Open OBS and click Controls > Settings at the bottom to enter the settings page.
2. Click Stream and select Custom for Service.
3. Fill in the Server and Stream Key fields with the information obtained in Getting a Push URL.
Server: Enter the OBS push address (rtmp://domain/AppName/).
Streaming Key: cEnter the OBS push name (StreamName?txSecret=xxxxx&txTime=liveteststream).
4. Click OK to save the information.
Step 2. Configure the source
Note:
For bitrate, recording, and other settings, click Tools > Auto-Configuration Wizard in the top menu bar, and follow the instructions provided by OBS to complete the settings.
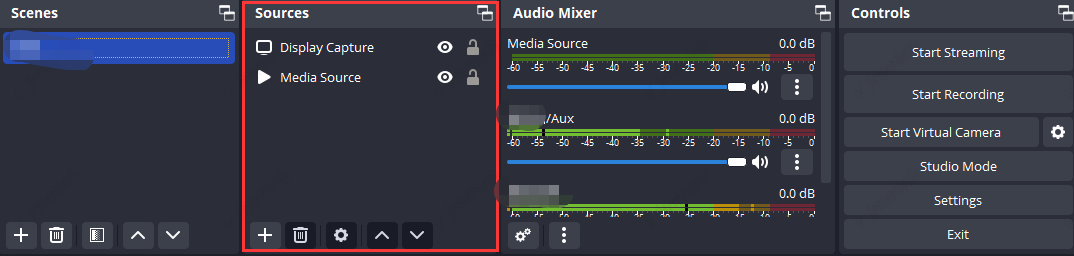
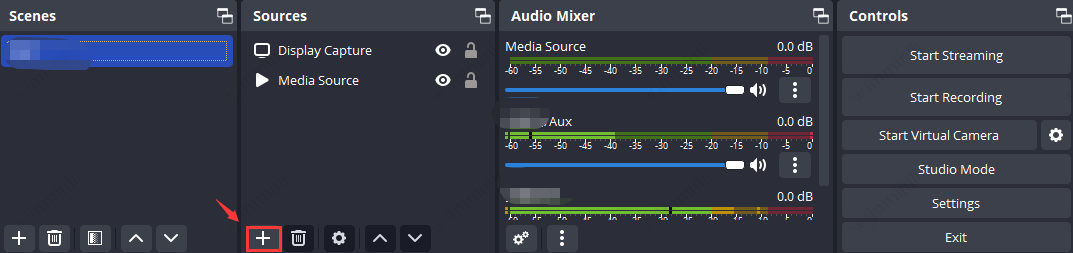
1. Find Sources in the menu bar at the bottom.
2. Click + and select a source that fits your needs, for example, Display Capture.
Common live streaming sources
Input Source
Description
VLC Video Source
Installing VLC to enable this source
Image
Publishing a single image
Image Slide Show
Publishing multiple images (you can determine the order of playback and whether to loop the playback)
Scene
Insertion of an entire scene as the source to enable various streaming effects
Media Source
Publishing a local file
Text
Adding real-time text to your stream
Display Capture
Capturing and publishing your monitor in real time
Browser
Displaying URL content in a browser or opening a local html file
Game Capture
Streaming a game from a specified source in real time
Window Capture
Capturing and publishing the window you select in real time
Color Source
Adding a solid color to your scene. You can use this source for background colors or a global color tint by using the alpha channel.
Video Capture Device
Capturing and publishing the images captured by a camera in real time
Audio Input Capture
Audio live streaming (audio input device)
Audio Output Capture
Audio live streaming (audio output device)
Group
Placing sources in the same group to change visibility and lock status in batches
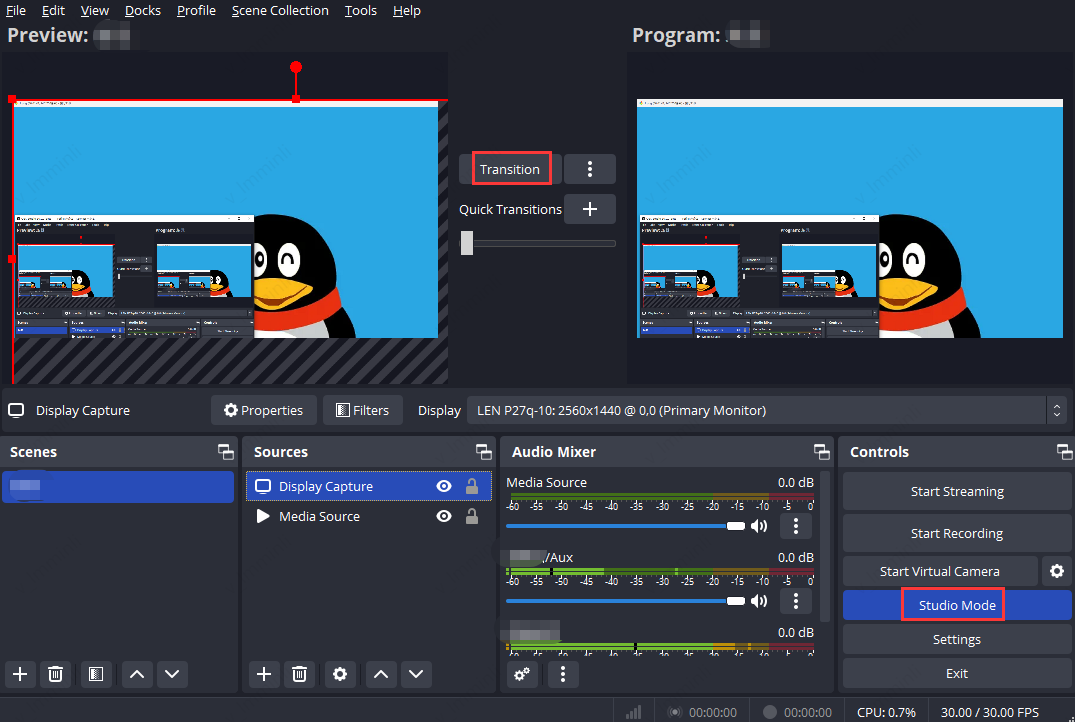
Step 3. Use the studio mode
In studio mode, you can edit your current live stream in real time and configure transitions for scene swapping, minimizing the impact on user experience.
1. Click Controls > Studio Mode in the menu bar at the bottom.
2. After editing, click Transition to swap the edit and live views.
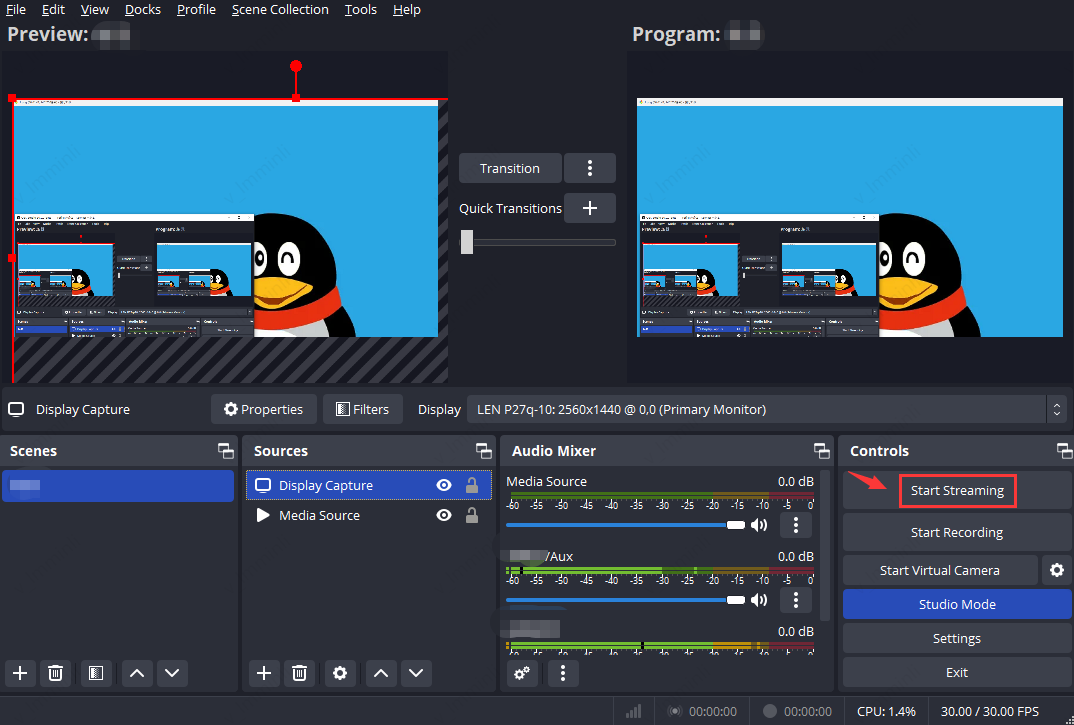
Step 4. Start streaming
1. Find Controls in the menu bar at the bottom.
2. Click Start Streaming to push your video to the configured push URL.
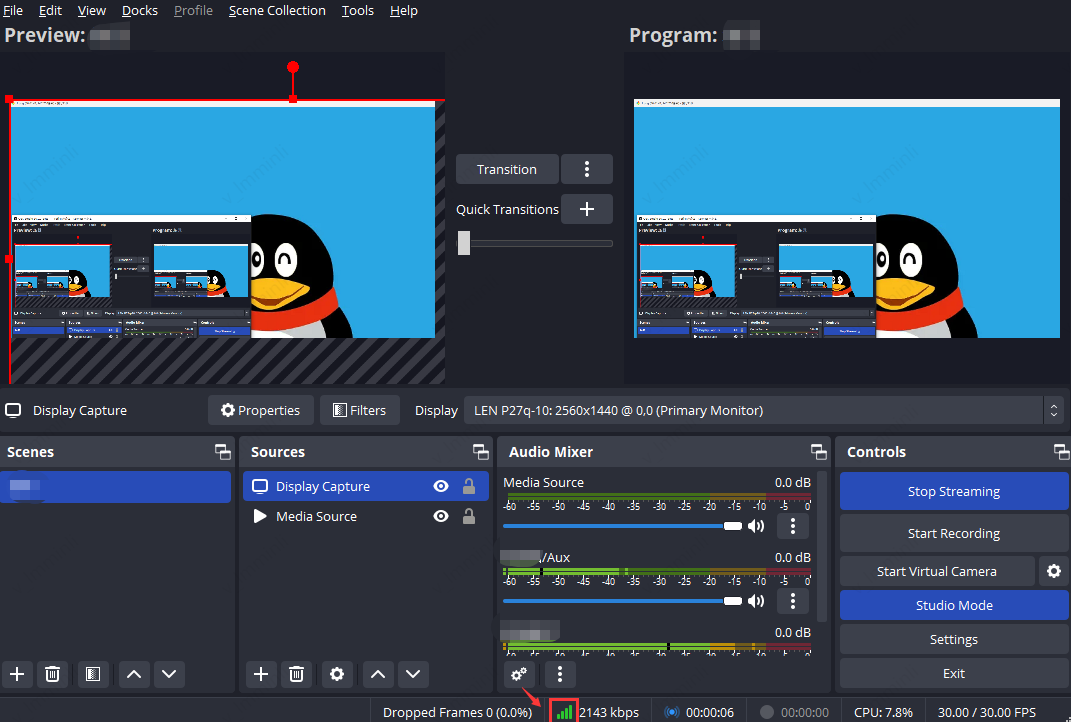
Note:
When the
green light appears at the bottom, it signifies a successful stream push.
If you want to stop the stream push, simply click on Stop Streaming.
Other Push Settings
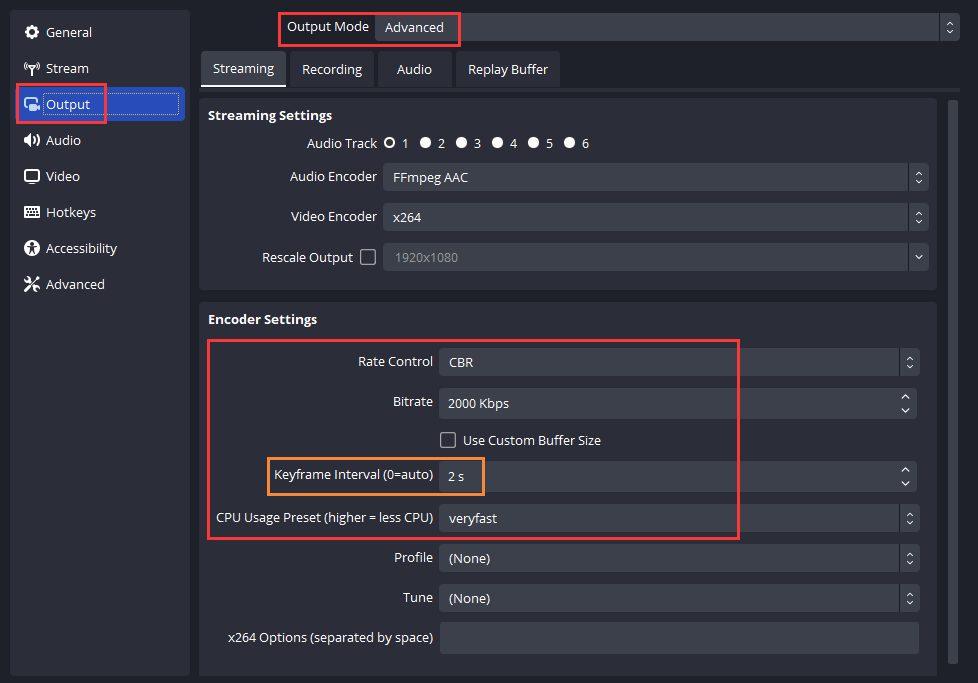
Streaming latency
1. Go to Controls > Settings > Output.
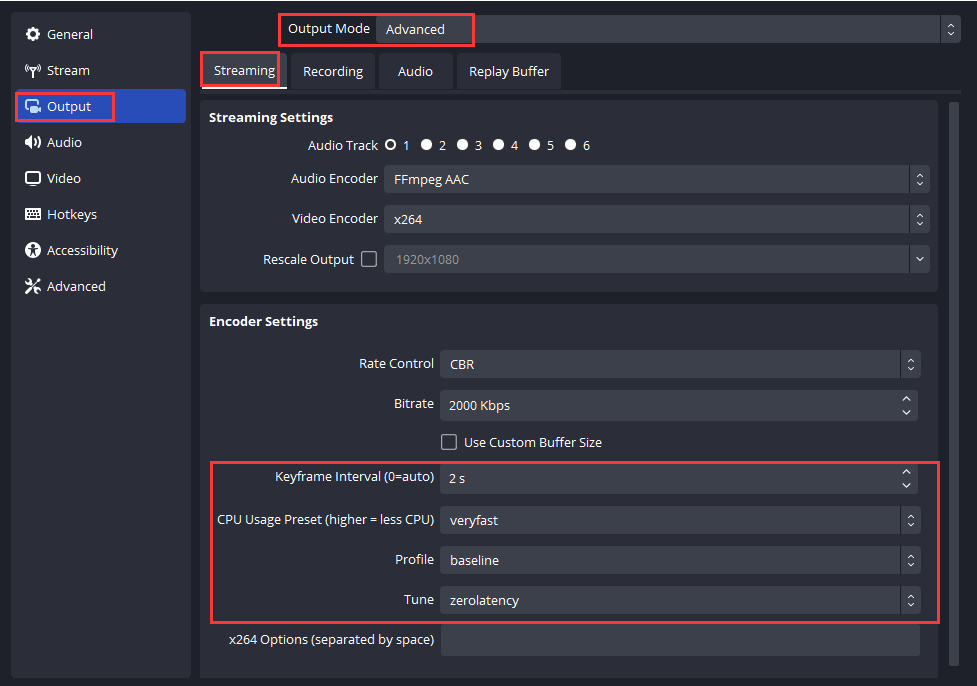
2. Select the Output Mode as Advanced to configure settings such as Keyframe Interval.Excessive keyframe interval (GOP) can affect the Live Event Broadcasting experience. It is recommended to set the size to 2s. The procedure of setting is shown in the figure below:
Removing B-frames in LEB
The LEB solution for web does not support decoding or playing B-frames. If a stream contains B-frames, the backend will remove them in transcoding, which will increase latency and incur transcoding fees. Please avoid pushing streams with B-frames or use streaming software such as OBS to remove them by adjusting the video encoding parameters. The figure below shows how to remove B-frames using OBS:
Local live recording
To record live streams to your local storage, follow the steps below:
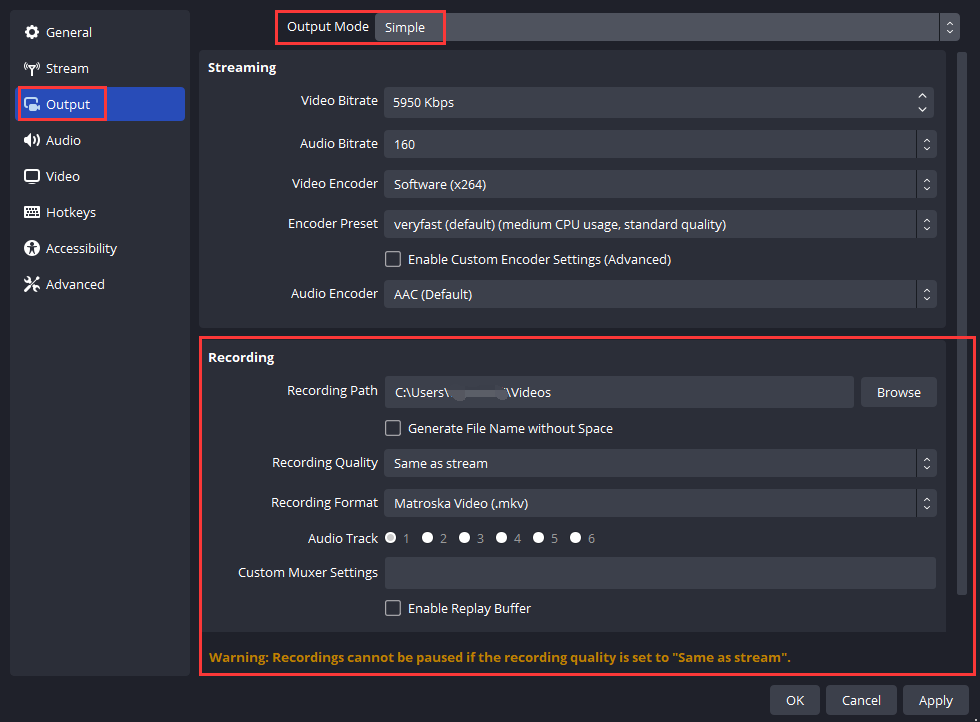
1. Go to Controls > Settings > Output.
2. Complete the settings under Recording and click OK.
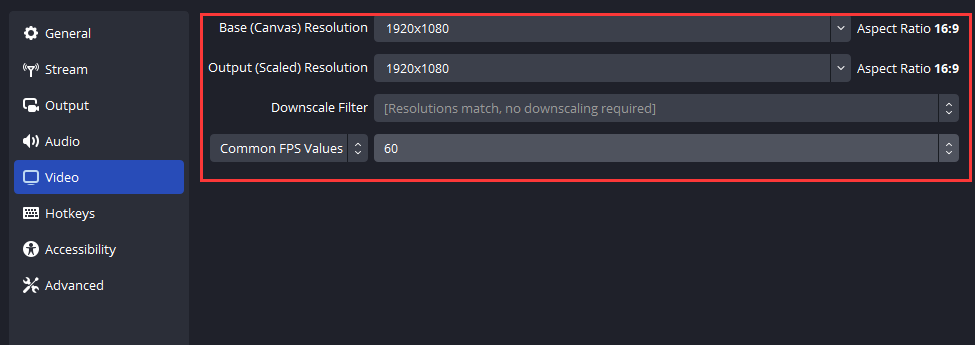
3. Click Video in the left sidebar to set the resolution and frame rate.
Note:
Resolution determines the clarity of video shown to viewers. The higher the resolution, the clearer the video. Frame rate (frames per second) determines playback smoothness. Typical frame rate falls in the range of 24 fps to 30 fps. Playback may stutter if frame rate is lower than 16 fps. Video games require higher frame rate and tend to stutter at a frame rate lower than 30 fps.
Transcoding
To change the video bitrate during streaming, follow the steps below:
1. Click Controls > Settings in the menu bar at the bottom.
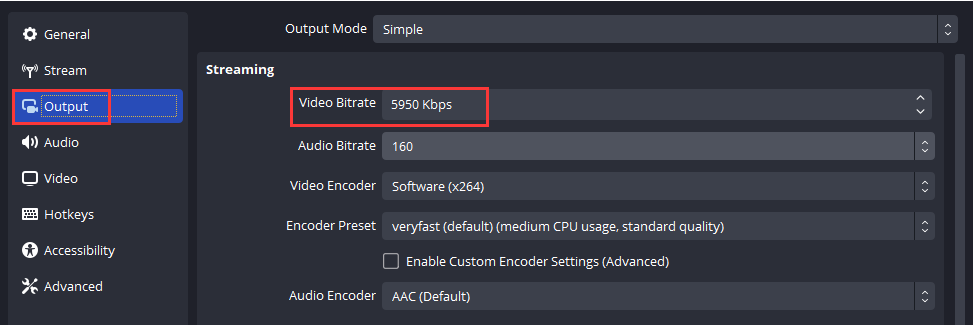
2. Click Output in the left sidebar and select Simple for Output Mode.
3. Enter the bitrate you want to use and click OK.
More
Audio-only push
According to OBS Forums, OBS Studio 23.2.1 and earlier versions do not support audio-only streaming.
You can follow the steps below to implement a similar feature. The method uses a static canvas (blank screen or image) for video content. This means there will still be video data in the live stream. To reduce bandwidth usage, you can set the video frame rate and bitrate to the minimum values.
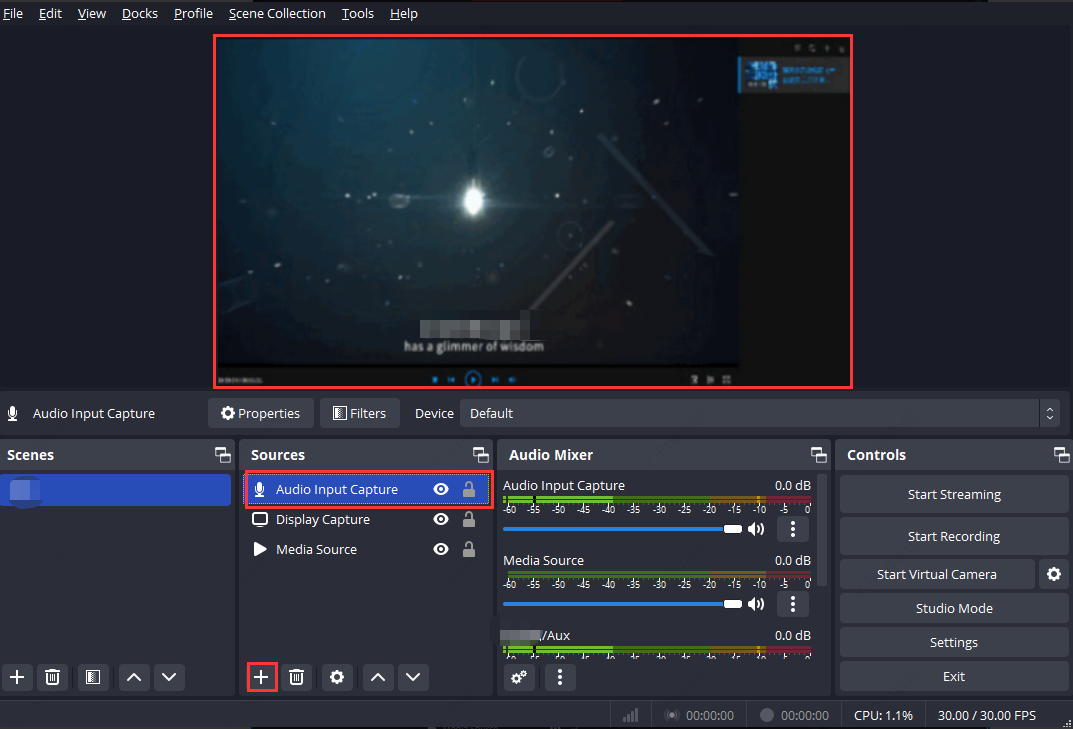
1. As instructed in Configure the source, select Audio Input Capture as the source. Do not use a video or image source.
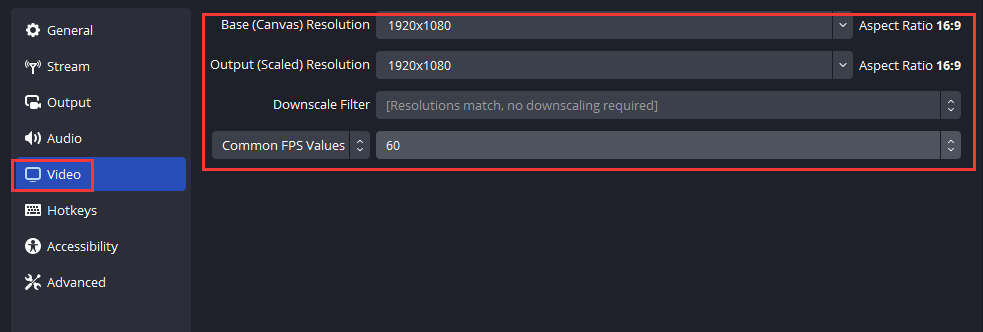
2. Go to Controls > Settings > Video.
3. Set Base (Canvas) Resolution and Common FPS Values to the minimum values and click OK.
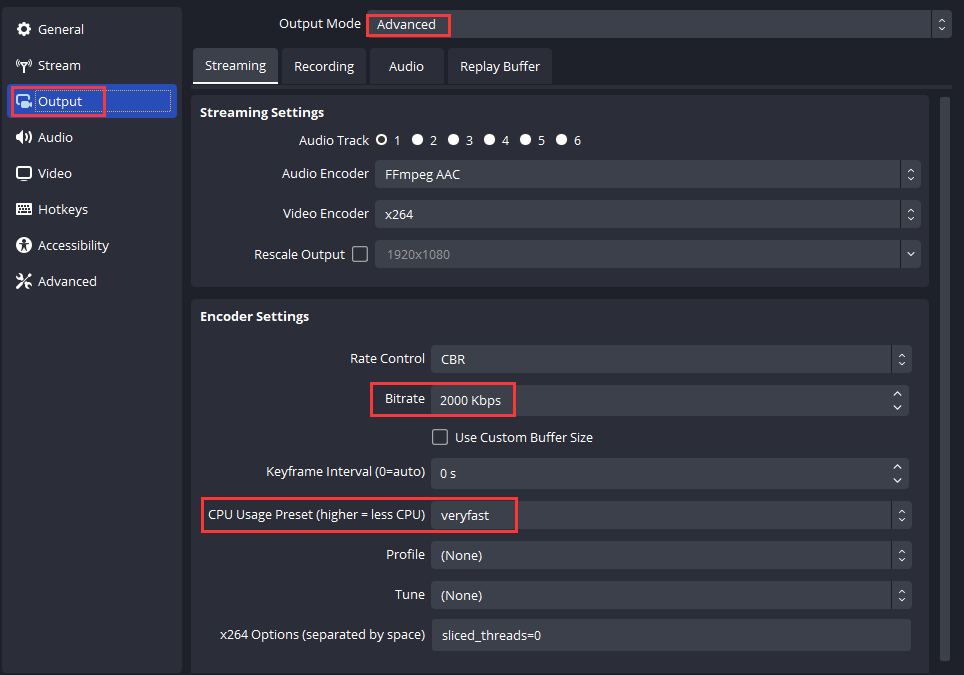
4. Click Output in the left sidebar, configure the output as shown below (set Bitrate to the minimum value), and click OK.
5. Start streaming as instructed in Configuring OBS for Push. The audience will hear audio, while the video will be a blank screen or an image. Because the video bitrate is set to the minimum value, the bandwidth usage is significantly lower than that of video push.
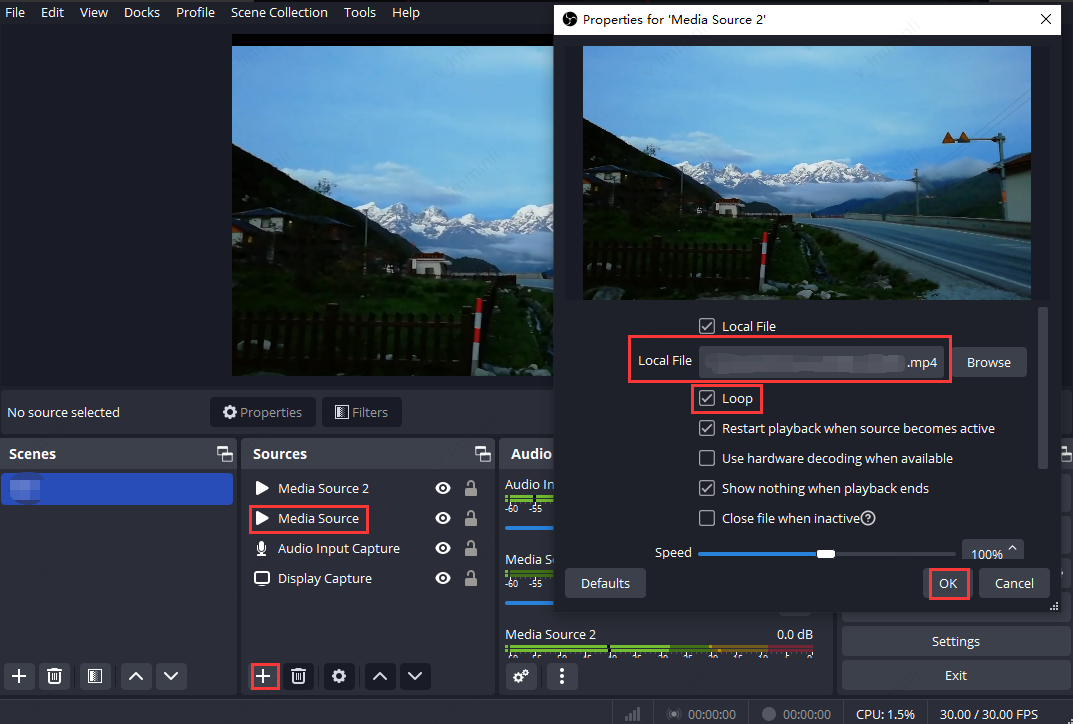
Video looping
1. Click + in Sources and select Media Source. In the pop-up window, choose a local file to stream, select Loop, and click OK.
After the push is finished, you can generate the playback address with the same StreamName as the push address. You can verify whether the stream is a successful push by the following method of playback:
PC: Supports the use of the VLC Player for stream pulling.
Mobile Live Video Broadcasting (MLVB) SDK is an extension of Cloud Streaming Services (CSS) in mobile scenarios. Compared with CSS services mainly for cloud integration, MLVB SDK not only offers a quick integration solution based on RTMP SDK, but also provides a one-stop professional resolution incorporating multiple cloud services, including Live Video Broadcasting(LVB), Live Event Broadcasting(LEB), Video on Demand(VOD), Chat and Cloud Object Storage(COS).In fact, Live Event Broadcasting (LEB) is an extension of Live Video Broadcasting(LVB) in ultra-low latency playback scenarios. It features lower latency than traditional streaming protocols and delivers superior playback experience with millisecond latency. It is suitable for scenarios with high requirements on latency, such as online education, sports streaming, and online quizzes.