With CSS, you can record a live stream and save the recording file to VOD or COS. This document shows you how to record to Cloud Object Storage (COS).
Notes
To record to COS, you need to activate COS first. We recommend you buy a storage package in advance to avoid service suspension caused by overdue payments. For details, see COS > Getting Started.
After enabling the recording feature, please make sure that your COS service is in normal status. If COS is not activated or is suspended due to overdue payments, live recording will fail. No recording files will be generated. Nor will fees be incurred.
A recording file is available about five minutes after recording ends. For example, if you start recording a live stream at 12:00 and stop at 12:30, you can get the recorded video at around 12:35.
After creating a recording template, you need to bind it to a push domain. For detailed directions, see "Recording Configuration". The template takes effect 5-10 minutes after binding.
Mixed-stream recording does not support mixing streams inside the Chinese mainland with streams outside. Doing so will cause an error and playback of the recording file will fail.
CSS needs permissions to store recording files in COS. Before you use the record-to-COS feature, make sure you have granted the necessary permission. If recording to COS fails due to insufficient permissions, the video cannot be recovered. For how to grant the permission, see "Authorizing CSS to Store Recording Files in COS".
Due to the default traffic and QPS limits of COS storage buckets, if your estimated concurrent push streams exceed 5000, please Submit a Ticket to adjust the QPS limit to avoid affecting the normal use of your business.
If you do not specify a recording template when initiating a recording task, the recording file will be saved to VOD.
When storing recorded content in COS and the storage folder includes the stream ID, please ensure the legality of the stream ID aligns with the naming conventions of COS folders/files to prevent file saving failures. For details on COS object naming conventions, refer to the Naming Conventions Document.
1. Log in to the CSS console and select Feature Configuration > Live Recording on the left sidebar.
2. Select Save to COS.
3. Click Create template to set the template information and proceed with the following configurations:
Basic recording configuration: This includes the template name, recording content, recording format, and other configuration items. For details, see Basic Recording Configuration Instructions.
Basic recording format configuration: This includes HLS file segmentation, max recording time per file, resumption timeout, and other configuration items. For details, see Basic Recording Format Configuration Instructions.
(Optional) Advanced recording format configuration: By clicking Advanced Configuration , you can access and select additional configurations. For details, see Advanced Recording Format Configuration Instructions.
4. Upon completion, click Save .
Basic Recording Configuration Instructions
Note:
When recording the original stream via WebRTC streaming, both HLS and MP4 formats can record and play audio normally, but the FLV format will lose audio. It is recommended to select HLS or MP4 format.
When an audio-only transcoding template is selected during specified transcoded stream recording, the HLS/FLV/MP4 recording file will miss the initial 2 seconds of content due to format conversion. Please plan your push and recording schedule accordingly.
Initiating a transcoding task is required for recording transcoded streams, which will incur additional transcoding costs. However, if the same transcoding template is used for playback, charges will not be duplicated.
Basic Configuration Item
Description
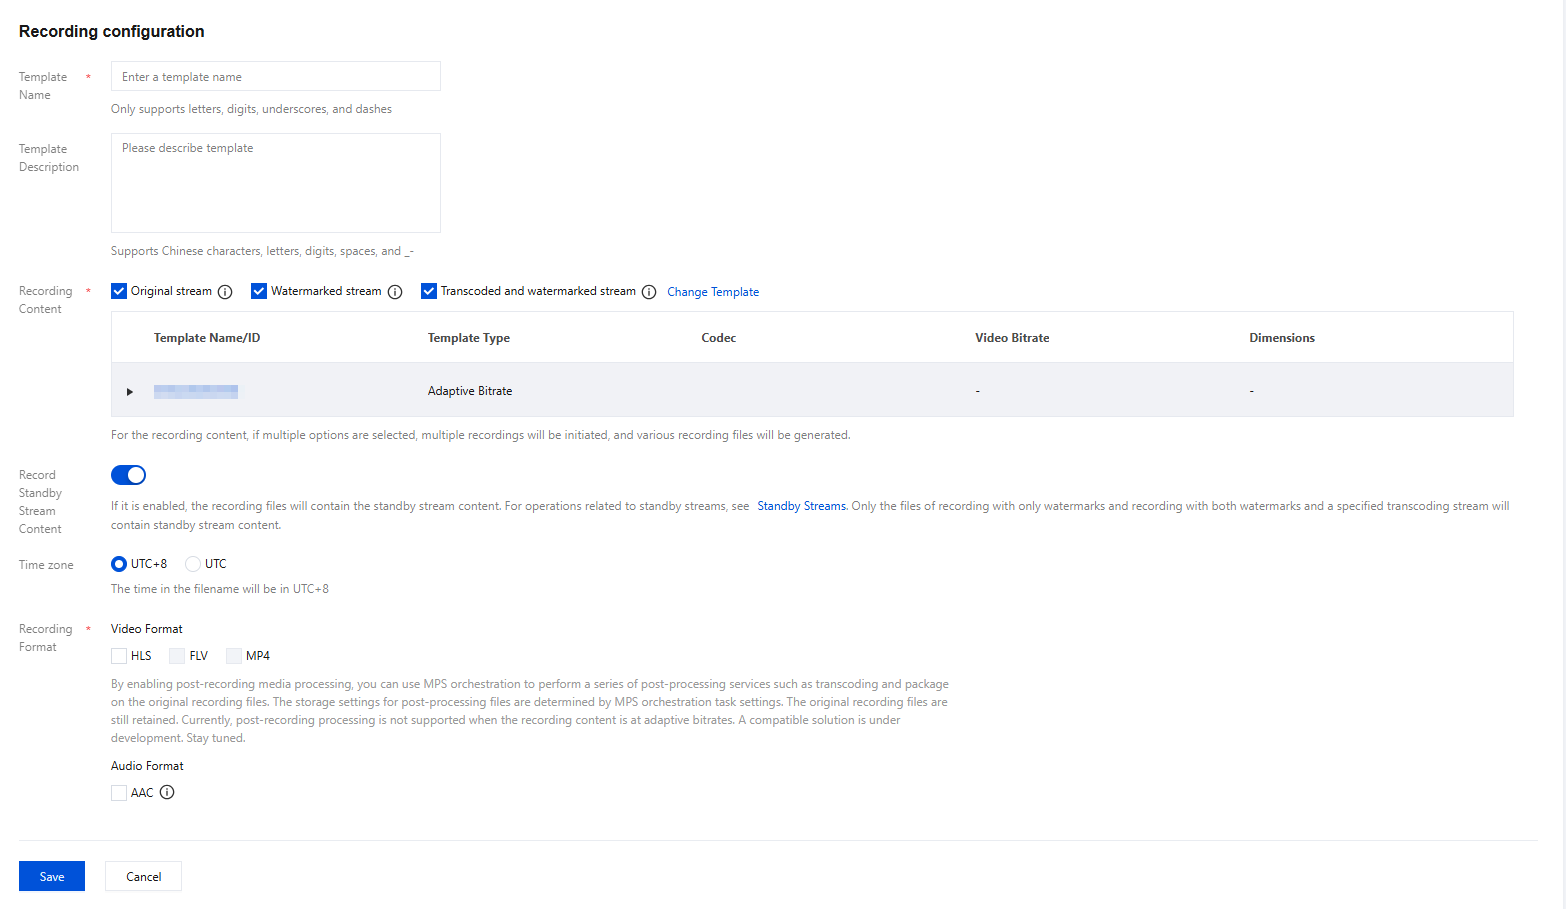
Template Name
The template name, which can contain letters, digits, underscores (_), and hyphens (-).
Template Description
The template description, which can be customized and can contain Chinese and English characters, digits, spaces, underscores (_), and hyphens (-).
Recording Content
Original stream
Record videos before transcoding, watermarking, and stream mixing. Please note that for WebRTC streams, recording the original stream may cause audio playback to fail, We recommend you select "Watermarked stream" or "Transcoded and watermarked stream".
Watermarked stream
Videos will be recorded after they are watermarked according to the specified watermark template. If a watermark template is not specified, the original stream will be recorded.
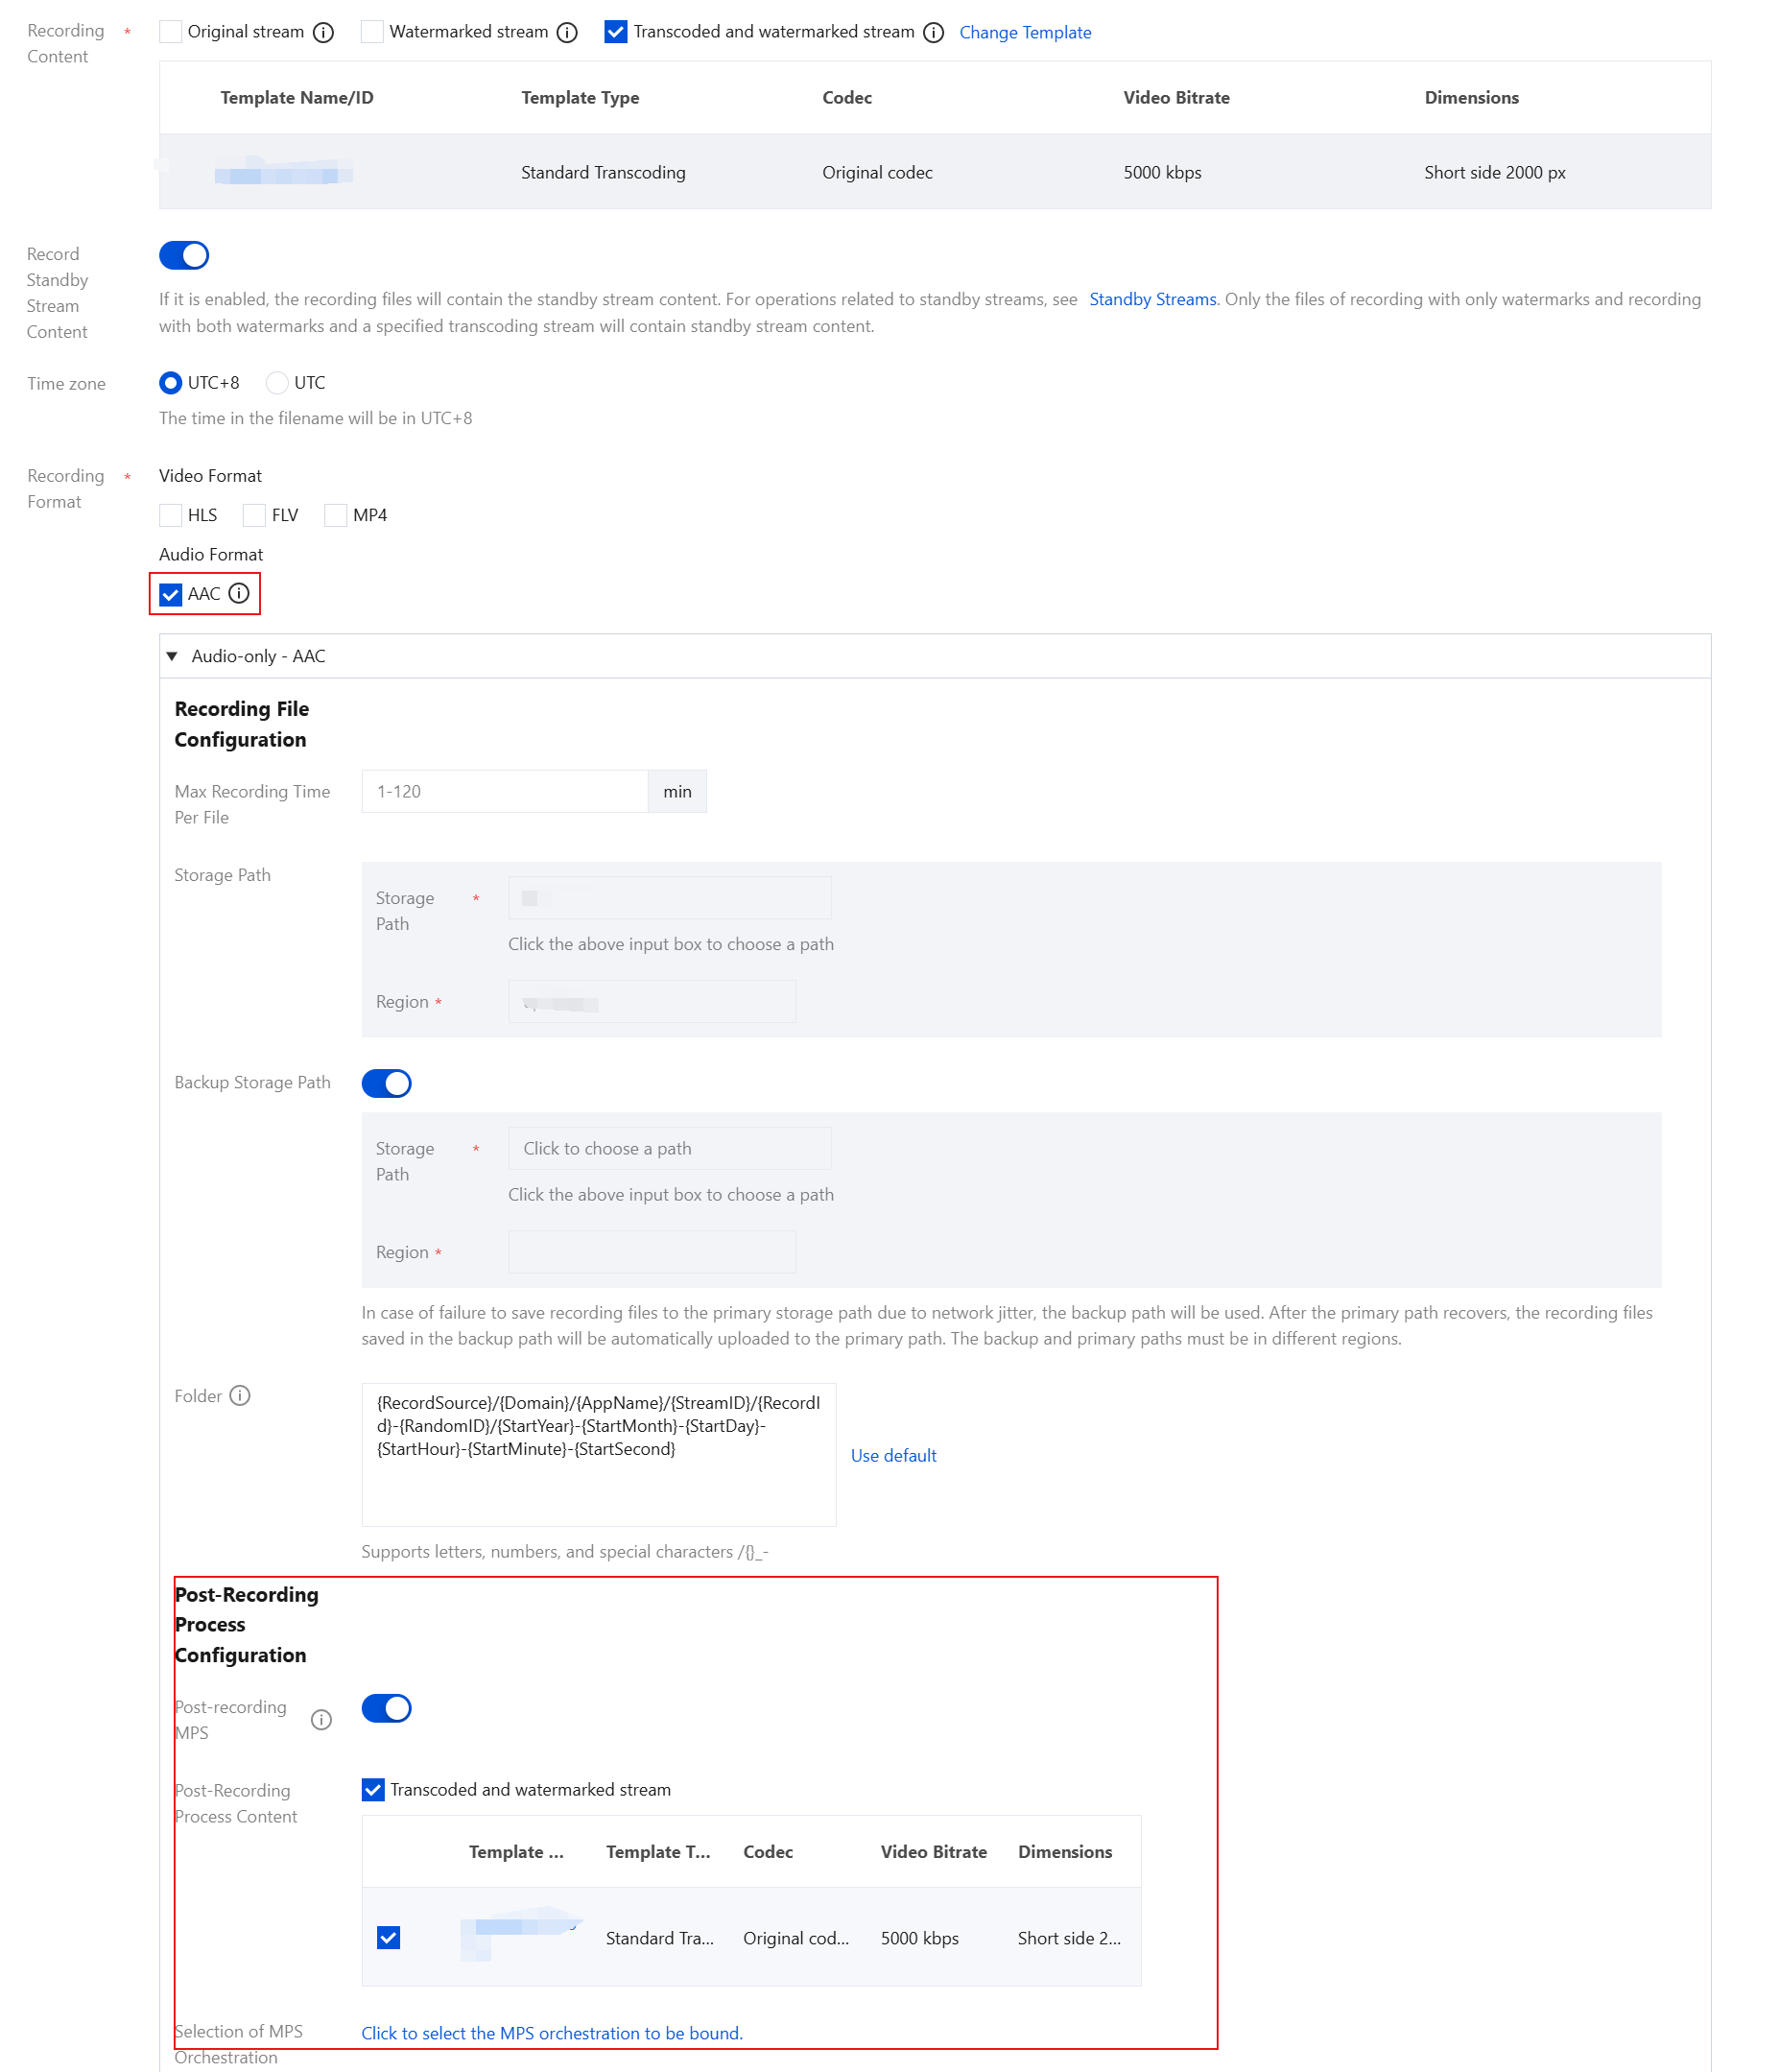
Transcoded and watermarked stream
Click Transcoded and watermarked stream .You can select an existing transcoding template or click the name of a template to modify its configuration. Videos will be recorded after they are transcoded according to the specified transcoding template. If the template is deleted, the settings for recording watermarked streams will apply.
Record Standby Stream Content
The "Record Standby Stream Content" toggle is displayed only when the Recording Content includes either a Watermarked stream or a Transcoded and watermarked stream. By default, this toggle is set to off.
If it is enabled, the recording files will contain the standby stream content. For operations related to standby streams, see Standby streams. Only when you record the watermarked stream, and transcoded and watermarked stream can the recorded files contain standy stream content.
If it is not enabled,the recording file will not include the standby stream content.For operations related to standby streams, see Standby streams.
Note:
When utilizing a watermarked stream, the Standby Stream Content may undergo segmented recording due to differences in resolution and encoding methods from the live stream. To circumvent this issue, it is advisable to designate a transcoded stream for recording. This ensures that the Standby Stream Content undergoes transcoding, effectively preventing segmentation and pixelation issues.
Time zone
You can select UTC+8 or UTC .
When UTC+8 is selected as the timezone, the naming of the recording files will use the UTC+8 time.
When UTC is selected as the timezone, the naming of the recording files will use the UTC time.
Recording Format
Videos can be output in formats of HLS, MP4, FLV, and AAC (for audio-only recording).
By enabling post-recording media processing, you can use MPS orchestration to perform a series of post-processing services such as transcoding and package on the original recording files. The storage settings for post-processing files are determined by MPS orchestration task settings. The original recording files are still retained. Currently, post-recording processing is not supported when the recording content is at adaptive bitrates. A compatible solution is under development. Stay tuned.
Basic Recording Format Configuration Instructions
Note:
Since the recording file is uploaded as it is recorded, it is impossible to ascertain the end time before uploading, preventing the inclusion of the end time in the file name.
Enabling simultaneous recording and uploading ensures files are uploaded immediately after recording ends. A single recording file supports a duration of up to 12 hours and enhances FLV recording's disaster recovery capability. Playback files may experience lag when being dragged for online playback, but this does not affect local playback.
1. Select the recording content and formats and complete the following settings:
Basic Recording Format Configuration Item
Description
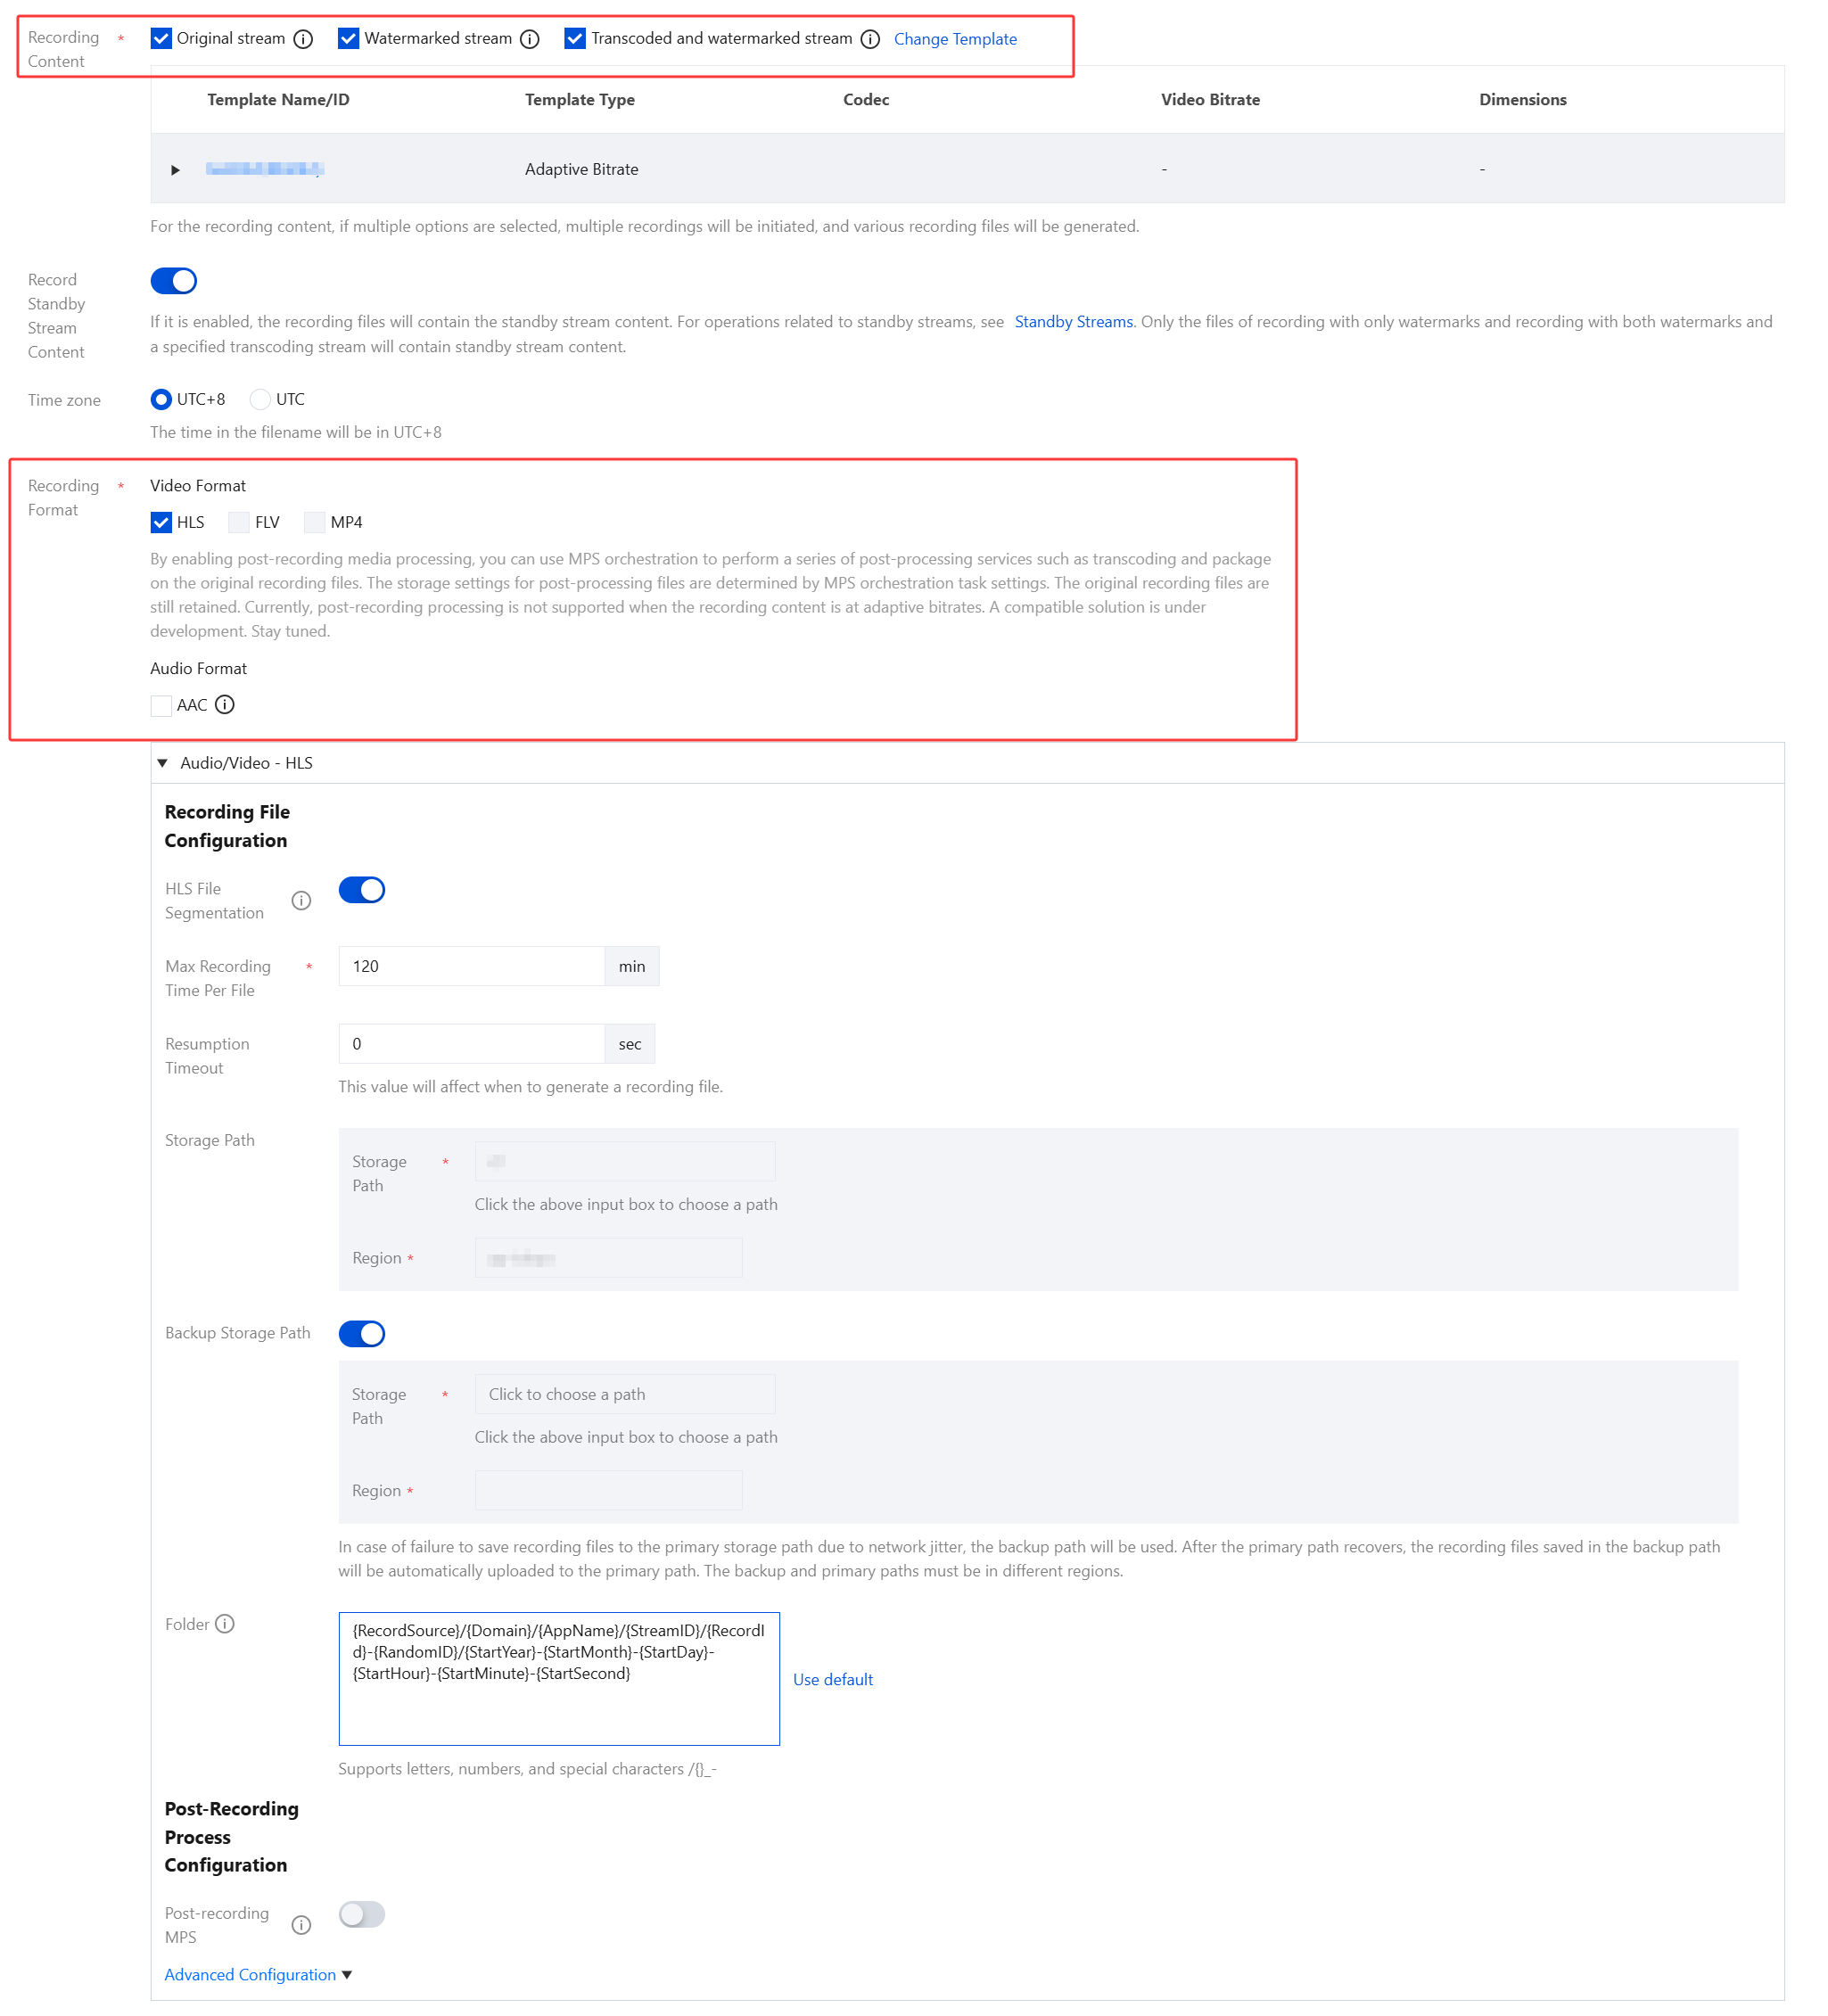
HLS File Segmentation
The HLS file segmentation feature is disabled by default. If post-processing services are needed, it is recommended to enable HLS file segmentation and set the duration of individual HLS recording files.
If HLS file segmentation is enabled, the duration of individual HLS recording files can be configured, allowing for the definition of the duration of files produced by post-recording processing.
If HLS file segmentation is disabled, recording will continue uninterrupted until the live stream ends. If post-recording processing has been configured, it will be initiated after the recording is complete.
Max Recording Time Per File (min)
Audio/Video - HLS format
There is no upper limit on the recording duration of a file in HLS format. If the waiting time for continuation of recording is exceeded, a new recording file will be generated to continue recording.
When an HLS recording file is saved to COS, the duration of a single TS file is set to 10 seconds by default.
When HLS file segmentation is enabled, the duration of a single HLS recording file can range from 1 to 720 minutes.
Audio/Video - FLV format
The duration of a single file recorded in FLV format is limited to 1 to 720 minutes.
Audio/Video - MP4 format
The duration of a single file recorded in MP4 format is limited to 1 to 720 minutes.
Audio-only - AAC format
The duration of a single file recorded in AAC format is limited to 1 to 120 minutes.
Resumption Timeout (sec)
The resumption timeout period directly affects the time it takes to generate a recording file.
When the interval of stream interruption does not exceed the set resumption timeout period, a single live stream will generate only one file. However, the recording file will be received after the resumption timeout period has elapsed, and recording costs will be incurred during the resumption timeout period. Please set a reasonable resumption timeout period.
OnlyHLS format supports resuming recording after stream interruptions, with the resumption timeout period being configurable from 1 to 1,800 seconds.
Storage path
You can select a COS bucket from buckets that you have created and completed authorization in Cloud Object Storage .
The region is the region of the mentioned bucket, which cannot be modified.
Backup storage path
The backup storage path feature is disabled by default. You can manually enable this feature according to your business needs.
When network jitter prevents the recording file from being stored in the primary storage path, the system will automatically store it in the backup storage path to prevent file loss. Once the primary storage path is restored, the recording file in the backup storage path will be automatically synchronized to the primary storage path. The primary and secondary regions cannot be the same.
Folder
The default storage folder is{RecordSource}/{Domain}/{AppName}/{StreamID}/{RecordId}/{StartYear}-{StartMonth}-{StartDay}-{StartHour}-{StartMinute}-{StartSecond}.
{RecordSource}indicates the content type. If the original stream is recorded, this is "origin". If a transcoded stream is recorded, this is the transcoding template ID.
{StartYear}indicates the starting year.
{StartMonth}indicates the starting month.
{StartDay}indicates the starting day.
{StartMinute}indicates the starting minute.
{StartSecond}indicates the starting second.
{Domain}indicates the push domain.
{AppName} indicates the push path.
{StreamID} indicates the stream ID.
{RecordId}indicates the recording task ID, which is returned by the CreateRecordTask API.
(/) indicates folder levels. (-) is an ordinary character.
{RandomID}:random number
2. Click Save.
Advanced Recording Format Configuration Instructions
1. Log in to the CSS console and select Feature Configuration > Live recording > Save to COS > Create template > Recording Format > Advanced Configuration.
Note:
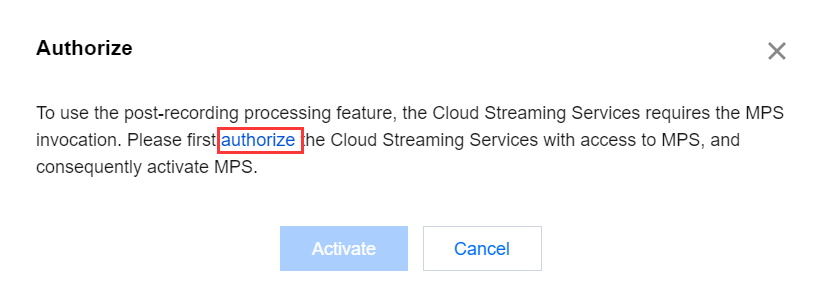
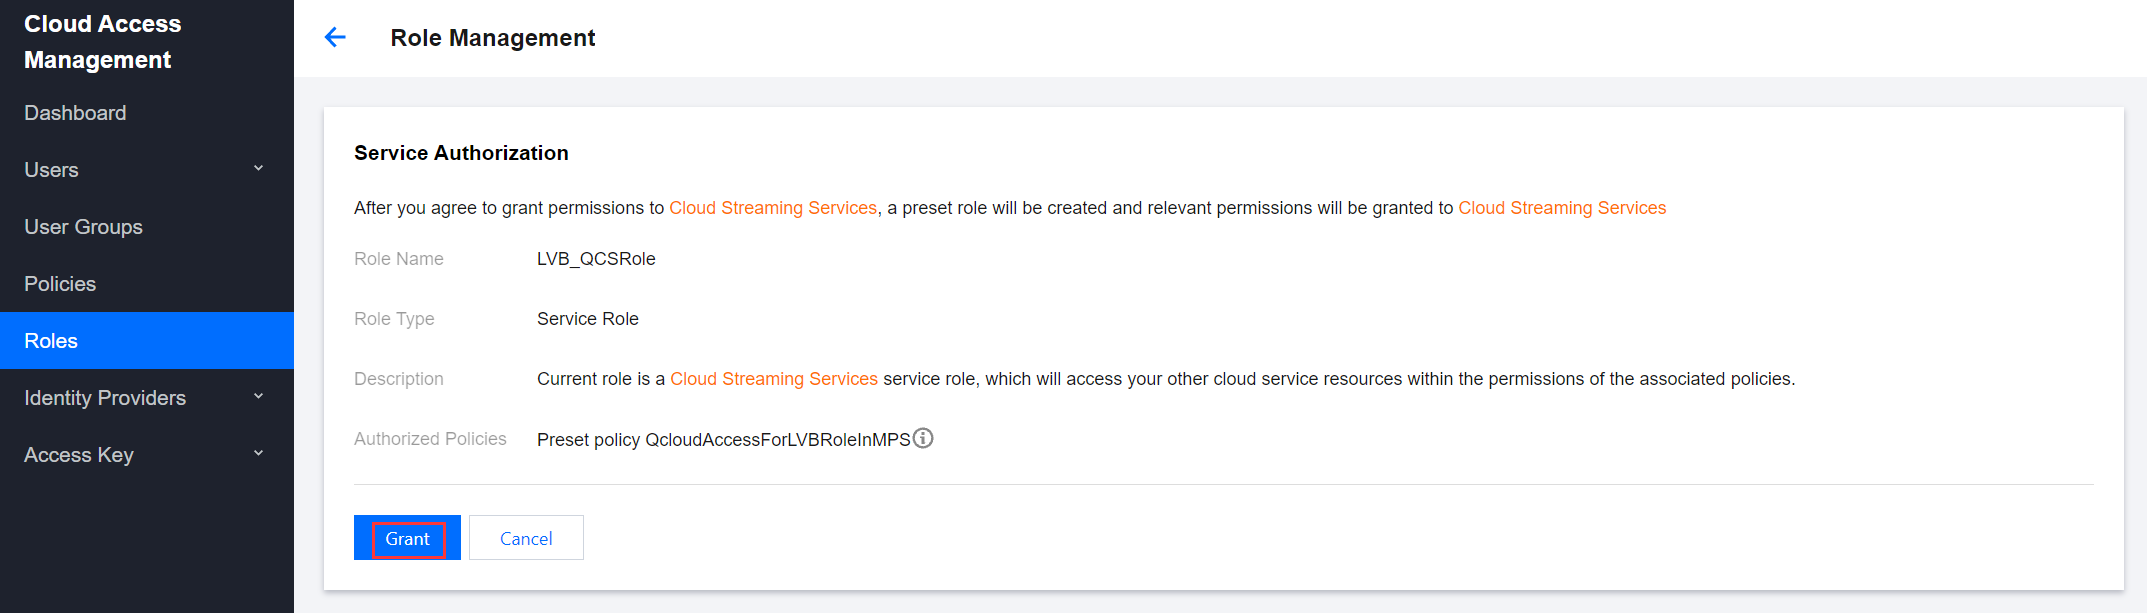
Prerequisite: Since this is the first time activating the post-recording MPS feature , the Cloud Streaming Services console needs to call the Media Processing Service (MPS), requiring you to create a service role and authorize the current account role to use the MPS product.
2. Click authorize to enter the CAM role management page.
3. On the role management page, click Grant to complete the identity verification and finalize the MPS authorization, enabling normal use of the MPS.
4. After successful authorization, the system will automatically activate the MPS product and display the Save to COS page.
5. Choose Create template > Recording Format > Advanced Configuration , and proceed with the following configuration:
5.1 You can switch between different tabs to view the configuration requirements for Audio/Video - HLS format, Audio/Video - FLV format, Audio/Video - MP4 format, and Audio-only - AAC format.
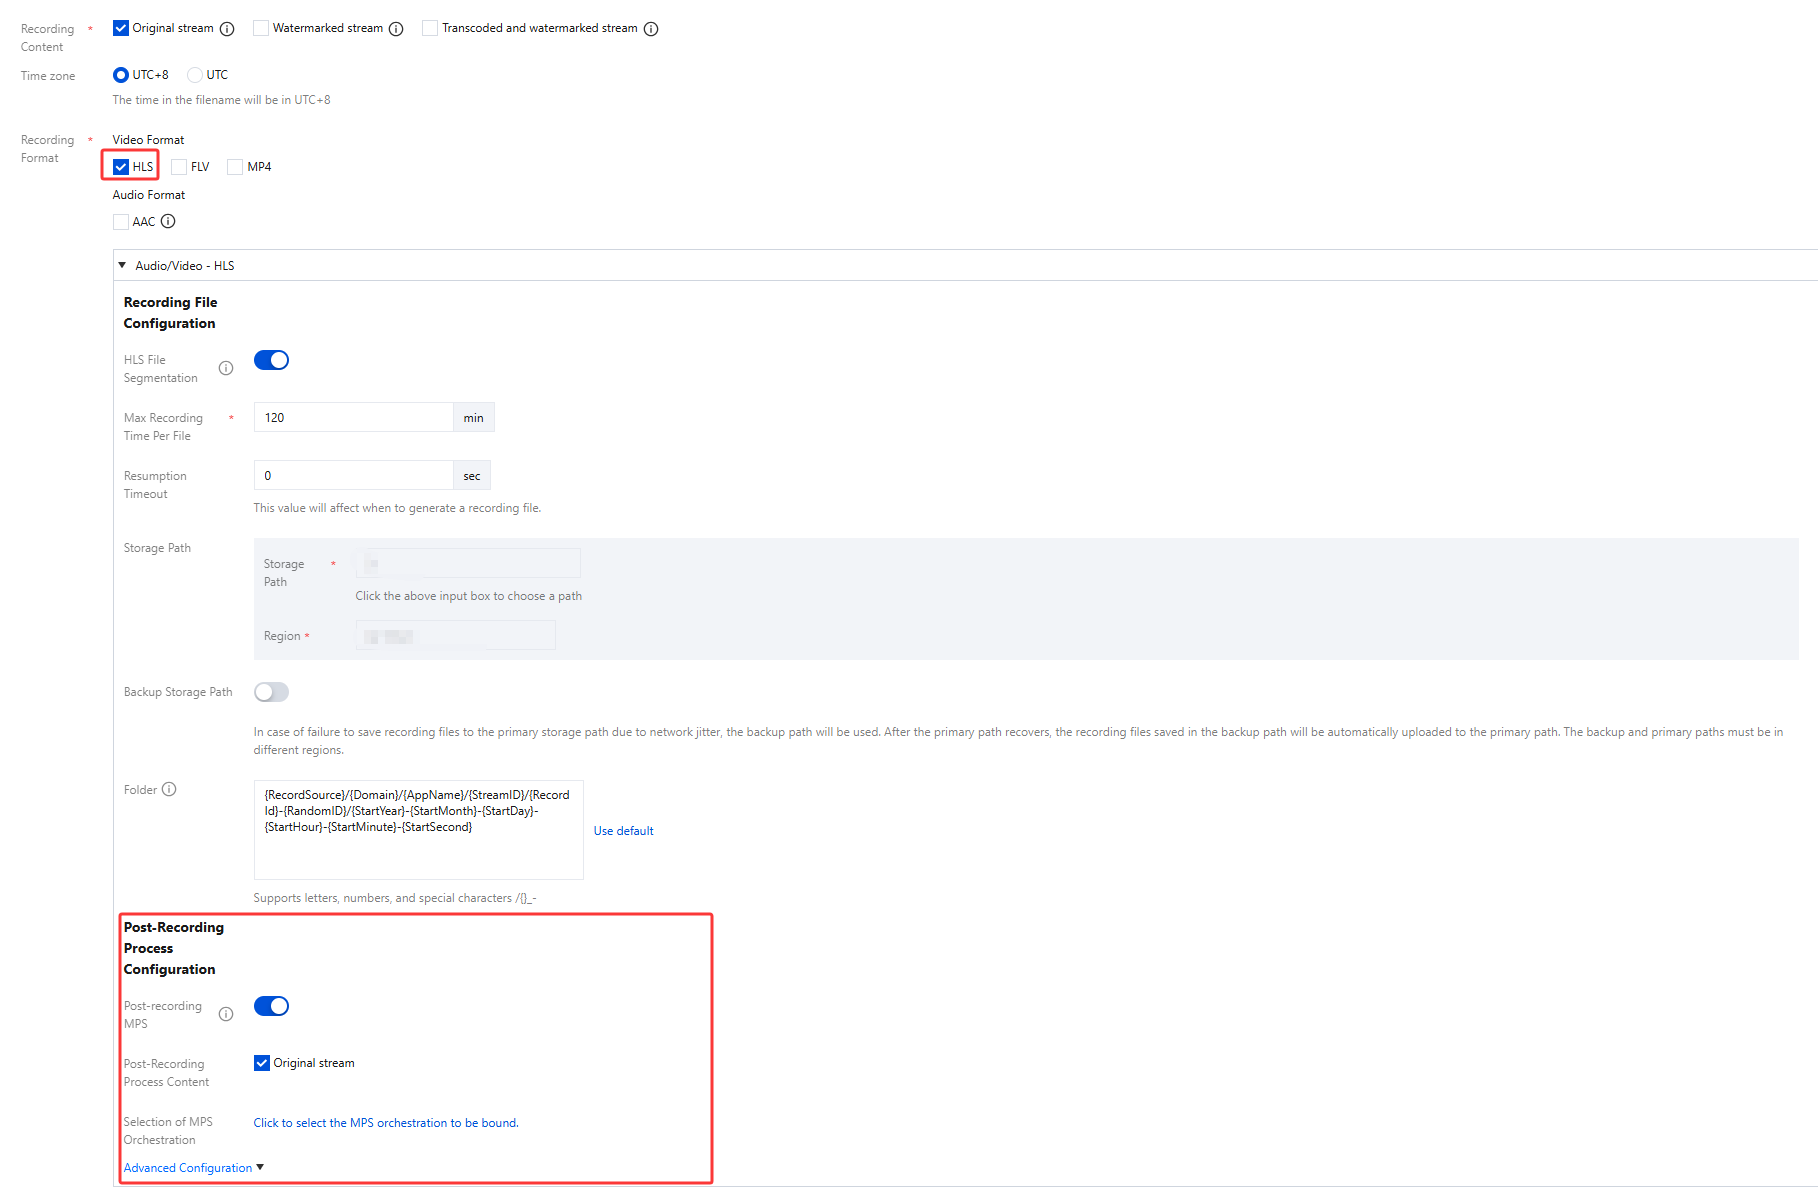
Audio/Video - HLS Format
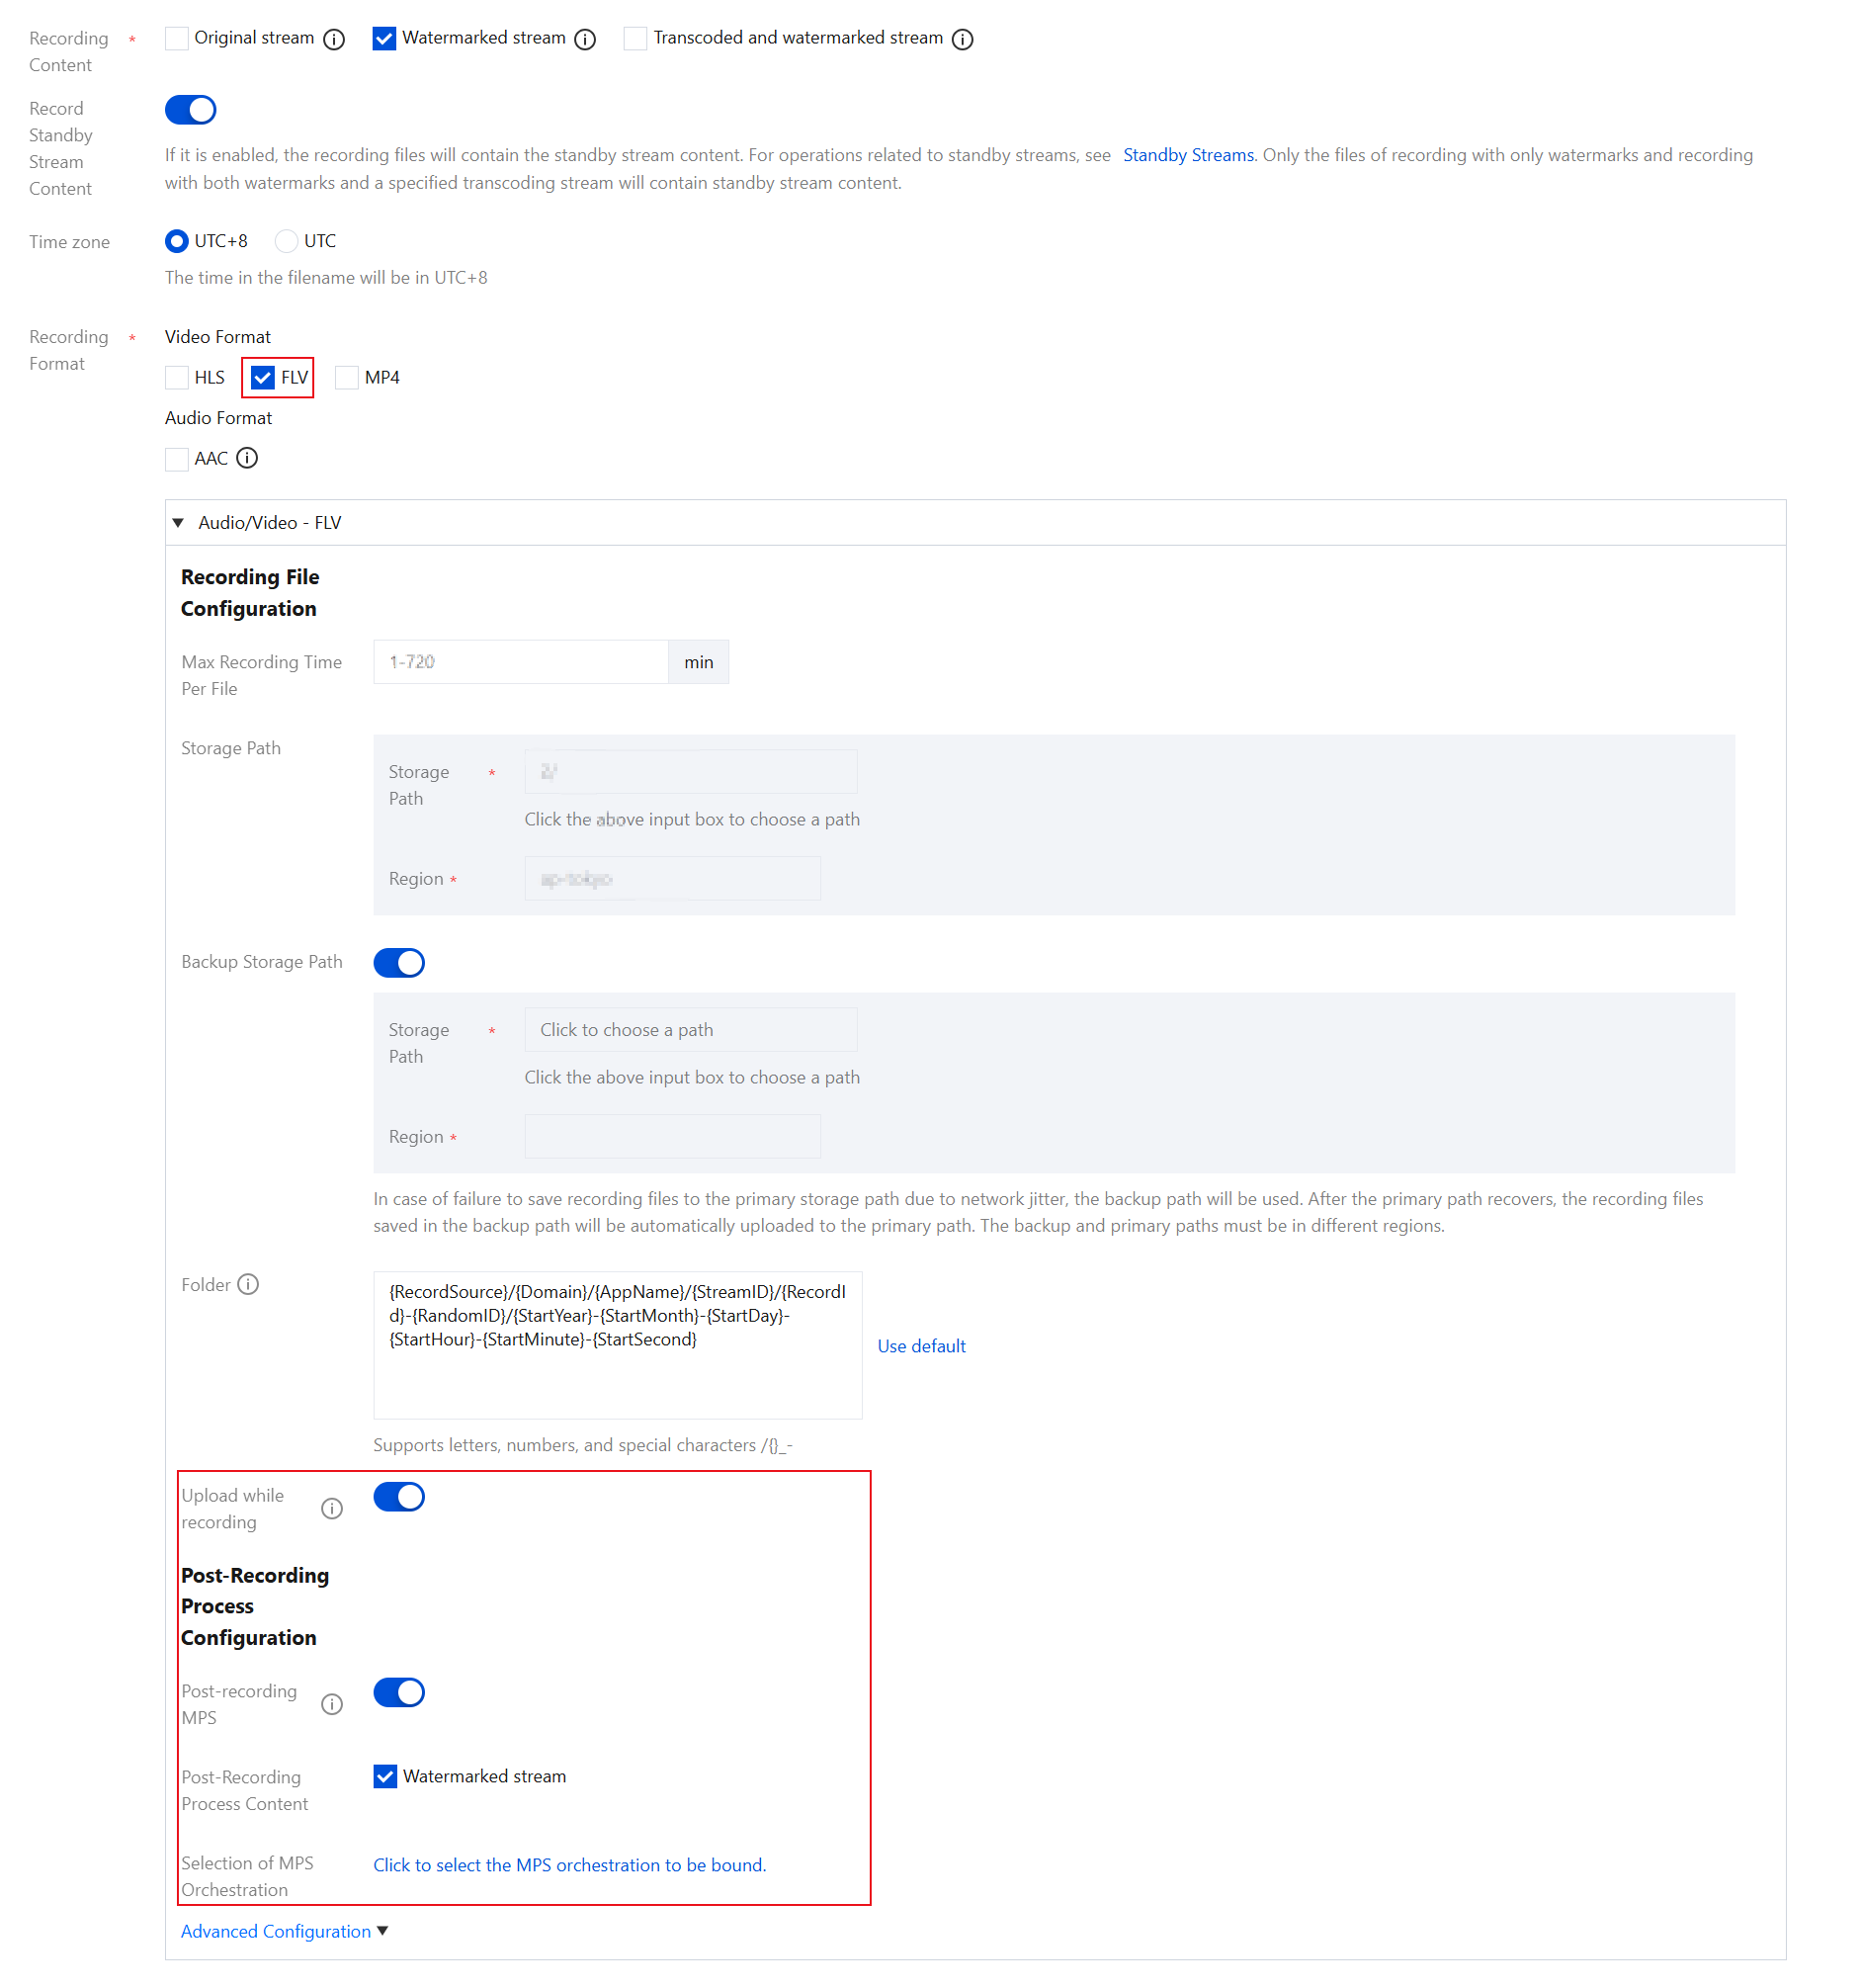
Audio/Video - FLV Format
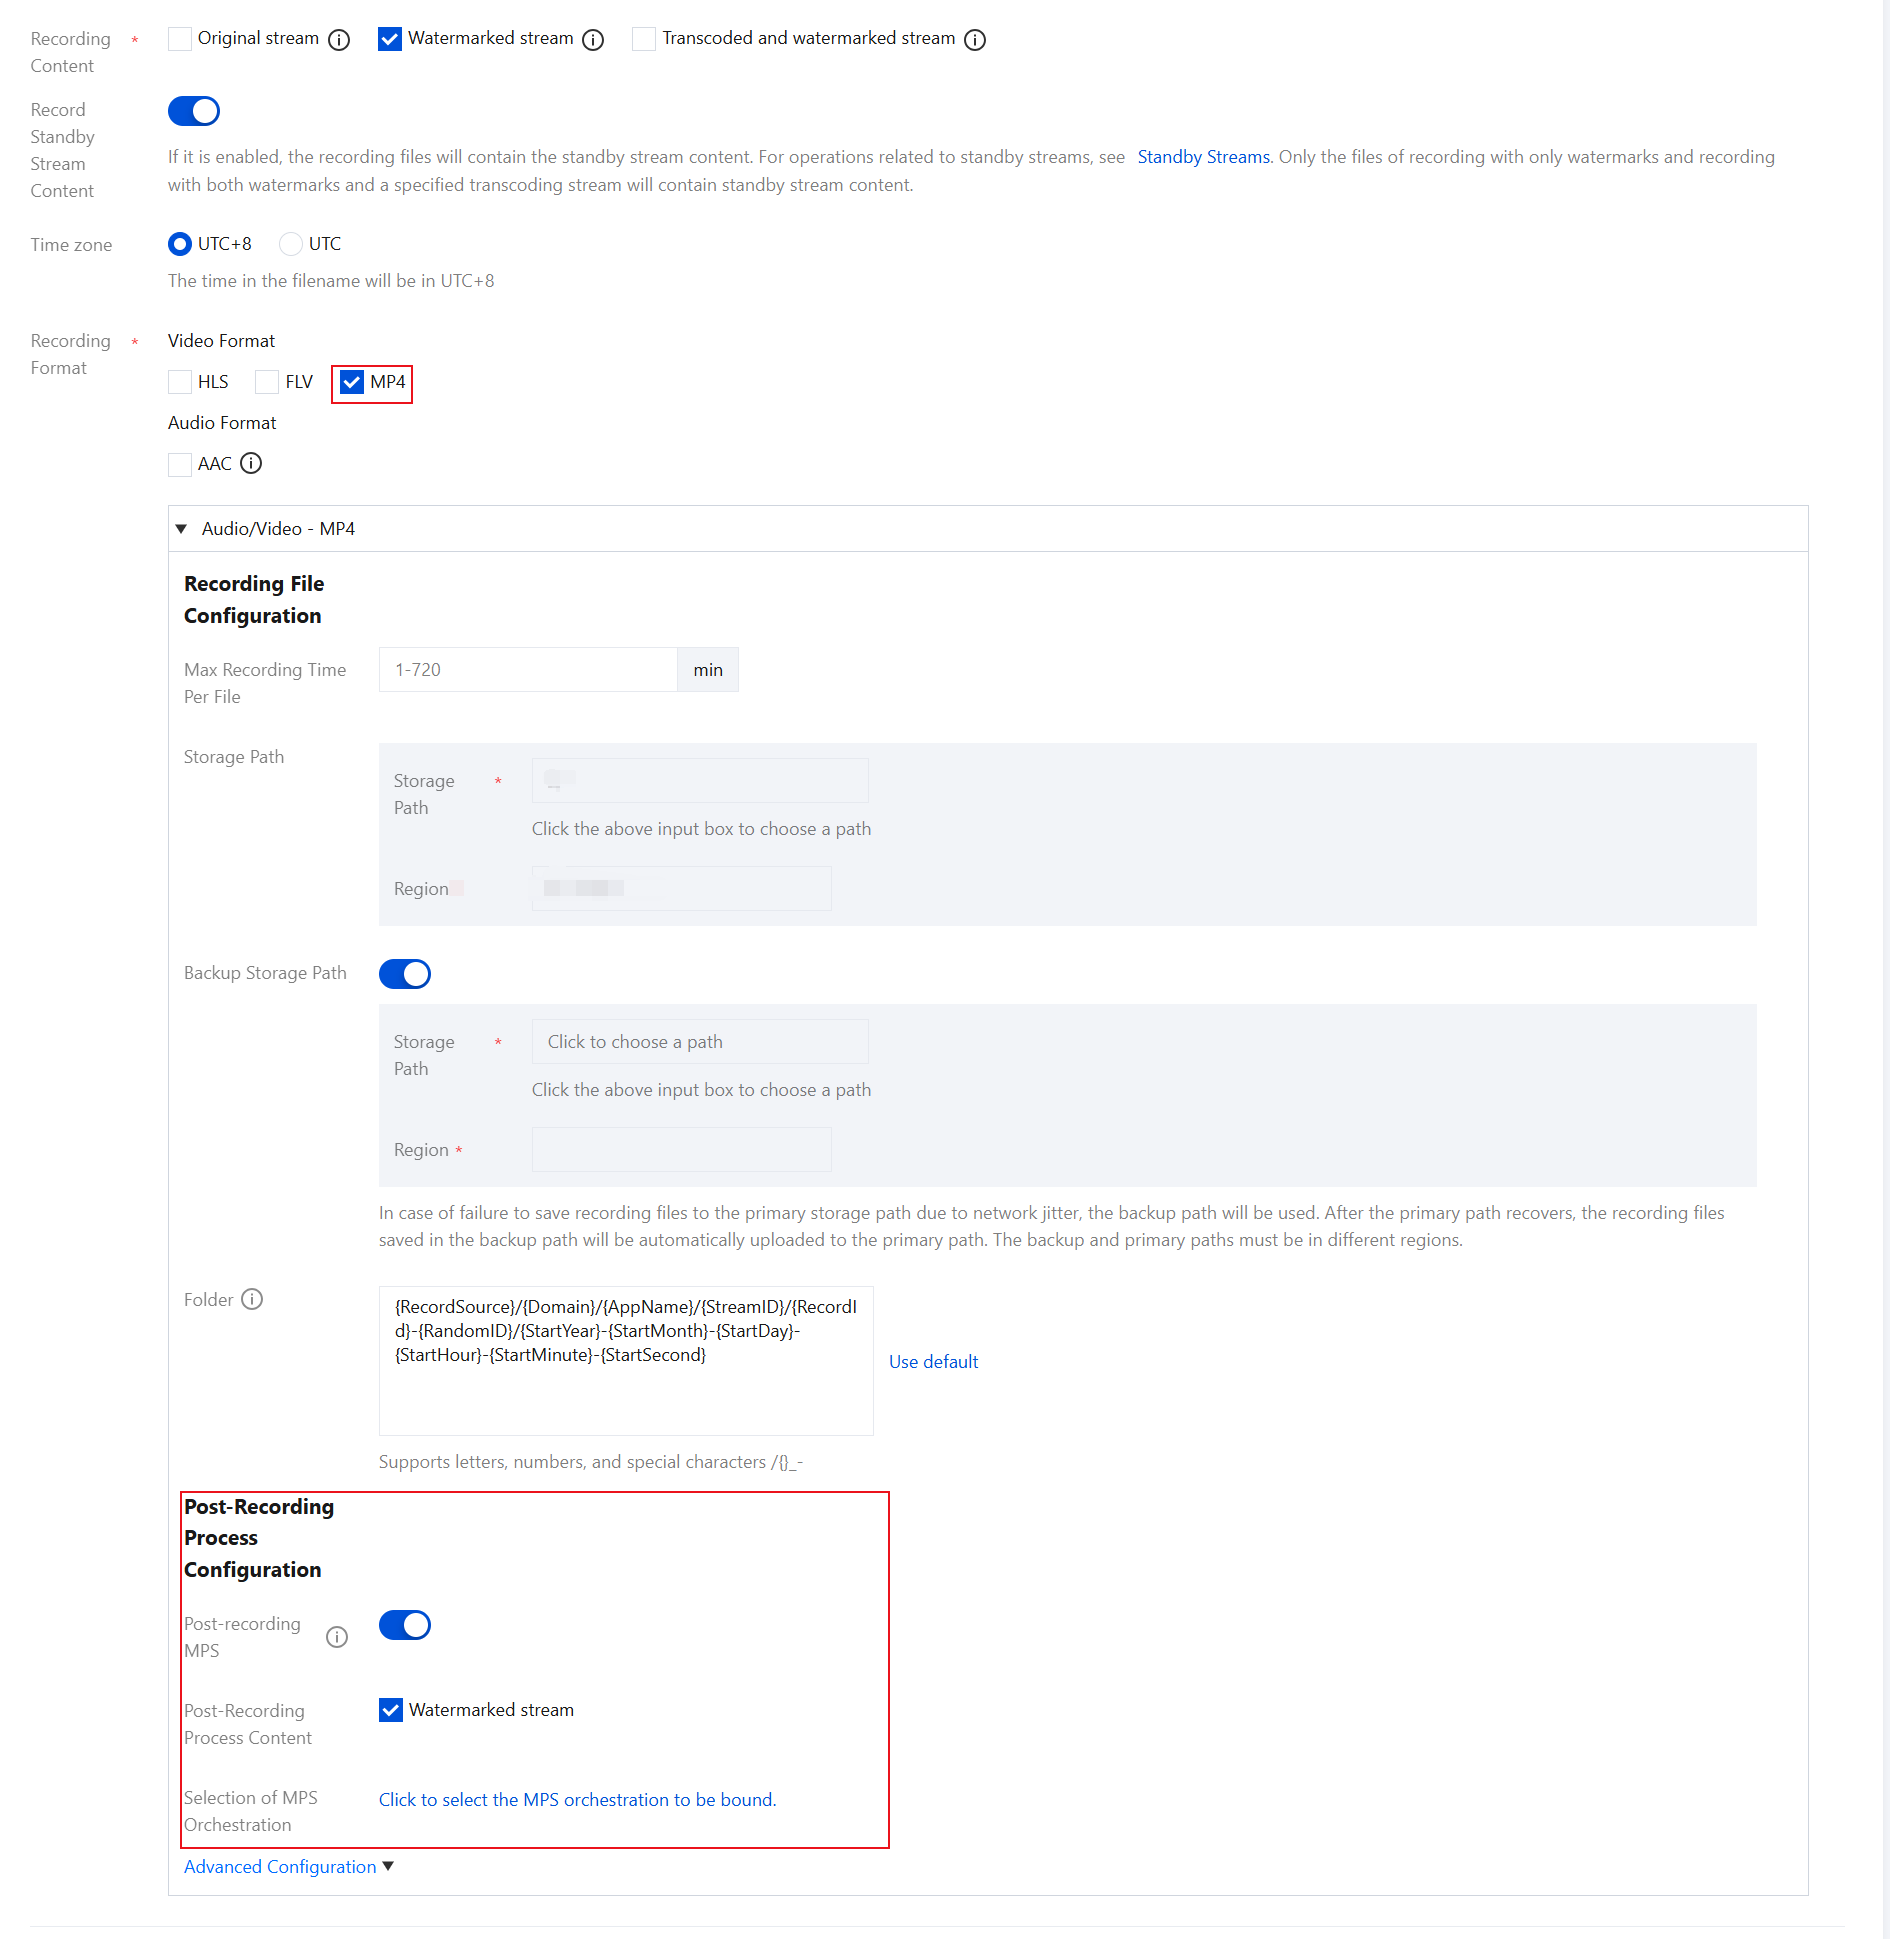
Audio/Video - MP4 Format
Audio-only - AAC Format
After you select this format, AAC files will be generated when audio-only or quasi-audio/video live streams are pushed.
Advanced Configuration Item
Description
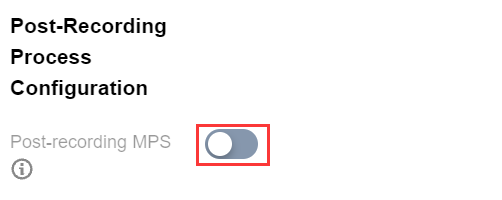
Post-Recording Process Configuration
The post-recording MPS feature is disabled by default. You can manually enable this feature based on your business needs.
After enabling the post-recording MPS, no post-recording process content is selected by default. You need to manually select the corresponding process content.
When HLS, FLV, MP4, and AAC audio and video formats are enabled with post-recording processing, MPS orchestration cannot be empty.
After enabling the post-recording MPS, you can use the MPS orchestration to transcode, repackage, and perform a series of other post-processing services on the original recording files. The storage setting for the processed files is determined by the MPS orchestration task settings, while the original recording files are still retained.
You can cancel or change the MPS orchestration . You can click to select the bound MPS orchestration and choose an orchestration already created under the MPS orchestration application, or click the orchestration name on the current MPS orchestration selection page to go to the MPS console to add/modify the orchestration configuration.
After the orchestration is successfully bound, the MPS template will be executed after the recording file is generated, incurring corresponding Media Processing fees.
Upload while recording
The upload while recording feature is disabled by default. You can manually enable this feature based on your business needs.
Currently, only the FLV format supports the upload while recording feature . Once enabled, it allows immediate upload of files after recording ends, supports a recording file duration of up to 12 hours, and enhances FLV recording's disaster recovery capability. Playback files may experience lag when being dragged for online playback, but this does not affect local playback.
Binding a Domain Name
1. Log in to the CSS console, select Feature Configuration > Live Recording on the left sidebar, and click Save to COS.
Bind a domain to an existing template: Click Bind Domain Name in the top left.
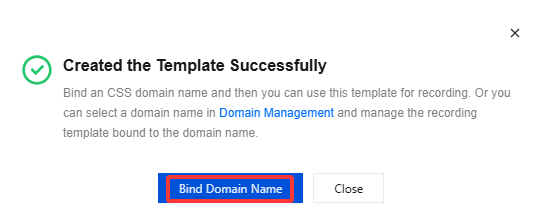
Bind a domain after creating a template: After creating a template, click Bind Domain Name in the dialog box that pops up.
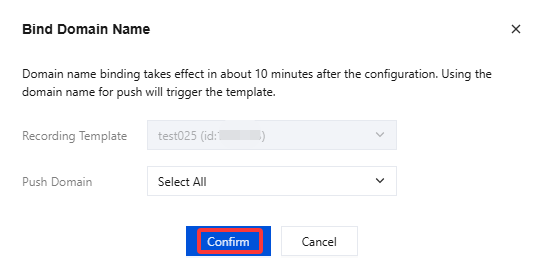
2. In the pop-up window, select a Recording template and a Push domainname(Multiple push domain names can be bound simultaneously) and then click Confirm.
Unbinding a Domain Name
1. Log in to the CSS console, select Feature Configuration >Live Recording on the left sidebar, and click Save to COS.
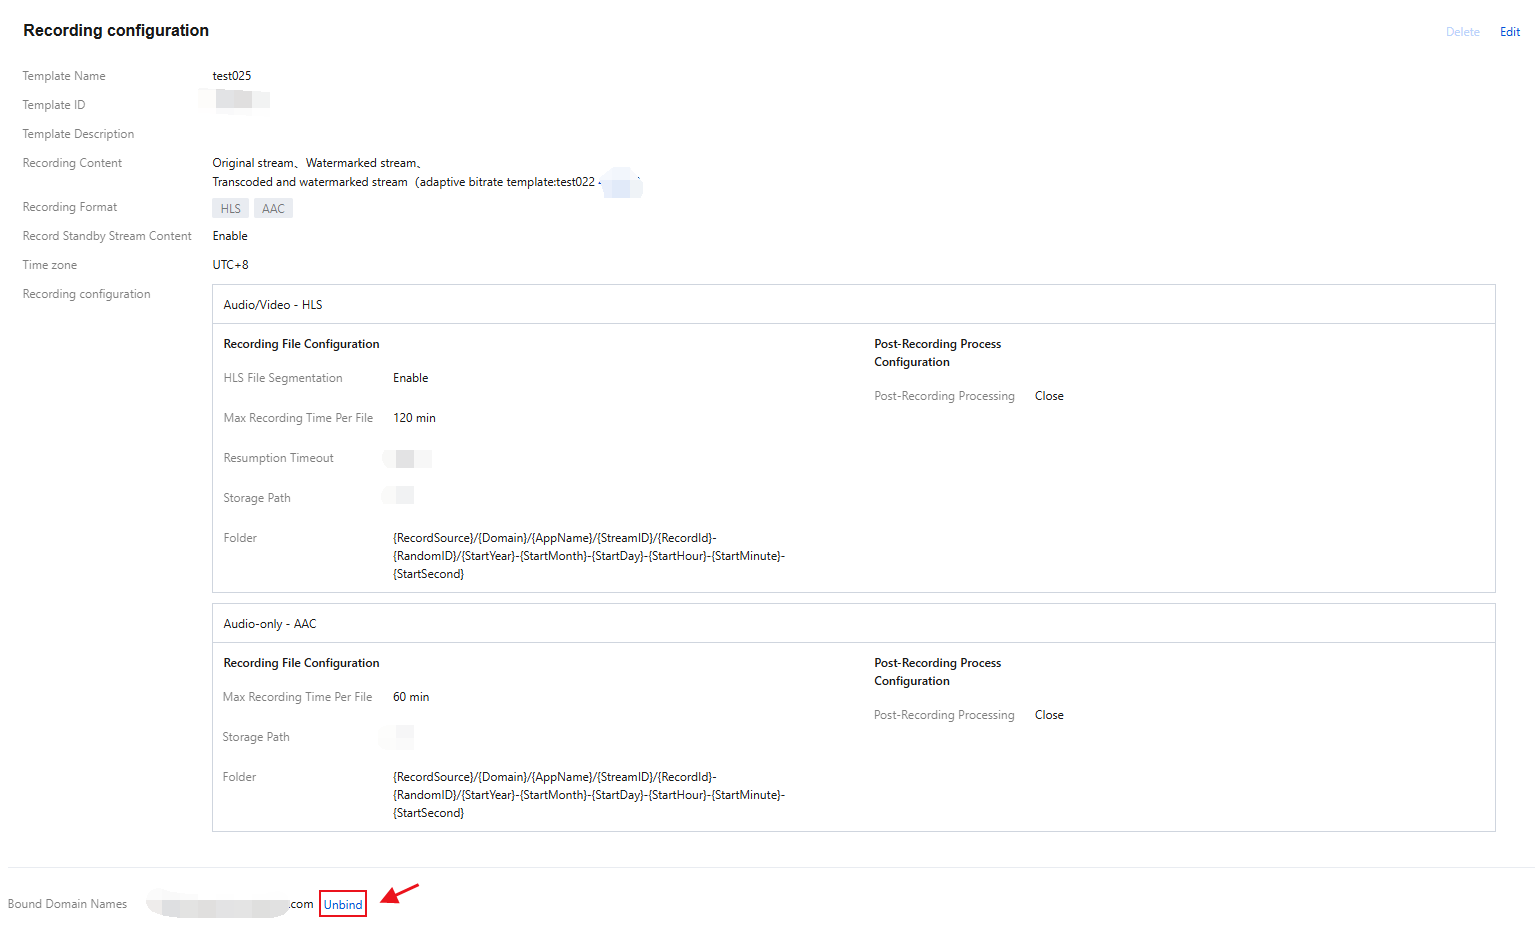
2. Select a recording template bound with domain names, find the target domain name, and click Unbind.
3. In the pop-up window, click Confirm.
Note:
Unbinding the recording template will not affect ongoing live streams.
To cancel recording for ongoing streams, stop the streams and push them again.
Modifying a Template
1. Go to Feature Configuration > Live Recording and select Save to COS.
2. Select the target recording template and click Edit on the right to modify the template information.
3. Click Save.
Deleting a Template
Note:
If the template has been associated, you need to first unbind it before you can delete it.
Once a template is deleted, it cannot be restored. Please proceed with caution.
The management of recording templates in the console is at the domain name level, and currently, it is impossible to cancel the rules created by the associated interface. If you have associated a specific stream through the recording management interface, you will need to call Delete Recording Rule to unbind it.
1. Log in to the CSS console, select Feature Configuration >Live Recording on the left sidebar, and click Save to COS.
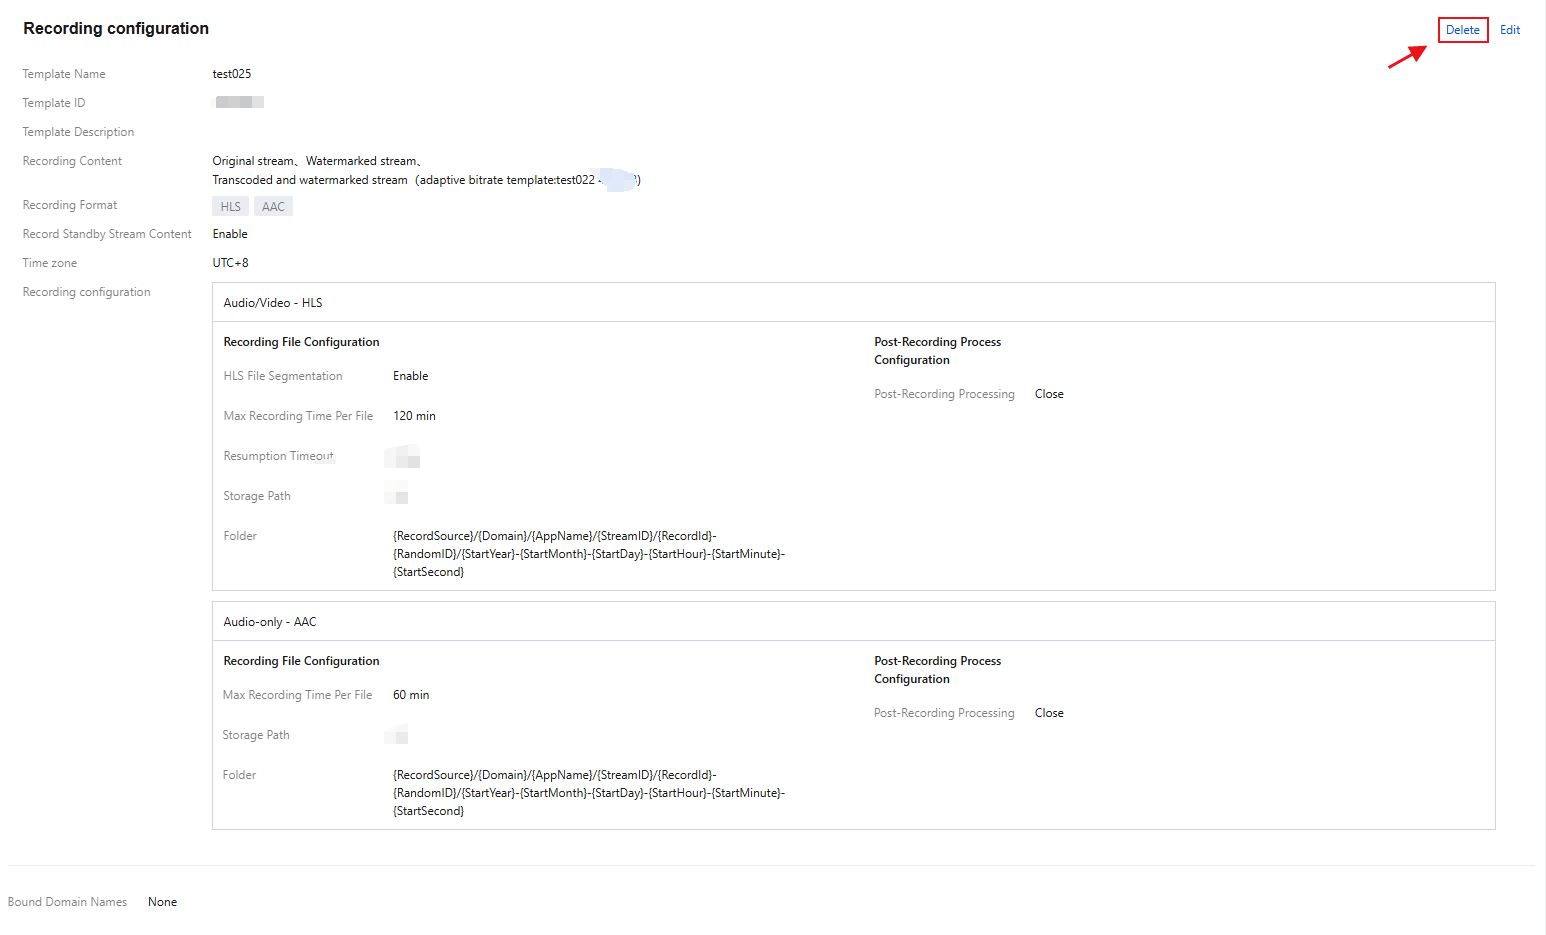
2. Select the target recording template, and click Delete in the upper right.
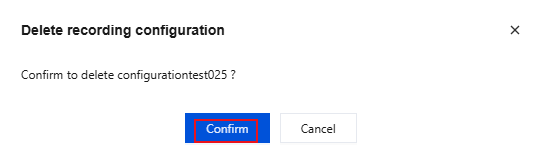
3. In the pop-up window, click Confirm.
More
You can also unbind and bind domains and recording templates on the Domain Management page. For details, see Recording Configuration.