1. In the left sidebar, click Cluster to go to the Cluster Management page.
2. Click the ID of the target cluster to go to the details page of the cluster.
3. Choose Node Management > Node in the left sidebar to go to the node list page, and click Create Node.
4. On the Create Node page, configure the parameters as instructed below.
The main parameters are described as follows:
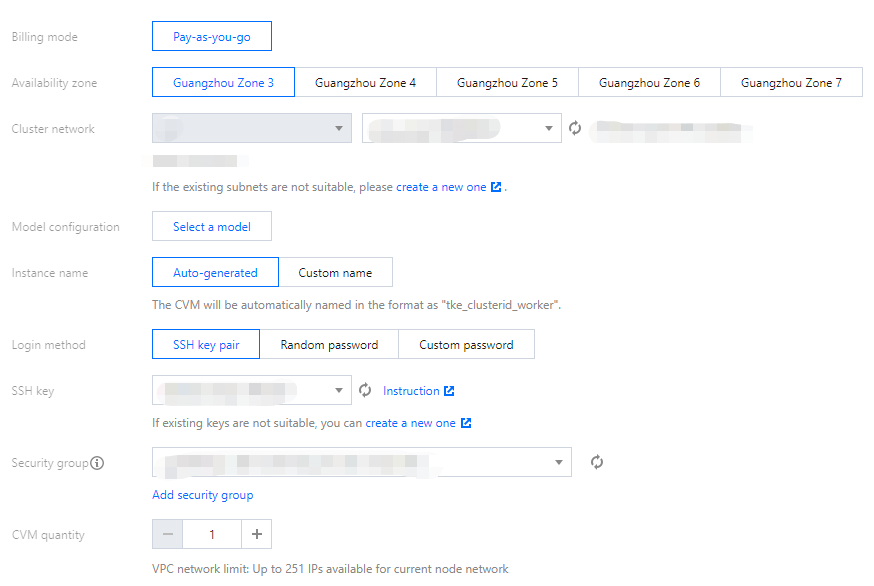
Billing Mode: Pay-as-you-go is supported. For more information, see Billing Plans.
Availability Zone: This parameter is used to filter the available subnet list under the available zone.
Cluster Network: Select the subnet that assigns IP to the created node. A single node creation only supports a single subnet.
Model Configuration: Click Select a Model. On the Model Configuration page, select the values as needed based on the following descriptions:
Model: Select the model by specifying the number of CPU cores, memory size, and instance type. For more information, see Families and Models.
System disk: Controls the storage and schedules the operating of Cloud Virtual Machines (CVMs). You can view the system disk types available for the selected model and select the system disk as required. For more information, see Cloud Disk Types.
Data disk: Stores all user data.
Instance Name: The CVM instance name displayed on the console, which is determined by the naming mode of host name. The following two naming methods are provided:
Auto-generated: The host name will be automatically named. It supports sequential numbering or custom format for multiple instances. Up to 60 characters allowed. The instance name is automatically generated by default in the format of tke_cluster id_worker.
Custom Name: The host name is manually configured. The instance name is the same as the host name without reconfiguration.
Login Method: Select any one of the following login methods as required:
SSH Key Pair: A key pair is a pair of parameters generated by an algorithm. It is a way to log in to a CVM instance that is more secure than regular passwords. For more details, see SSH Key.
SSH Key: This parameter displays only when SSH Key Pair is selected. Select an existing key in the drop-down list. For how to create a key, see Creating an SSH key.
Random Password: The system sends an automatically generated password to your Message Center.
Custom Password: Set a password as prompted.
Security Group: The default value is the security group specified when the cluster is created. You can replace the security group or add a security group as required.
Amount: Specify the desired capacity as needed.
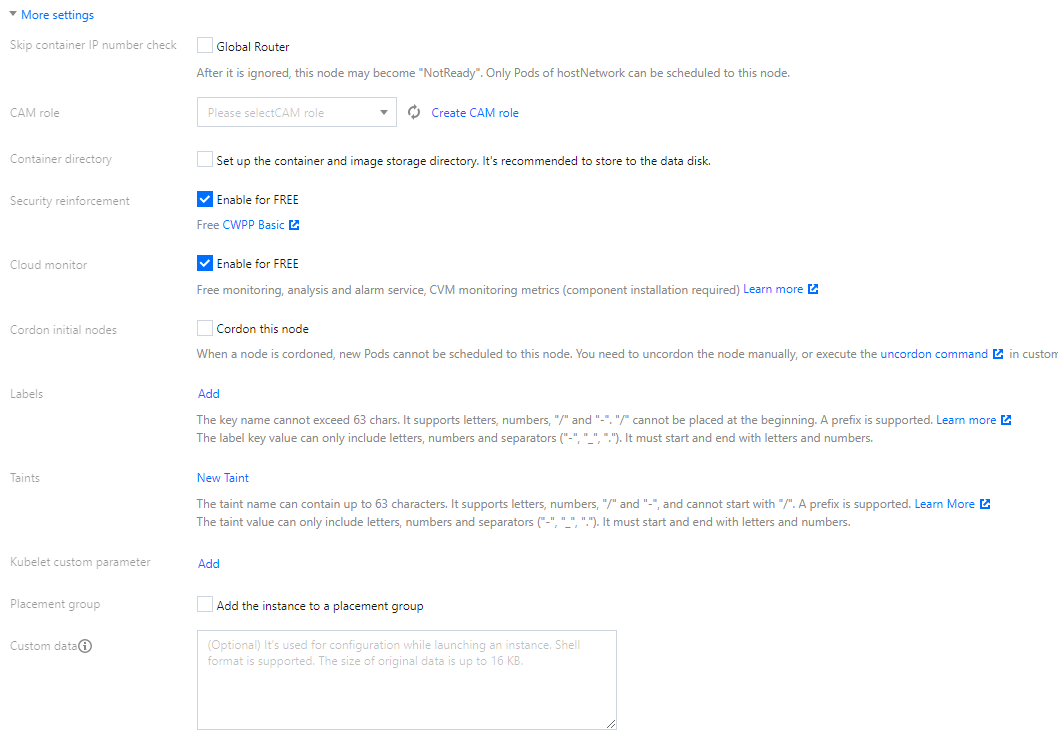
5. (Optional) Click More Settings on the Create Node page to view or configure more information.
CAM Role: You can bind all the nodes created this time to the same CAM role, and grant the authorization policy bound to the role to the nodes. For more information, see Managing Roles.
Container Directory: Select this option to set up the container and image storage directory. We recommend that you store to the data disk, such as /var/lib/docker.
Security Services: Free DDoS, Web Application Firewall (WAF) and Cloud Workload Protection (CWP) are activated by default. For more information, see Cloud Workload Protection.
Cloud Monitor: Free monitoring, analysis, and alarms are activated by default, and components are installed to obtain CVM monitoring metrics. For more information, see Tencent Cloud Observability Platform.
Cordon initial nodes: After you check Cordon this node, new Pods cannot be scheduled to this node. You can uncordon the node manually, or execute the uncordon command in custom data as needed.
Label: Click New Label to custom a label, which is used to filter or manage nodes.
Custom Data: Specify custom data to configure the node, that is, to run the configured script when the node is started up. You need to ensure the reentrant and retry logic of the script. The script and its log files can be viewed at the node path: /usr/local/qcloud/tke/userscript.
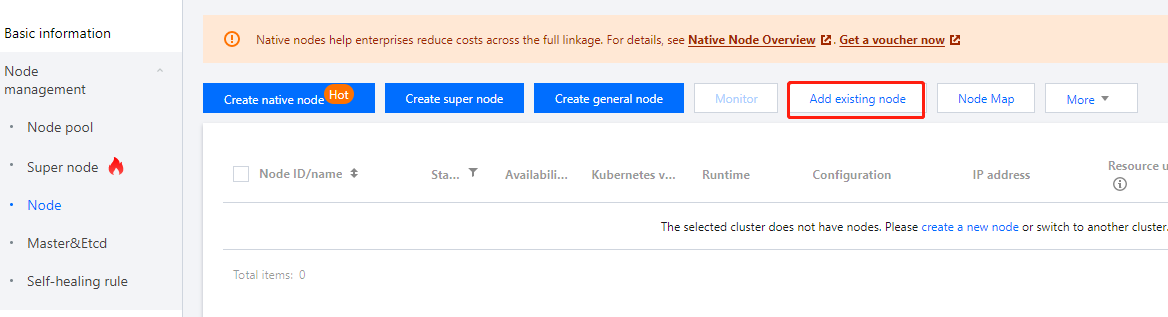
Adding an existing node
Note
Only CVM instances in the same VPC can be added to a cluster.
Do not add public gateway CVMs to the cluster. A DNS exception occurs when this type of CVM is reinstalled and added to the cluster, and the node becomes unavailable.
1. In the left sidebar, click Cluster to go to the Cluster Management page.
2. Click the ID of the target cluster to go to the details page of that cluster.
3. Choose Node Management > Node to go to the node list page, and click Add Existing Node.
4. On the Select Nodes page, select the node to add and click Next.
5. On the CVM Configuration page, configure the CVM instance to add to the cluster.
Mount Data Disk: The related settings for formatting the mounting. Enter the device name and mount point, and select whether to format the system or not.
Note
If you need to mount NVMe data disks to a high I/O, high-performance HCC model, you are advised to set file system volume labels for the data disks and add them to the cluster independently, without adding them to other models at the same time.
Back up the important data in advance. If you have formatted the disk, you don’t need to format the system, just enter the mount point.
The settings for formatting the mounting will take effect for the selected nodes. Please ensure that the entered device name, for example, /dev/vdb meets your expectations (If you have performed hot swapping and other operations on CBS, the device name may change).
If you have created partitions or are using LVM, please enter the partition name or logical volume name in the device name, and configure the corresponding parameters for formatting the mounting.
If you enter the incorrect device name, an error will occur and the node initialization will be terminated.
If the entered mount point does not exist, a corresponding directory will be created, and no error will occur.
Do not check: Do not set the data disk mounting. You can manually mount or use the script to mount.
Check: You need to set the device name, format system (you can select Do not format), and mount point. If you want to format the device "/dev/vdb" into "ext4" and mount it to the /var/lib/docker directory, you can set the device name to /dev/vdb, select ext4 for the format system, and set the mount point to /var/lib/docker.
Container Directory: Set up the container and image storage directory. It's recommended to store to the data disk.
Operating System: You can modify the OS setting in the cluster details page. After the modification, the newly added or reinstalled nodes will use the new operating system.
Login Method:
Custom Password: Set a password as prompted.
SSH Key Pair: A key pair is a pair of parameters generated by an algorithm. Logging in to a CVM using a key pair is more secure than using regular passwords. For more information, see SSH Keys.
Random Password: A password will be automatically generated and sent to you through the Message Center.
Security Group: Configure network access control for the CVM instance as needed. You can click Add Security Group to open other ports to the internet.