驱逐或封锁节点
Download
聚焦模式
字号
操作场景
本文档指导您如何驱逐或封锁节点。
操作步骤
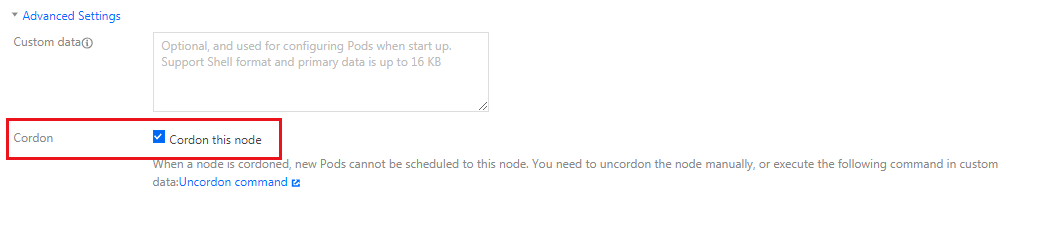
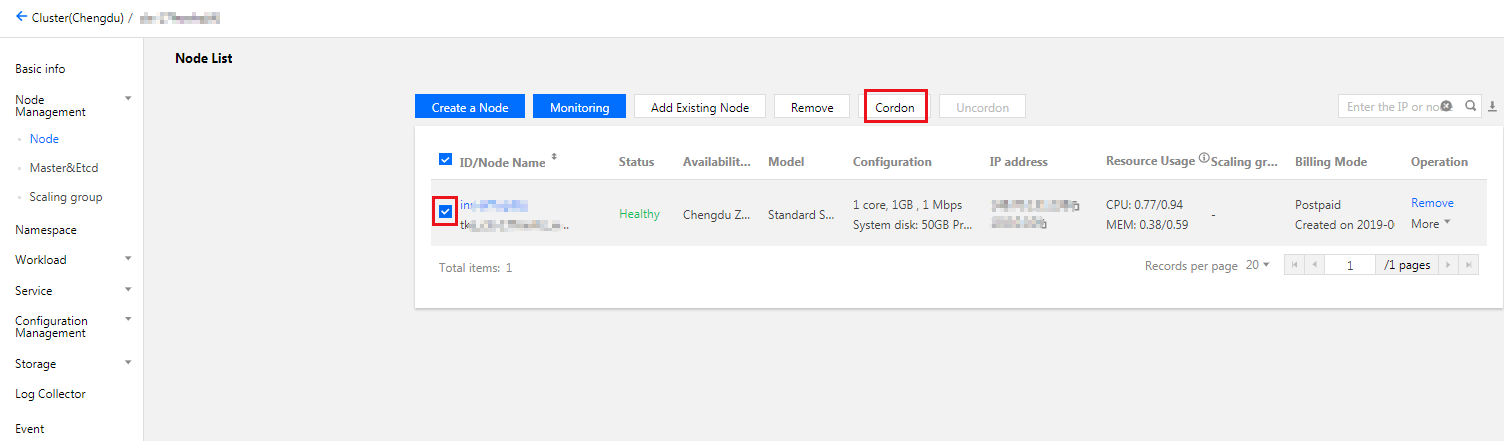
封锁节点
封锁(cordon)节点后,将不接受新的 Pod 调度到该节点,您需要手动取消封锁的节点。封锁节点后,如果节点之前已被 CLB 绑定作为后端目标节点,节点将从目标节点列表中移除。封锁节点有以下两种方法:

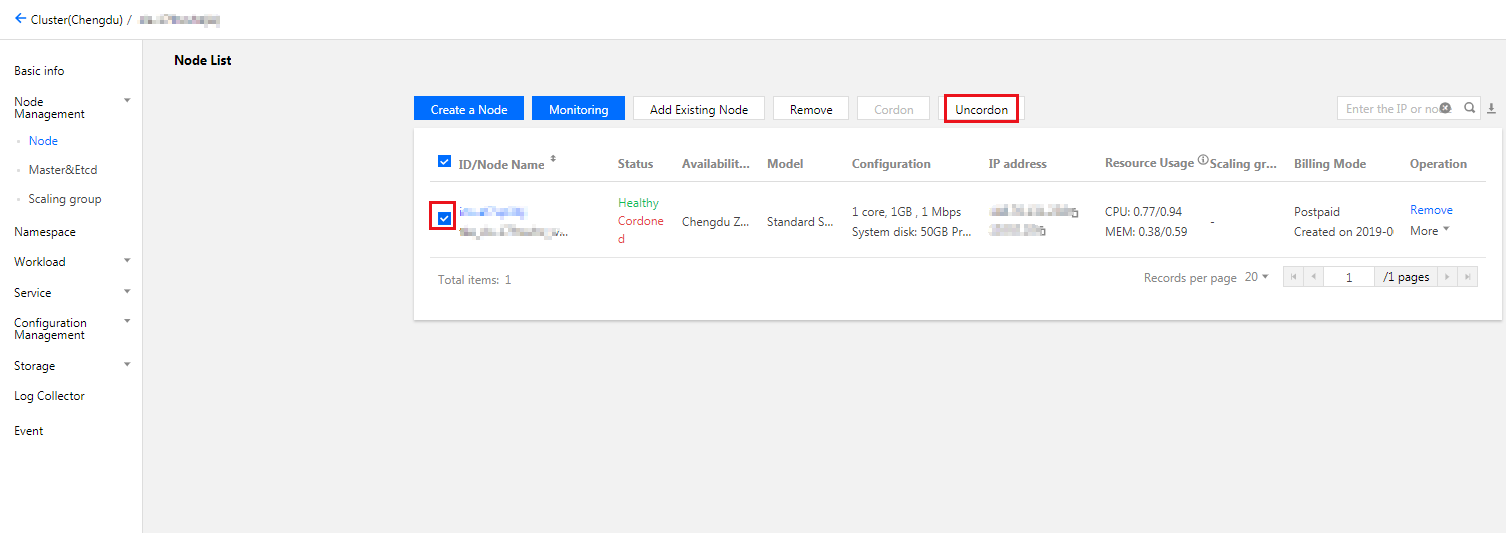
取消封锁节点
取消封锁(uncordon)节点后,将允许新的 Pod 调度到该节点。取消封锁有以下两种方法:
通过执行脚本的方式新增节点时,您可以在该脚本中添加取消封锁节点的命令,即可取消封锁。其示例如下:
#!/bin/sh# your initialization scriptecho "hello world!"# If you set unschedulable when you create a node,# after executing your initialization script,# use the following command to make the node schedulable.node=`ps -ef|grep kubelet|grep -oE 'hostname-override=\\S+'|cut -d"=" -f2`#echo ${node}kubectl uncordon ${node} --kubeconfig=/root/.kube/config
kubectl uncordon 命令即表示取消封锁节点。
驱逐节点
概述
在节点上执行维护之前,您可以通过驱逐(drain)节点安全地从节点中逐出 Pod。节点驱逐后,自动将节点内的所有 Pod(不包含 DaemonSet 管理的 Pod)驱逐到集群内其他节点上,并将驱逐的节点设置为封锁状态。
注意:
本地存储的 Pod 被驱逐后数据将丢失,请谨慎操作。
操作方法
1. 登录 容器服务控制台。
2. 在左侧导航栏中,单击 集群,进入集群管理页面。
3. 单击需要驱逐节点的集群 ID/名称,进入该集群的管理页面。如下图所示:
4. 在左侧导航栏中,选择节点管理 > 节点,进入节点列表页面。
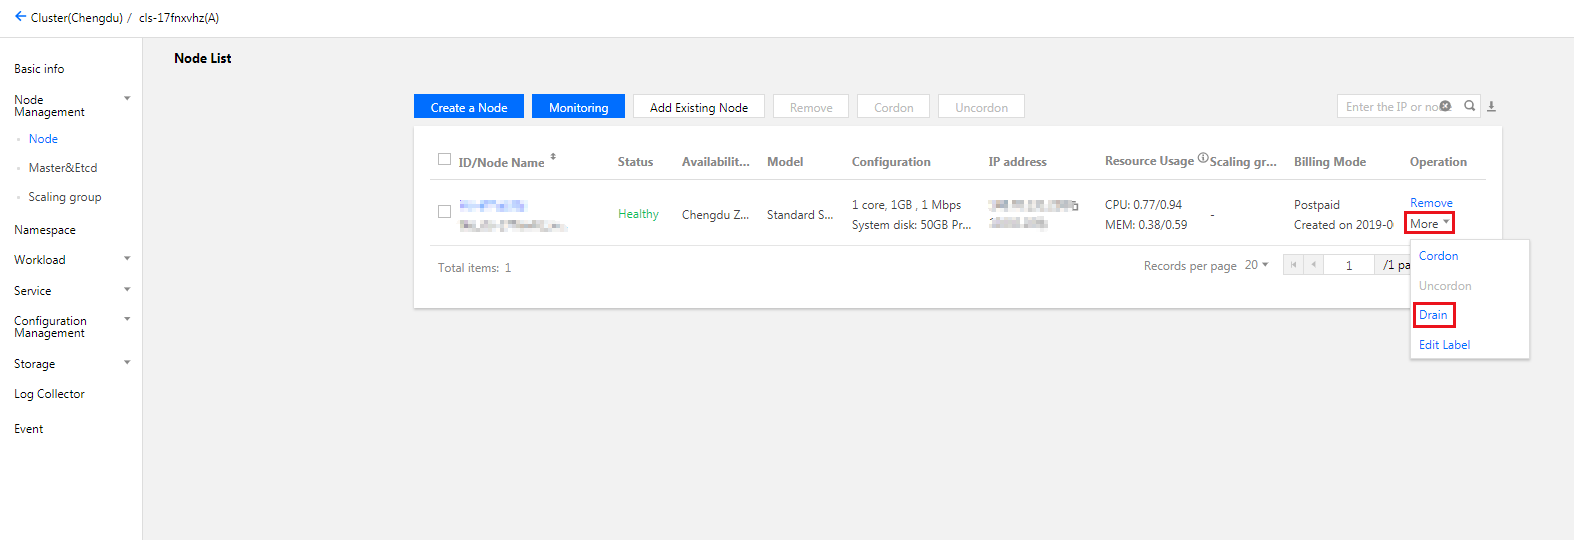
5. 在需要驱逐节点的节点行中,单击更多 > 驱逐。如下图所示:
6. 在弹出的对话框中,单击确定,即可完成驱逐。
文档反馈