This document describes how image cache works and its billing rules, creation, and usage method. You can use image cache to accelerate image pull during instance creation so as to expedite instance startup. This capability is applicable to TKE Serverless cluster Pods and super nodes.
How it Works
When image cache accelerates instance startup, it will start a container instance in advance to pull the image, store the image in a data disk with a customizable size, and use the data disk as the cache of cloud disk snapshot, that is, the image data is already stored in the snapshot. You can choose to automatically or manually match the image cache when creating a container instance or Pod, and the specified number of data disks will be created based on the image snapshot and directly mounted to the instance to avoid image layer download, speeding up container instance and Pod creation.
Compared with the image reuse capability, image cache has the following strengths:
It has no time limit and is only subject to the lifecycle of the image cache (snapshot).
You only need to cold start a Pod in advance, which will be terminated immediately after snapshot creation.
It has no limit on AZs, as AZs will be automatically matched during cloud disk creation based on snapshot.
It has no limit on workloads, as workloads in the same region can be matched.
Billing Overview
The following resources are involved when you create an image cache, and their billing rules are as detailed below:
Billable Items
Billing Description
Documentation
Image cache
When you create an image cache, you need to run a 2C4G container instance to pull the image. After image cache creation, the container instance will be automatically released, and its billing will stop.
When you create an image cache, you need to bind a Premium Cloud Storage data disk to store the image. The disk size is customizable and 20 GB by default. After image cache creation, the data disk will be automatically released, and its billing will stop.
A snapshot will be created based on the above-mentioned data disk, and its lifecycle will be the same as that of the image cache. It is billed by usage duration and capacity.
When the image cache is used, a Premium Cloud Storage data disk with the same capacity will be created based on the matched image cache snapshot and bound to the Pod. Therefore, in addition to the Pod creation fees, data disk fees will also be incurred.
Data disk fees = Capacity * Unit price * Instance running duration
2. Select Application > Image Cache in the left sidebar, On the Image Cache page that appears, click Create instance.
3. On the Create image cache page, configure relevant parameters.
Instance name: Custom.
Region: Select as needed.
Container network: Assign IPs within the container IP range to the container instances.
Security group: It has the capability of a firewall and can limit the network communication of the instance. Default value: default.
Operating system: Select Windows or Linux.
Image: Select the image and version to be cached as needed.
Image credentials: When you select Docker Hub or a private image in a third-party image repository, you must enter the image credentials, i.e., access address, username, and password of the repository.
Advanced settings:
Cache size: It determines the size of the snapshot and the data disk bound during instance creation.
Note:
The image size displayed in the image repository is the size of the compressed data. Creating an image cache involves pulling and expanding the image. If the image or image compression ratio is too large, the default 20 GB data disk will be insufficient, so a larger data disk space is recommended.
Expiration policy: Select the retention duration of the image cache, which is "Permanent" by default.
4. Click Create instance. After the image cache is created, it will be displayed in the image cache list. You can click the event name to view the creation progress.
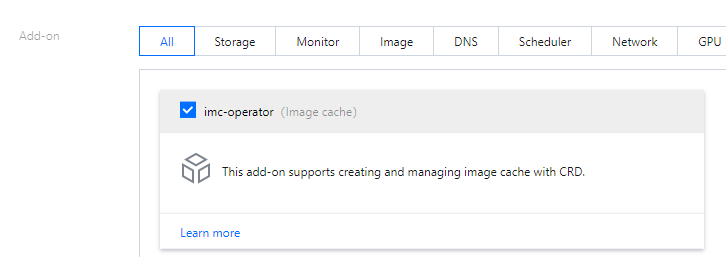
Creating image cache with CRD
The image cache add-on needs to be installed in the cluster if you want to create an image cache with CRD. After the add-on is installed, you can use Tencent Cloud image cache with the method of CRD+Controller without the need to call the cloud API. The steps are as follows:
If there are any exception, you can check the events:
kubectl describe imc xxx
Using an existing image cache
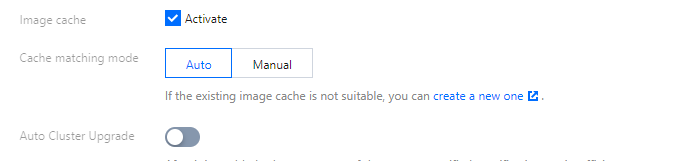
When you create a Pod in a Serverless cluster, you can enable image cache in Advanced Settings on the Create Workload page.
Two image cache match methods, Automatic match and Manual match, are supported. Select one as needed.
Automatic match
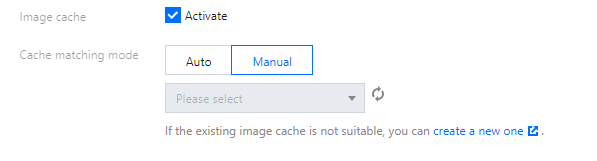
Manual match
If you select Automatic match, the optimal image cache will be matched automatically according to the following match policy:
If the image names and versions are completely the same, the image cache can be matched.
Images with a smaller cache size will be matched first.
Images with a later creation time will be matched first.
Note
If the versions are both "nginx: latest", the image cache can still be matched; however, as the creation time may be different, the versions may be inconsistent. Therefore, we recommend you specify the version clearly when creating an image cache and instance.
If the corresponding image cache fails to be matched, an image will be pulled normally.
If you select Manual match, you need to manually select a specific image cache. Note that after you manually specify an image cache, a data disk will be directly created based on the image cache snapshot and bound to the instance. However, if the data disk does not have the image entered during instance creation (that is, an incorrect image cache is specified manually), an image will be pulled from the newly created data disk.
You can specify a Pod annotation to use an image cache on super nodes in TKE clusters. For more information, see super node Annotation.
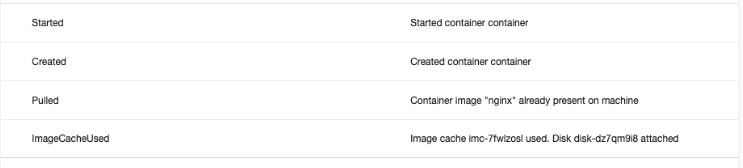
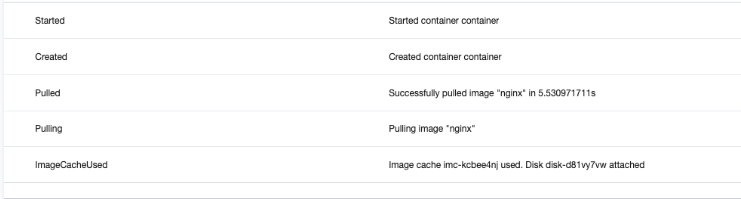
You can check whether the match succeeds in the instance creation event.
If the image cache is matched successfully, the following event will be displayed:
If this event is not displayed, no appropriate image caches have been matched.
Note that if you choose to manually match an image cache but it fails to be matched, an image will be pulled from the newly created data disk, and the following event will be displayed: