This article describes how to use the edgectl script to add user's third-party nodes to an edge cluster. Unlike CVMs and ECMs, these nodes belong to the user and may be located in the user's IDC room, office, or various types of edge regions. These machines can access Tencent Cloud services over the Internet. In this scenario, users can download the edgectl script from the cloud and execute it locally to add the node to the edge cluster.
The following operating systems are supported (tested and adapted for use):
Ubuntu 20.04/18.04/16.04
CentOS 8.0/7.8/7.6/7.2
TencentOS Server 3.2/3.1/2.6/2.4
Tencent Linux Release 2.2 (Final)
Debian 10.2/9.0
SUSE Linux Enterprise Server 12 SP3
Please ensure that the node you want to add has installed wget, systemctl, and iptables.
The node's network needs to have the ability to access the internet actively.
Note:
Due to different operating system environments deployed by different users, it is not ruled out that certain configurations may affect the successful addition of nodes. In this case, please check the deployment log of edgectl on the node (/tmp/tkeedge-install.log) for detailed troubleshooting.
2. On the Cluster Management page, click on the Edge Cluster ID that needs to add an edge node to enter the details page of that cluster.
3. Select "Node Management" > "Nodes" on the left side of the page and enter the node list page. Click "Script to Add Node".
4. In the "Add Edge Node" window that pops up, configure according to the following steps to obtain the initialization script for the node.
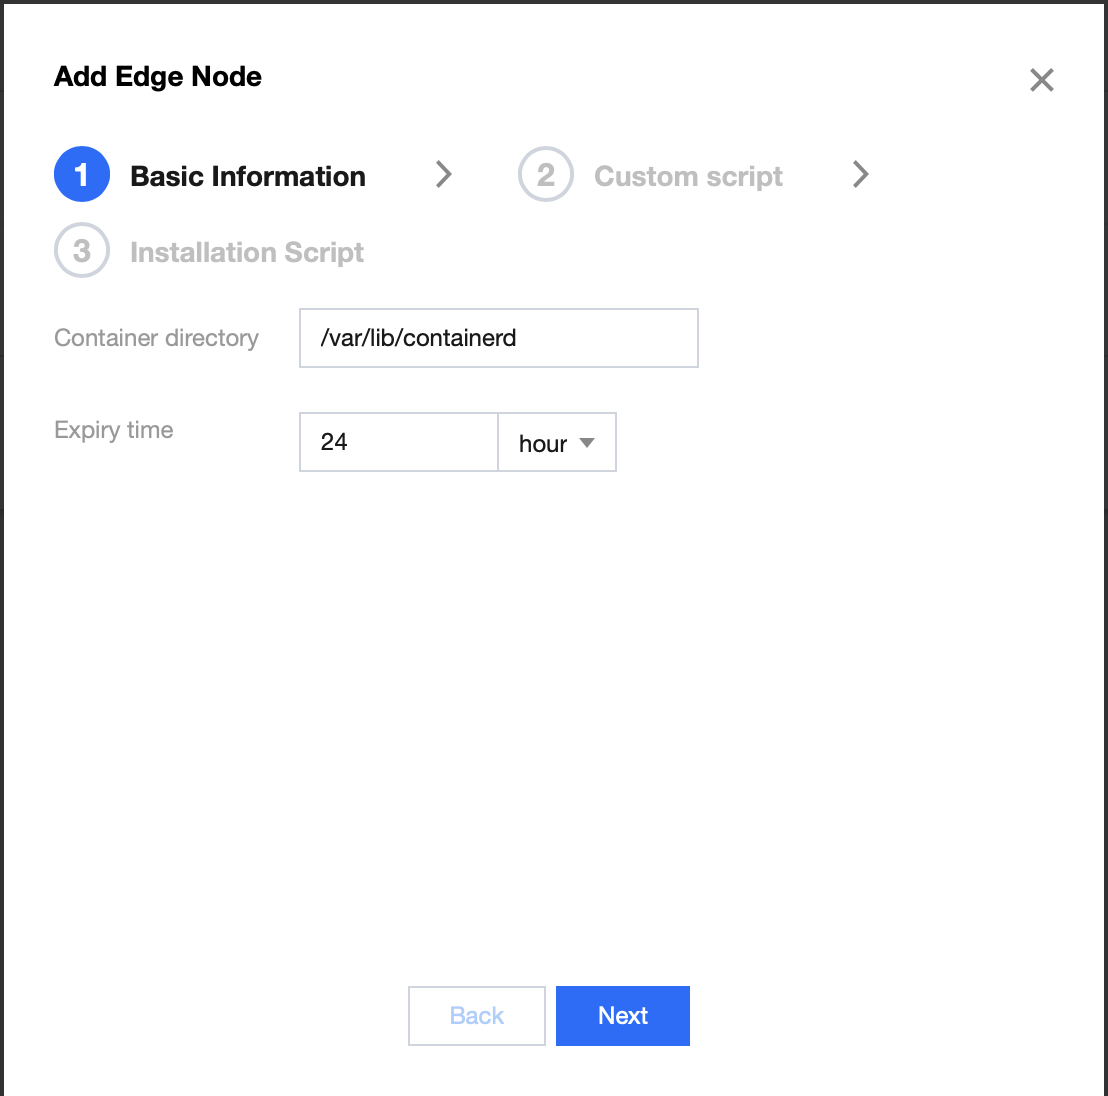
4.1 In the "Configuration" step, obtain the initial configuration and modify parameter values as follows:
Container directory: Set the container and image storage directory, it is recommended to store it in the data disk, for example /var/lib/docker.
Expiration time: Set the expiration time of the "installation script" command, the configurable range is from 1 minute to 24 hours, and the default configuration is 24 hours.
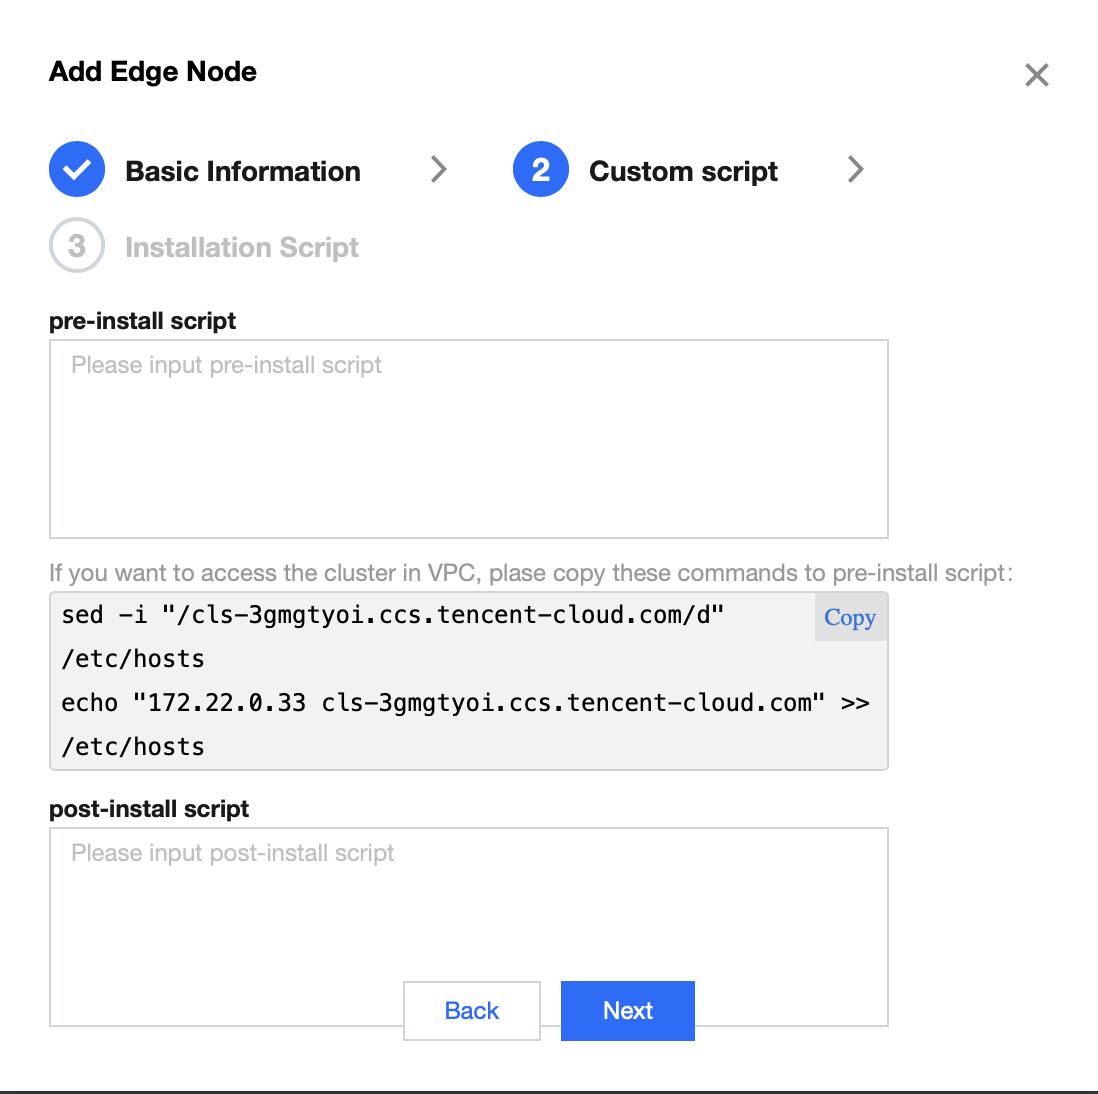
4.2 After clicking "Next", add custom scripts:
pre-install script: Here, you can set up pre-installation scripts for node access, which can be used to perform some cleanup or pre-configuration work under special conditions to enhance adaptability in different scenarios.
post-install script: Here, you can set up post-installation scripts for node access, which can be used to perform some subsequent cleanup or configuration work after the node is successfully added, enhancing adaptability in different scenarios.
Note:
In the above figure, because "Internal Network Access" is enabled, it will prompt for the execution of commands. If the user wants to add CVM nodes through the internal network, please copy and paste these instructions into the pre-install script. If adding nodes through the external network, these instructions can be ignored.
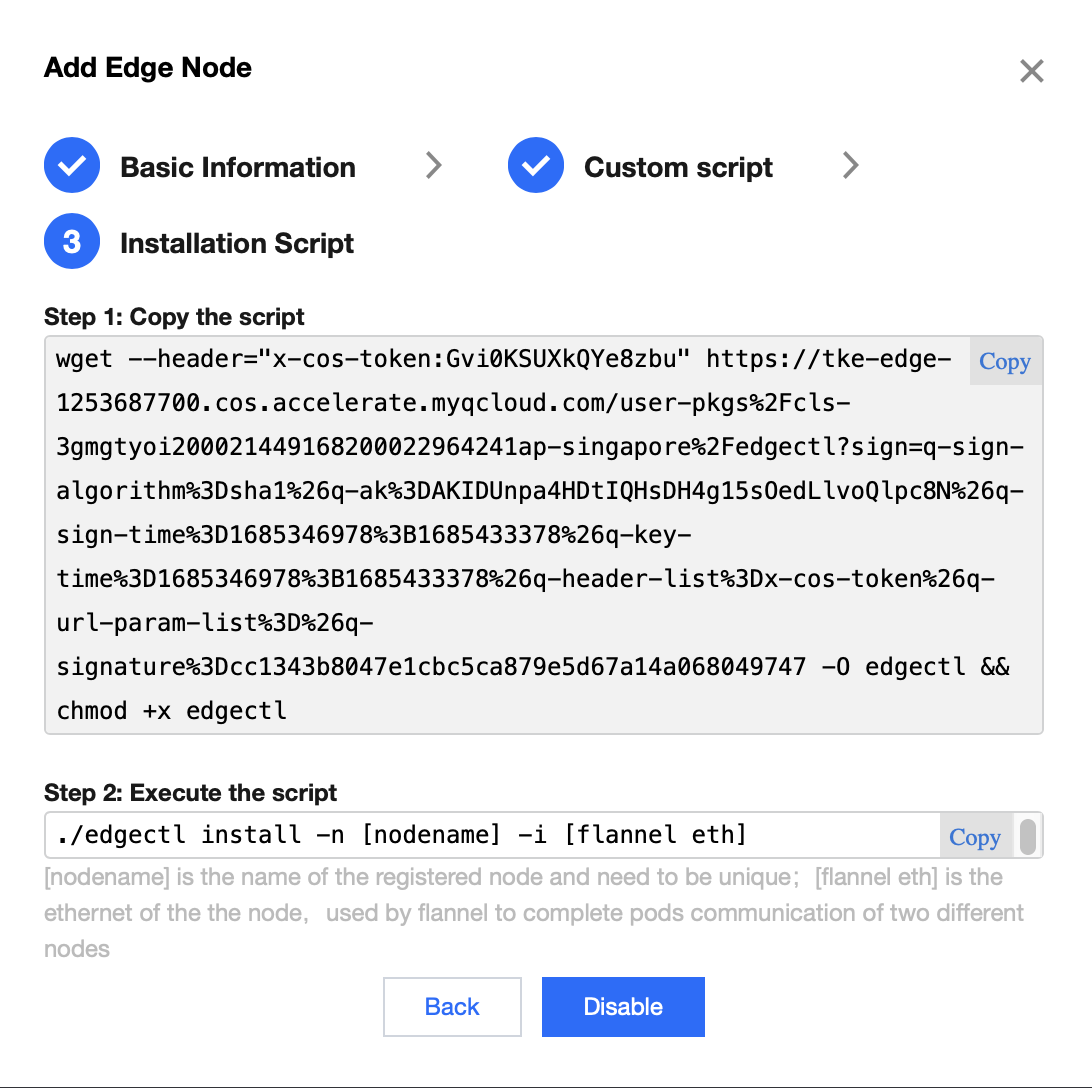
4.3 In the "Generate Installation Script" step, copy the script command to obtain the corresponding node initialization script.
5. Log in to the prepared server and switch to the root account to execute the copied command.
Note:
Executing this command will automatically download the edgectl edge node management tool.
The edgectl obtained in this step is valid for the time period set by the "Expiration Time" parameter. Please complete the node addition within this time period. After the expiration time, please execute the script to add the node operation again to obtain edgectl again.
6. To view the edgectl command, run the "Initialize Node" operation. For more operations with edgectl, please refer to the Edgectl script manual
Executing this command will check the host environment, install the required components for the edge node and automatically register the node to the edge cluster.
Due to network and installation speed factors, adding nodes may take several minutes.
To confirm the installation process information, view the log file at /tmp/tke-edge-install.log.
7. After confirming the command has been executed successfully, go to the "Node List" page and refresh to view the newly added nodes. You can also perform other operations on the node, such as eviction, removal, blocking, editing tags or unblocking.
Related Operations
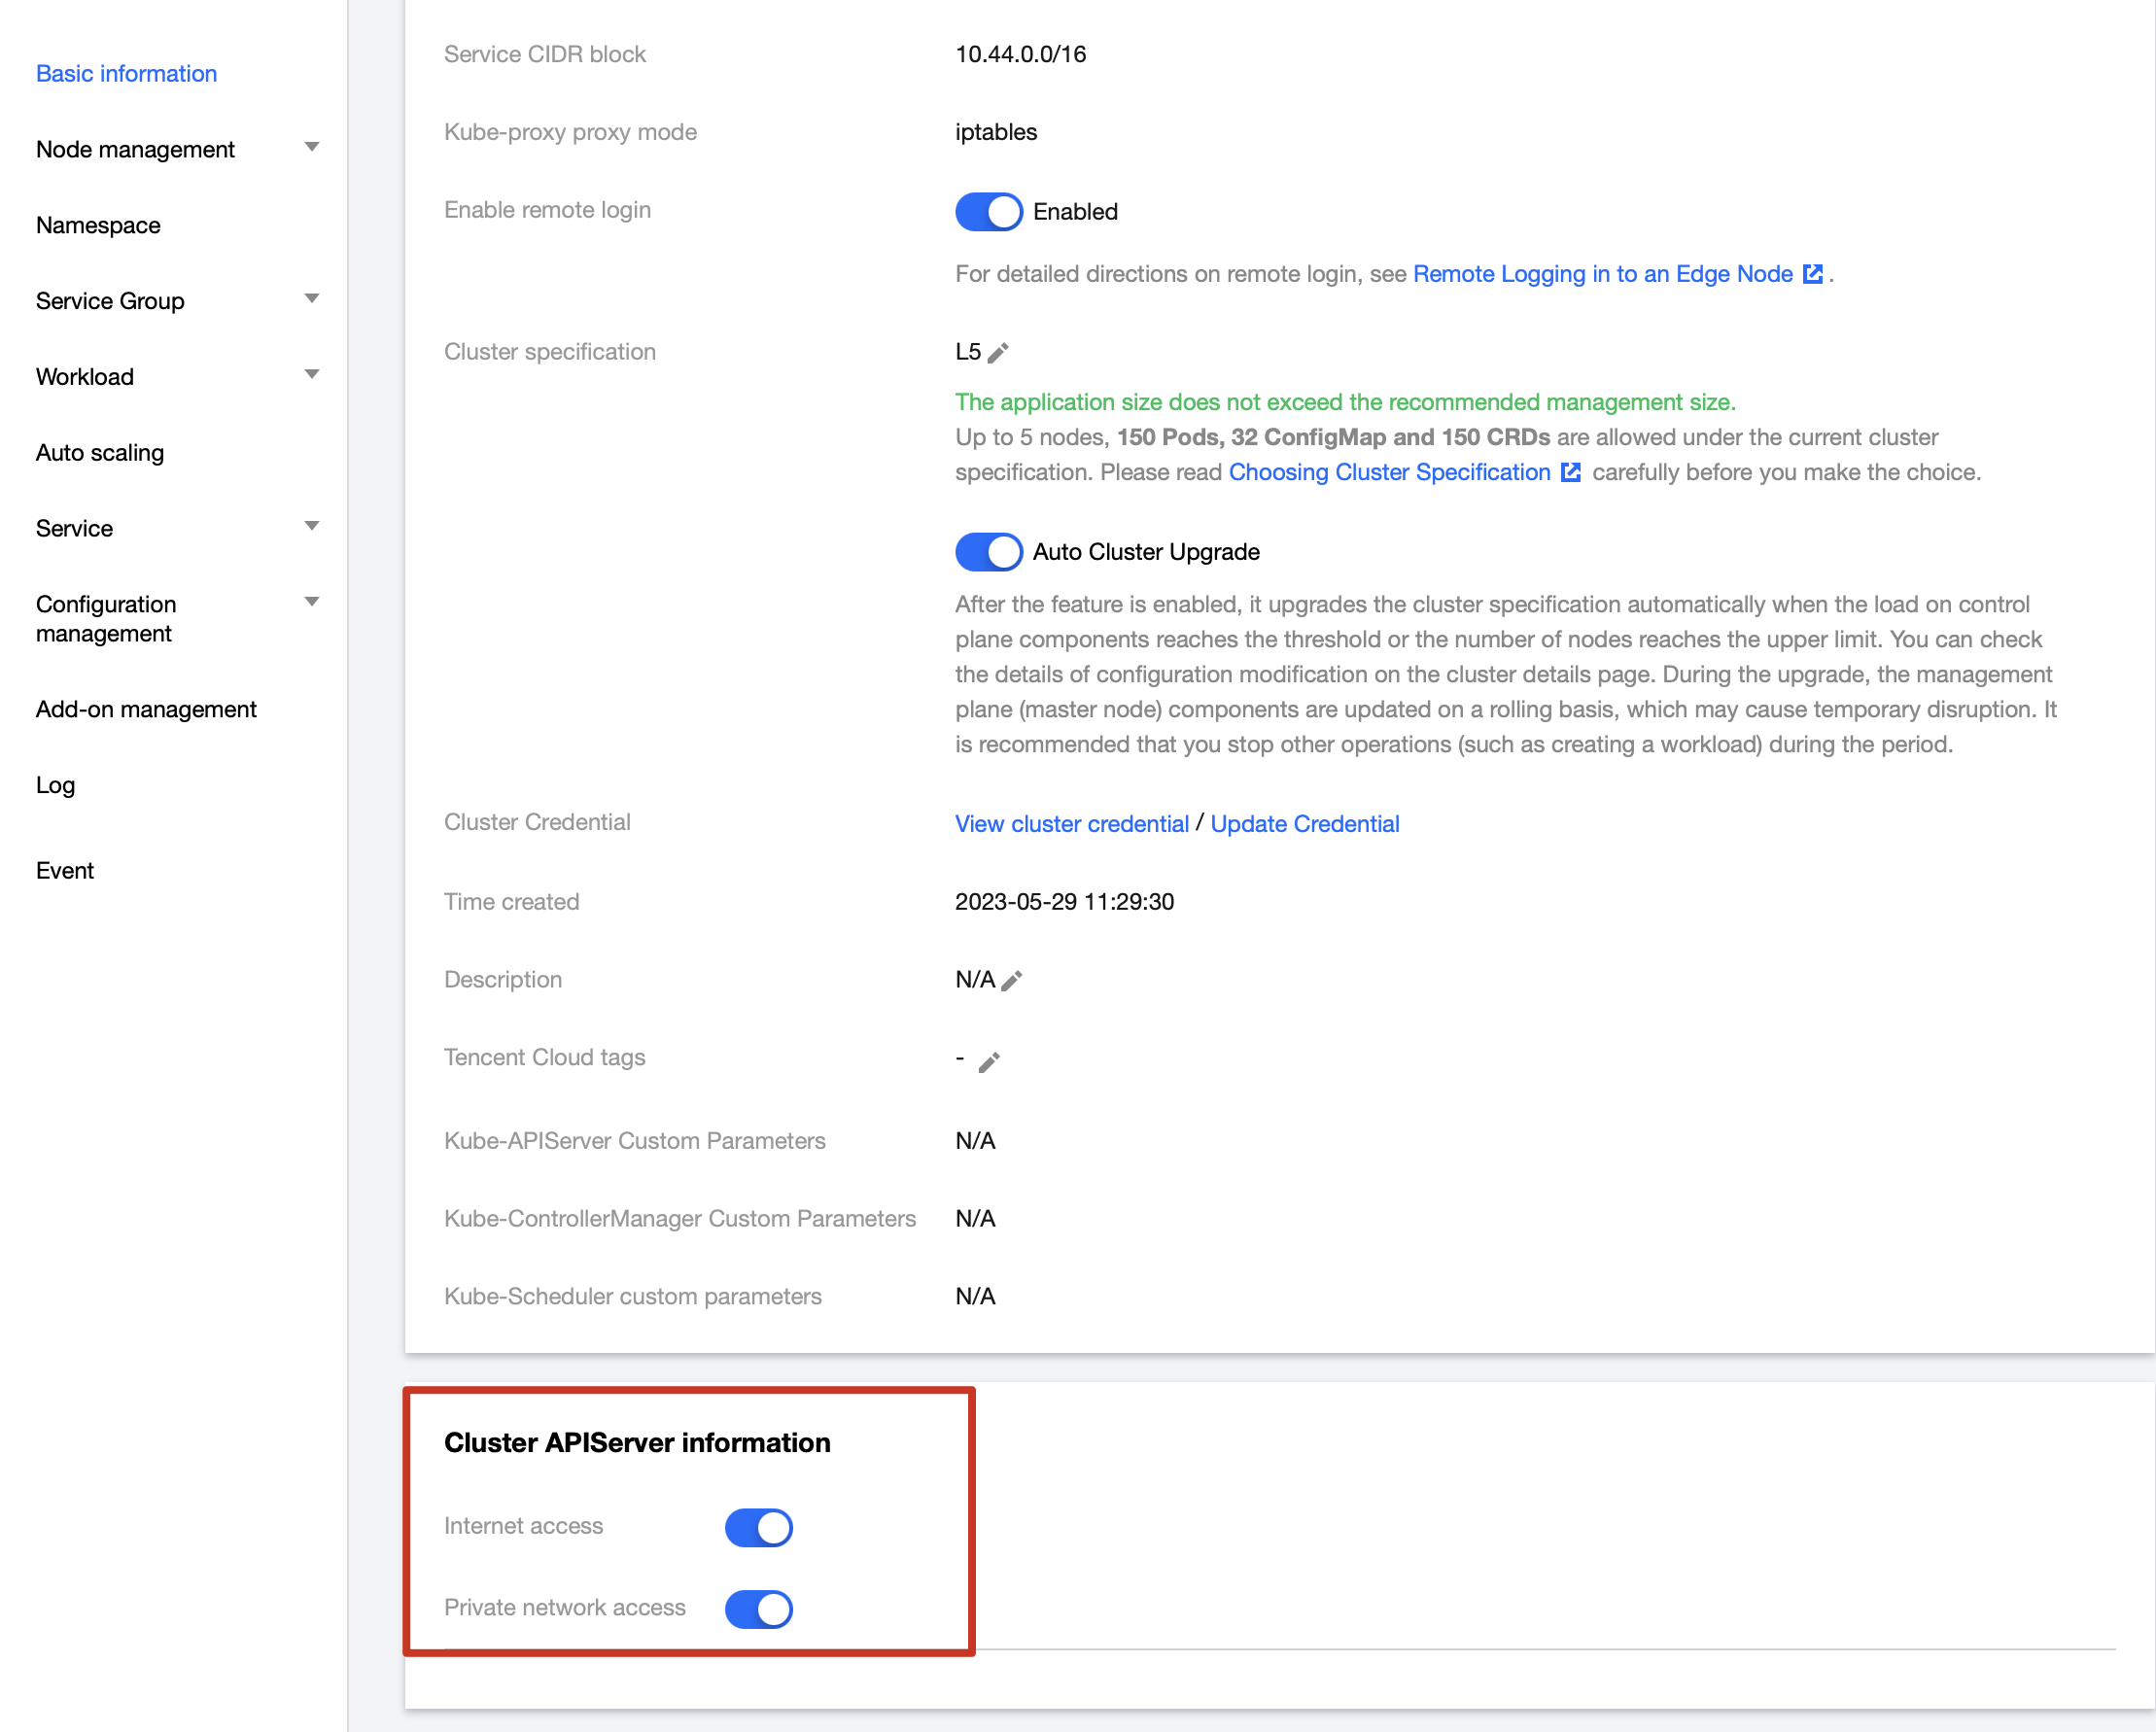
Close cluster Internet and Private access
To disable both external and internal network access to the cluster, go to the "Basic Information" page of the cluster and turn off "Internet Network Access" and "Private Network Access".
Edge Node Authority
1. The edge nodes managed by the edge cluster K8S have the default permission setting of "system:node". For details on the "system:node" permission, please refer to Using Node Authorization.
2. The kubeconfig file on the edge node will use the "system:node" permission by default. If you need to obtain the cluster certificate for operating the cluster, please refer to Connecting a Cluster.
Edge GPU Node
The edge cluster already has a nvidia-device-plugin DaemonSet submitted with image version nvidia-device-plugin:v0.9.0. If an edge node needs to deploy a DaemonSet, execute the following command to automatically deploy it to the corresponding node:
If a corresponding system with an NVIDIA GPU version is used, the edge cluster will automatically install GPU drivers. Users of other systems can install the corresponding GPU drivers themselves.When adding an edge node via script, the edge cluster is not responsible for installing GPU drivers. The user should install the GPU drivers themselves.
To add a CVM node with GPU support via script
For edge nodes added with scripts, the edge cluster is not responsible for installing the GPU driver, which needs to be installed by the user.
Note:
The CVM system version with GPU is a subset of the edge node system. If the system of the edge node does not support this version, adding a CVM node with GPU may fail. Therefore, please follow the requirements of the edge node system carefully.

 Yes
Yes
 No
No
Was this page helpful?