Tencent Cloud TKE-KMS Plugin integrates the rich key management features of Key Management Service (KMS) to provide powerful encryption/decryption capabilities for Secret in Kubernetes cluster. This document describes how to encrypt data for Kubernetes cluster via KMS.
Concepts
Key Management Service (KMS)
Key Management Service (KMS) is a security management solution that leverages a third-party certified hardware security module (HSM) to generate and protect keys so you can easily create and manage keys, helping you to meet your key management and compliance needs in multi-application and multi-business scenarios.
Prerequisites
You have created a TKE self-deployed cluster that meets the following conditions:
Kubernetes v1.10.0 or later.
Etcd v3.0 or later.
Note:
If you want to check the version, you can go to Cluster Management page and select the cluster ID to go to the Basic Information page to view.
Directions
Creating a KMS key and obtaining the ID
1. Log in to the KMS Console, and go to Customer Managed CMK page.
2. At the top of the Customer Managed CMK page, select the region for which you want to create a key, and click Create.
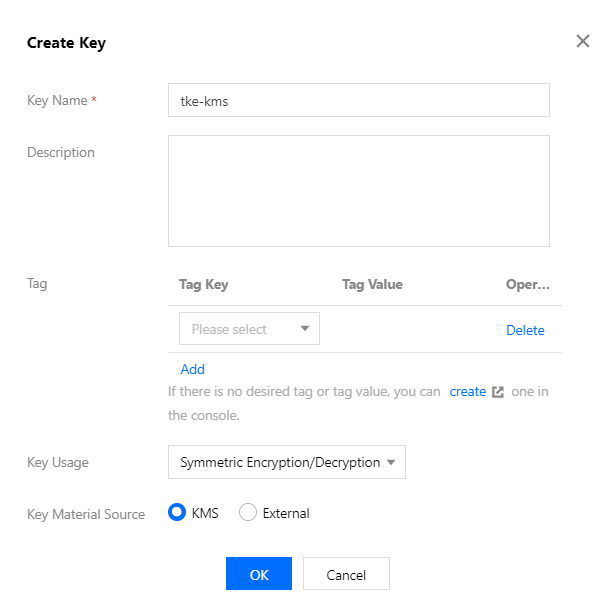
3. On the pop-up window, configure the parameters according to the following information, as shown below:
The key parameters are as follows. Retain the default settings for other parameters.
Key Name: this is required and must be unique within the region. It can contain letters, numbers, _, -, and cannot begin with KMS-. In this document, we take tke-kms as an example.
Description: this is optional and used to specify the type of data to be protected, or the application to be used in conjunction with the CMK.
Key Usage: select Symmetric encryption and decryption.
Key Material Source: select KMS or External based on the actual needs. In this document, we take KMS as an example.
4. Click OK to go back to Customer Managed CMK page to view the created keys.
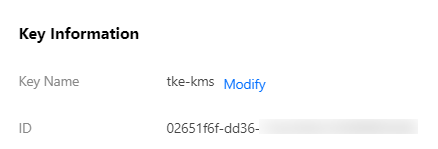
5. Click the key ID to go to Key Information page, you can view the complete ID of the key on this page. See the figure below:
Creating and obtaining access key
Before using TKE for the first time, go to the TencentCloud API Key page to apply for SecretId and SecretKey. If you already have them, skip this procedure.
1. Log in to the CAM console and select Access Key > Manage API Key in the left sidebar to go to the Manage API Key page.
2. On the Manage API Key page, click Create Key to create a pair of SecretId/SecretKey.
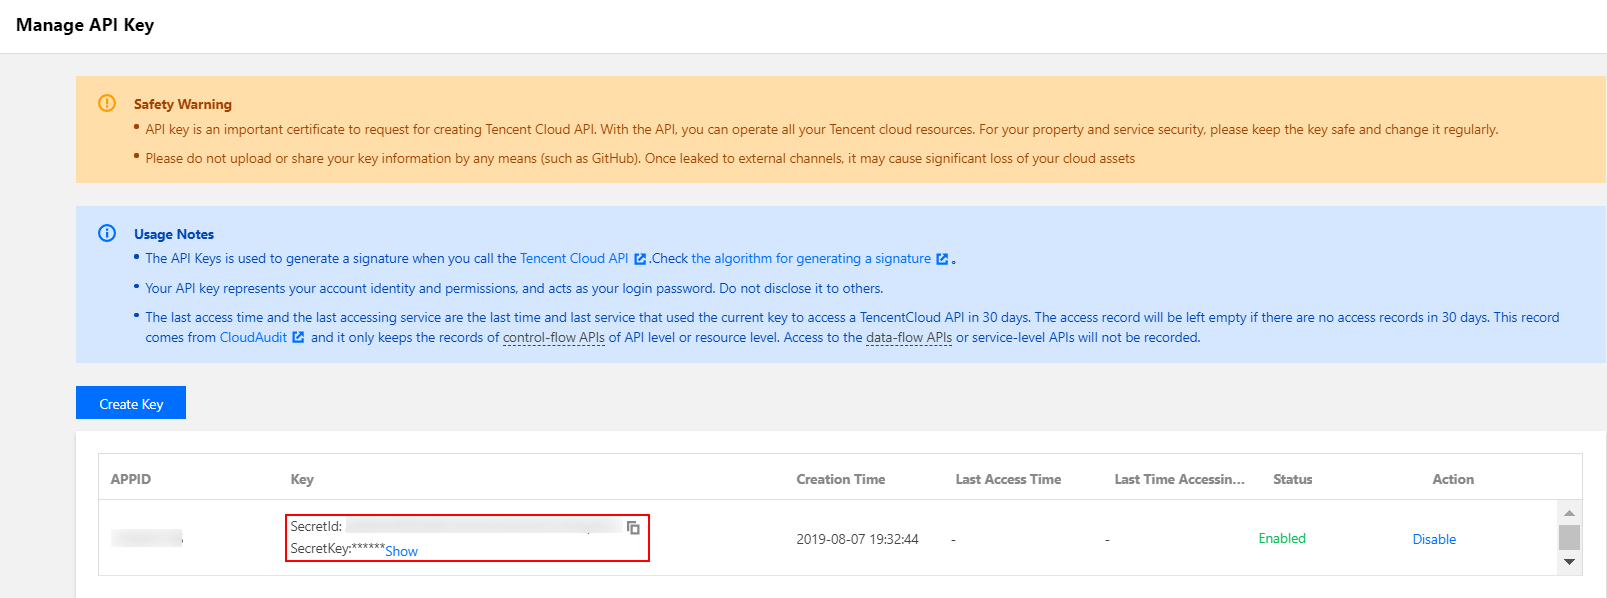
3. You can check the key’s information including SecretId and SecretKey on Manage API Key page when the creation is completed. See the figure below:
Creating a DaemonSet and deploying tke-kms-plugin
1. Log in to the TKE console and click Cluster in the left sidebar.
2. On the Cluster Management page, click the ID of the cluster that meet the conditions to go to the cluster details page.
3. Select Create Via YAML at the top right corner on any interface of the cluster to go to Create Via YAML page. Enter the parameters for tke-kms-plugin.yaml, as shown below:
Note:
Enter values for the following parameters based on the actual needs:
{{REGION}}: the region where KMS key resides. You can check Region List for the valid values.
images: ccr.ccs.tencentyun.com/tke-plugin/tke-kms-plugin:1.0.0: tke-kms-plugin image address. If you want to use the self-created tke-kms-plugin image, you can replace it.
Master node security group defaults to close port 22. You need to open port 22 on the security group interface before logging in to the node. For more information, see Adding a Security Group Rule.
2. Run the following command to create and open the YAML file.
vim /etc/kubernetes/encryption-provider-config.yaml
3. Press i to switch to the edit mode and edit the YAML file. Enter the followings according to the K8s version that you actually use:
4. After editing is completed, press Esc and enter :wq to save the file and go back.
5. Run the following command to edit the YAML file.
vi /etc/kubernetes/manifests/kube-apiserver.yaml
6. Press i to switch to the edit mode and add the followings to args according to the K8s version you actually use.
Note:
Self-deployed cluster of K8s v1.10.5. You need to remove kube-apiserver.yaml from the /etc/kubernetes/manifests directory and move it back to the directory after you have completed the editing.
7. Add Volume command to /var/run/tke-kms-plugin/server.sock. The location and content for adding is as follows:
Note:
/var/run/tke-kms-plugin/server.sock is a unix socket that is listened when tke kms server is launched. kube apiserver will access tke kms server by accessing the socket.
Add the followings for volumeMounts::
- mountPath: /var/run/tke-kms-plugin
name: tke-kms-plugin-dir
Add the followings for volume::
- hostPath:
path: /var/run/tke-kms-plugin
name: tke-kms-plugin-dir
8. When the editing is finished, press Esc, enter :wq and save the /etc/kubernetes/manifests/kube-apiserver.yaml file. Wait for kube-apiserver to restart.
Verification
1. Log in to the node of the cluster and run the following command to create a Secret.