This series of documents describe how to deploy deep learning in TKE Serverless from direct TensorFlow deployment to subsequent Kubeflow deployment and are intended to provide a comprehensive scheme for implementing container-based deep learning.
Prerequisites
This document proceeds to run a deep learning task in TKE Serverless by using a self-built cluster after the steps in Building Deep Learning Container Image are completed.The self-built image has been uploaded to the image repository ccr.ccs.tencentyun.com/carltk/tensorflow-model, which can be directly pulled for use with no rebuild required.
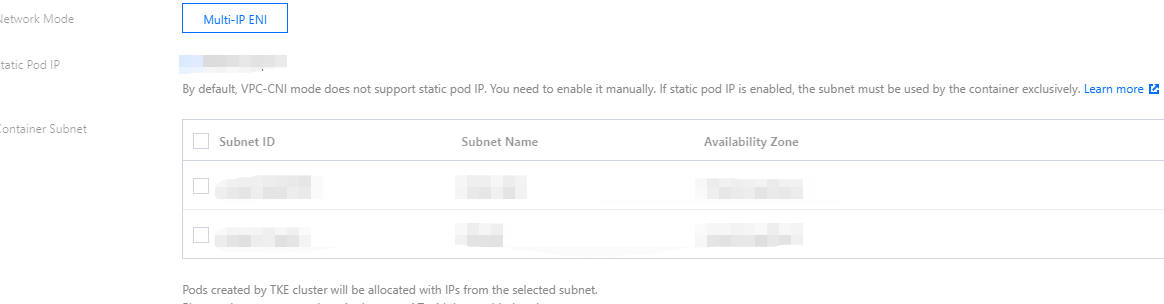
As you need to run a GPU-based training task, when creating a cluster, please pay attention to the supported resources in the AZ of the selected container network and be sure to select an AZ that supports GPU as shown below:
Creating CFS file system (optional)
The container will be automatically deleted, and the resources will be automatically released after the task ends. Therefore, to persistently store models and data, we recommend you mount an external storage service such as CBS, CFS, and COS.
In this example, CFS is used as an NFS disk to persistently store data with frequent reads and writes.
Creating CFS file system
1. Log in to the CFS console and enter the File System page.
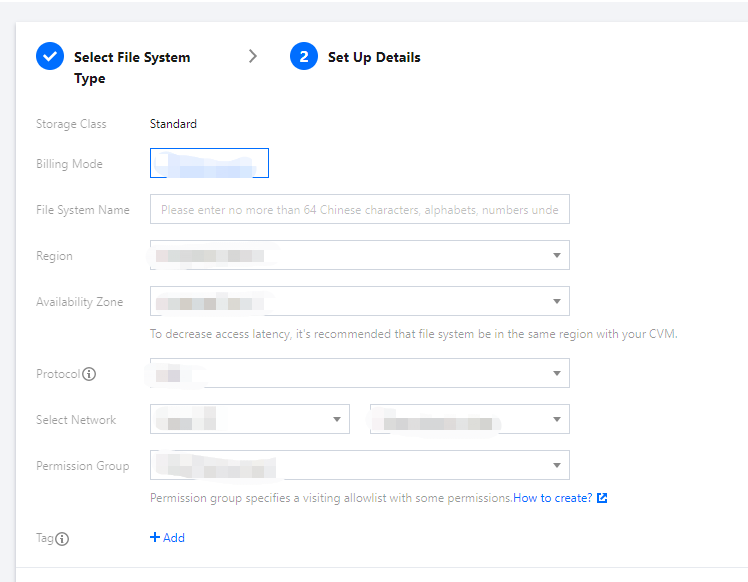
2. Click Create. On the Create File System page that pops up, select the file system type and click Next: Detailed Settings.
3. On the Detailed Settings page, set the relevant configuration items. For more information on CFS types and configurations, please see Creating File Systems and Mount Targets.
Note:
The CFS file system must be created in the region of the cluster.
4. After confirming that everything is correct, click Buy Now and make the payment to create a file system.
Getting file system mount information
1. On the File System page, click the ID of the file system whose sub-target path needs to be obtained to enter the file system details page.
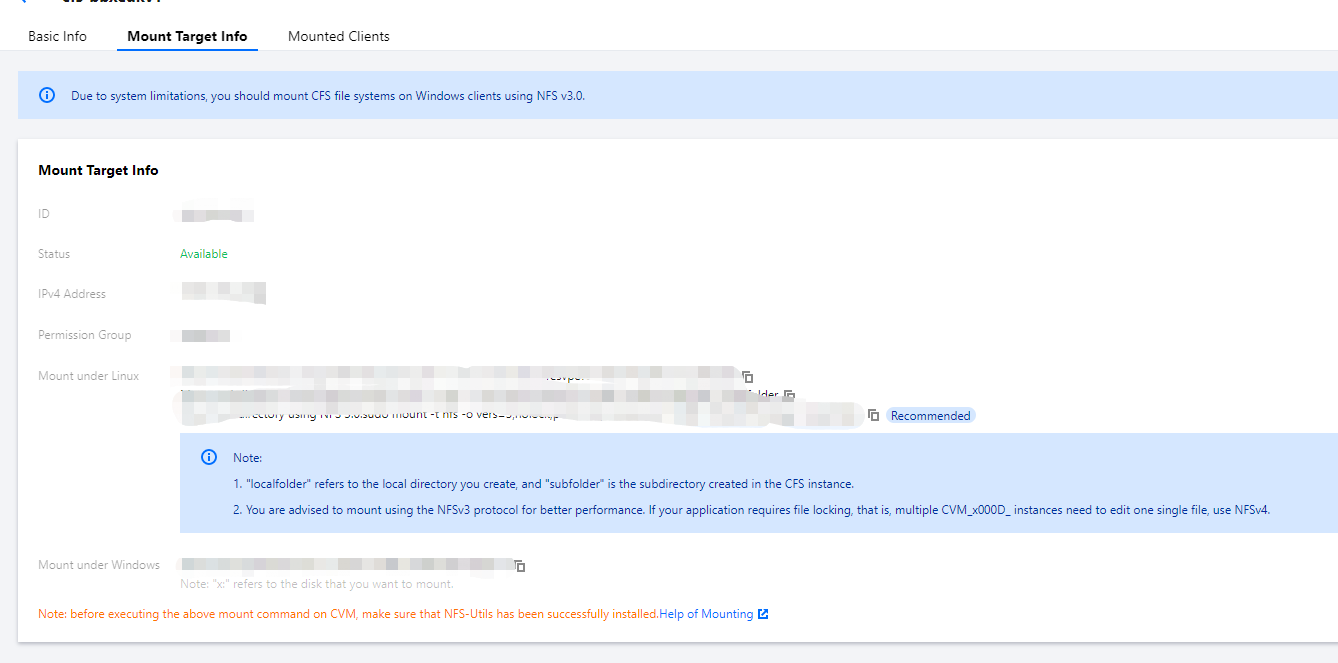
2. Select the Mount Target Info tab and get the file system mount information next to Mount to Linux as shown below:
Note:
Note down the IPv4 address in the mount target details, such as 10.0.0.161:/, which will be used as the NFS path in subsequent mount configuration.
Creating training task
This task uses the MNIST handwritten digit recognition dataset and two-layer CNN as an example. The sample image is the self-built image created in the previous chapter. If you need to use a custom image, please see Creating Deep Learning Container Image. Two task creation methods are provided below:
Console
kubectl
Taking the essence of the deep learning task into account, Job node deployment is used as an example in this document. For more information on how to deploy a Job, please see Job Management.The following is the example of deployment in the console:
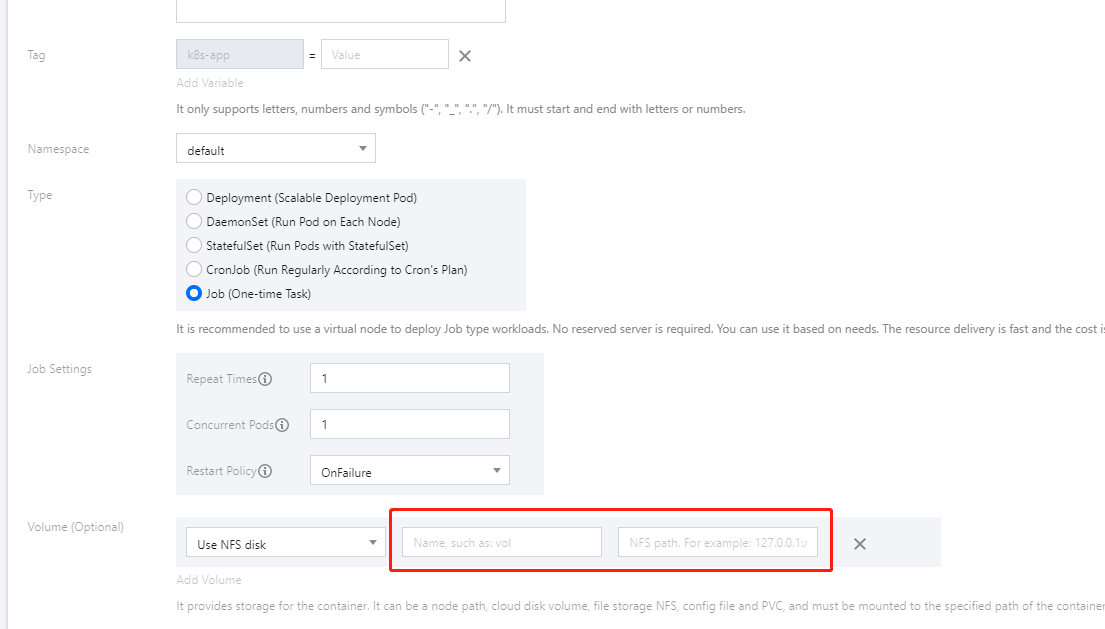
1. In the Volume (optional) configuration item, select Using NFS disk and enter the name and IPv4 address of the CFS file system created previously as shown below:
2. In the Mount Target configuration item in Containers in the Pod, select the volume and configure the mount target as shown below.
Note:
As the dataset may need to be downloaded online, you need to configure the public network access for the cluster. For more information, please see Public Network Access.
After selecting a GPU model, when setting the request and limit, you need to assign the container CPU and memory resources meeting the resource specifications. The actual values do not need to be accurate down to the ones place.When configuring in the console, you can also delete the default configuration and leave it empty to configure "unlimited" resources, which also have the corresponding billing specifications. This approach is recommended.
The container running command is inherited from Docker's CMD field, whose preferred form is exec. If you do not call the shell command, there will be no normal shell processing. Therefore, if you want to run a command in the shell form, you need to add "sh" and "-c" at the beginning.When you enter multiple commands and parameters in the console, each command should take a line (subject to the line break)
You can also use a YAML file to create a task.
1. Prepare a YAML file. Below is the sample file gpu_pod.yaml:
apiVersion: v1
kind: Pod
metadata:
name: tf-cnn
annotations:
#eks.tke.cloud.tencent.com/cpu: "8"
#eks.tke.cloud.tencent.com/gpu-count: "1"
eks.tke.cloud.tencent.com/gpu-type: T4
#eks.tke.cloud.tencent.com/mem: 32Gi
spec:
containers:
- name: tf-cnn
image: hkccr.ccs.tencentyun.com/carltk/tensorflow-model:latest # Training task image
- name: tf-model-cfs # Persistently store the training results to CFS
nfs:
path: / # Enter the root directory of the CFS file system here
server: 10.0.1.8 # Enter the IPv4 address of the created CFS file system
restartPolicy: OnFailure
2. Run the following command to complete deployment:
kubectl create -f [yaml_name]
Note:
In addition to the precautions mentioned above for directions in the console, you also need to pay attention to the following:
You need to use annotations to declare resource assignment in the YAML file. For more information, please see Annotation. You also should note that different GPU models correspond to different CPU and memory options. We recommend you enter the values as needed.
You can reserveeks.tke.cloud.tencent.com/gpu-type only with no other items needed in annotations. If /gpu-count is specified, then cpu and mem must also be specified. (In this document, we recommend you not add other items, which will not affect the actual effect. If you enter other items without following the specifications, OOM errors may occur.)
For nvidia.com/gpu in GPU scheduling, only limits is required. If only annotations is specified, an error will be reported that no cards are found. If only limits is specified, its values will be considered as the request. If request is also specified, its value must be the same as that of limits. For more information, please see Schedule GPUs (here, adding the cpu and memory settings in request and limits is also not recommended as detailed above).
Viewing running result
You can view the running result either in the console or on the command line:
Console
Command line
After creating a Job, you will be redirected to the Job management page by default. You can also enter the page as follows:
1. Log in to the TKE console and click Cluster on the left sidebar.
2. In the elastic cluster list, click the ID of the cluster whose events you want to view to enter the cluster management page.
3. Select Workload > Job and click the newly created Job in the Job list.
Select the Log tab to view logs as shown below:
You can run commands to view events or logs:
Run the following command to view events:
kubectl describe pod [name]
See the figure below:
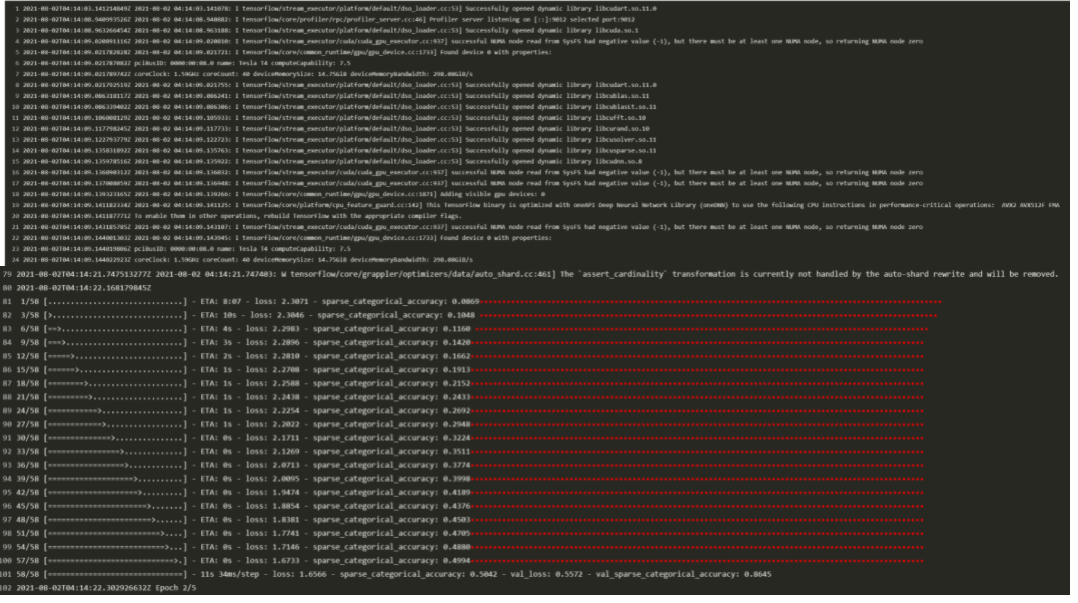
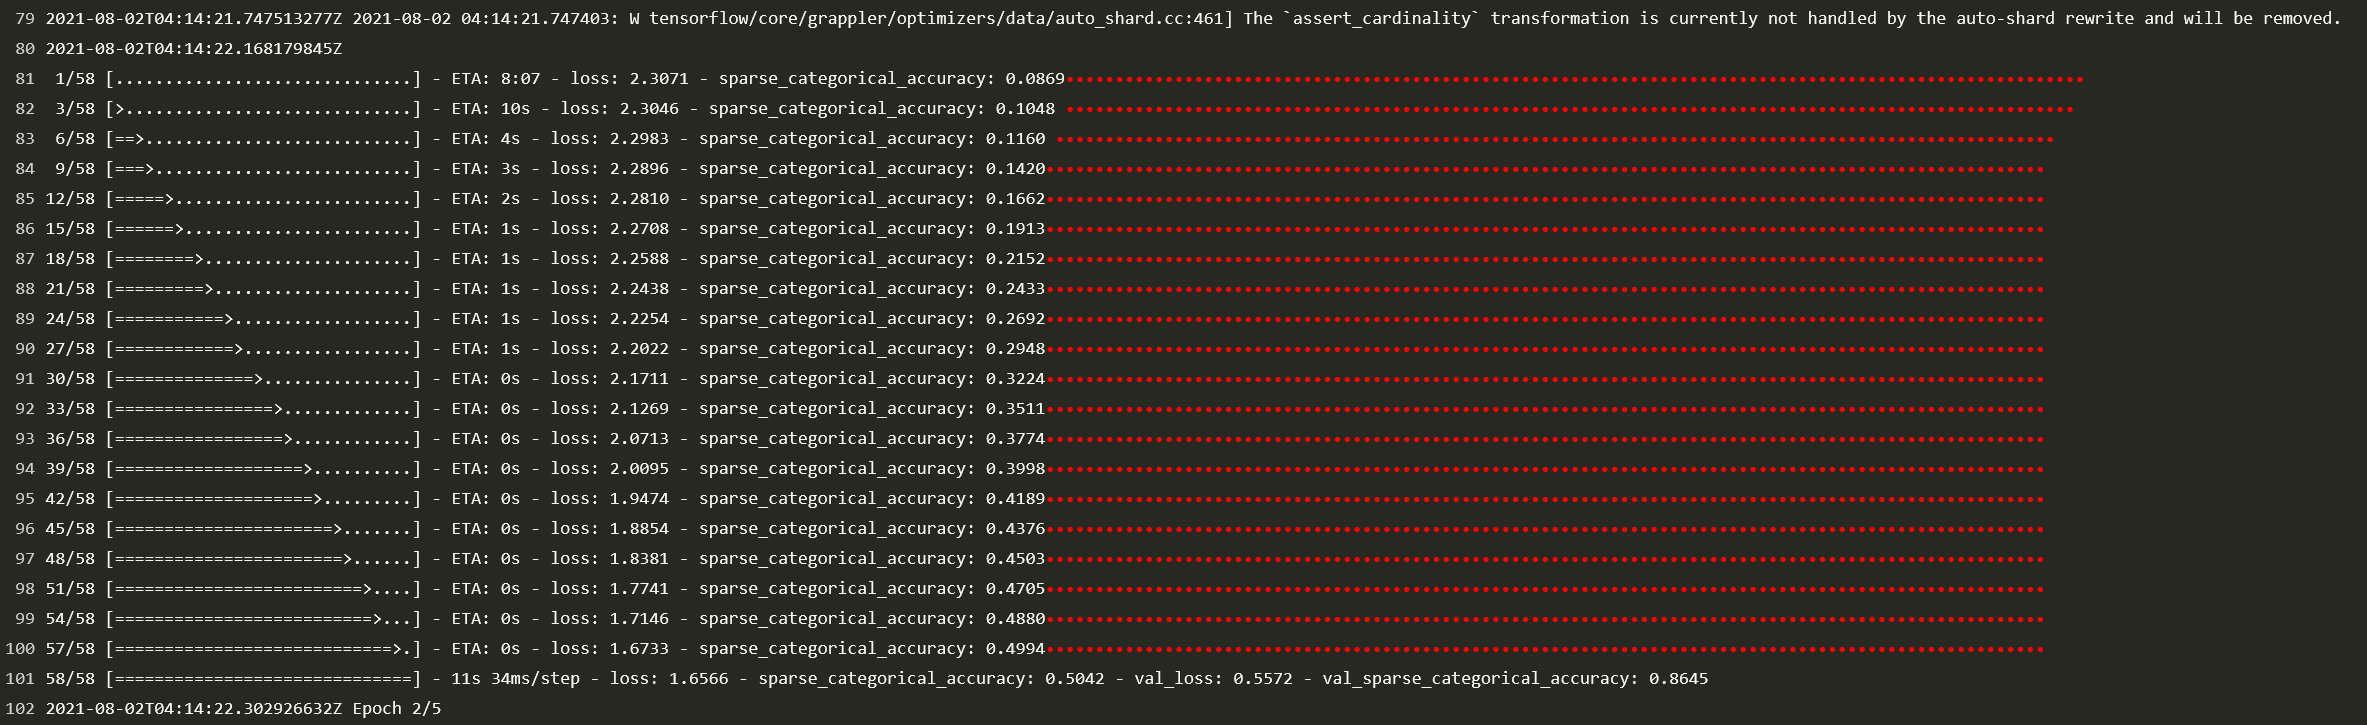
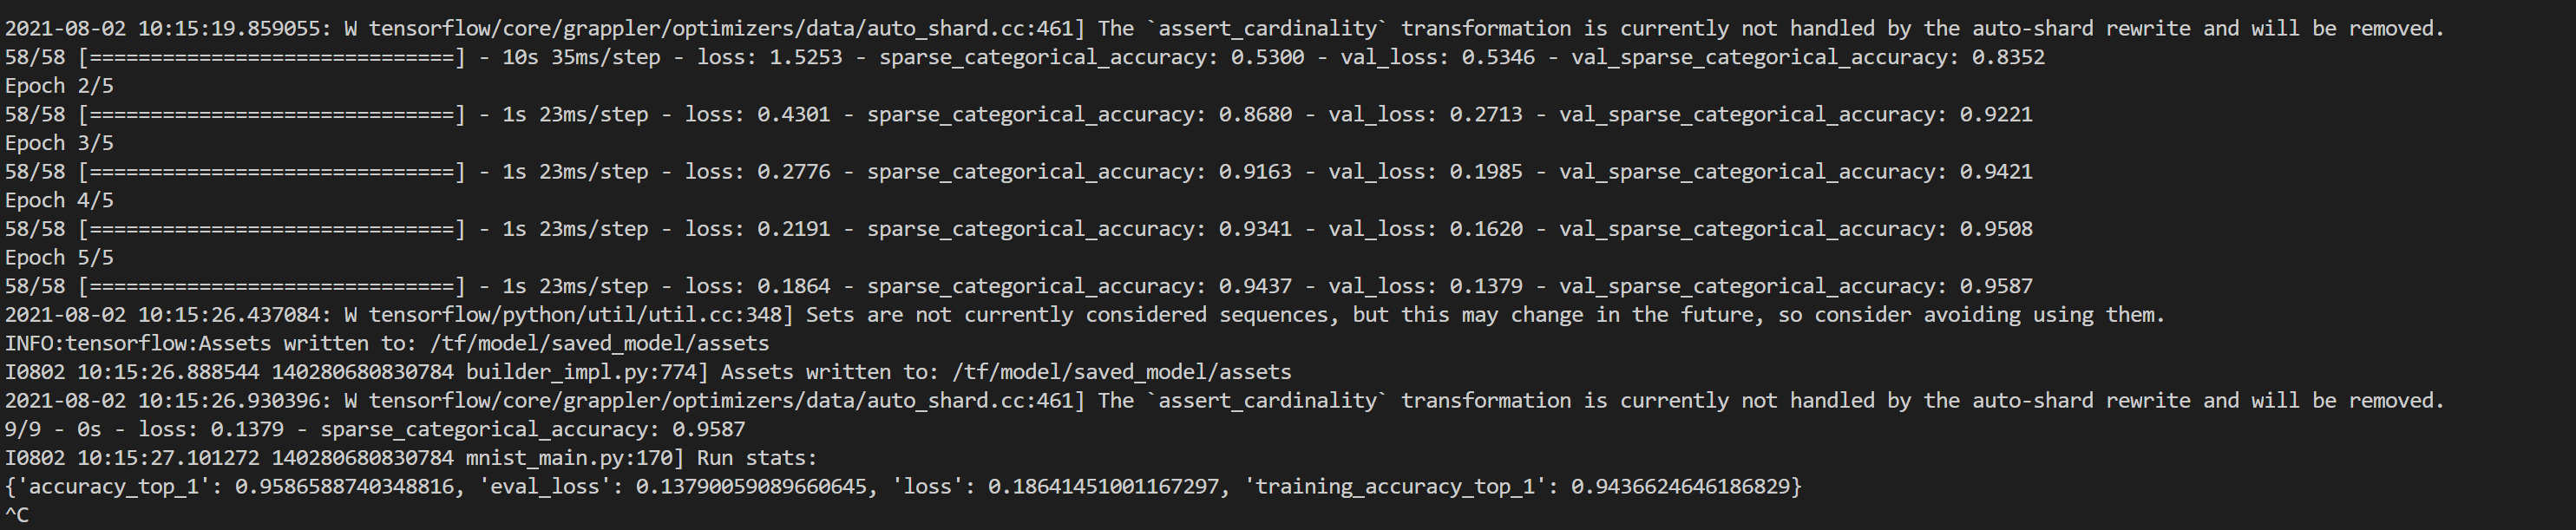
Run the following command to output logs continuously:
kubectl logs -f [pod_name]
See the figure below:
As TKE Serverless containers will be terminated after use, you can view logs only when the Pod is in Running status. For the solution, please see Log Collection.
Viewing storage
If you have configured NFS as instructed above, you can go to the mount target to view NFS storage:
1. Run the following command to enter the relevant mount directory to check whether it exists:
cd /mound_data
See the figure below:
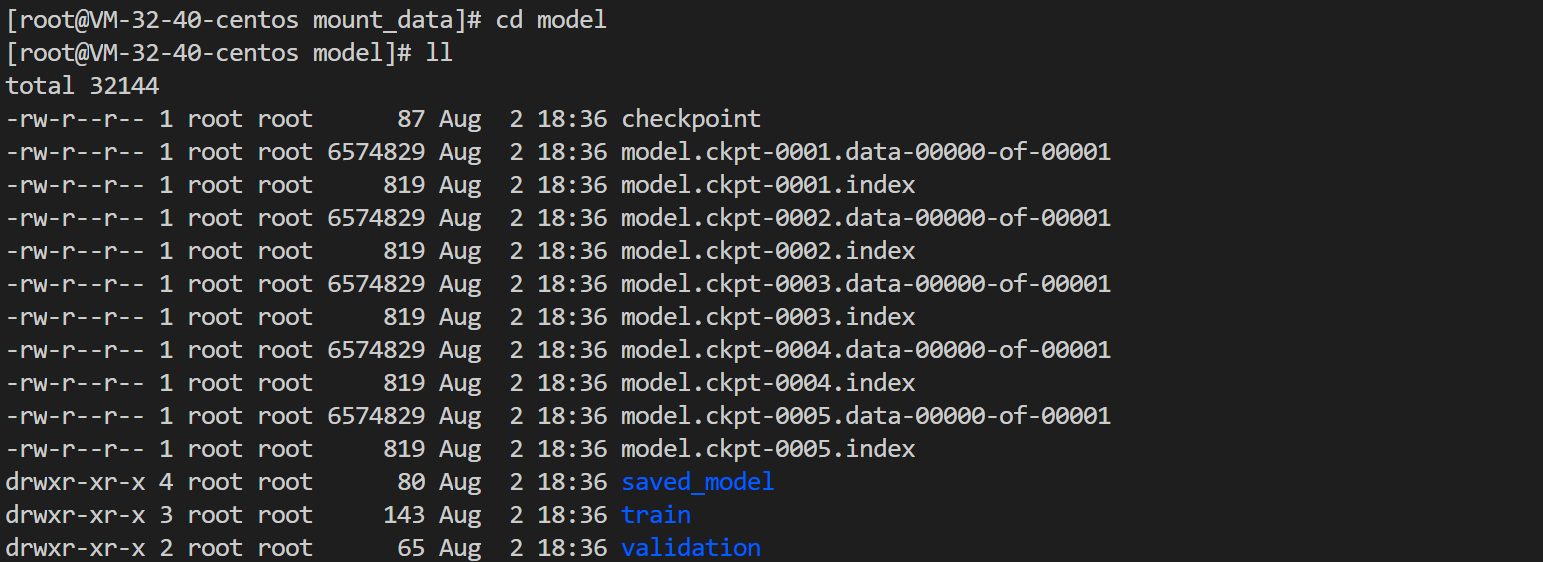
2. Enter the model directory and view whether there is relevant data in it as shown below:
3. Enter the data directory and view whether there is relevant data in it as shown below:
Relevant Operations
Using GPU to deploy deep learning task in TKE
Deployment in TKE is almost the same as that in TKE Serverless. Taking deployment through kubectl with a YAML file as an example, TKE has the following differences:
When creating a TKE node, you should select a node with GPU. For more information, please see Using a GPU Node.
As the node has built-in GPU resources, annotations and resources are not needed. Practically, you can reserve annotations, which TKE will not process. We recommend you comment out resources, as it may cause unreasonable resource requirements.
FAQs
If you encounter any problems when performing this practice, please see FAQs for troubleshooting.