2. Na página de gerenciamento da instância, selecione a instância e mova o mouse para a coluna Primary IP (IP principal) para visualizar seu IP privado e clique em
para copiar o IP privado, conforme mostrado abaixo:
A informação retornada é o endereço IP privado, conforme mostrado abaixo:
Para obter mais informações sobre os metadados da instância, consulte Metadados da instância.
Configuração do DNS da rede privada
Quando ocorre um erro de resolução de rede, você pode configurar manualmente o DNS da rede privada com base no sistema operacional do seu CVM.
Para o sistema operacional Linux
1. Faça login no CVM do Linux.
2. Execute o seguinte comando para abrir o arquivo /etc/resolv.conf.
vi /etc/resolv.conf
3. Pressione i para alternar para o modo de edição e modifique o IP do DNS de acordo com a região correspondente na lista de DNS da rede privada.
Por exemplo, para alterar o IP do DNS da rede privada para um servidor DNS da rede privada na região de Pequim.
nameserver 10.53.216.182
nameserver 10.53.216.198
options timeout:1 rotate
4. Pressione Esc, digite :wq, salve o arquivo e retorne.
Para o sistema operacional Windows
1. Faça login no CVM do Windows.
2. Na interface do sistema operacional, abra o Control Panel (Painel de controle) > Network and Sharing Center (Central de rede e compartilhamento) > Change adapter settings (Alterar configurações do adaptador).
3. Clique com o botão direito em Ethernet e selecione Properties (Propriedades) para abrir a janela “Ethernet Properties (Propriedades de Ethernet)”.
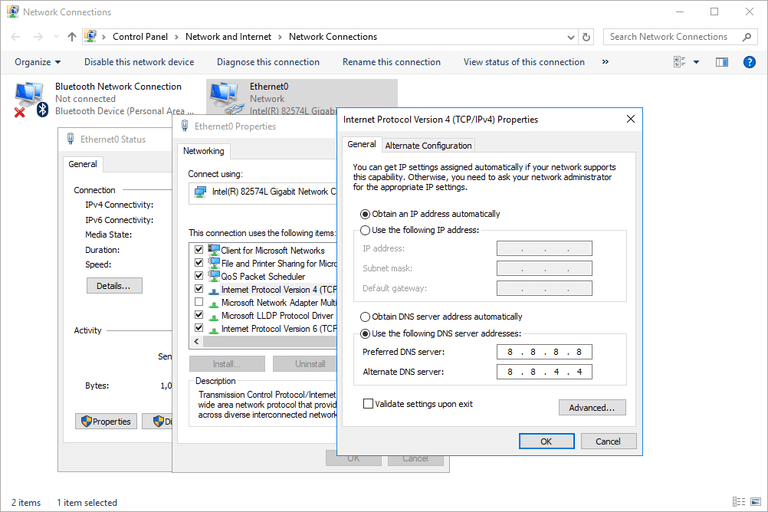
4. Na janela “Ethernet Properties (Propriedades de Ethernet)”, clique duas vezes em IP version 4 (TCP/IPv4) (IP versão 4 (TCP/IPv4)), conforme mostrado abaixo:
5. Selecione Use the following DNS server address (Usar o seguinte endereço de servidor DNS) e modifique o IP do DNS de acordo com a região correspondente na lista DNS da rede privada.