This document describes how to migrate data online from your source server to an instance of Tencent Cloud Virtual Machine (CVM) via the go2tencentcloud client by importing a migration source. This method applies to most server migration scenarios, such as server cloud migration from IDCs, cross-cloud migration, and cross-region migration within Tencent Cloud. You can specify multiple migration tool parameters to meet custom migration needs.
Migration Workflow
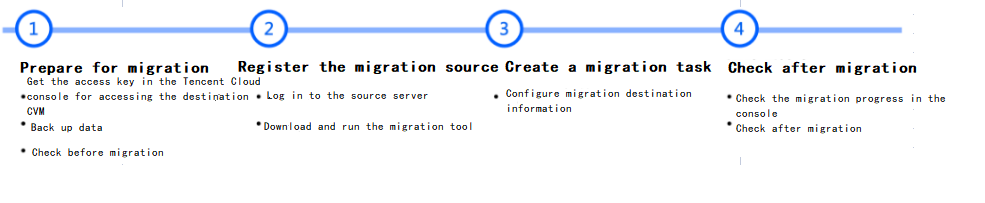
The process of online migration by importing a migration source via the go2tencentcloud client is shown in the figure below:
Migration Directions
Step 1. Prepare for migration
Go to Manage API Key to create a key and obtain the SecretId and SecretKey.
Stop applications on the server and back up your data.
Source server: You can use the snapshot feature or other methods to back up data on the source server. The source server is the server to be migrated.
Destination CVM: Create a snapshot of the instance (See Creating Snapshots) to back up the data.
Notes for migration with a sub-account via the console:
When the migration destination is a CVM instance, the sub-account should have the QcloudCSMFullAccess and QcloudCVMFullAccess permissions. You can log in to the Cloud Access Management (CAM) console with your root account to grant the permissions.
When the migration destination is a CVM image, the sub-account should have the QcloudCSMFullAccess, QcloudCVMFullAccess, and QcloudCVMFinanceAccess permissions. You can log in to the CAM console with your root account to grant the permissions.
Before the migration, you need to check the following configuration based on the actual conditions:
If the migration destination is a CVM instance, both the source server and the destination CVM instance need to be checked.
If the migration destination is a CVM image, only the source server needs to be checked.
Linux source server
Ensure that the current system time is synchronized with the standard time. Otherwise, the request initiated by the migration tool to access Tencent Cloud APIs will fail.
2. (Optional) Check and install Cloudbase-Init (See Installing Cloudbase-Init on Windows). It’s recommended to install it on the source server before the migration.
If it is installed before migration, network configuration, activation, and other initialization operations are performed automatically after migration.
If it is not installed before migration, you may need to log in to the instance via VNC and manually modify the network configurations.
3. It is recommended that you temporarily disable the antivirus software to avoid mistakenly killing the migration tool, which could cause a migration failure.
Destination CVM
1. Storage space: The number of cloud disks (including system and data disks) on the destination CVM instance should be greater than or equal to that of disks on the source server. The cloud disk capacity of the destination CVM instance should be greater than or equal to the disk capacity of the source server. For convenience, it is recommended to keep the number and capacity of cloud disks consistent with those of disks on the source server.
2. Security group: Port 80, port 443 and port 3389 are opened.
3. Bandwidth: Set the bandwidth cap on both the two ends to the highest possible value. During the process, the traffic consumed is approximately the amount of data migrated. Adjust the billing mode beforehand if necessary.
Note:
Check the source server by executing sudo ./go2tencentcloud_x64 --check.
The go2tencentcloud migration tool automatically checks the source server when it starts running. It also automatically checks the destination CVM instance when a migration task starts. To skip checks and perform forced migration, execute the following command to start the tool: sudo ./go2tencentcloud_x64 -ignore-check.
The go2tencentcloud migration tool automatically performs disk partitioning and formatting on the destination CVM instance and migrates data from the source server disks (including the system disk and mounted data disks) to the corresponding cloud disks of the destination CVM instance. Before migration, you do not need to log in to the destination CVM instance to perform operations such as disk partitioning and initialization.
Step 2. Import the migration source
Import with the migration tool
Linux source server
Windows source server
1. Run the following command on the source server to download the migration tool go2tencentcloud.zip, and go to the corresponding directory.
The files in the go2tencentcloud directory will not be migrated. Do not place the files to be migrated in this directory.
2. (Optional) Exclude files and directories on the source server that do not need to be migrated.
Add files and directories that don’t need to be migrate to the rsync_excludes_linux.txt file.
3. Import the migration source.
3.1 For example, on a 64-bit Linux source server, execute the following commands in sequence as the root user to run the tool.
chmod +x go2tencentcloud_x64
sudo ./go2tencentcloud_x64
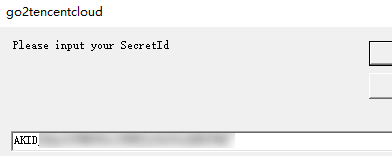
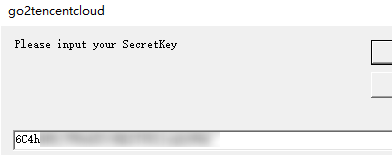
3.2 Enter the SecretId and SecretKey of the account API access key obtained in Prerequisites and press Enter as shown below:
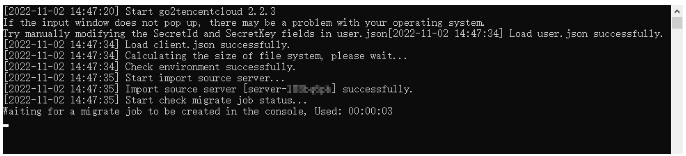
If you see the following message, the source server is imported successfully. You can now see the server in the CVM console.
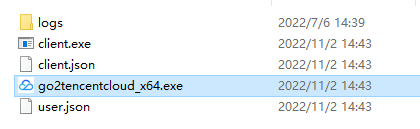
1. Download or upload go2tencentcloud.zip to the source server. Decompress the file to the go2tencentcloud folder. Open go2tencentcloud-windows, and the directory is shown as below.
2. Run go2tencentcloud_x64.exe.
Method 1: Right-click go2tencentcloud_x64.exe and run it as admin. Enter SecretId and SecretKey in the pop-up window.
Method 2: Start cmd or PowerShell command line as admin: cd /d "absolute path of the directory of go2tencentcloud_x64.exe", and run go2tencentcloud_x64.exe.
3. Enter Tencent Cloud API key (SecretId and SecretKey) in the pop-up window.
4. If the following message appears, the source server information is imported. You can now check the source server in the CVM console.
Note:
If "Import source server successfully" does not appear, check the logs in the logs/log file under the migration tool directory for troubleshooting.
After the migration source is imported successfully, the migration tool process will not be terminated if you close the SSH session connection on the Linux source server or the remote desktop session on the Windows source server.
Check the source server in the console
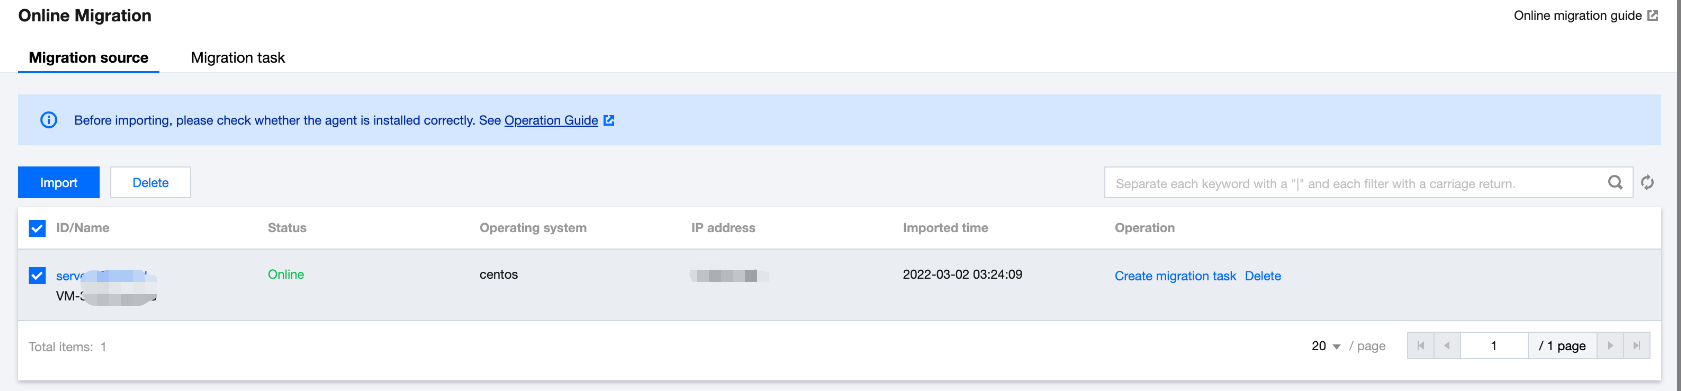
Log in to the CVM console and check the imported server. Its status should be Online, as shown below:
Note:
After the migration source is imported successfully, do not terminate the migration tool process on the source server until the migration task is completed. Otherwise, the migration source status becomes Offline, and the migration task cannot be completed.
Step 3. Create a migration task
1. Create a migration task
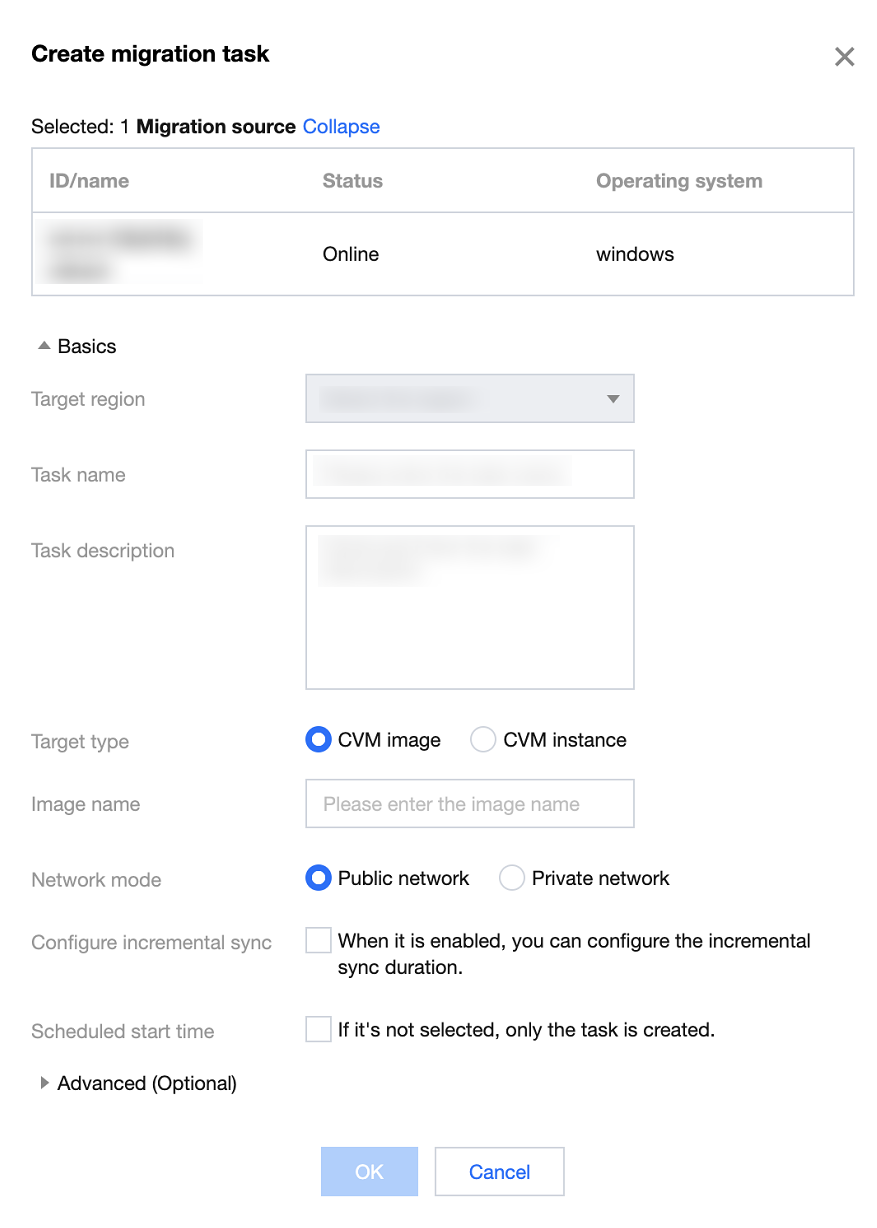
Log in to the CVM console, go to the online migration page, locate the source server, and click Create migration task. In the Create migration task pop-up window, configure the task as shown below:
Configuration description:
Basics:
Item
Required
Description
Target Region
Yes
Tencent Cloud region to which the source server is to be migrated. For more information on regions, see Regions and AZs.
Task name
Yes
The migration task name.
Task description
No
Migration task description.
Destination type
Yes
Set the destination type for the source server to be migrated to Tencent Cloud.
CVM image: Create a CVM image for the source server.
Image name: Name of the destination CVM image that will be generated for the migration source. If the name already exists, the migration task ID is appended to the name.
CVM instance: Select a CVM instance in the destination region as the migration destination.
Target instance: It is recommended that the operating system of the destination CVM instance be consistent with that of the source server if possible. For example, if the operating system of the source server is CentOS 7, select a CVM instance with the operating system of CentOS 7 as the migration destination.
Note:
Select the destination CVM instance with caution. After migration, the data of the destination CVM instance will be overwritten and reset. If the destination CVM instance cannot meet needs, you can go to the purchase page to create an instance.
Network mode
Yes
The network used for transferring data.
Public network: Transfer over the public network.
Private network: Transfer over the private network. For details, see Migrating via Private Network.
VPC: Create the relay instance in a VPC when migrating to a CVM image.
Subnet: Create the relay instance in a subnet when migrating to a CVM image.
Migration method
Yes
For Linux instances:
File-level migration: Higher compatibility and relatively slower transfer speed.
Block-level migration: Faster transfer speed and relatively lower compatibility.
Windows block-level migration: Block-level migration, with faster transfer speed and relatively lower compatibility.
Configure incremental sync
No
You can customize the incremental sync duration to continuously sync the data.
Not enable: The migration tool scans for and migrate the increments. Generally, it is implemented for once.
Enable: You can select the incremental sync duration. The migration tool will continuously sync the data to Tencent Cloud. You can also manually stop the incremental sync in the task list.
After the incremental synchronization starts, you can view the incremental synchronization records on the task details page of the console.
Scheduled execution time
No
Set the time when the migration task will be automatically started after creation. It can be as early as 10 minutes after the current time.
Advanced (Optional):
Item
Required
Description
Data rate (KB/s)
No
The upper limit of data rate during the migration (0 to 25600 KB/s). It’s set to 0 by default.
This item is not available for migration to Windows.
Checksum verification
No
When it is enabled, data consistency check is enhanced, but the transfer speed may be reduced. This item is not available for migration on Windows.
2. Start the migration task
Note:
You can skip this step if your task is scheduled, which will automatically start running at the scheduled execution time.
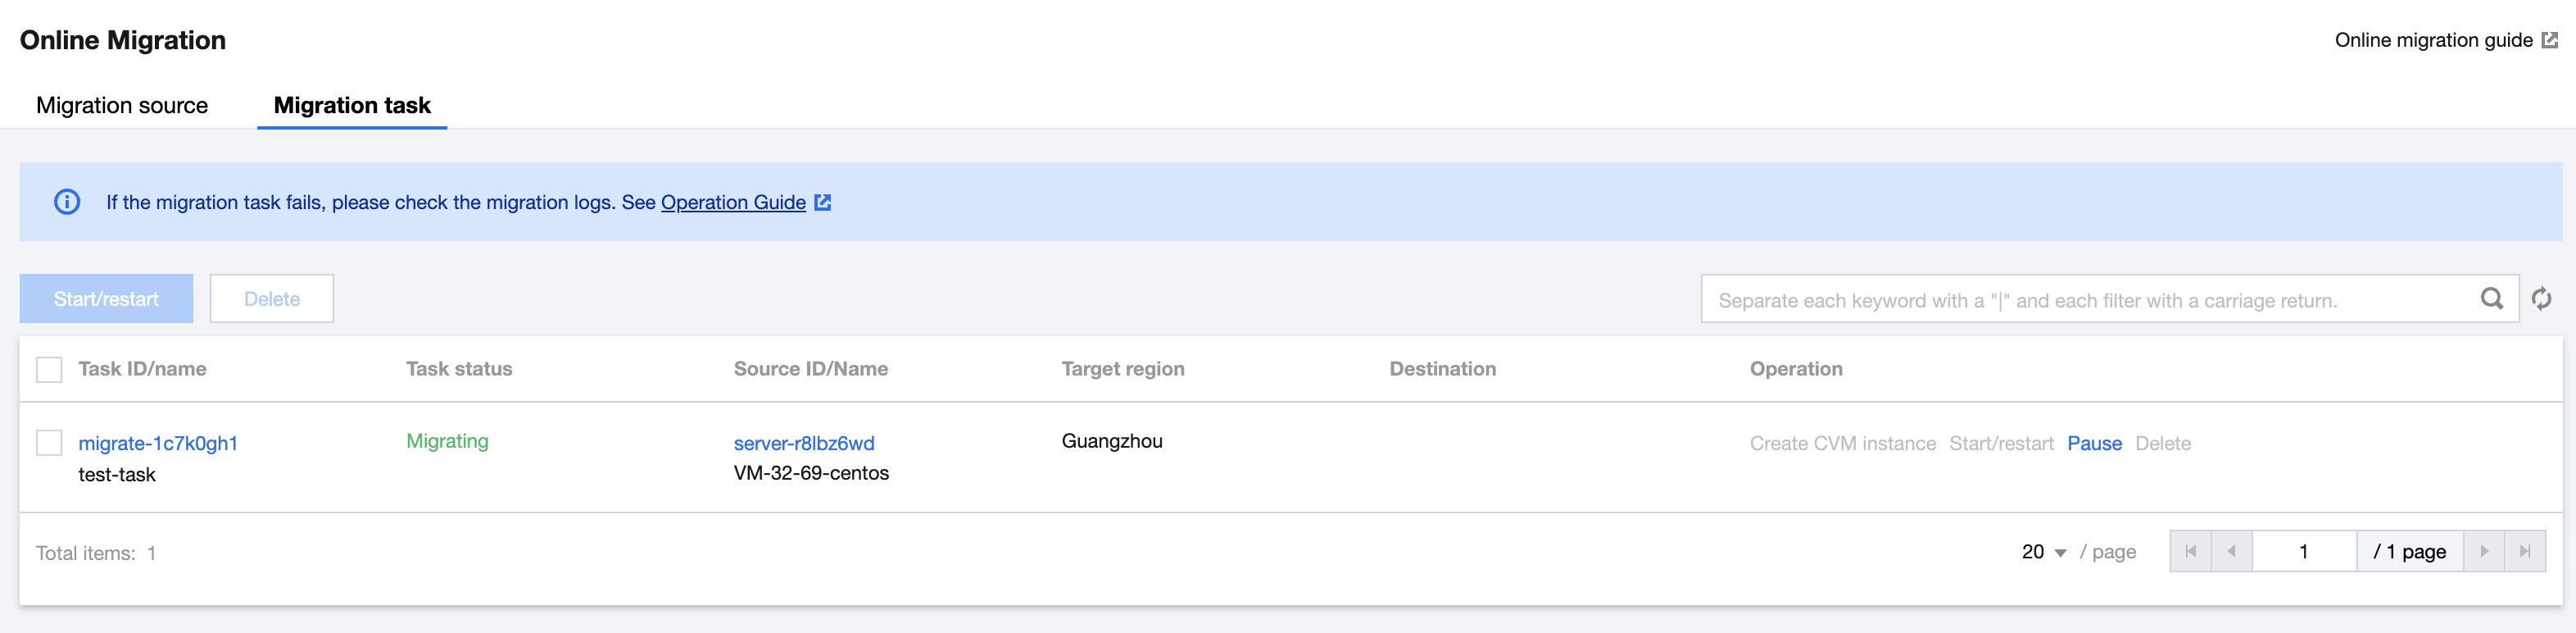
After creating a migration task, you can click the Migration task tab to view the task as shown below:
You can click Start/Retry on the right of the task to start it, click OK in the pop-up window, and the task status will become Migrating as shown below:
Note:
If the migration destination is a CVM instance, the destination CVM enters migration mode after the migration starts. Do not reinstall the system, shut down, terminate, or reset passwords of the destination CVM until the migration ends and the destination CVM exits the migration mode.
If the migration destination is a CVM image, a relay instance do_not_delete_csm_instance will be created under your account after the migration starts. Don't reinstall, shut down, or terminate the relay instance or reset its password. It will be automatically terminated by the system after the migration ends.
Step 4. Check after migration
1. View the migration progress in the console
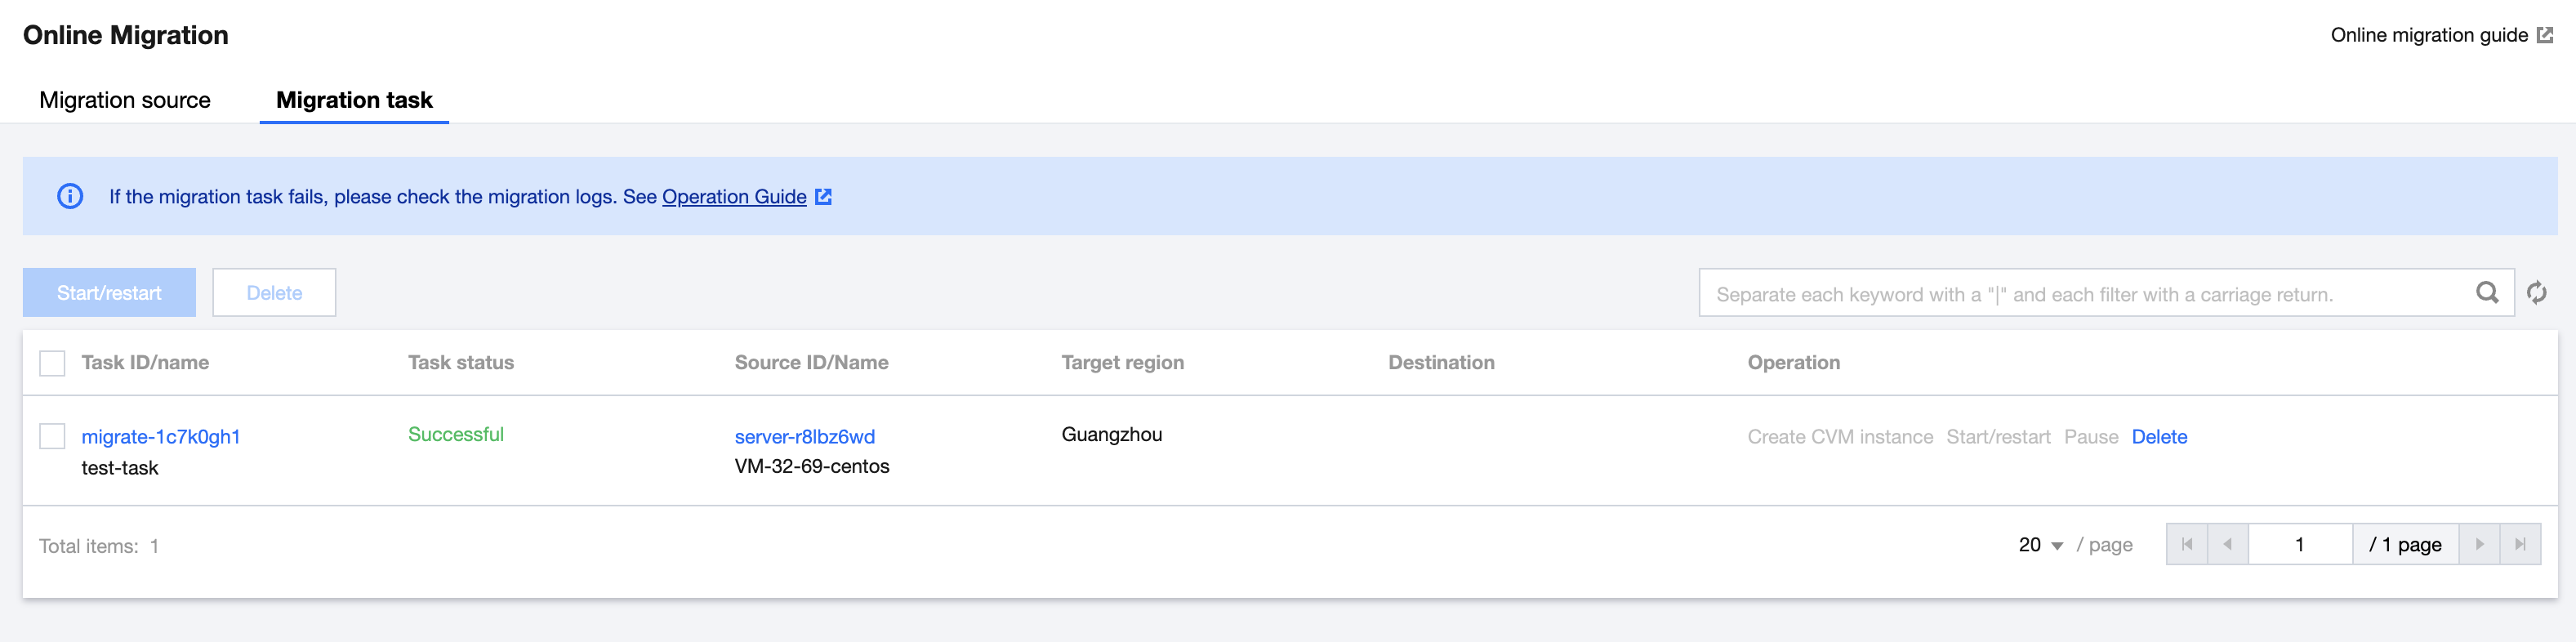
After the migration task status becomes Successful, the migration is completed successfully, as shown below:
Note:
The time consumption of data transfer is affected by factors such as the data volume of the source server and network bandwidth. Please wait patiently for the migration process to complete.
After the migration task starts, you can click Pause on the row of the task to stop it.
The migration tool supports resumable transfer. After a task is paused, you can click Start/Retry to continue the migration from where the task is paused.
A migration task can be paused during data transfer. After you click Pause for it in the console, the migration tool will pause the data transfer in progress.
If the migration process is time-consuming and you need to stop it, you can pause the migration task first and click Delete to delete it.
2. Check after migration
Failed migration:
Check the error information in log files (under the migration tool directory by default), operation guides, or FAQs about Server Migration for troubleshooting. After troubleshooting, click Start/Retry under the operation column to restart the migration task.
Successful migration:
Migrating to a CVM: The destination CVM starts up normally. Data on the CVM is consistent with that on the source server. The network and other system services are normal.
Migrating to a CVM image: Click the CVM image ID on the row of the migration task to go to the CVM image page and view the image information. You can use this image to create CVM instances.