安装 IIS 服务
Download
聚焦模式
字号
操作场景
本文档以 Windows Server 2012 R2 操作系统和 Windows Server 2008 操作系统为例,介绍在 Windows 云服务器上进行 IIS 角色添加与安装。
操作步骤
Windows Server 2012 R2 操作系统
1. 登录 Windows 云服务器。
2. 在操作系统界面,单击 
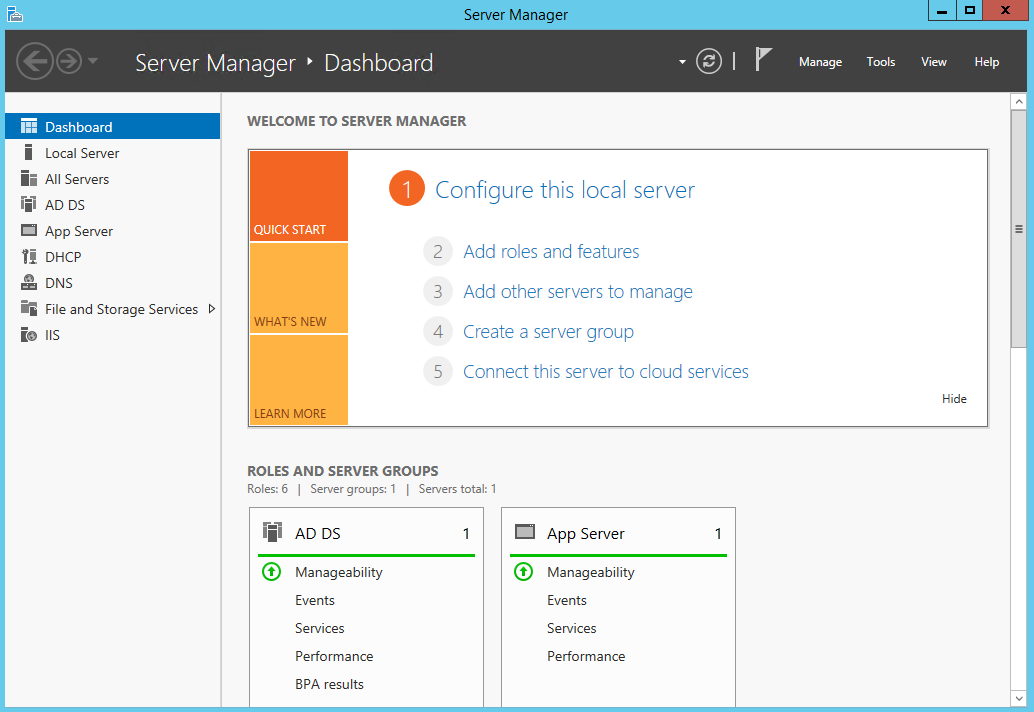
3. 单击添加角色和功能,弹出添加角色和功能向导窗口。
4. 在添加角色和功能向导窗口中,单击下一步。
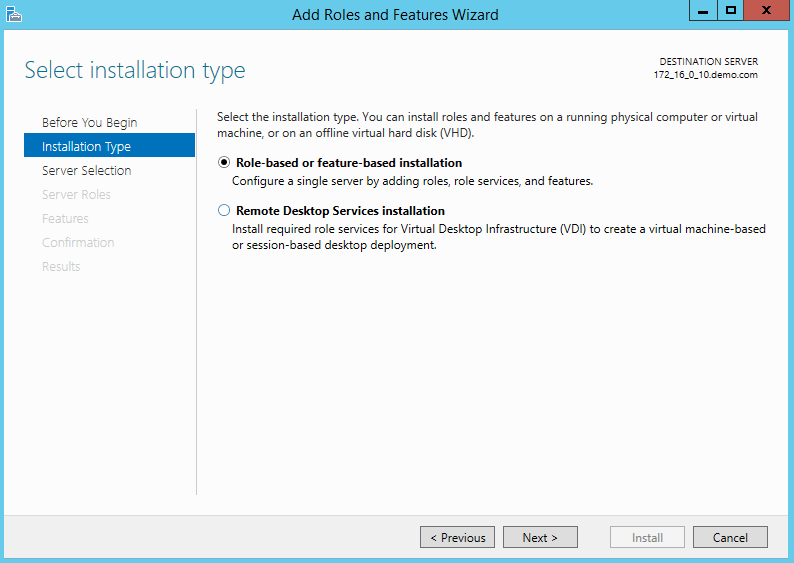
5. 在选择安装类型界面,选择基于角色或基于功能的安装,并连续单击2次下一步。如下图所示:
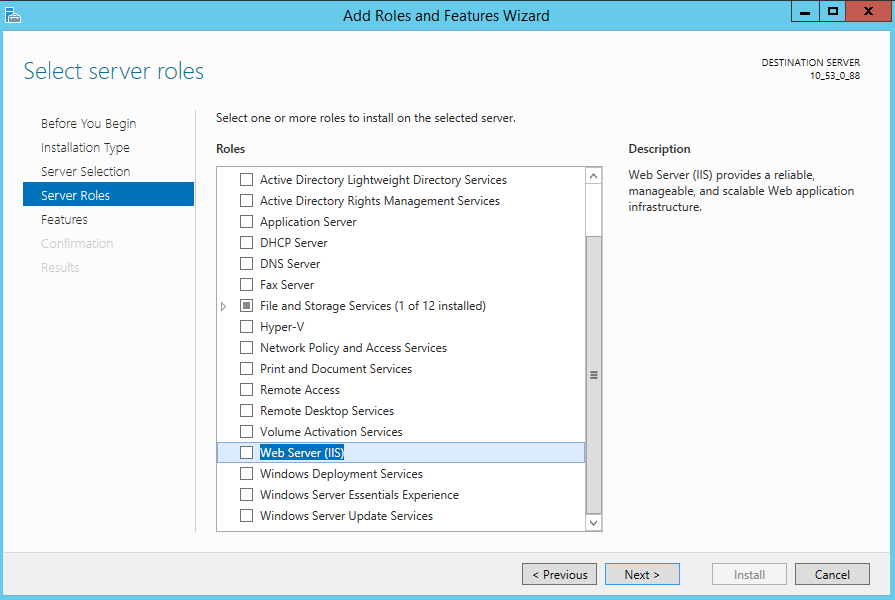
6. 在选择服务器角色界面,勾选 Web 服务器(IIS)。如下图所示:
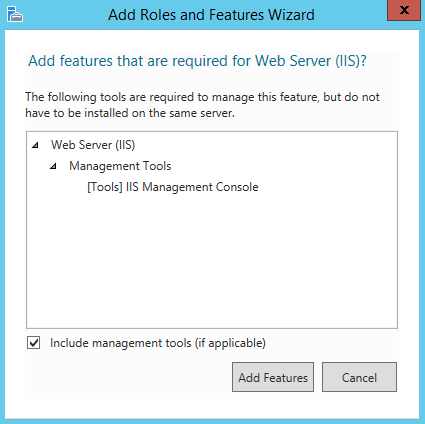
弹出添加 Web 服务器(IIS) 所需的功能提示框。
7. 在弹出的添加 Web 服务器(IIS) 所需的功能提示框中,单击添加功能。如下图所示:
8. 单击下一步。
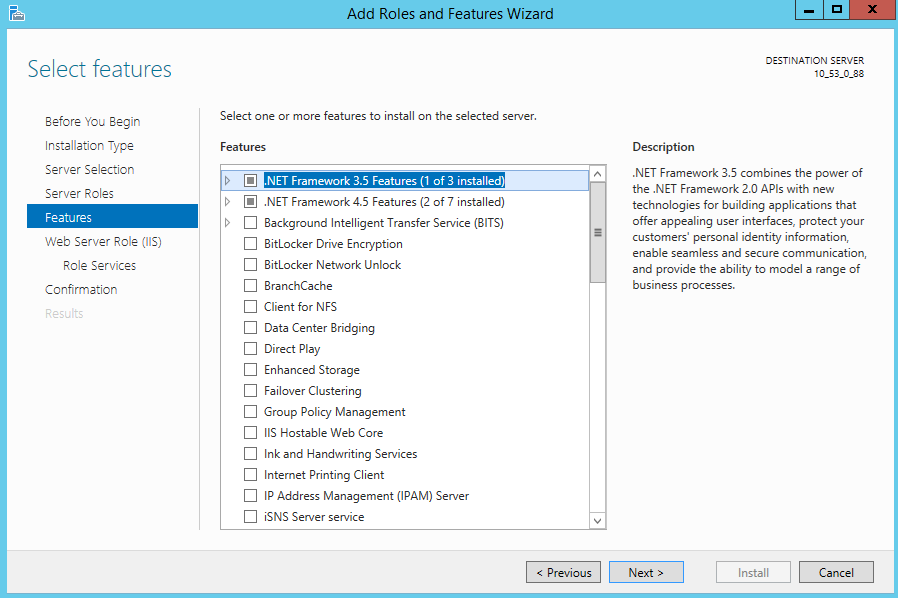
9. 在选择功能界面,勾选 .NET Framework 3.5 功能,并连续单击2次下一步。如下图所示:
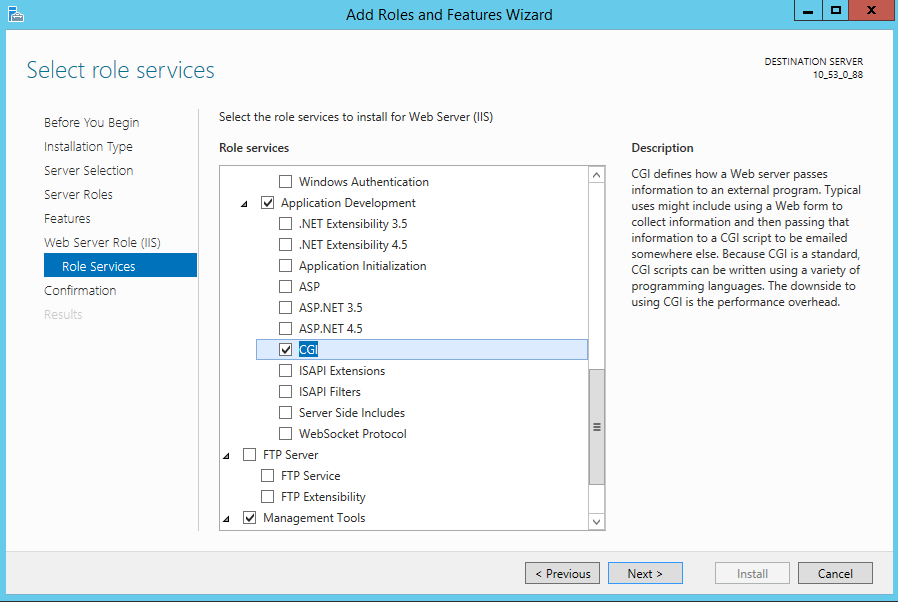
10. 在选择角色服务界面,勾选CGI,单击下一步。如下图所示:
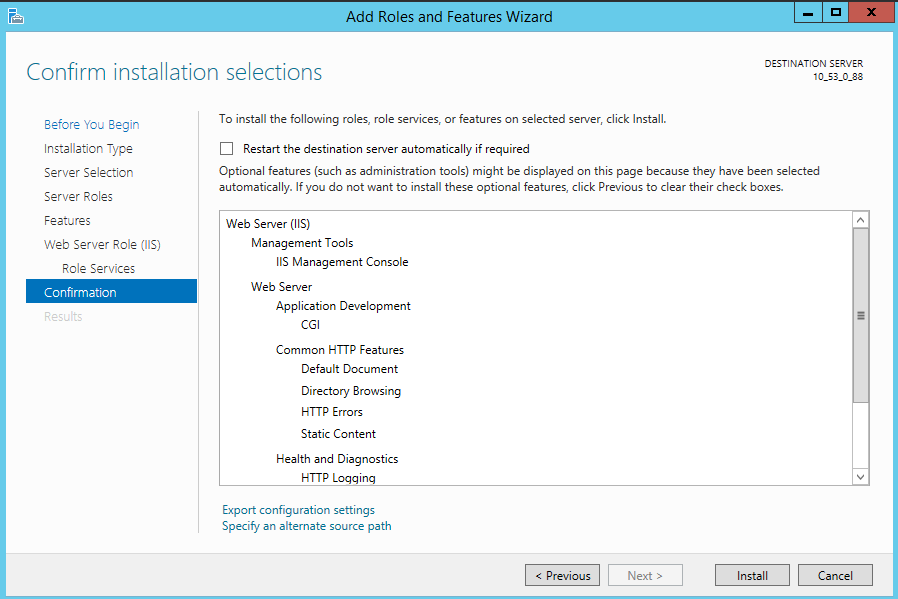
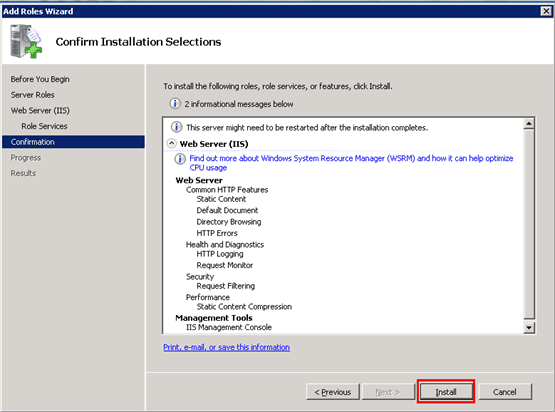
11. 确认安装信息,单击安装,并等待安装完成。如下图所示:
12. 安装完成后,在云服务器的浏览器中访问 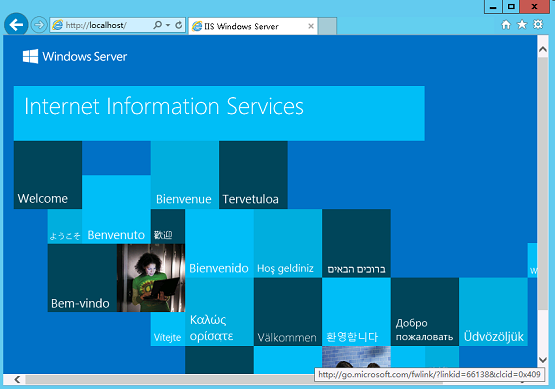
http://localhost/,验证 IIS 是否安装成功。
若出现以下界面,即表示成功安装。
Windows Server 2008 操作系统
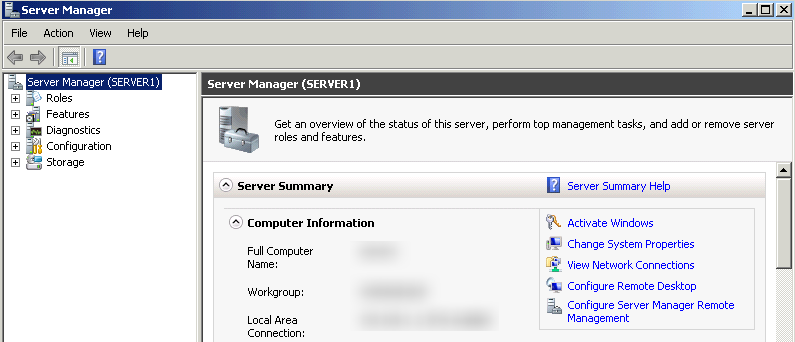
1. 登录 Windows 云服务器。
2. 在操作系统界面,单击 
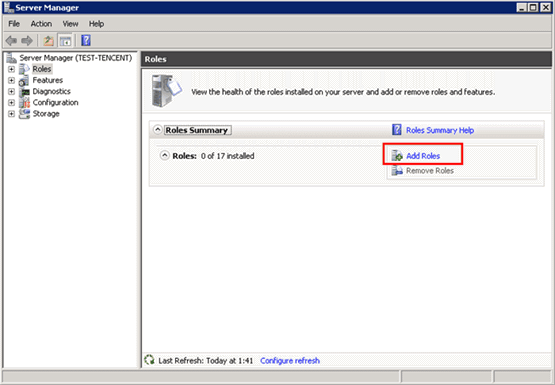
3. 在左侧导航栏中,选择角色,并在右侧窗口中单击添加角色。如下图所示:
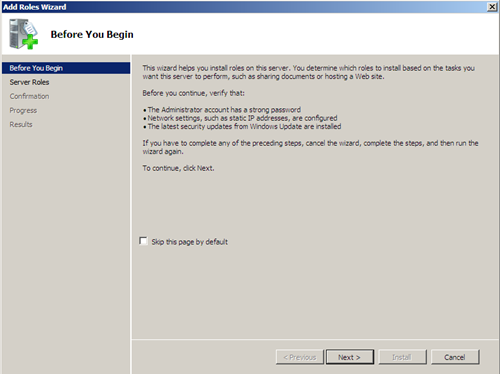
4. 在打开的添加角色向导窗口中,单击下一步。如下图所示:
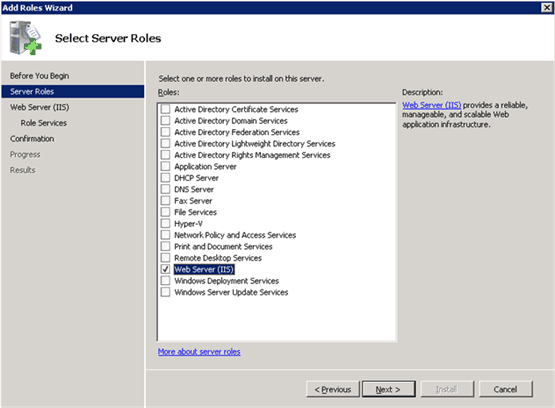
5. 在选择服务器角色界面,勾选 Web 服务器 (IIS),并连续单击2次下一步。如下图所示:
6. 在选择角色服务界面,勾选CGI,单击下一步。如下图所示:

7. 确认安装信息,单击安装,并等待安装完成。如下图所示:
8. 安装完成后,在云服务器的浏览器中访问 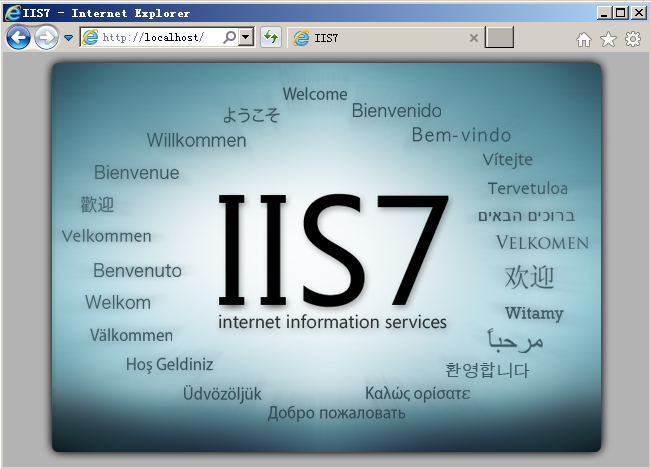
http://localhost/,验证 IIS 是否安装成功。
若出现以下界面,即表示成功安装。
文档反馈