This document describes how to install Python for different operating systems.
Using an Installation Package
1. Download a package
Go to the Python website to download an installation package according to your OS.
Note:
Python has dropped support for Python 2 since January 1, 2020. Therefore, you are advised to install Python 3.
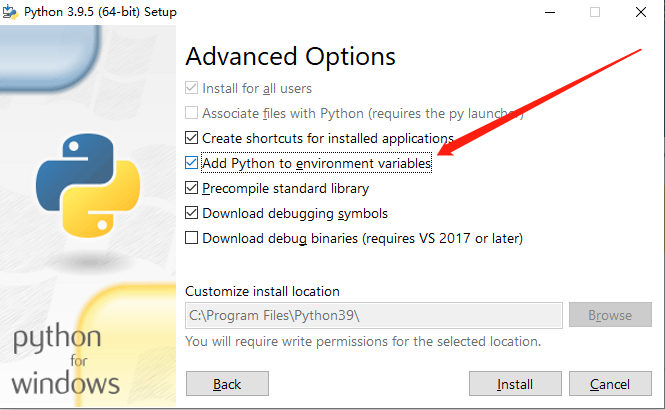
2. Install the package
Install the downloaded package as instructed.
Note:
If you use Windows, check Add Python to environment variables.
3. Verify the installation
Run the following command in Terminal to view the Python version:
python -V
If the Python version is displayed, Python has been installed successfully.
Note:
If you use Windows, you may need to restart your computer after the installation.
4. Configure environment variables
In Windows, if “not recognized as an internal or external command” is reported in Terminal after the command above is run, right-click the Computer icon, click Properties > Advanced system settings > Environment Variables, and in the System variables area, click New to add the Python installation path: